/image.png (optional)
---
```
## Assets
Whenever possible, upload assets (e.g., images) to GitHub instead of storing them in the `/public` folder. This helps keep your repository organized and makes it easier to manage your assets.
### Images
**Note: In the following example:**
- I provided screenshots for both light and dark mode.
- I used `Image from 'next/image'` which gave me 4x improvement on the image file size for better performance.
see the following example in action here: [User Guides](/docs/user_guides)
```mdx filename="Example"
import Image from 'next/image'
```
### How to Upload Images and Videos on GitHub
- Go to the LibreChat repository
- Find a random conversation or PR
- Paste an image from your clipboard into the text input box. It will automatically be converted into a URL.
- Copy and paste the resulting URL in your document. (Then exit the page without actually posting the comment.😉)

- Upload directly from the web UI:

## Test the Docs
### Review carefully before submitting your PR
Before submitting a PR for your blog post, **always** test to ensure everything looks and functions as intended.
#### Check the following:
- Your new document(s) for layout, accuracy and completeness
- The document's position in the Table of Contents (ToC)
- The image and link in your document
#### To test:
1. Prepare the environment by running `pnpm install`
2. Start the dev server with `pnpm dev`
3. Test the build by running `pnpm build` followed by `pnpm start`
# Syntax Highlighting (/docs/documentation/syntax_highlighting)
{/* TODO: This page contained Nextra-specific interactive examples with React hooks
(useRef, useEffect, useState) that are incompatible with Fumadocs Server Components.
The page needs to be rewritten with Fumadocs syntax highlighting examples. */}
This documentation uses [Shiki](https://shiki.matsu.io) for syntax highlighting at build time.
## Basic Usage
Add code blocks using triple backticks with a language identifier:
````md
```js
console.log('hello, world')
```
````
Renders as:
```js
console.log('hello, world')
```
## Supported Languages
All languages supported by Shiki are available. Common ones include:
- `js` / `javascript`
- `ts` / `typescript`
- `jsx` / `tsx`
- `bash` / `sh`
- `json`
- `yaml`
- `python`
- `go`
- `rust`
- `css`
- `html`
- `markdown` / `md`
- `sql`
- `dockerfile`
## Filenames
You can add a filename to code blocks:
````md
```js filename="example.js"
console.log('hello')
```
````
## Line Highlighting
Highlight specific lines:
````md
```js {1,3-4}
import React from 'react'
function Hello() {
return Hello
}
```
````
# Agents (/docs/features/agents)
# Agents: Build Custom AI Assistants
LibreChat's AI Agents feature provides a flexible framework for creating custom AI assistants powered by various model providers.
This feature is similar to OpenAI's Assistants API and ChatGPT's GPTs, but with broader model support and a no-code implementation, letting you build sophisticated assistants with specialized capabilities.
## Getting Started
To create a new agent, select "Agents" from the endpoint menu and open the Agent Builder panel found in the Side Panel.
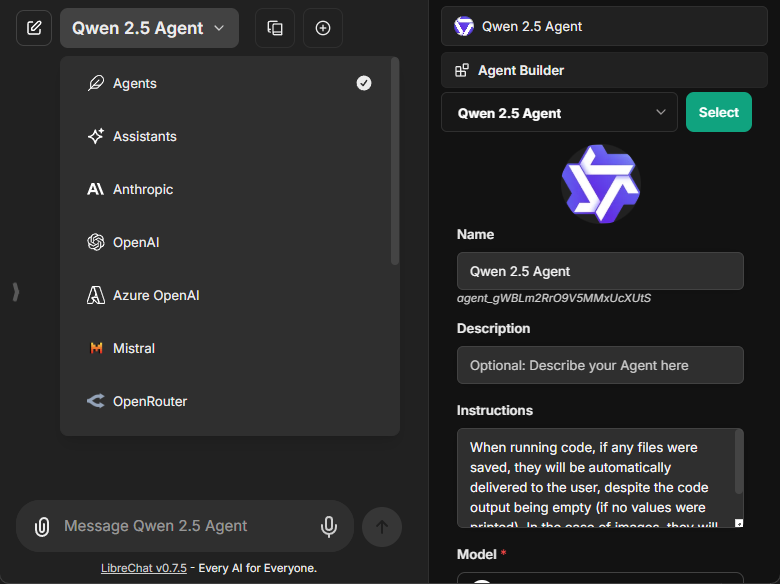
The creation form includes:
- **Avatar**: Upload a custom avatar to personalize your agent
- **Name**: Choose a distinctive name for your agent
- **Description**: Optional details about your agent's purpose
- **Instructions**: System instructions that define your agent's behavior
- **Model**: Select from available providers and models
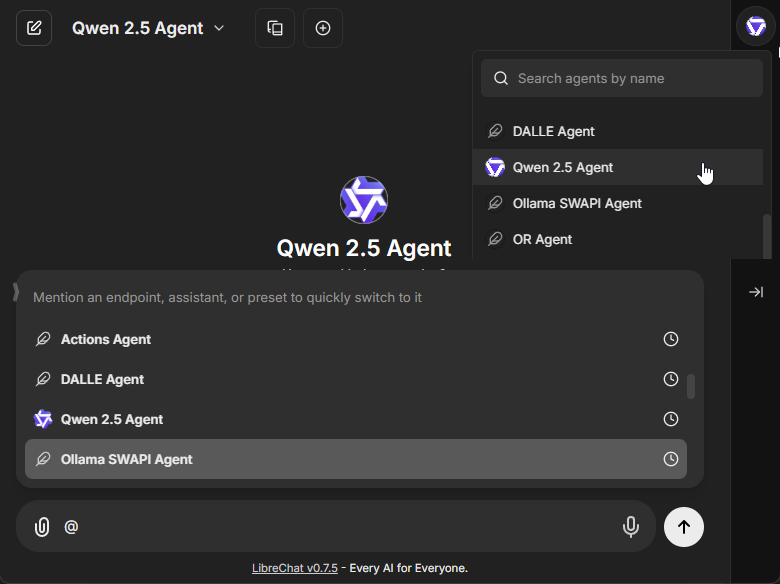
**Existing agents can be selected from the top dropdown of the Side Panel.**
- **Also by mention with "@" in the chat input.**
### Model Configuration
The model parameters interface allows fine-tuning of your agent's responses:
- Temperature (0-1 scale for response creativity)
- Max context tokens
- Max output tokens
- Additional provider-specific settings
## Agent Capabilities
> **Note:** All capabilities can be toggled via the `librechat.yaml` configuration file. See [docs/configuration/librechat_yaml/object_structure/agents#capabilities](/docs/configuration/librechat_yaml/object_structure/agents#capabilities) for more information.
### Code Interpreter
When enabled, the Code Interpreter capability allows your agent to:
- Execute code in multiple languages, including:
- Python, JavaScript, TypeScript, Go, C, C++, Java, PHP, Rust, and Fortran
- Process files securely through the LibreChat Code Interpreter API
- Run code without local setup, configuration, or sandbox deployment
- Handle file uploads and downloads seamlessly
- [More info about the Code Interpreter API](/docs/features/code_interpreter)
- **Requires an API Subscription from [code.librechat.ai](https://code.librechat.ai/pricing)**
### File Search
The File Search capability enables:
- RAG (Retrieval-Augmented Generation) functionality
- Semantic search across uploaded documents
- Context-aware responses based on file contents
- File attachment support at both agent and chat thread levels
### File Context
The File Context capability allows your agent to store extracted text from files as part of its system instructions:
- Extract text while maintaining document structure and formatting
- Process complex layouts including multi-column text and mixed content
- Handle tables, equations, and other specialized content
- Work with multilingual content
- Text is stored in the agent's instructions in the database
- **No OCR service required** - Uses text parsing by default with fallback methods
- **Enhanced by OCR** - If OCR is configured, extraction quality improves for images and scanned documents
- Uses the same processing logic as "Upload as Text": **OCR > STT > text parsing**
- [More info about OCR configuration](/docs/features/ocr)
**Note:** File Context includes extracted text in the agent's system instructions. For temporary document questions in individual conversations, use [Upload as Text](/docs/features/upload_as_text) from the chat instead.
### Model Context Protocol (MCP)
MCP is an open protocol that standardizes how applications provide context to Large Language Models (LLMs), acting like a universal adapter for AI tools and data sources.
For more information, see documentation on [MCP](/docs/features/mcp).
#### Agents with MCP Tools
1. Configure MCP servers in your `librechat.yaml` file
2. Restart LibreChat to initialize the connections
3. Create or edit an agent
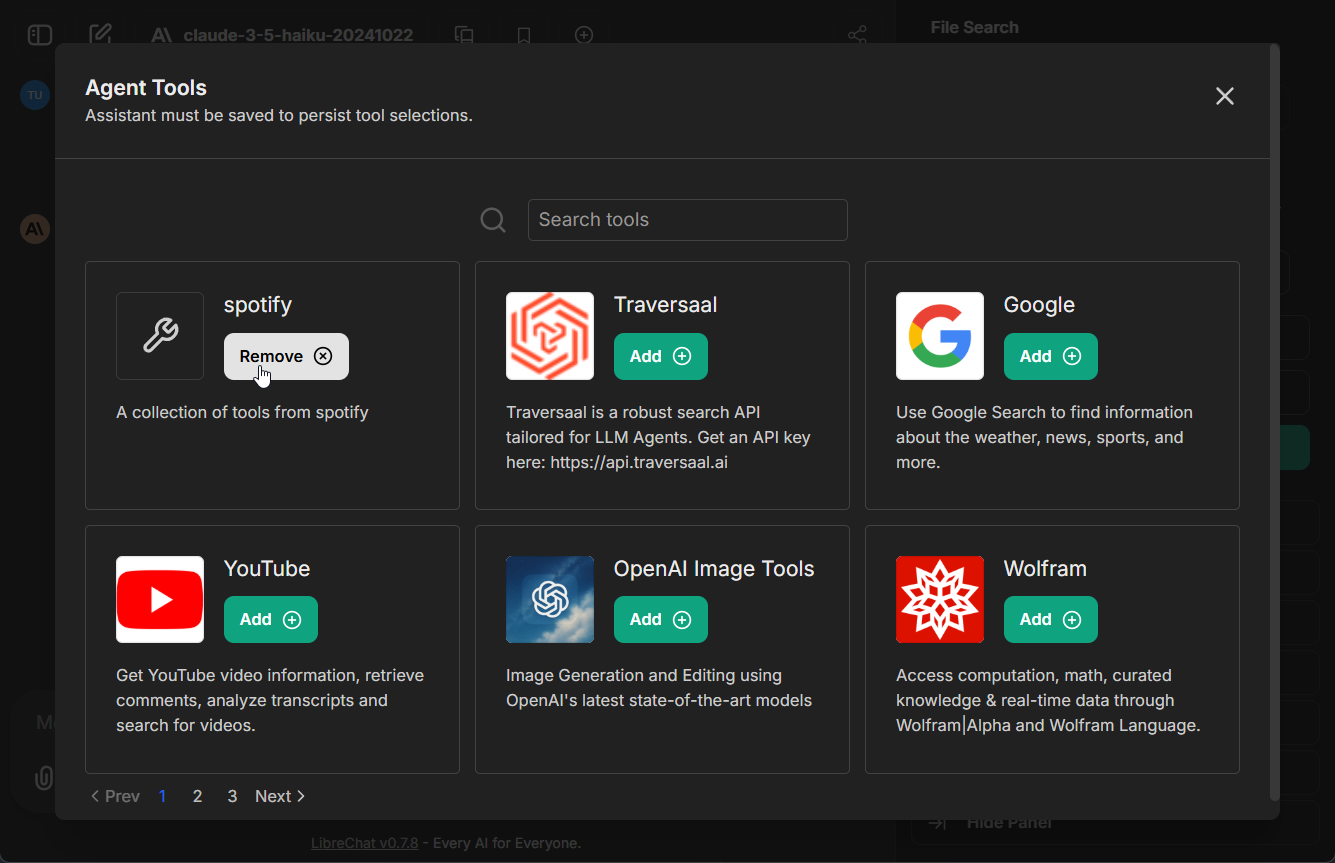
4. Click the "Add Tools" button in the Agent Builder panel to open the Tools Dialog shown below
5. Select the MCP server(s) you want to add - each server appears as a single entry
6. Save your changes to the agent
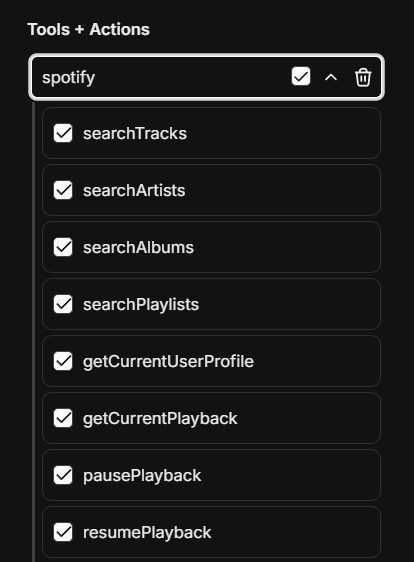
In this example, we've added the **[Spotify MCP server](https://github.com/LibreChat-AI/spotify-mcp)** to an agent.
#### Managing MCP Tools
Once an MCP server is added to an agent, you can fine-tune which specific tools are available:
- After adding an MCP server, expand it to see all available tools
- Check/uncheck individual tools as needed
- For example, the Spotify MCP server provides ~20 tools (search, playback control, playlist management, etc.)
- This granular control lets you limit agents to only the tools they need
Learn More:
- [Configuring MCP Servers](/docs/features/mcp)
- [Model Context Protocol Introduction](https://modelcontextprotocol.io/introduction)
### Deferred Tools
Deferred tools allow agents to have access to many MCP tools without loading them all into the LLM context upfront. Instead, deferred tools are discoverable at runtime via a **Tool Search** mechanism.
This is especially useful when an agent has access to many MCP servers with dozens of tools—loading them all would consume a large portion of the context window and degrade response quality.
**How it works:**
- Tools marked as "deferred" are excluded from the initial LLM context
- A `ToolSearch` tool is automatically added, allowing the LLM to discover and load deferred tools on demand
- Once discovered, the tool is available for the rest of the conversation
**Configuring deferred tools:**
1. Open the Agent Builder and add MCP tools
2. Click the dropdown on any MCP tool
3. Toggle "Defer Loading" — deferred tools show a clock icon
**Note:** The `deferred_tools` capability is enabled by default. It can be toggled via the [`librechat.yaml` agents configuration](/docs/configuration/librechat_yaml/object_structure/agents#capabilities).
{/*
### Programmatic Tool Calling
**Note:** this feature is still in private beta and not accessible to all users.
Programmatic Tool Calling (PTC) allows MCP tools to be executed via code in a sandbox environment rather than being called directly by the LLM. This enables more complex tool orchestration—for example, calling multiple tools in sequence, processing results with code, or building dynamic workflows.
**How it works:**
- Tools marked for "code execution" calling are routed through the Code Interpreter sandbox
- The LLM writes code that calls the tools programmatically, allowing for loops, conditionals, and data transformations
- Results flow back through the sandbox to the LLM
**Configuring programmatic tools:**
1. Open the Agent Builder and add MCP tools
2. Click the dropdown on any MCP tool
3. Toggle "Code Execution" calling — programmatic tools show a code icon
**Note:** The `programmatic_tools` capability is **disabled by default** and requires the latest [Code Interpreter API](/docs/features/code_interpreter). It can be enabled via the [`librechat.yaml` agents configuration](/docs/configuration/librechat_yaml/object_structure/agents#capabilities).
*/}
### Artifacts
The Artifacts capability enables your agent to generate and display interactive content:
- Create React components, HTML code, and Mermaid diagrams
- Display content in a separate UI window for clarity and interaction
- Configure artifact-specific instructions at the agent level
- [More info about Artifacts](/docs/features/artifacts)
When enabled, additional instructions specific to the use of artifacts are added by default. Options include:
- **Enable shadcn/ui instructions**: Adds instructions for using shadcn/ui components (a collection of re-usable components built using Radix UI and Tailwind CSS)
- **Custom Prompt Mode**: When enabled, the default artifacts system prompt will not be included, allowing you to provide your own custom instructions
Configuring artifacts at the agent level is the preferred approach, as it allows for more granular control compared to the legacy app-wide configuration.
If you enable Custom Prompt Mode, you should include at minimum the basic artifact format in your instructions.
Here's a simple example of the minimum instructions needed:
````md
When creating content that should be displayed as an artifact, use the following format:
:::artifact{identifier="unique-identifier" type="mime-type" title="Artifact Title"}
```
Your artifact content here
```
:::
For the type attribute, use one of:
- "text/html" for HTML content
- "application/vnd.mermaid" for Mermaid diagrams
- "application/vnd.react" for React components
- "image/svg+xml" for SVG images
````
### Tools
Agents can also be enhanced with various built-in tools:
- **[OpenAI Image Tools](/docs/features/image_gen#1--openai-image-tools-recommended)**: Image generation & editing using **[GPT-Image-1](https://platform.openai.com/docs/models/gpt-image-1)**
- **[DALL-E-3](/docs/features/image_gen#2--dalle-legacy)**: Image generation from text descriptions
- **[Stable Diffusion](/docs/features/image_gen#3--stable-diffusion-local)** / **[Flux](/docs/features/image_gen#4--flux)**: Text-to-image generation
- **[Wolfram](/docs/configuration/tools/wolfram)**: Computational and mathematical capabilities
- **[OpenWeather](/docs/configuration/tools/openweather)**: Weather data retrieval
- **[Google Search](/docs/configuration/tools/google_search)**: Access to web search functionality
- **Calculator**: Mathematical calculations
- **Tavily Search**: Advanced search API with diverse data source integration
- **Azure AI Search**: Information retrieval
- **Traversaal**: A robust search API for LLM Agents
- Tools can be disabled using the [`librechat.yaml`](/docs/configuration/librechat_yaml) configuration file:
- [More info](/docs/configuration/librechat_yaml/object_structure/agents#capabilities)
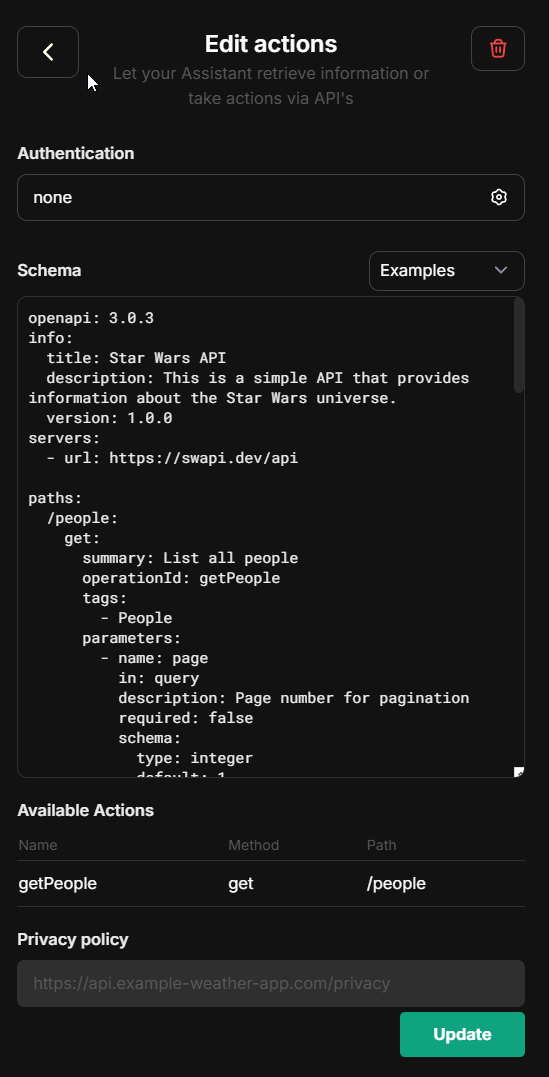
### Actions
With the Actions capability, you can dynamically create tools from [OpenAPI specs](https://swagger.io/specification/) to add to your Agents.

**Clicking the button above will open a form where you can input the OpenAPI spec URL and create an action:**
- Actions can be disabled using the [`librechat.yaml`](/docs/configuration/librechat_yaml) configuration file:
- [More info](/docs/configuration/librechat_yaml/object_structure/agents#capabilities)
- Individual domains can be whitelisted for agent actions:
- [More info](/docs/configuration/librechat_yaml/object_structure/actions#alloweddomains)
- Note that you can add add the 'x-strict': true flag at operation-level in the OpenAPI spec for actions.
If using an OpenAI model supporting it, this will automatically generate function calls with 'strict' mode enabled.
- Strict mode supports only a partial subset of json. Read https://platform.openai.com/docs/guides/structured-outputs/some-type-specific-keywords-are-not-yet-supported for details.
### Agent Chain
The Agent Chain capability enables a Mixture-of-Agents (MoA) approach, allowing you to create a sequence of agents that work together:
- Create chains of specialized agents for complex tasks
- Each agent in the chain can access outputs from previous agents
- Configure the maximum number of steps for the agent chain
- **Note:** Access this feature from the Advanced Settings panel in the Agent Builder
- **Note:** This feature is currently in beta and may be subject to change
- The current maximum of agents that can be chained is 10, but this may be configurable in the future
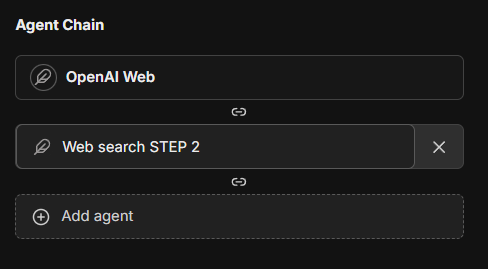 This feature introduces a layered Mixture-of-Agents architecture to LibreChat, where each agent takes all the outputs from agents in the previous layer as auxiliary information in generating its response, as described in [the eponymous "Mixture-of-Agents" paper](https://arxiv.org/abs/2406.04692).
### Advanced Settings
Advanced settings for your agent (found in the Advanced view of the Agent form) outside of "capabilities."
#### Max Agent Steps
This setting allows you to limit the number of steps an agent can take in a "run," which refers to the agent loop before a final response is given.
If left unconfigured, the default is 25 steps, but you can adjust this to suit your needs. For admins, you can set a global default as well as a global maximum in the [`librechat.yaml`](/docs/configuration/librechat_yaml/object_structure/agents#recursionlimit) file.
A "step" refers to either an AI API request or a round of tool usage (1 or many tools, depending on how many tool calls the LLM provides from a single request).
A single, non-tool response is 1 step. A singular round of tool usage is usually 3 steps:
1. API Request -> 2. Tool Usage (1 or many tools) -> 3. Follow-up API Request
## File Management
Agents support multiple ways to work with files:
### In Chat Interface
When chatting with an agent, you have four upload options:
1. **Upload Images**
- Uploads images for native vision model support
- Sends images directly to the model provider
2. **Upload as Text** (requires `context` capability)
- Extracts and includes full document content in conversation
- Uses text parsing by default; enhanced by OCR if configured
- Content exists only in current conversation
- See [Upload as Text](/docs/features/upload_as_text)
3. **Upload for File Search** (requires `file_search` capability, toggled ON)
- Uses semantic search (RAG) with vector stores
- Returns relevant chunks via tool use
- Optimal for large documents/multiple files
- Sub-optimal for structured data (CSV, Excel, JSON, etc.)
4. **Upload for Code Interpreter** (requires `execute_code` capability, toggled ON)
- Adds files to code interpreter environment
- Optimal for structured data (CSV, Excel, JSON, etc.)
- More info about [Code Interpreter](/docs/features/code_interpreter)
### In Agent Builder
When configuring an agent, you can attach files in different categories:
1. **Image Upload**: For visual content the agent can reference
2. **File Search Upload**: Documents for RAG capabilities
3. **Code Interpreter Upload**: Files for code processing
4. **File Context**: Documents with extracted text to supplement agent instructions
**File Context** uses the `context` capability and works just like ["Upload as Text"](/docs/features/upload_as_text) - it uses text parsing by default and is enhanced by OCR when configured. Text is extracted at upload time and stored in the agent's instructions. This is ideal for giving agents persistent knowledge from documents, PDFs, code files, or images with text.
**Processing priority:** OCR > STT > text parsing (same as Upload as Text)
**Note:** The extracted text is included as part of the agent's system instructions.
## Sharing and Permissions
### Administrator Controls
Administrators have access to global permission settings within the agent builder UI:
- Enable/disable agent sharing across all users
- Control agent usage permissions
- Manage agent creation rights
- Configure platform-wide settings
The first account created for your instance is an administrator. If you need to add an additional administrator, you may [access MongoDB](/docs/configuration/mongodb/mongodb_auth) and update the user's profile:
```
db.users.updateOne(
{ email: 'USER_EMAIL_ADDRESS' },
{ $set: { role: 'ADMIN' } }
)
```
The use of agents for all users can also be disabled via config, [more info](/docs/configuration/librechat_yaml/object_structure/interface).
### User-Level Sharing
Individual users can:
- Share their agents with all users (if enabled)
- Control editing permissions for shared agents
- Manage access to their created agents
### Notes
- Instructions, model parameters, attached files, and tools are only exposed to the user if they have editing permissions
- An agent may leak any attached data, whether instructions or files, through conversation--make sure your instructions are robust against this
- Only original authors and administrators can delete shared agents
- Agents are private to authors unless shared
## Optional Configuration
LibreChat allows admins to configure the use of agents via the [`librechat.yaml`](/docs/configuration/librechat_yaml) file:
- Disable Agents for all users (including admins): [more info](/docs/configuration/librechat_yaml/object_structure/interface)
- Customize agent capabilities using: [more info](/docs/configuration/librechat_yaml/object_structure/agents)
## Best Practices
- Provide clear, specific instructions for your agent
- Carefully consider which tools are necessary for your use case
- Organize files appropriately across the four upload categories
- Review permission settings before sharing agents
- Test your agent thoroughly before deploying to other users
## Recap
1. Select "Agents" from the endpoint dropdown menu
2. Open the Agent Builder panel
3. Fill out the required agent details
4. Configure desired capabilities (Code Interpreter, File Search, File Context, etc.)
5. Add necessary tools and files
6. Set sharing permissions if desired
7. Create and start using your agent
When chatting with agents, you can:
- Use "Upload as Text" to include full document content in conversations (text parsing by default, enhanced by OCR)
- Use "Upload for File Search" for semantic search over documents (requires RAG API)
- Add files to agent's "File Context" to included a file's full content as part of the agent's system instructions
## Migration Required (v0.8.0-rc3+)
Starting from version v0.8.0-rc3, LibreChat uses a new Access Control List (ACL) based permission system for agents. If you're upgrading from an earlier version, you must run the agent permissions migration for existing agents to remain accessible.
### What the Migration Does
The agent permissions migration transitions your agents from a simple ownership model to a sophisticated ACL-based system with multiple permission levels:
- **OWNER**: Full control over the agent
- **EDITOR**: Can view and modify the agent
- **VIEWER**: Read-only access to the agent
Without running this migration, existing agents will be inaccessible through the new permission-aware API endpoints.
### Running the Migration
Choose the appropriate command based on your deployment method:
#### 1. For the default `docker-compose.yml` (if you use `docker compose up` to start the app):
**Preview changes (dry run):**
```bash
docker compose exec api npm run migrate:agent-permissions:dry-run
```
**Execute migration:**
```bash
docker compose exec api npm run migrate:agent-permissions
```
**Custom batch size (for large datasets):**
```bash
docker compose exec api npm run migrate:agent-permissions:batch
```
#### 2. For the `deploy-compose.yml` (if you followed the [Ubuntu Docker Guide](/docs/remote/docker_linux)):
**Preview changes (dry run):**
```bash
docker exec -it LibreChat-API /bin/sh -c "cd .. && npm run migrate:agent-permissions:dry-run"
```
**Execute migration:**
```bash
docker exec -it LibreChat-API /bin/sh -c "cd .. && npm run migrate:agent-permissions"
```
**Custom batch size (for large datasets):**
```bash
docker exec -it LibreChat-API /bin/sh -c "cd .. && npm run migrate:agent-permissions:batch"
```
#### 3. For local development (from project root):
**Preview changes (dry run):**
```bash
npm run migrate:agent-permissions:dry-run
```
**Execute migration:**
```bash
npm run migrate:agent-permissions
```
**Custom batch size (for large datasets):**
```bash
npm run migrate:agent-permissions:batch
```
### What Happens During Migration
- **Private Agents**: Remain accessible only to their creators (receive OWNER permission)
- **Shared Agents**: If an agent was previously shared, it will receive appropriate ACL entries as a Public Agent (shared to all users)
- **System Detection**: LibreChat automatically detects unmigrated agents at startup and displays a warning
You can adjust the resulting agent permissions via the Agent Builder UI.
The same migration process applies to prompts. If you also have existing prompts, run the prompt permissions migration using the same commands but replace `agent` with `prompt` in the command names.
## Agents API (Beta)
LibreChat agents can also be accessed programmatically via API, enabling external applications and scripts to interact with your agents using OpenAI-compatible SDKs or the Open Responses format.
See the [Agents API documentation](/docs/features/agents_api) for setup and usage details.
## What's next?
LibreChat Agents usher in a new era for the app where future pipelines can be streamlined via Agents for specific tasks and workflows across your experience in LibreChat.
Future updates will include:
- General improvements to the current Agent experience
- Multi-agent orchestration for complex workflows
- Ability to customize agents for various functions: titling (chat thread naming), memory management (user context/history), and prompt enhancement (input assistance/predictions)
- More tools, configurable tool parameters, dynamic tool creation.
Furthermore, the update introduces a new paradigm for LibreChat, as its underlying architecture provides a much needed refresh for the app, optimizing both the user experience and overall app performance.
To highlight one notable optimization, an AI generation of roughly 1000 tokens will transfer about 1 MB of data using traditional endpoints (at the time of writing, any endpoint option besides Agents and AWS Bedrock).
Using an agent, the same generation will transfer about about 52 kb of data, a 95% reduction in data transfer, which is that much less of a load on the server and the user's device.
---
AI Agents in LibreChat provide a powerful way to create specialized assistants without coding knowledge while maintaining the flexibility to work with your preferred AI models and providers.
---
#LibreChat #AIAssistants #NoCode #OpenSource
# Agents API (Beta) (/docs/features/agents_api)
The Agents API is currently in beta. Endpoints, request/response formats, and behavior may change as we iterate toward a stable release.
LibreChat exposes your agents through two API-compatible interfaces, allowing external applications, scripts, and services to interact with your agents programmatically.
## Overview
The Agents API provides two interfaces:
- **OpenAI-compatible Chat Completions** — `POST /api/agents/v1/chat/completions`
- **Open Responses API** — `POST /api/agents/v1/responses`
Both are authenticated via API keys and support streaming responses, making it easy to integrate LibreChat agents into existing workflows that already use OpenAI SDKs or similar tooling.
LibreChat is adopting [Open Responses](https://www.openresponses.org/) as its primary API framework for serving agents. While the Chat Completions endpoint provides backward compatibility with existing OpenAI-compatible tooling, the Open Responses endpoint represents the future direction.
## Enabling the Agents API
The Agents API is gated behind the `remoteAgents` interface configuration. All permissions default to `false`.
```yaml filename="librechat.yaml"
interface:
remoteAgents:
use: true
create: true
```
See [Interface Configuration — remoteAgents](/docs/configuration/librechat_yaml/object_structure/interface#remoteagents) for all available options.
**Note:** Admin users have all remote agent permissions enabled by default.
## API Key Management
Once `remoteAgents.use` and `remoteAgents.create` are enabled, users can generate API keys from the LibreChat UI. These keys authenticate requests to the Agents API.
## Endpoints
### Chat Completions (OpenAI-compatible)
```
POST /api/agents/v1/chat/completions
```
Use any OpenAI-compatible SDK by pointing it at your LibreChat instance. The `model` parameter corresponds to an agent ID.
**Example with curl:**
```bash
curl -X POST https://your-librechat-instance/api/agents/v1/chat/completions \
-H "Authorization: Bearer YOUR_API_KEY" \
-H "Content-Type: application/json" \
-d '{
"model": "agent_abc123",
"messages": [
{"role": "user", "content": "Hello, what can you help me with?"}
],
"stream": true
}'
```
**Example with OpenAI SDK (Python):**
```python
from openai import OpenAI
client = OpenAI(
base_url="https://your-librechat-instance/api/agents/v1",
api_key="YOUR_API_KEY"
)
response = client.chat.completions.create(
model="agent_abc123",
messages=[{"role": "user", "content": "Hello!"}],
stream=True
)
for chunk in response:
print(chunk.choices[0].delta.content, end="")
```
### List Models
```
GET /api/agents/v1/models
```
Returns available agents as models. Useful for discovering which agents are accessible with your API key.
### Open Responses API
```
POST /api/agents/v1/responses
```
The Open Responses endpoint follows the [Open Responses specification](https://www.openresponses.org/), an open inference standard initiated by OpenAI and built by the open-source AI community. It is designed for agentic workflows with native support for reasoning, tool use, structured outputs, and streaming semantic events.
```bash
curl -X POST https://your-librechat-instance/api/agents/v1/responses \
-H "Authorization: Bearer YOUR_API_KEY" \
-H "Content-Type: application/json" \
-d '{
"model": "agent_abc123",
"input": "What is the weather today?"
}'
```
## Token Usage Tracking
All Agents API requests track token usage against the user's balance (when token spending is configured). Both input and output tokens are counted, including cache tokens for providers that support them (OpenAI, Anthropic).
## Roadmap
- **Open Responses as primary interface** — We plan to expand the Open Responses endpoint with full support for agentic loops, tool orchestration, and streaming semantic events.
- **Anthropic Messages API** — We may add support for the Anthropic Messages API format as an additional interface in the future.
## Related Documentation
- [Agents](/docs/features/agents) — Creating and configuring agents
- [Interface Configuration — remoteAgents](/docs/configuration/librechat_yaml/object_structure/interface#remoteagents) — Access control settings
- [Token Usage](/docs/configuration/token_usage) — Configuring token spending and balance
- [Open Responses Specification](https://www.openresponses.org/) — The open inference standard
# Artifacts - Generative UI (/docs/features/artifacts)
- **Generative UI:** Create React components, HTML code, and Mermaid diagrams
- **Flexible Integration:** Use any model you have set up
- **Iterative Design:** Rapidly improve and refine generated outputs
- **Agent Integration:** Configure artifacts at the agent level (recommended approach)
> **Note:** The preferred way to use artifacts is now through the [Agents feature](/docs/features/agents#artifacts), which allows for more granular control by enabling/disabling artifacts at the agent level rather than app-wide.
This feature introduces a layered Mixture-of-Agents architecture to LibreChat, where each agent takes all the outputs from agents in the previous layer as auxiliary information in generating its response, as described in [the eponymous "Mixture-of-Agents" paper](https://arxiv.org/abs/2406.04692).
### Advanced Settings
Advanced settings for your agent (found in the Advanced view of the Agent form) outside of "capabilities."
#### Max Agent Steps
This setting allows you to limit the number of steps an agent can take in a "run," which refers to the agent loop before a final response is given.
If left unconfigured, the default is 25 steps, but you can adjust this to suit your needs. For admins, you can set a global default as well as a global maximum in the [`librechat.yaml`](/docs/configuration/librechat_yaml/object_structure/agents#recursionlimit) file.
A "step" refers to either an AI API request or a round of tool usage (1 or many tools, depending on how many tool calls the LLM provides from a single request).
A single, non-tool response is 1 step. A singular round of tool usage is usually 3 steps:
1. API Request -> 2. Tool Usage (1 or many tools) -> 3. Follow-up API Request
## File Management
Agents support multiple ways to work with files:
### In Chat Interface
When chatting with an agent, you have four upload options:
1. **Upload Images**
- Uploads images for native vision model support
- Sends images directly to the model provider
2. **Upload as Text** (requires `context` capability)
- Extracts and includes full document content in conversation
- Uses text parsing by default; enhanced by OCR if configured
- Content exists only in current conversation
- See [Upload as Text](/docs/features/upload_as_text)
3. **Upload for File Search** (requires `file_search` capability, toggled ON)
- Uses semantic search (RAG) with vector stores
- Returns relevant chunks via tool use
- Optimal for large documents/multiple files
- Sub-optimal for structured data (CSV, Excel, JSON, etc.)
4. **Upload for Code Interpreter** (requires `execute_code` capability, toggled ON)
- Adds files to code interpreter environment
- Optimal for structured data (CSV, Excel, JSON, etc.)
- More info about [Code Interpreter](/docs/features/code_interpreter)
### In Agent Builder
When configuring an agent, you can attach files in different categories:
1. **Image Upload**: For visual content the agent can reference
2. **File Search Upload**: Documents for RAG capabilities
3. **Code Interpreter Upload**: Files for code processing
4. **File Context**: Documents with extracted text to supplement agent instructions
**File Context** uses the `context` capability and works just like ["Upload as Text"](/docs/features/upload_as_text) - it uses text parsing by default and is enhanced by OCR when configured. Text is extracted at upload time and stored in the agent's instructions. This is ideal for giving agents persistent knowledge from documents, PDFs, code files, or images with text.
**Processing priority:** OCR > STT > text parsing (same as Upload as Text)
**Note:** The extracted text is included as part of the agent's system instructions.
## Sharing and Permissions
### Administrator Controls
Administrators have access to global permission settings within the agent builder UI:
- Enable/disable agent sharing across all users
- Control agent usage permissions
- Manage agent creation rights
- Configure platform-wide settings
The first account created for your instance is an administrator. If you need to add an additional administrator, you may [access MongoDB](/docs/configuration/mongodb/mongodb_auth) and update the user's profile:
```
db.users.updateOne(
{ email: 'USER_EMAIL_ADDRESS' },
{ $set: { role: 'ADMIN' } }
)
```
The use of agents for all users can also be disabled via config, [more info](/docs/configuration/librechat_yaml/object_structure/interface).
### User-Level Sharing
Individual users can:
- Share their agents with all users (if enabled)
- Control editing permissions for shared agents
- Manage access to their created agents
### Notes
- Instructions, model parameters, attached files, and tools are only exposed to the user if they have editing permissions
- An agent may leak any attached data, whether instructions or files, through conversation--make sure your instructions are robust against this
- Only original authors and administrators can delete shared agents
- Agents are private to authors unless shared
## Optional Configuration
LibreChat allows admins to configure the use of agents via the [`librechat.yaml`](/docs/configuration/librechat_yaml) file:
- Disable Agents for all users (including admins): [more info](/docs/configuration/librechat_yaml/object_structure/interface)
- Customize agent capabilities using: [more info](/docs/configuration/librechat_yaml/object_structure/agents)
## Best Practices
- Provide clear, specific instructions for your agent
- Carefully consider which tools are necessary for your use case
- Organize files appropriately across the four upload categories
- Review permission settings before sharing agents
- Test your agent thoroughly before deploying to other users
## Recap
1. Select "Agents" from the endpoint dropdown menu
2. Open the Agent Builder panel
3. Fill out the required agent details
4. Configure desired capabilities (Code Interpreter, File Search, File Context, etc.)
5. Add necessary tools and files
6. Set sharing permissions if desired
7. Create and start using your agent
When chatting with agents, you can:
- Use "Upload as Text" to include full document content in conversations (text parsing by default, enhanced by OCR)
- Use "Upload for File Search" for semantic search over documents (requires RAG API)
- Add files to agent's "File Context" to included a file's full content as part of the agent's system instructions
## Migration Required (v0.8.0-rc3+)
Starting from version v0.8.0-rc3, LibreChat uses a new Access Control List (ACL) based permission system for agents. If you're upgrading from an earlier version, you must run the agent permissions migration for existing agents to remain accessible.
### What the Migration Does
The agent permissions migration transitions your agents from a simple ownership model to a sophisticated ACL-based system with multiple permission levels:
- **OWNER**: Full control over the agent
- **EDITOR**: Can view and modify the agent
- **VIEWER**: Read-only access to the agent
Without running this migration, existing agents will be inaccessible through the new permission-aware API endpoints.
### Running the Migration
Choose the appropriate command based on your deployment method:
#### 1. For the default `docker-compose.yml` (if you use `docker compose up` to start the app):
**Preview changes (dry run):**
```bash
docker compose exec api npm run migrate:agent-permissions:dry-run
```
**Execute migration:**
```bash
docker compose exec api npm run migrate:agent-permissions
```
**Custom batch size (for large datasets):**
```bash
docker compose exec api npm run migrate:agent-permissions:batch
```
#### 2. For the `deploy-compose.yml` (if you followed the [Ubuntu Docker Guide](/docs/remote/docker_linux)):
**Preview changes (dry run):**
```bash
docker exec -it LibreChat-API /bin/sh -c "cd .. && npm run migrate:agent-permissions:dry-run"
```
**Execute migration:**
```bash
docker exec -it LibreChat-API /bin/sh -c "cd .. && npm run migrate:agent-permissions"
```
**Custom batch size (for large datasets):**
```bash
docker exec -it LibreChat-API /bin/sh -c "cd .. && npm run migrate:agent-permissions:batch"
```
#### 3. For local development (from project root):
**Preview changes (dry run):**
```bash
npm run migrate:agent-permissions:dry-run
```
**Execute migration:**
```bash
npm run migrate:agent-permissions
```
**Custom batch size (for large datasets):**
```bash
npm run migrate:agent-permissions:batch
```
### What Happens During Migration
- **Private Agents**: Remain accessible only to their creators (receive OWNER permission)
- **Shared Agents**: If an agent was previously shared, it will receive appropriate ACL entries as a Public Agent (shared to all users)
- **System Detection**: LibreChat automatically detects unmigrated agents at startup and displays a warning
You can adjust the resulting agent permissions via the Agent Builder UI.
The same migration process applies to prompts. If you also have existing prompts, run the prompt permissions migration using the same commands but replace `agent` with `prompt` in the command names.
## Agents API (Beta)
LibreChat agents can also be accessed programmatically via API, enabling external applications and scripts to interact with your agents using OpenAI-compatible SDKs or the Open Responses format.
See the [Agents API documentation](/docs/features/agents_api) for setup and usage details.
## What's next?
LibreChat Agents usher in a new era for the app where future pipelines can be streamlined via Agents for specific tasks and workflows across your experience in LibreChat.
Future updates will include:
- General improvements to the current Agent experience
- Multi-agent orchestration for complex workflows
- Ability to customize agents for various functions: titling (chat thread naming), memory management (user context/history), and prompt enhancement (input assistance/predictions)
- More tools, configurable tool parameters, dynamic tool creation.
Furthermore, the update introduces a new paradigm for LibreChat, as its underlying architecture provides a much needed refresh for the app, optimizing both the user experience and overall app performance.
To highlight one notable optimization, an AI generation of roughly 1000 tokens will transfer about 1 MB of data using traditional endpoints (at the time of writing, any endpoint option besides Agents and AWS Bedrock).
Using an agent, the same generation will transfer about about 52 kb of data, a 95% reduction in data transfer, which is that much less of a load on the server and the user's device.
---
AI Agents in LibreChat provide a powerful way to create specialized assistants without coding knowledge while maintaining the flexibility to work with your preferred AI models and providers.
---
#LibreChat #AIAssistants #NoCode #OpenSource
# Agents API (Beta) (/docs/features/agents_api)
The Agents API is currently in beta. Endpoints, request/response formats, and behavior may change as we iterate toward a stable release.
LibreChat exposes your agents through two API-compatible interfaces, allowing external applications, scripts, and services to interact with your agents programmatically.
## Overview
The Agents API provides two interfaces:
- **OpenAI-compatible Chat Completions** — `POST /api/agents/v1/chat/completions`
- **Open Responses API** — `POST /api/agents/v1/responses`
Both are authenticated via API keys and support streaming responses, making it easy to integrate LibreChat agents into existing workflows that already use OpenAI SDKs or similar tooling.
LibreChat is adopting [Open Responses](https://www.openresponses.org/) as its primary API framework for serving agents. While the Chat Completions endpoint provides backward compatibility with existing OpenAI-compatible tooling, the Open Responses endpoint represents the future direction.
## Enabling the Agents API
The Agents API is gated behind the `remoteAgents` interface configuration. All permissions default to `false`.
```yaml filename="librechat.yaml"
interface:
remoteAgents:
use: true
create: true
```
See [Interface Configuration — remoteAgents](/docs/configuration/librechat_yaml/object_structure/interface#remoteagents) for all available options.
**Note:** Admin users have all remote agent permissions enabled by default.
## API Key Management
Once `remoteAgents.use` and `remoteAgents.create` are enabled, users can generate API keys from the LibreChat UI. These keys authenticate requests to the Agents API.
## Endpoints
### Chat Completions (OpenAI-compatible)
```
POST /api/agents/v1/chat/completions
```
Use any OpenAI-compatible SDK by pointing it at your LibreChat instance. The `model` parameter corresponds to an agent ID.
**Example with curl:**
```bash
curl -X POST https://your-librechat-instance/api/agents/v1/chat/completions \
-H "Authorization: Bearer YOUR_API_KEY" \
-H "Content-Type: application/json" \
-d '{
"model": "agent_abc123",
"messages": [
{"role": "user", "content": "Hello, what can you help me with?"}
],
"stream": true
}'
```
**Example with OpenAI SDK (Python):**
```python
from openai import OpenAI
client = OpenAI(
base_url="https://your-librechat-instance/api/agents/v1",
api_key="YOUR_API_KEY"
)
response = client.chat.completions.create(
model="agent_abc123",
messages=[{"role": "user", "content": "Hello!"}],
stream=True
)
for chunk in response:
print(chunk.choices[0].delta.content, end="")
```
### List Models
```
GET /api/agents/v1/models
```
Returns available agents as models. Useful for discovering which agents are accessible with your API key.
### Open Responses API
```
POST /api/agents/v1/responses
```
The Open Responses endpoint follows the [Open Responses specification](https://www.openresponses.org/), an open inference standard initiated by OpenAI and built by the open-source AI community. It is designed for agentic workflows with native support for reasoning, tool use, structured outputs, and streaming semantic events.
```bash
curl -X POST https://your-librechat-instance/api/agents/v1/responses \
-H "Authorization: Bearer YOUR_API_KEY" \
-H "Content-Type: application/json" \
-d '{
"model": "agent_abc123",
"input": "What is the weather today?"
}'
```
## Token Usage Tracking
All Agents API requests track token usage against the user's balance (when token spending is configured). Both input and output tokens are counted, including cache tokens for providers that support them (OpenAI, Anthropic).
## Roadmap
- **Open Responses as primary interface** — We plan to expand the Open Responses endpoint with full support for agentic loops, tool orchestration, and streaming semantic events.
- **Anthropic Messages API** — We may add support for the Anthropic Messages API format as an additional interface in the future.
## Related Documentation
- [Agents](/docs/features/agents) — Creating and configuring agents
- [Interface Configuration — remoteAgents](/docs/configuration/librechat_yaml/object_structure/interface#remoteagents) — Access control settings
- [Token Usage](/docs/configuration/token_usage) — Configuring token spending and balance
- [Open Responses Specification](https://www.openresponses.org/) — The open inference standard
# Artifacts - Generative UI (/docs/features/artifacts)
- **Generative UI:** Create React components, HTML code, and Mermaid diagrams
- **Flexible Integration:** Use any model you have set up
- **Iterative Design:** Rapidly improve and refine generated outputs
- **Agent Integration:** Configure artifacts at the agent level (recommended approach)
> **Note:** The preferred way to use artifacts is now through the [Agents feature](/docs/features/agents#artifacts), which allows for more granular control by enabling/disabling artifacts at the agent level rather than app-wide.
## Key Features of LibreChat's Code Artifacts:
- Instant prototyping of websites and UIs with generative AI
- Effortless creation of dynamic, responsive layouts
- Interactive learning environment for React and HTML
- Complex idea visualization using Mermaid diagrams
- AI-powered intuitive, user-centric design iterations
- Free and open-source alternative to paid AI tools
Experience the future of UI/UX design and development with LibreChat's generative capabilities. Bring your ideas to life faster than ever before!
## Content-Security-Policy
You may need to need to update your web server's Content-Security-Policy to include `frame-src 'self' https://*.codesandbox.io` in order to load generated HTML apps in the Artifacts panel. This is a dependency of the [sandpack](https://sandpack.codesandbox.io/) library.
## Self-Hosting the Sandpack Bundler
Artifacts in LibreChat use CodeSandbox's Sandpack library to securely render HTML/JS code. By default, LibreChat connects to CodeSandbox's public CDN, which may also transmit telemetry for its usage.
For enhanced privacy, security compliance, or isolated network environments, you can [self-host the bundler.](https://sandpack.codesandbox.io/docs/guides/hosting-the-bundler)
### Why Self-Host the Sandpack Bundler?
[Self-hosting the bundler](https://sandpack.codesandbox.io/docs/guides/hosting-the-bundler) provides several advantages:
- **Privacy & Security**: Keep code execution within your own infrastructure
- **Reliability**: Remove dependency on external services
- **Performance**: Reduce latency by hosting the bundler in your network
- **Compliance**: Meet organizational data handling requirements
- **Control**: Configure and customize to your specific needs
### Configuration
Once you have a self-hosted bundler set up, simply configure LibreChat to use it by setting the environment variable:
```bash
# `.env` file
SANDPACK_BUNDLER_URL=http://your-bundler-url
```
### General Considerations
Self-hosting the bundler introduces some additional overhead:
- **CORS Configuration**: You'll need to manage cross-origin resource sharing policies
- **Security Management**: You become responsible for the security of the bundler service
- **Maintenance**: Updates and patches will need to be applied manually
- **Resource Requirements**: Additional server resources will be needed to host the bundler
For detailed instructions on setting up and maintaining your self-hosted bundler, refer to the [forked CodeSandbox repository](https://github.com/LibreChat-AI/codesandbox-client) tailored for LibreChat deployment, including the removal of telemetry from Sandpack.
---
AI News 2024: The Original and BEST Open-Source AI Chat Platform, LibreChat Releases Code Artifacts! This Generative UI Tool Can Generate React, HTML & Diagrams Instantly from a Single Prompt in Your Browser with Any LLM, OpenAI, Anthropic, LLAMA, Mistral, DeepSeek Coder & More Thanks to OLLAMA Integration.
#AINews2024 #OpenSourceAI #GenerativeUI #CodeArtifacts #WebDevelopment #ReactJS #LLM #AIPrototyping #DevTools #OLLAMA #LibreChat
# Authentication (/docs/features/authentication)
LibreChat has a user authentication system that allows users to sign up and log in securely and easily. The system is scalable and can handle a large number of concurrent users without compromising performance or security.
By default, we have email signup and login enabled, which means users can create an account using their email address and a password. They can also reset their password if they forget it.
Additionally, our system can integrate social logins from various platforms such as Google, GitHub, Discord, OpenID, and more. This means users can log in using their existing accounts on these platforms, without having to create a new account or remember another password.
**For further details, refer to the configuration guides provided here: [Authentication](/docs/configuration/authentication)**
- When you run the app for the first time, you need to create a new account by clicking on "Sign up" on the login page. The first account you make will be the admin account. At the moment, the only privilege of the admin user is to control [agents](docs/features/agents#administrator-controls), prompts, and [memory](/docs/features/memory) permissions, and it will be useful for the admin dashboard to manage users and other settings later.
- The first account created should ideally be a local account (email and password).


# Code Interpreter API (/docs/features/code_interpreter)
## Introduction
LibreChat's Code Interpreter API provides a secure and hassle-free way to execute code and manage files through a simple API interface. Whether you're using it through LibreChat's Agents or integrating it directly into your applications, the API offers a powerful sandbox environment for running code in multiple programming languages.
## Subscription
**Access to this feature requires an [API subscription, get started here](https://code.librechat.ai/pricing).**
## Getting Started
1. Visit [code.librechat.ai](https://code.librechat.ai/pricing) to get your API key
2. Integrate the API into your application or use it through LibreChat
3. Start executing code and generating files securely
## Key Features
### Supported Languages
Execute code in multiple programming languages:
- Python, Node.js (JS/TS), Go, C/C++, Java, PHP, Rust, Fortran, Rscript
### Seamless File Handling
- Upload files for processing
- Download generated outputs
- Secure file management
- Session-based file organization
### Security & Convenience
- Secure sandboxed execution environment
- No local setup required
- No server deployment needed
- No configuration management
## Using the API
### In LibreChat
The API has first-class support in LibreChat through two main methods:
1. **[AI Agents](/docs/features/agents#code-interpreter)**: Enable Code Interpreter in your agent's configuration to allow it to execute code and process files automatically.
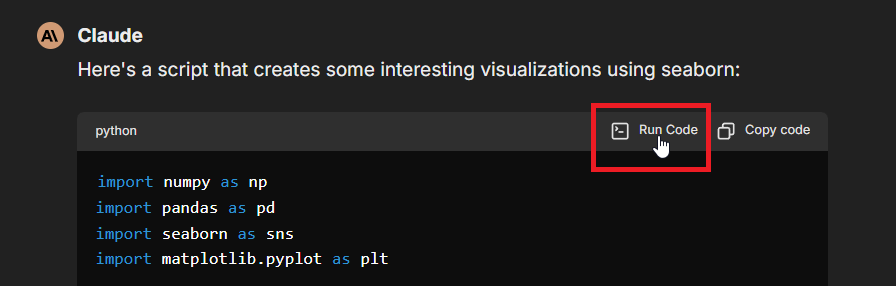
2. **Manual Execution**: Use the "Run Code" button in code blocks within the chat interface, as shown here:
### Set up API key
- **Per-user setup:** input your API key in LibreChat when prompted (using the above methods)
- **Global setup:** use `LIBRECHAT_CODE_API_KEY` environment variable in the .env file of your project (provides access to all users)
### Direct API Integration
The Code Interpreter API can be integrated into any application using a simple API key authentication:
1. Get your API key from [code.librechat.ai](https://code.librechat.ai/pricing)
2. Include the API key in your requests using the `x-api-key` header
### Enterprise
The enterprise plan requires use of the `LIBRECHAT_CODE_BASEURL` environment variable to correspond with the self-hosted instance of the API, along with any generated API keys from the dashboard, used the same way as mentioned above.
## Core Functionality
### Code Execution
- Run code snippets in supported languages
- Receive stdout/stderr output
- Get execution statistics (memory usage, CPU time)
- Handle program arguments
- Access execution status and results
### File Operations
- Upload input files
- Download generated outputs
- List available files
- Delete unnecessary files
- Manage file sessions
### Limitations
- Code cannot access the network
- Only 10 files can be generated per run
- Execution limits vary by plan:
- **Hobby**:
- 256 MB RAM per execution
- 25 MB per file upload
- 750 requests per month
- **Enthusiast**:
- 512 MB RAM per execution
- 50 MB per file upload
- 3,000 requests per month
- **Pro**:
- 512 MB RAM per execution
- 150 MB per file upload
- 7,000 requests per month
- The [Enterprise Plan](https://code.librechat.ai/pricing) provides custom limits and features
## Use Cases
- **Code Testing**: Test code snippets in multiple languages
- **File Processing**: Transform and analyze files programmatically
- **AI Applications**: Execute AI-generated code securely
- **Development Tools**: Build interactive coding environments
- **Objective Logic**: Verify code logic and correctness, improving AI models
## Why a Paid API?
While LibreChat remains free and open source under the MIT license, the Code Interpreter API is offered as a paid service for several key reasons:
1. **Project Sustainability**: Subscribing to an API plan provides direct support to the project's development, even more effectively than [GitHub Sponsors](https://github.com/sponsors/danny-avila). Your subscription helps ensure LibreChat's continued growth and improvement.
2. **Technical Considerations**: Including code execution capabilities in the core project would add significant complexity and hardware requirements that not all users need. The API service eliminates these concerns while maintaining a lightweight core application.
3. **Managed Service Benefits**:
- No complex configuration
- Immediate availability
- Regular updates and maintenance
- Professional support
- Secure, sandboxed environment
4. **Intellectual Property Protection**: The Code Interpreter's architecture represents significant innovation in secure, scalable sandbox technology. While similar solutions exist, they often lack the comprehensive security measures and scalability features that make this implementation unique. Keeping this component as a closed-source API helps protect these innovations and ensures the service maintains its high security and performance standards.
Even if you only use code execution occasionally, subscribing helps support LibreChat's development while enhancing your experience with professional-grade features. It's a win-win that keeps the core project free while offering optional advanced capabilities for those who need them.
---
## Conclusion
The Code Interpreter API provides a secure, convenient way to execute code and manage files without the hassle of setting up and maintaining execution environments. Whether you're using it through LibreChat's Agents or integrating it directly into your applications, it offers a robust solution for code execution needs.
For detailed technical specifications and API reference, please visit our [API Documentation](https://code.librechat.ai/docs).
#LibreChat #CodeExecution #API #Development
# Forking Chats (/docs/features/fork)
import Image from 'next/image'
## Why Fork Conversations?
Think of forking like creating a new path in your chat - it's super handy when you want to:
### Keep Things On Track
Sometimes you'll hit on an interesting side topic but don't want to derail your main conversation. Forking lets you dive into that rabbit hole while keeping your original chat clean
### Play "What If"
Want to see how different approaches might play out? Fork the chat and try various angles. It's like having multiple parallel conversations, each exploring a different possibility
### Save Important Context
When you fork, you can bring along as much or as little of the previous chat as you need. This way, you're not starting completely from scratch, and the AI still has the background it needs
### Share Specific Parts
Need to show someone just part of your conversation? Instead of copying and pasting or sharing your whole chat history, you can fork just the relevant bit and share that
### Keep Ideas Organized
Long chats can spawn lots of different ideas. Rather than letting them get tangled together, you can fork each one into its own thread and develop them separately
### Try Different Approaches
Sometimes you might wonder if there's a better way to ask something. Forking lets you experiment with different ways of talking to the AI without messing up your main conversation
## Forking Options
Use these settings to fork messages with the desired behavior.
Forking refers to creating a new conversation that starts/ends from specific messages in the current conversation, creating a copy according to the options selected.
The "target message" refers to either the message the popup was opened from, or, if you check "Start fork here", the latest message in the conversation.
### Visible messages only:
This option forks only the visible messages; in other words, the direct path to the target message, without any branches.
### Include related branches:
This option forks the visible messages, along with related branches; in other words, the direct path to the target message, including branches along the path.
### Include all to/from here (default):
This option forks all messages leading up to the target message, including its neighbors; in other words, all message branches, whether or not they are visible or along the same path, are included.
## Additional Options
- **Start fork here:** If checked, forking will commence from this message to the latest message in the conversation, according to the behavior selected above.
- **Remember:** Check to remember the options you select for future usage, making it quicker to fork conversations as preferred.
- Alternatively you can control the default behavior in the settings menu:
# Image Generation & Editing (/docs/features/image_gen)
## Quick Start
Get image generation working in under 5 minutes with OpenAI Image Tools (recommended).
### Create an Agent
Go to the **Agents** panel in LibreChat and create a new agent. Give it a name like "Image Creator".
### Add OpenAI Image Tools
In the agent's **Tools** list, select **OpenAI Image Tools**. This adds both image generation and image editing capabilities.
### Set Your API Key
Add the following to your `.env` file:
```bash filename=".env"
IMAGE_GEN_OAI_API_KEY=sk-your-openai-api-key
```
### Restart and Test
| Deployment | Command |
|------------|---------|
| Docker | `docker compose down && docker compose up -d` |
| Local | Stop (Ctrl+C) then `npm run backend` |
Send a message like "Generate an image of a sunset over mountains" to your agent.
---
LibreChat comes with **built-in image tools** that you can add to an **[Agent](/docs/features/agents).**
Each has its own look, price-point, and setup step (usually just an API key or URL).
| Tool | Best for | Needs |
|------|----------|-------|
| **OpenAI Image Tools** | Cutting-edge results (GPT-Image-1).
Can also ***edit*** the images you upload. | OpenAI API |
| **Gemini Image Tools** | Google's latest image models with context-aware generation. | Gemini API or Vertex AI |
| **DALL·E (3 / 2)** | Legacy OpenAI Image models. | OpenAI API |
| **Stable Diffusion** | Local or self-hosted generation, endless community models. | Automatic1111 API |
| **Flux** | Fast cloud renders, optional fine-tunes. | Flux API |
| **MCP** | Bring-your-own-Image-Generators | MCP server with image output support |
**Notes:**
- API keys can be omitted in favor of allowing the user to enter their own key from the UI.
- Image Outputs are directly sent to the LLM as part of the immediate chat context following generation.
- The LLM will only get vision context from images attached to user messages, and not from generations/edits, except for immediately after generation.
- See [Image Storage and Handling](#image-storage-and-handling) for more details.
- MCP Server tool image outputs are supported, which may output images similarly to LC's built-in tools.
- Note: MCP servers may or may not use the correct format when outputting images. See details in the [MCP section below](#5--model-context-protocol-mcp).
---
## 1 · OpenAI Image Tools (recommended)
### Features
"OpenAI Image Tools" are an agent toolkit made up of 2 separate tools.
- **Image Generation**:
- **Create** brand-new images from text prompts (no upload required).
- **Image Editing**:
- **Edit** or **remix** the images you just uploaded—change colours, add objects, extend the canvas, etc.
- Both use OpenAI's latest image generation model, **GPT-Image-1**, for superior instruction following, text rendering, detailed editing, real-world knowledge
- See OpenAI's [Image Generation documentation](https://platform.openai.com/docs/guides/image-generation?image-generation-model=gpt-image-1) for more details.
#### Generation vs. Editing
| Use-case | Invokes |
|----------|---------------|
| "Start from scratch" | **Image Generation** |
| "Use existing image(s)" | **Image Editing** |
The agent decides which tool to use based on the context:
- **Image Generation** creates brand new images from text descriptions only
- **Image Editing** modifies or remixes existing images using their image IDs
- These can be images from the current message or previously generated/referenced images
- The LLM keeps track of image IDs as long as they remain in the context window
- Includes the referenced image IDs in the tool output
- Both tools are always available, but the LLM will choose the appropriate one based on the user's request
- Both tools will include the generated image ID in the tool output
⚠️ **Important**
- Image editing relies on image IDs, which are retained in the chat history.
- When files are uploaded to the current request, their image IDs are added to the context of the LLM before any tokens are generated.
- Previously referenced or generated image IDs can be used for editing, as long as they remain within the context window.
- The LLM can include any relevant image IDs in the `image_ids` array when calling the image editing tool.
- You can also attach previously uploaded images from the side panel without needing to upload them again.
- This also has the added benefit of providing a vision model with the image context, which can be useful for informing the `prompt` for the image editing tool.
### Parameters
#### Image Generation
• **prompt** – text description (required)
• **size** – `auto` (default), `1024x1024` (square), `1536x1024` (landscape), or `1024x1536` (portrait)
• **quality** – `auto` (default), `high`, `medium`, or `low`
• **background** – `auto` (default), `transparent`, or `opaque` (transparent requires PNG or WebP format)
#### Image Editing
• **image_ids** – array of image IDs to use as reference for editing (required)
• **prompt** – text description of the changes (required)
• **size** – `auto` (default), `1024x1024`, `1536x1024`, `1024x1536`, `256x256`, or `512x512`
• **quality** – `auto` (default), `high`, `medium`, or `low`
### Setup
Create or reuse an OpenAI key and add to `.env`:
```bash
IMAGE_GEN_OAI_API_KEY=sk-...
# optional extras
IMAGE_GEN_OAI_BASEURL=https://...
```
For Azure OpenAI deployments, you will first need access: https://aka.ms/oai/gptimage1access
Then, add your corresponding credentials to your `.env` file:
```bash
IMAGE_GEN_OAI_API_KEY=your-api-key
# optional extras
IMAGE_GEN_OAI_BASEURL=https://deploymentname.openai.azure.com/openai/deployments/gpt-image-1/
IMAGE_GEN_OAI_AZURE_API_VERSION=2025-04-01-preview
```
Then add "OpenAI Image Tools" to your Agent's *Tools* list.
### Advanced Configuration
You can customize the tool descriptions and prompt guidance by setting these environment variables:
```bash
# Image Generation Tool Descriptions
IMAGE_GEN_OAI_DESCRIPTION=...
IMAGE_GEN_OAI_PROMPT_DESCRIPTION=...
# Image Editing Tool Descriptions
IMAGE_EDIT_OAI_DESCRIPTION=...
IMAGE_EDIT_OAI_PROMPT_DESCRIPTION=...
```
### Pricing
See the [GPT-Image-1 pricing page](https://platform.openai.com/docs/models/gpt-image-1) and [Image Generation Documentation](https://platform.openai.com/docs/guides/image-generation?image-generation-model=gpt-image-1#cost-and-latency) for details on costs associated with image generation.
---
## 2 · Gemini Image Tools
Gemini Image Tools integrate Google's latest image generation models, supporting both text-to-image generation and image context-aware editing.
### Features
- **Text-to-Image Generation**: Create high-quality images from detailed text descriptions
- **Image Context Support**: Use existing images as context or inspiration for new generations
- **Image Editing**: Generate new images based on modifications to existing ones (include original image ID)
- **Multiple Models**: Choose between `gemini-2.5-flash-image` (default) or `gemini-3-pro-image-preview`
- **Dual API Support**: Works with both simple Gemini API keys and Google Cloud Vertex AI
### Parameters
• **prompt** – Detailed text description of the desired image (required, up to 32,000 characters)
• **image_ids** – Optional array of image IDs to use as visual context for generation
### Setup
#### Option 1: Gemini API (Recommended)
Get an API key from [Google AI Studio](https://aistudio.google.com/app/apikey):
```bash
GEMINI_API_KEY=your_api_key_here
```
#### Option 2: Vertex AI (Enterprise)
For Google Cloud users with Vertex AI access:
```bash
GOOGLE_SERVICE_KEY_FILE=/path/to/service-account.json
GOOGLE_CLOUD_LOCATION=us-central1 # optional, default: global
```
### Model Selection
```bash
# Default model (fast and efficient)
GEMINI_IMAGE_MODEL=gemini-2.5-flash-image
# Higher quality model
GEMINI_IMAGE_MODEL=gemini-3-pro-image-preview
```
### Advanced Configuration
Customize tool descriptions via environment variables:
```bash
GEMINI_IMAGE_GEN_DESCRIPTION=...
GEMINI_IMAGE_GEN_PROMPT_DESCRIPTION=...
GEMINI_IMAGE_IDS_DESCRIPTION=...
```
More details can be found in the dedicated [Gemini Image Gen guide](/docs/configuration/tools/gemini_image_gen).
---
## 3 · DALL·E (legacy)
DALL·E provides high-quality image generation using OpenAI's legacy image models.
### Parameters
• **prompt** – Text description of the desired image (required, up to 4000 characters)
• **style** – `vivid` (hyper-real, dramatic - default) or `natural` (less hyper-real)
• **quality** – `standard` (default) or `hd`
• **size** – `1024x1024` (default/square), `1792x1024` (wide), or `1024x1792` (tall)
### Setup
```bash
# Required
DALLE_API_KEY=sk-... # or DALLE3_API_KEY=sk-...
# Optional
DALLE_REVERSE_PROXY=https://... # Alternative endpoint
DALLE3_BASEURL=https://... # For Azure or custom endpoints
DALLE3_AZURE_API_VERSION=2023-12-01-preview # For Azure deployments
DALLE3_SYSTEM_PROMPT=... # Custom system prompt for DALL·E
```
### Advanced Configuration
For Azure OpenAI deployments, configure both the base URL and API version:
```bash
DALLE3_BASEURL=https://your-resource-name.openai.azure.com/openai/deployments/your-deployment-name
DALLE3_AZURE_API_VERSION=2023-12-01-preview
DALLE3_API_KEY=your-azure-api-key
```
Enable the **DALL·E** tool for the Agent and start prompting.
### Pricing
See the [DALL-E pricing page](https://platform.openai.com/docs/models/dall-e-3) and [Image Generation Documentation](https://platform.openai.com/docs/guides/image-generation?image-generation-model=dall-e-3) for details on costs associated with image generation.
---
## 4 · Stable Diffusion (local)
Run images entirely on your own machine or server.
Point LibreChat at any Automatic1111 (or compatible) endpoint and you're set.
### Parameters
• **prompt** – Detailed keywords describing desired elements in the image (required)
• **negative_prompt** – Keywords describing elements to exclude from the image (required)
The Stable Diffusion implementation uses these default parameters:
- cfg_scale: 4.5
- steps: 22
- width: 1024
- height: 1024
These values are currently fixed but provide good results for most use cases.
### Setup
```bash
SD_WEBUI_URL=http://127.0.0.1:7860 # URL to your Automatic1111 WebUI
```
No API key required—just the reachable URL.
More details on setting up Automatic1111 can be found in the dedicated [Stable Diffusion guide](/docs/configuration/tools/stable_diffusion).
---
## 5 · Flux
Cloud generator with an emphasis on speed and optional fine-tuned models.
### Features
- Fast cloud-based image generation
- Support for fine-tuned models
- Multiple quality levels and aspect ratios
- Raw mode for less processed, more natural-looking images
### Parameters
The Flux tool supports three main actions:
1. **generate** - Create a new image from a text prompt
2. **generate_finetuned** - Create an image using a fine-tuned model
3. **list_finetunes** - List available custom models for the user
More details can be found in the dedicated [Flux guide](/docs/configuration/tools/flux#parameters).
### Setup
```bash
FLUX_API_KEY=flux_live_...
FLUX_API_BASE_URL=https://api.us1.bfl.ai # default is fine for most users
```
Choose the **Flux** tool inside the Agent. Prompts are plain text; one call produces one image.
### Pricing
See the [Flux pricing page](https://docs.bfl.ml/pricing/) for details on costs associated with image generation.
---
## 6 · Model Context Protocol (MCP)
Image outputs are supported from MCP servers.
For example, the [Puppeteer MCP Server](https://github.com/modelcontextprotocol/servers/tree/main/src/puppeteer) can be used to generate screenshots of web pages, which correctly output the image in the expected format and is treated the same as LC's built-in image tools.
> The examples below assume LibreChat is running outside of Docker, directly using Node.js. The Model Context Protocol is a relatively new framework, and many developers are still learning how to properly serve their systems with uv/node for scalable distribution.
> As this technology is still emerging, there are currently few image-generating servers available, and many existing ones have yet to adopt the correct response format for images.
> While many MCP servers do function well within Docker, the following examples do not, or not without more advanced configurations, showcasing some of the current inconsistency between MCP servers.
```yaml
mcpServers:
puppeteer:
command: npx
args:
- -y
- "@modelcontextprotocol/server-puppeteer"
```
The following is an example of an [Image Generation server](https://github.com/GongRzhe/Image-Generation-MCP-Server) that outputs images using [Replicate API](https://replicate.com/account/api-tokens), but returns URLs of the images, which doesn't conform to MCP's image response standard.
> Note: for this particular server, you need to install the `@gongrzhe/image-gen-server` package globally using npm, i.e. `npm install -g @gongrzhe/image-gen-server`, then point to the package's compiled files as shown below.
```yaml
mcpServers:
image-gen:
command: "node"
# First, install the package globally using npm:
# `npm install -g @gongrzhe/image-gen-server`
# Then, point to the location of the installed package,
# which you can find by running `npm root -g`
args:
- "{REPLACE_WITH_NODE_MODULES_LOCATION}/@gongrzhe/image-gen-server/build/index.js"
# Example with output from `npm root -g`:
# - "/home/danny/.nvm/versions/node/v20.19.0/lib/node_modules/@gongrzhe/image-gen-server/build/index.js"
env:
# Do not hardcode the API token here, use the environment variable instead
# The following will pick up the token from your .env file or environment
REPLICATE_API_TOKEN: "${REPLICATE_API_TOKEN}"
MODEL: "google/imagen-3"
```
---
## Image Storage and Handling
All generated images are:
1. Saved according to the configured [**`fileStrategy`**](/docs/configuration/librechat_yaml/object_structure/config#filestrategy)
2. Displayed directly in the chat interface
3. Image tool outputs are directly sent to the LLM as part of the immediate chat context following generation.
- This may create issues if you are using an LLM that does not support image inputs.
- There will be an option to disable this behavior on a per-agent-basis in the future.
- These outputs are only directly sent to the LLM upon generation, not on every message.
- To include the image in the chat, you can directly attach it to the message from the side panel.
- To summarize, the LLM will only get vision context from images attached to user messages, and not from generations/edits, except for immediately after generation.
---
## Proxy Support
All image generation tools support proxy configuration through the `PROXY` environment variable:
```bash
PROXY=http://proxy-url:port
```
## Error Handling
If any of the tools encounter an error, they will return an error message explaining what went wrong. Common issues include:
- Invalid API key
- API unavailability
- Content policy violations
- Proxy/network issues
- Invalid parameters
- Unsupported image payload (see [Image Storage and Handling](#image-storage-and-handling) above)
---
## Prompting
Though you can customize the prompts for [OpenAI Image Tools](#advanced-configuration) and [DALL·E](#advanced-configuration-1), the following tips inform the default prompts supplied by the tools, which is helpful to know for your own writing/prompting.
1. Start with the **subject** and **style** (photo, oil painting, etc.).
2. Add **composition** and **camera / medium** ("wide-angle shot of…", "watercolour…").
3. Mention **lighting & mood** ("golden hour", "dramatic shadows").
4. Finish with **detail keywords** (textures, colours, expressions).
5. Keep negatives positive—describe what should be included, not what to avoid.
Example:
> A cinematic photo of an antique library bathed in warm afternoon sunlight. Tall wooden shelves overflow with leather-bound books, and dust particles shimmer in the light. A single green-shaded banker's lamp illuminates an open atlas on a polished mahogany desk in the foreground. 85 mm lens, shallow depth of field, rich amber tones, ultra-high detail.
## Related Pages
Create and configure AI agents with custom tools
Bring your own tools via Model Context Protocol
Detailed setup guide for Google Gemini image generation
# Import Conversations (/docs/features/import_convos)
Conversations Import allows user to import conversations exported from other AI chat applications. Currently, we support importing conversations from [ChatGPT](https://chatgpt.com/), [Claude](https://claude.ai/), [ChatbotUI v1](https://github.com/mckaywrigley/chatbot-ui/tree/b865b0555f53957e96727bc0bbb369c9eaecd83b?tab=readme-ov-file#legacy-code), and LibreChat itself.
The Import functionality is available in the "Settings" -> "Data Controls" section.
## Export your conversations
### ChatGPT
1. Follow the [ChatGPT export instructions](https://help.openai.com/en/articles/7260999-how-do-i-export-my-chatgpt-history-and-data) to export your conversations.
2. You should get a link to download the archive in your email.
3. Download the archive. It should be a zip file with a random name like: _d119d98bb3711aff7a2c73bcc7ea53d96c984650d8f7e033faef78386a9907-2024-01-01-10-30-00.zip_
4. Extract the content of the zip file.
### Claude
1. Follow the [Claude export instructions](https://support.claude.com/en/articles/9450526-how-can-i-export-my-claude-data) to export your conversations.
2. You will receive an email with a download link for your export archive.
3. Download and extract the archive.
## Import into LibreChat
1. Navigate to LibreChat **Settings** → **Data Controls**.
2. Click on the **Import** button and select the `conversations.json` file from the extracted archive.
3. Shortly you will get a notification that the import is complete.
# Overview (/docs/features)
# MCP (/docs/features/mcp)
Model Context Protocol (MCP) is an open protocol that standardizes how applications provide context to Large Language Models (LLMs). Think of MCP as the **"USB-C of AI"** - just as USB-C provides a universal connection standard for electronic devices, MCP offers a standardized way to connect AI models to diverse tools, data sources, and services.
LibreChat leverages MCP to dramatically expand what your AI agents can do, allowing you to integrate everything from file system access, web browsers, specialized APIs, to custom business tools.
## Why MCP Matters
LLMs are limited to their built-in capabilities. With MCP, LibreChat breaks down these walls by:
- **Connecting to any tool or service** that provides an MCP server
- **Standardizing integrations** so you don't need to edit LibreChat's code for each tool
- **Supporting multi-user environments** with proper authentication and isolation
- **Providing a growing ecosystem** of dynamic, ready-to-use integrations
## How MCP Works in LibreChat
LibreChat provides two ways to use MCP servers, either in the chat area or with agents.
You can configure MCP servers manually in your `librechat.yaml` file or by using [smithery.ai](https://smithery.ai) to find and install MCP servers into `librechat.yaml` ([see example below](#basic-configuration)). Any time you add or edit an MCP server, you will need to restart LibreChat to initialize the connections.
### In Chat Area
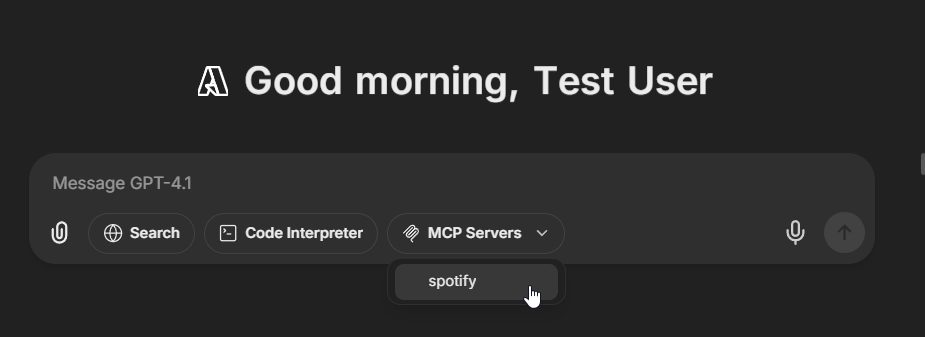
LibreChat displays configured MCP servers directly in the chat area when using traditional endpoints (OpenAI, Anthropic, Google, Bedrock, etc.):
- Select any non-agent endpoint first, and a tool-compatible model
- MCP servers appear in a dropdown in the chat interface below your text input
- When selected, all tools from that server become available to your current model
- Quick access to MCP tools without creating an agent, allowing multiple servers to be used at once
To disable MCP servers from appearing in the chat dropdown (keeping them agent-only), set [`chatMenu: false`](/docs/configuration/librechat_yaml/object_structure/mcp_servers#chatmenu) in your configuration:
```yaml
mcpServers:
internal-tools:
command: npx
args: ["-y", "internal-mcp-server"]
chatMenu: false # Only available in agent builder
```
### With Agents
MCP servers integrate seamlessly with LibreChat Agents:
1. Create or edit an agent
2. Click "Add MCP Server Tools" to open the Tools Dialog from the Agent Builder panel
3. Select MCP servers once added, each appears as a single entry
4. Fine-tune your agent's capabilites by enabling/disabling individual tools after adding
5. Save your agent

This higher-level organization keeps the interface manageable - even servers with 20+ tools (like Spotify) appear as single entries that can be expanded for granular control.
### Basic Configuration
Add MCP servers to your `librechat.yaml` file manually:
```yaml
mcpServers:
# ClickHouse Cloud
clickhouse-cloud:
type: streamable-http
url: https://mcp.clickhouse.cloud/mcp
# File system access
filesystem:
command: npx
args:
- -y
- "@modelcontextprotocol/server-filesystem"
- /path/to/your/documents
# Web browser automation
puppeteer:
command: npx
args:
- -y
- "@modelcontextprotocol/server-puppeteer"
# Production-ready cloud service
business-api:
type: streamable-http
url: https://api.yourbusiness.com/mcp
headers:
X-User-ID: "{{LIBRECHAT_USER_ID}}"
Authorization: "Bearer ${API_TOKEN}"
timeout: 30000
serverInstructions: true
```
### Adding MCP Servers in the UI
You can also add and configure MCP servers directly from the LibreChat interface without editing any configuration files or restarting the server.
#### Step 1: Open the MCP Settings Panel
Navigate to the **MCP Settings** panel from the right sidebar. You'll see any existing MCP servers listed here along with a **+** button to add new ones.
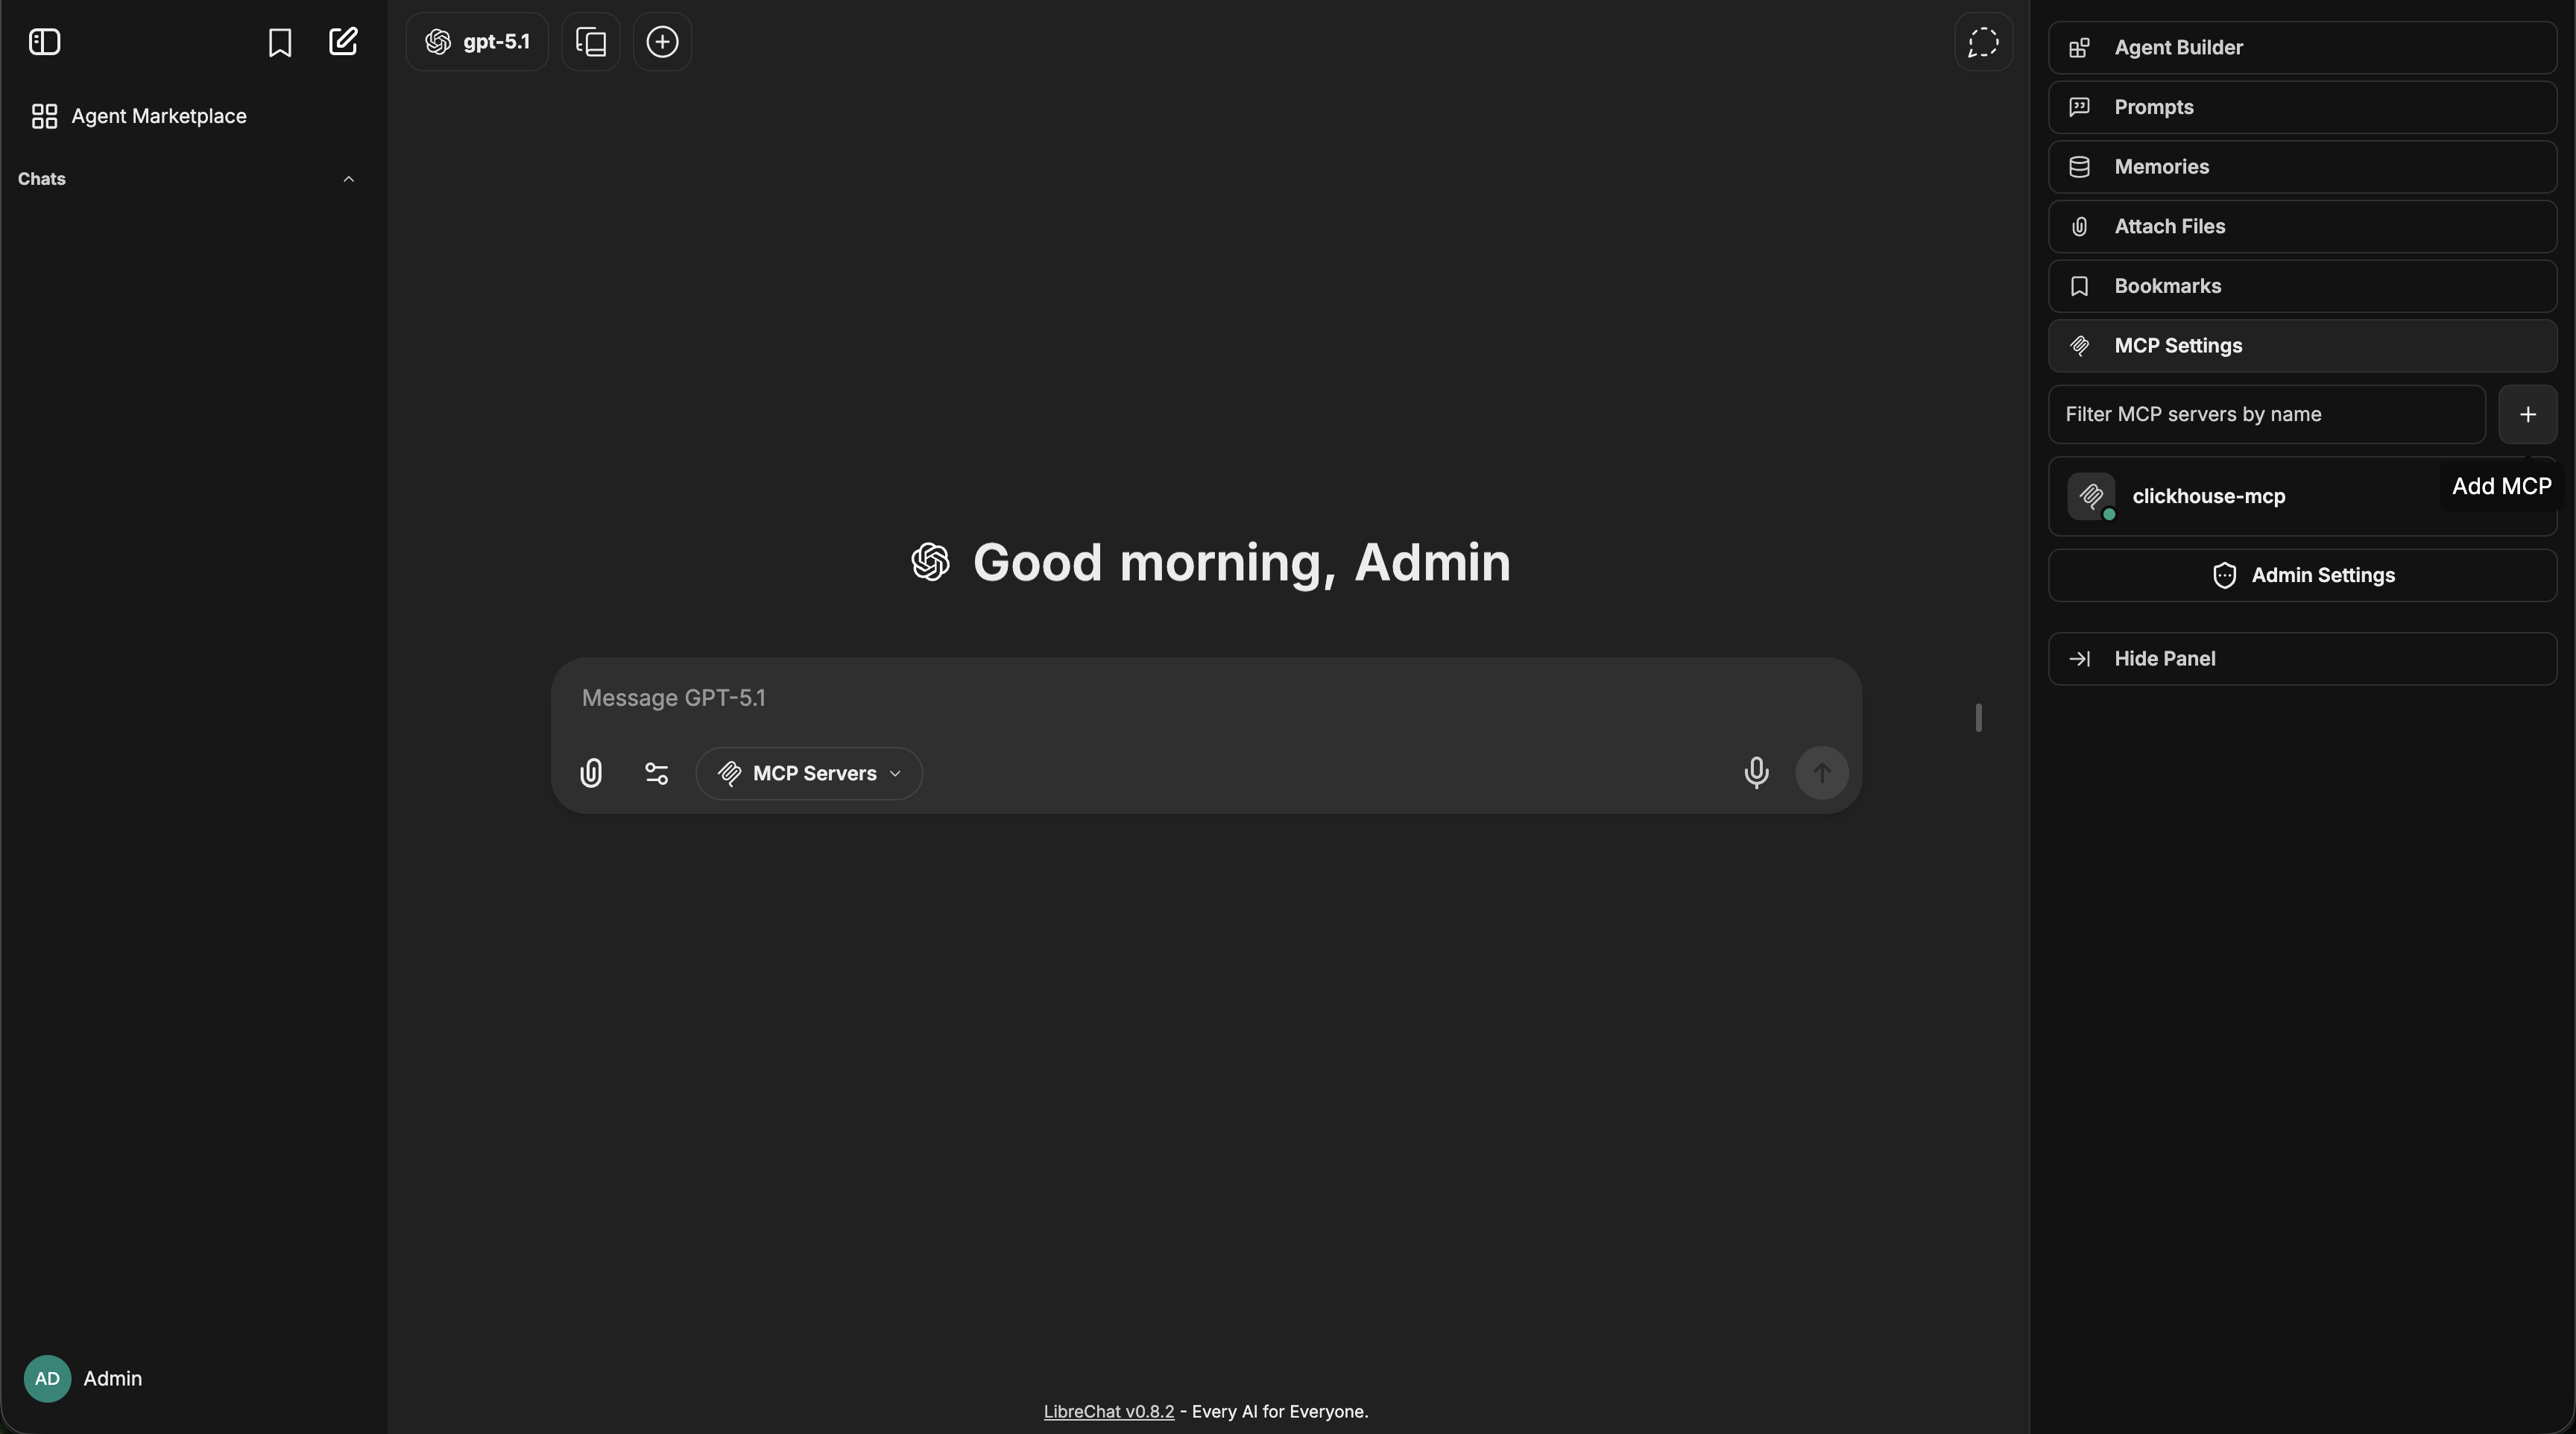
#### Step 2: Fill Out Server Details
Press the **+** button and fill out your MCP server name, description, URL, transport type, and authentication method, then click **Create**.
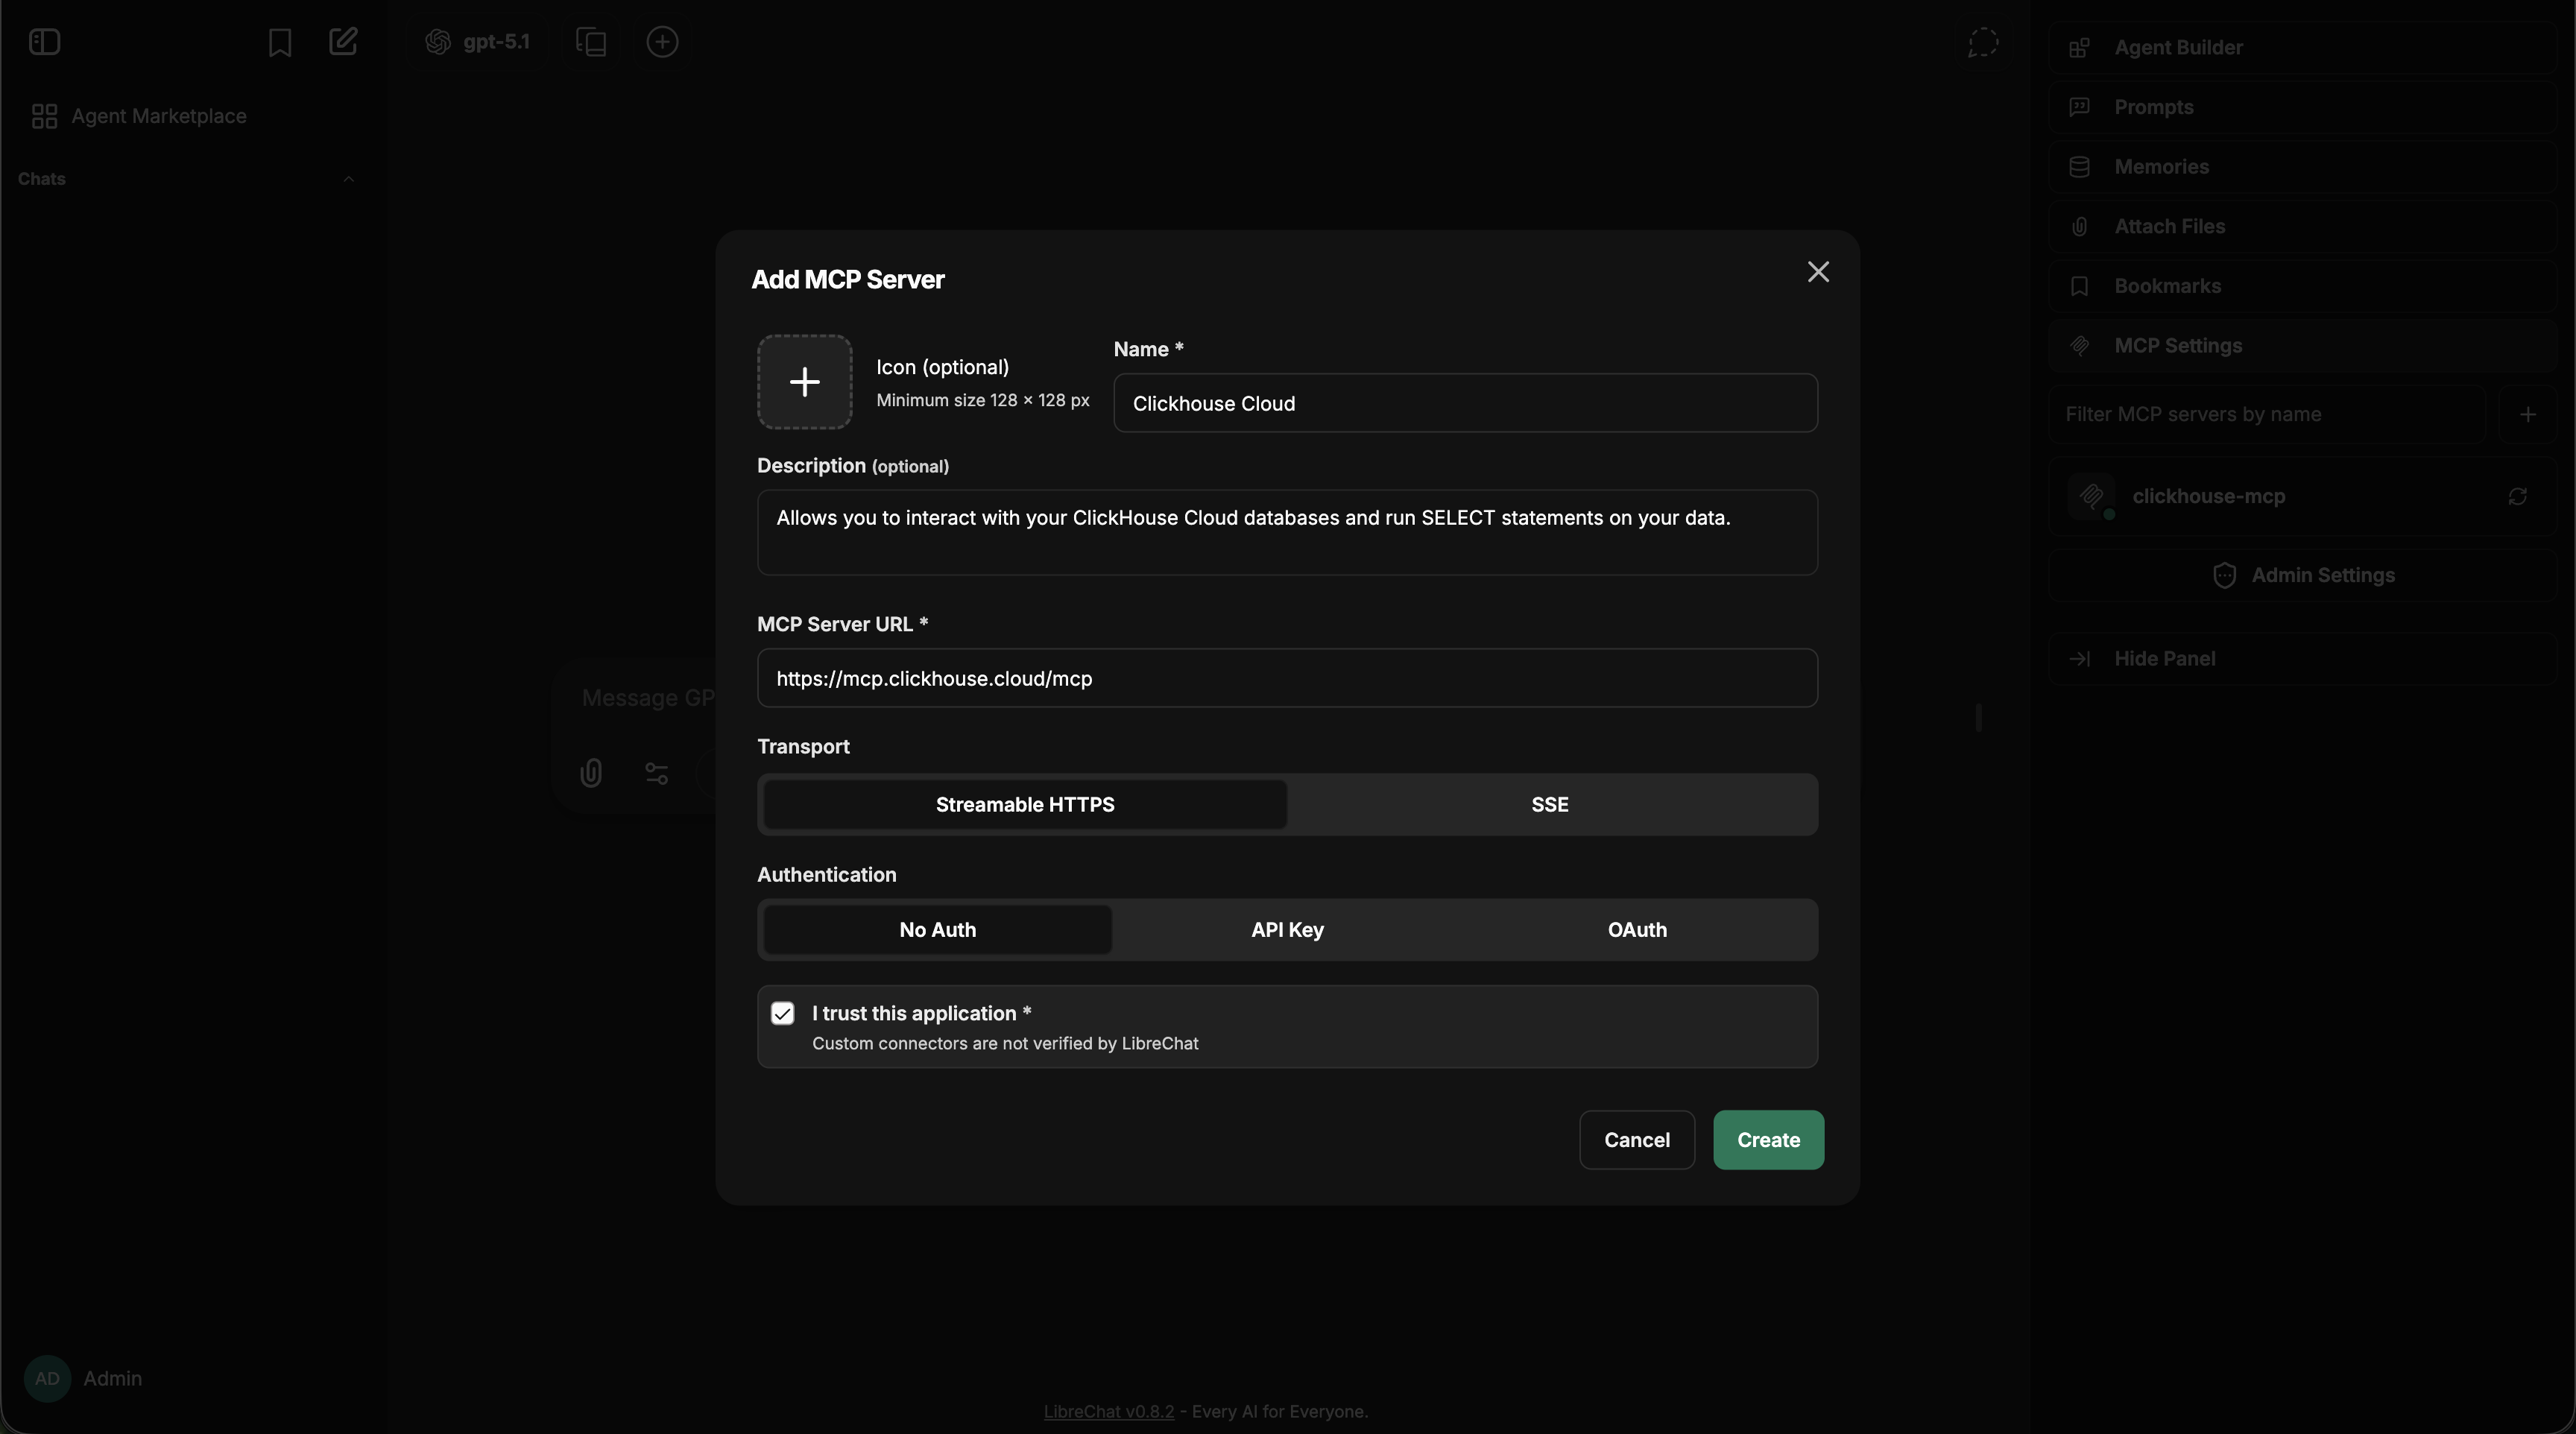
Your new server will appear in the MCP Settings panel with a confirmation toast.
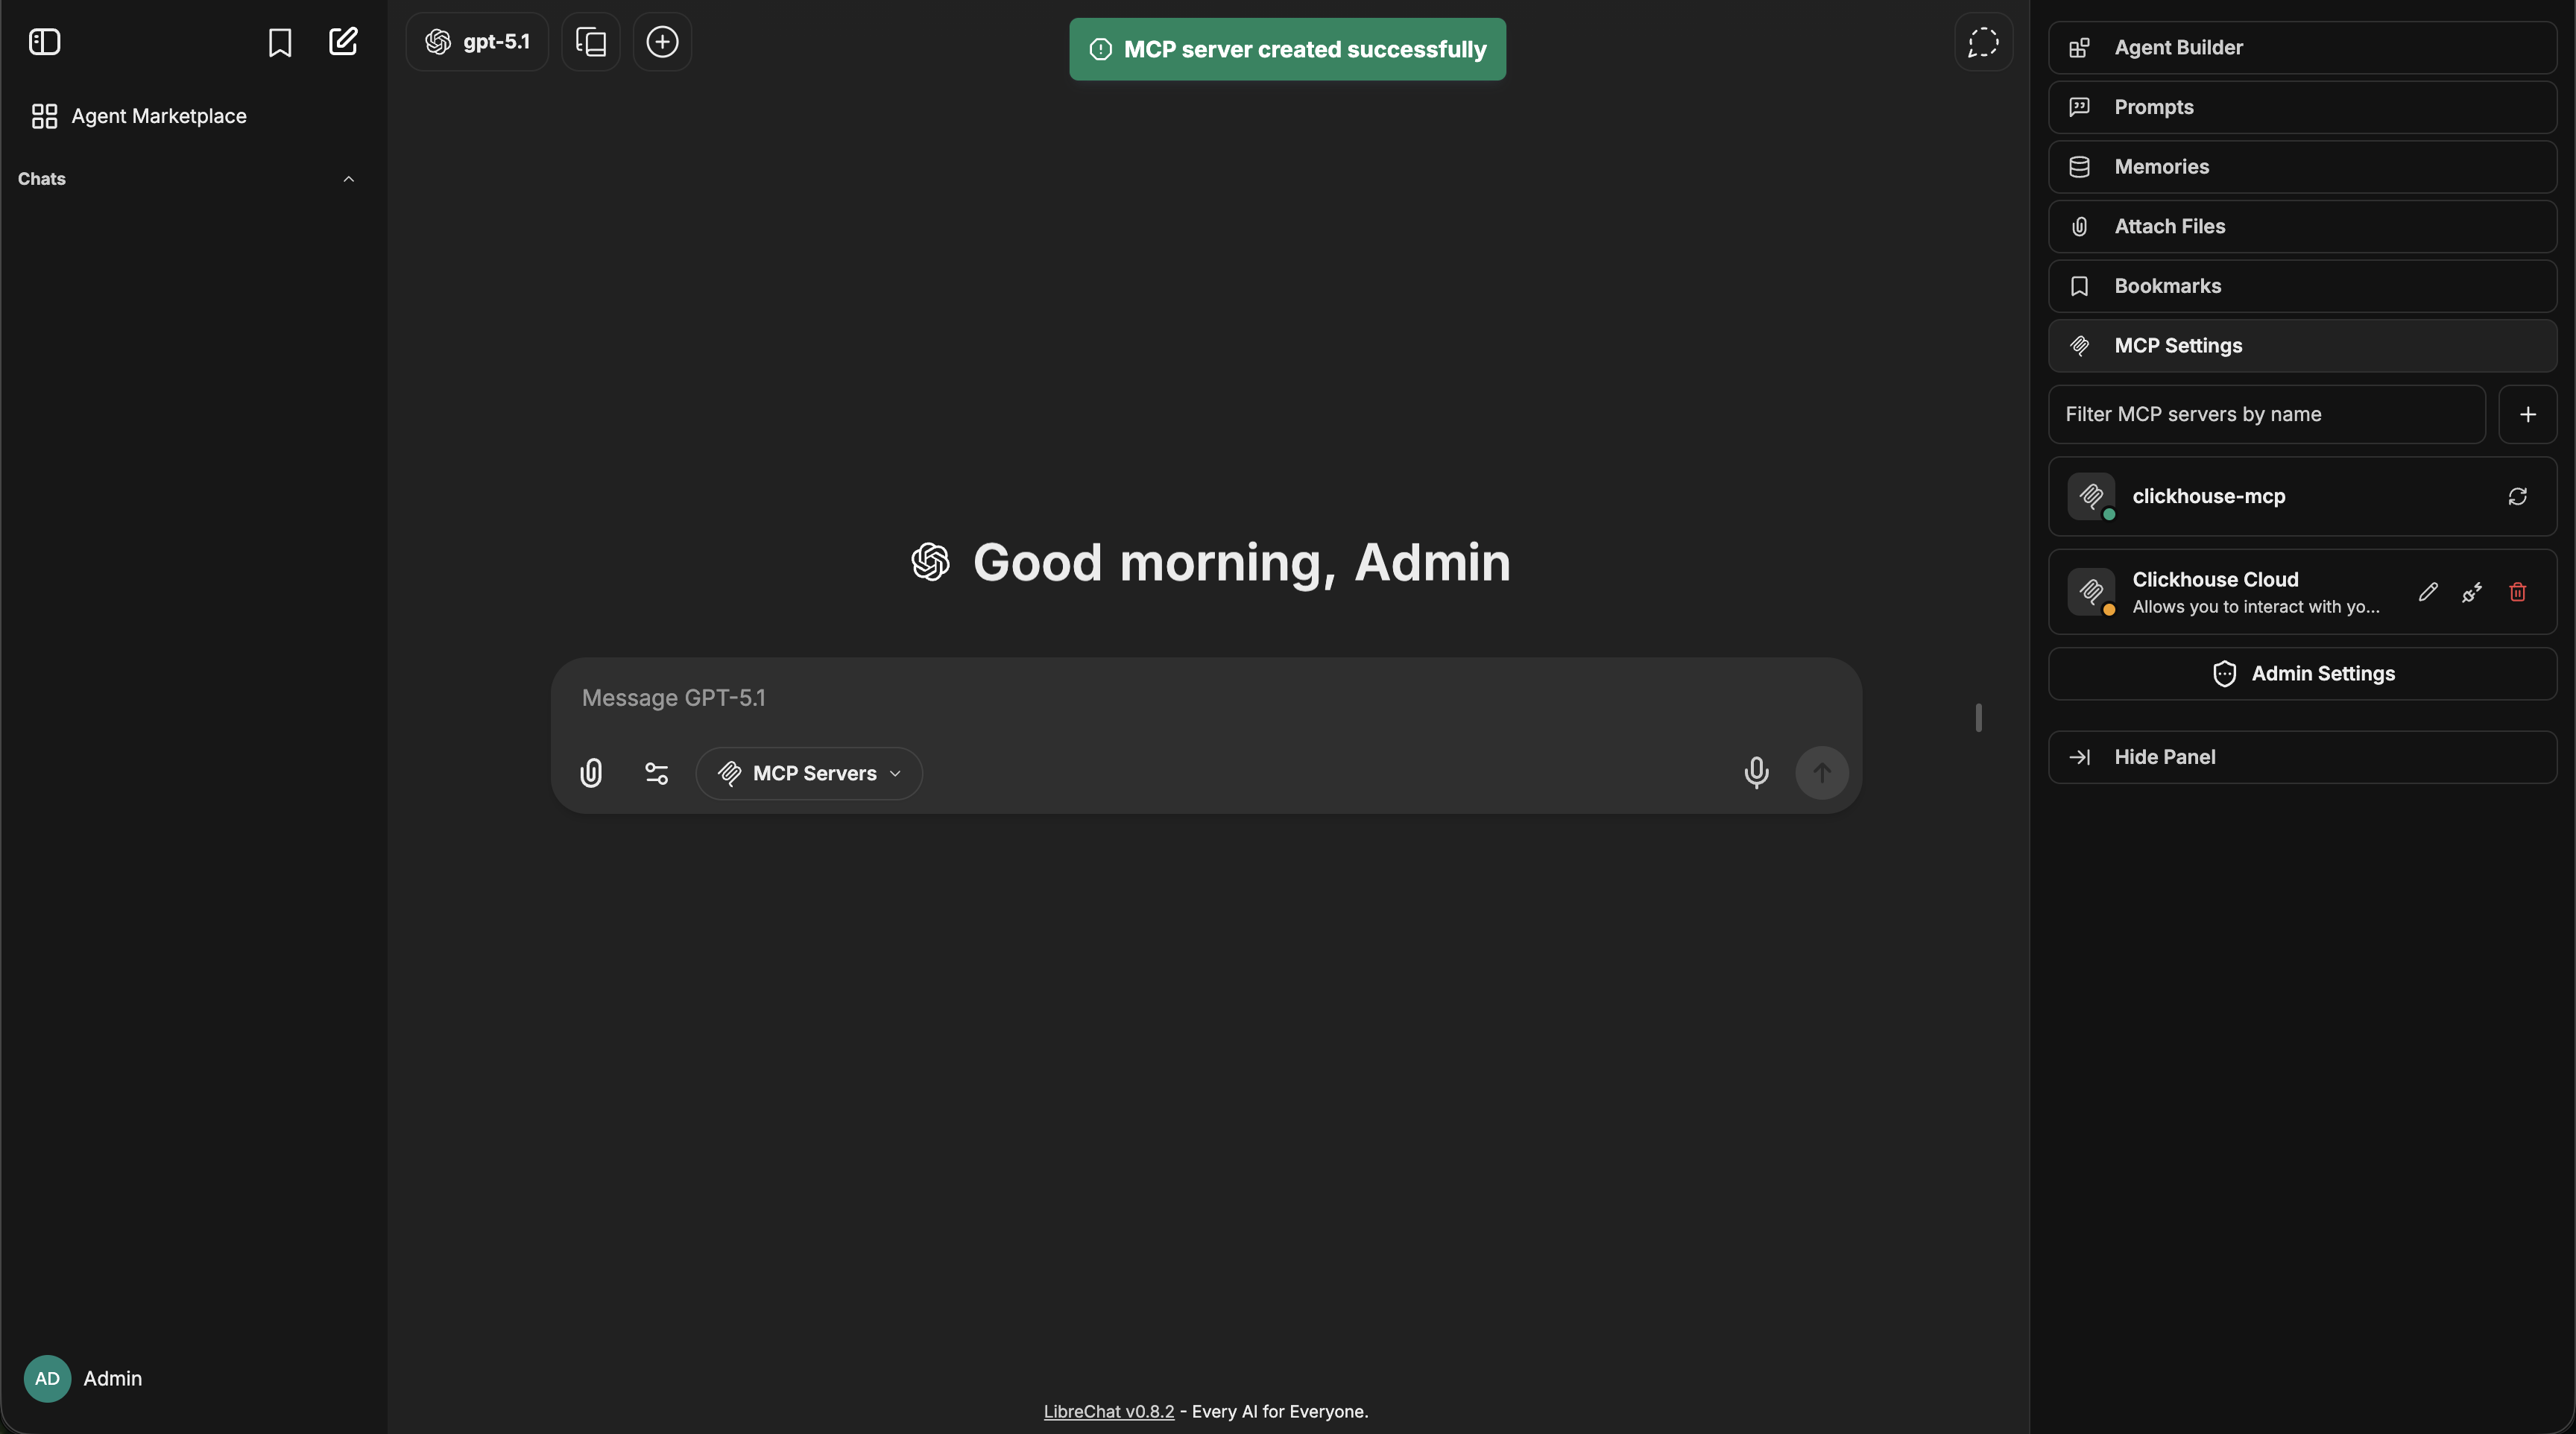
#### Step 3: Check Connection Status and Authenticate
Review the [connection status indicator](#connection-status-indicators) for your new server. If the server requires OAuth authentication, the status will show as disconnected. Click the server's authenticate/connect button (you can do this either by clicking on the MCP server itself in the chat dropdown menu, or by clicking on the connection icon first to be taken to a dialog with more information on the connection state) to begin the authentication flow.
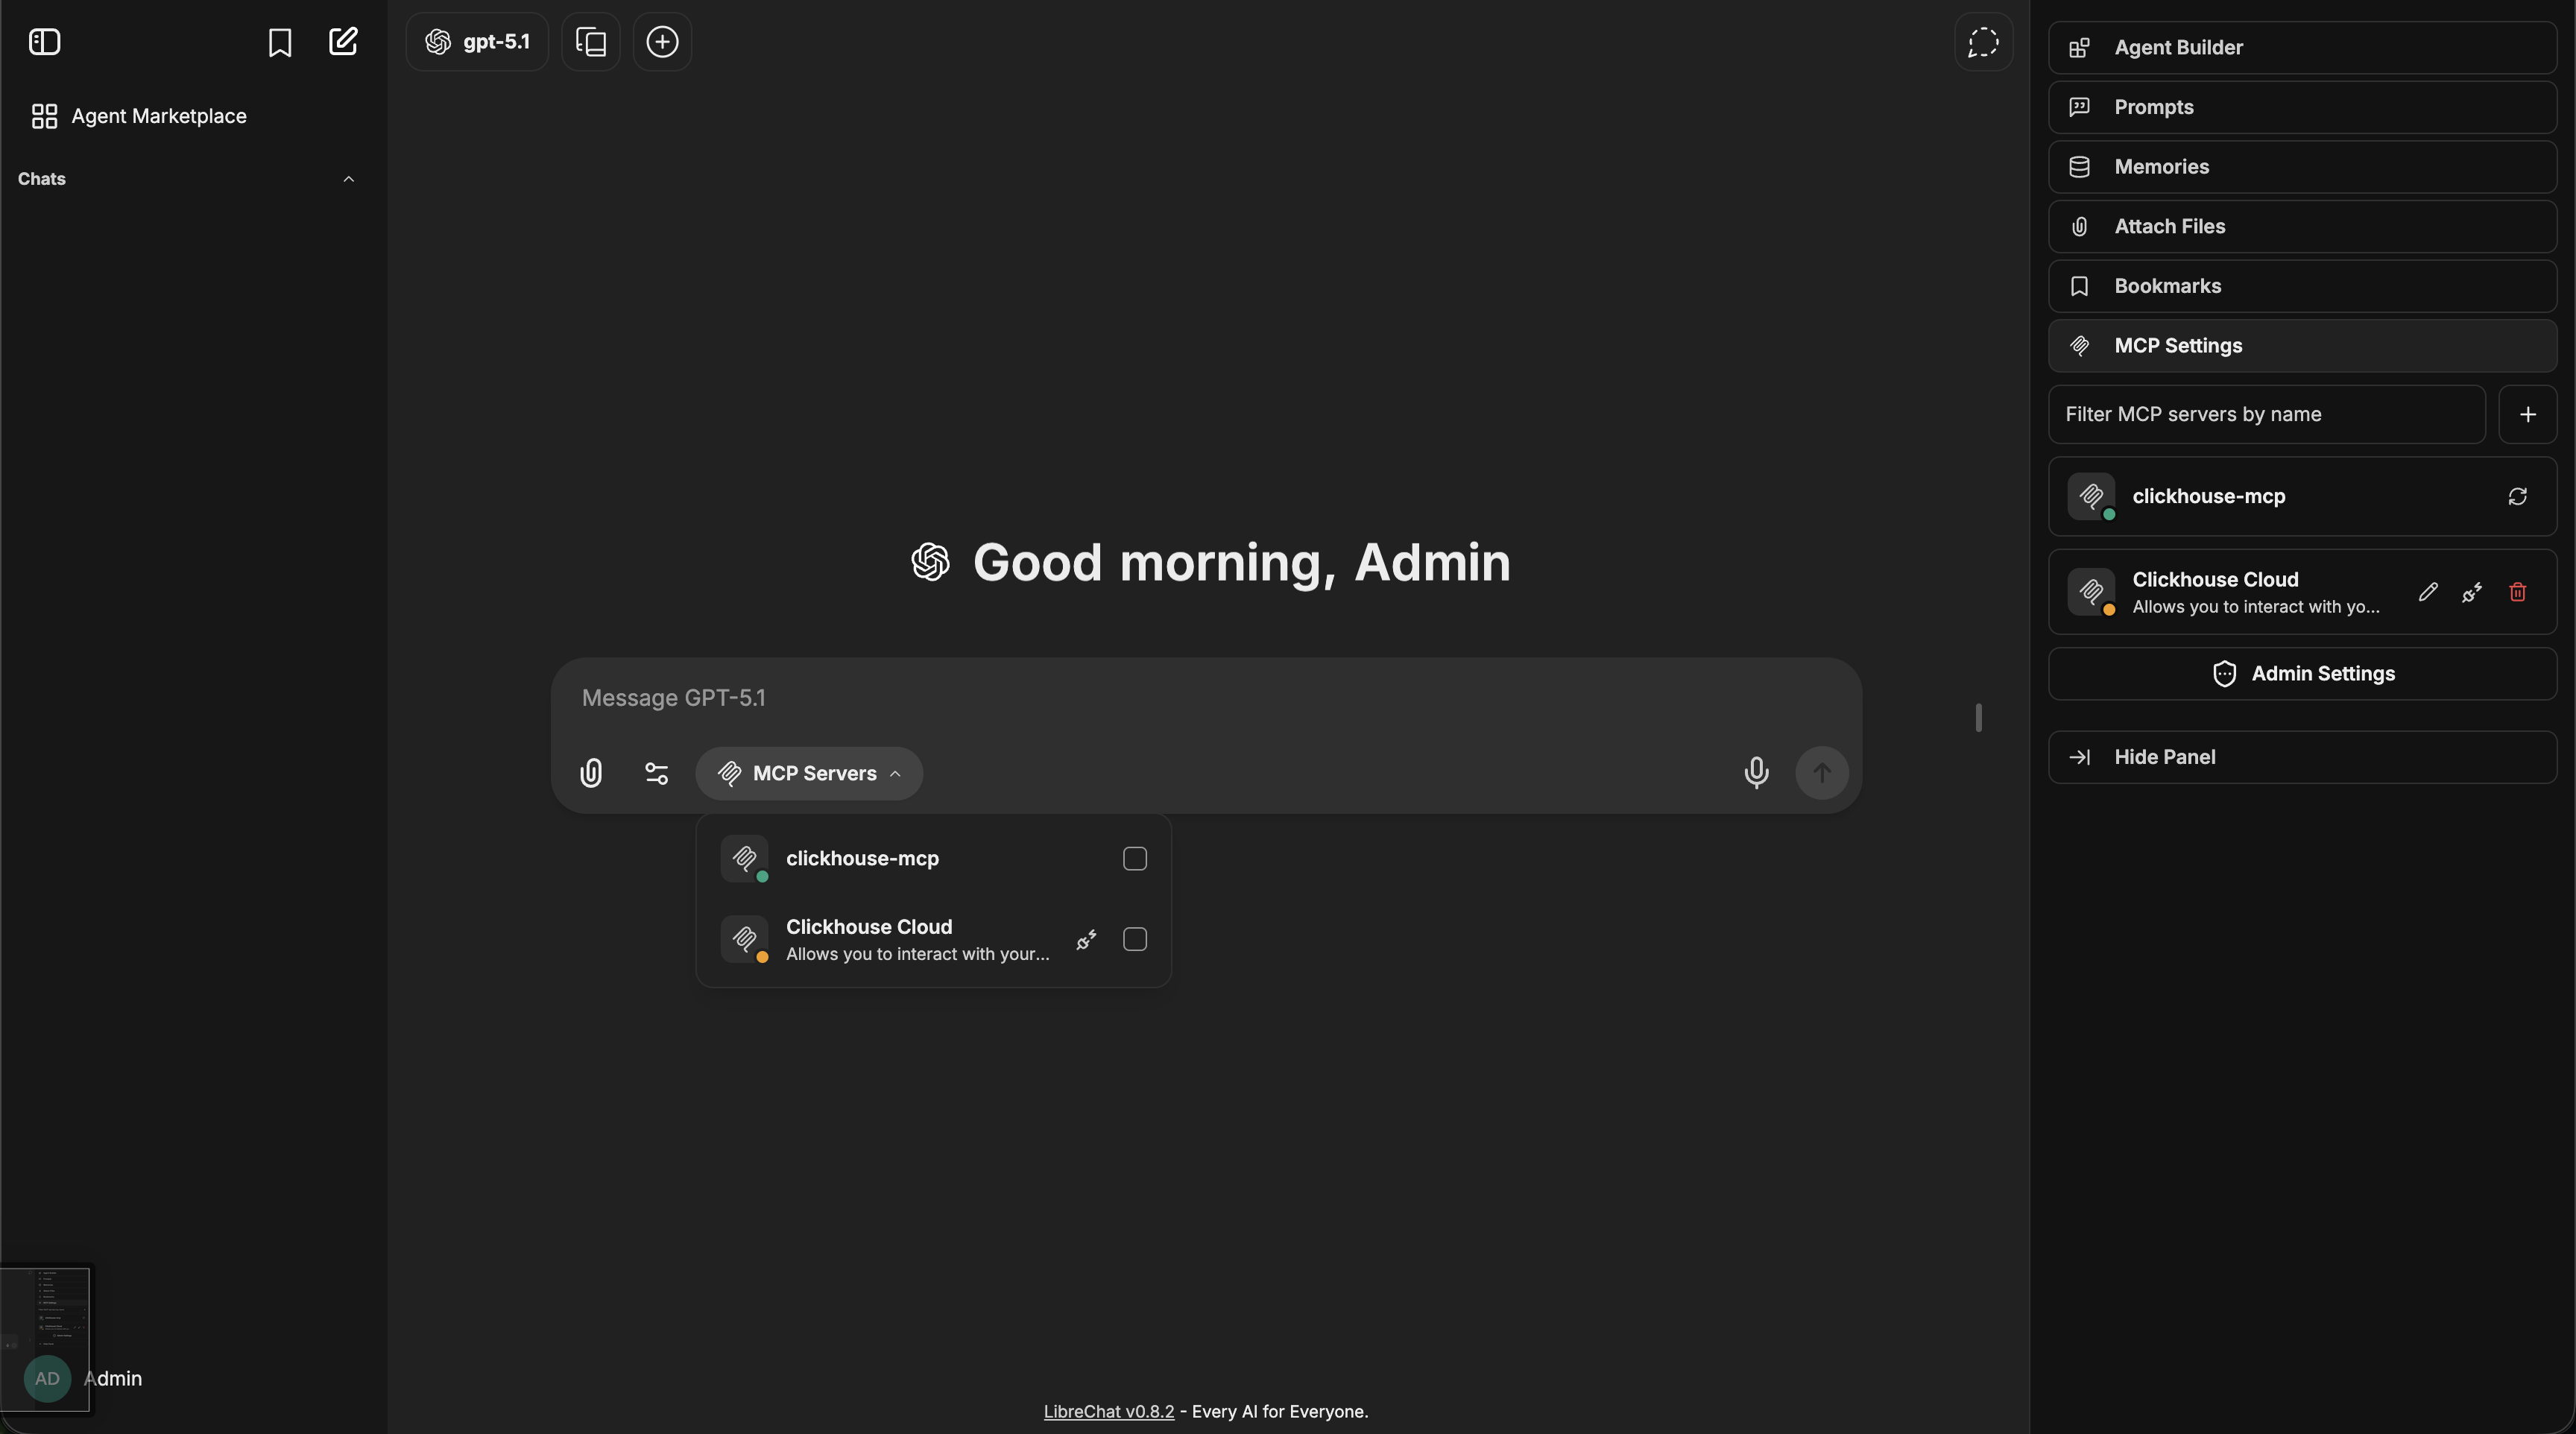
Once initiated, the status indicator will update to show that authentication is in progress.
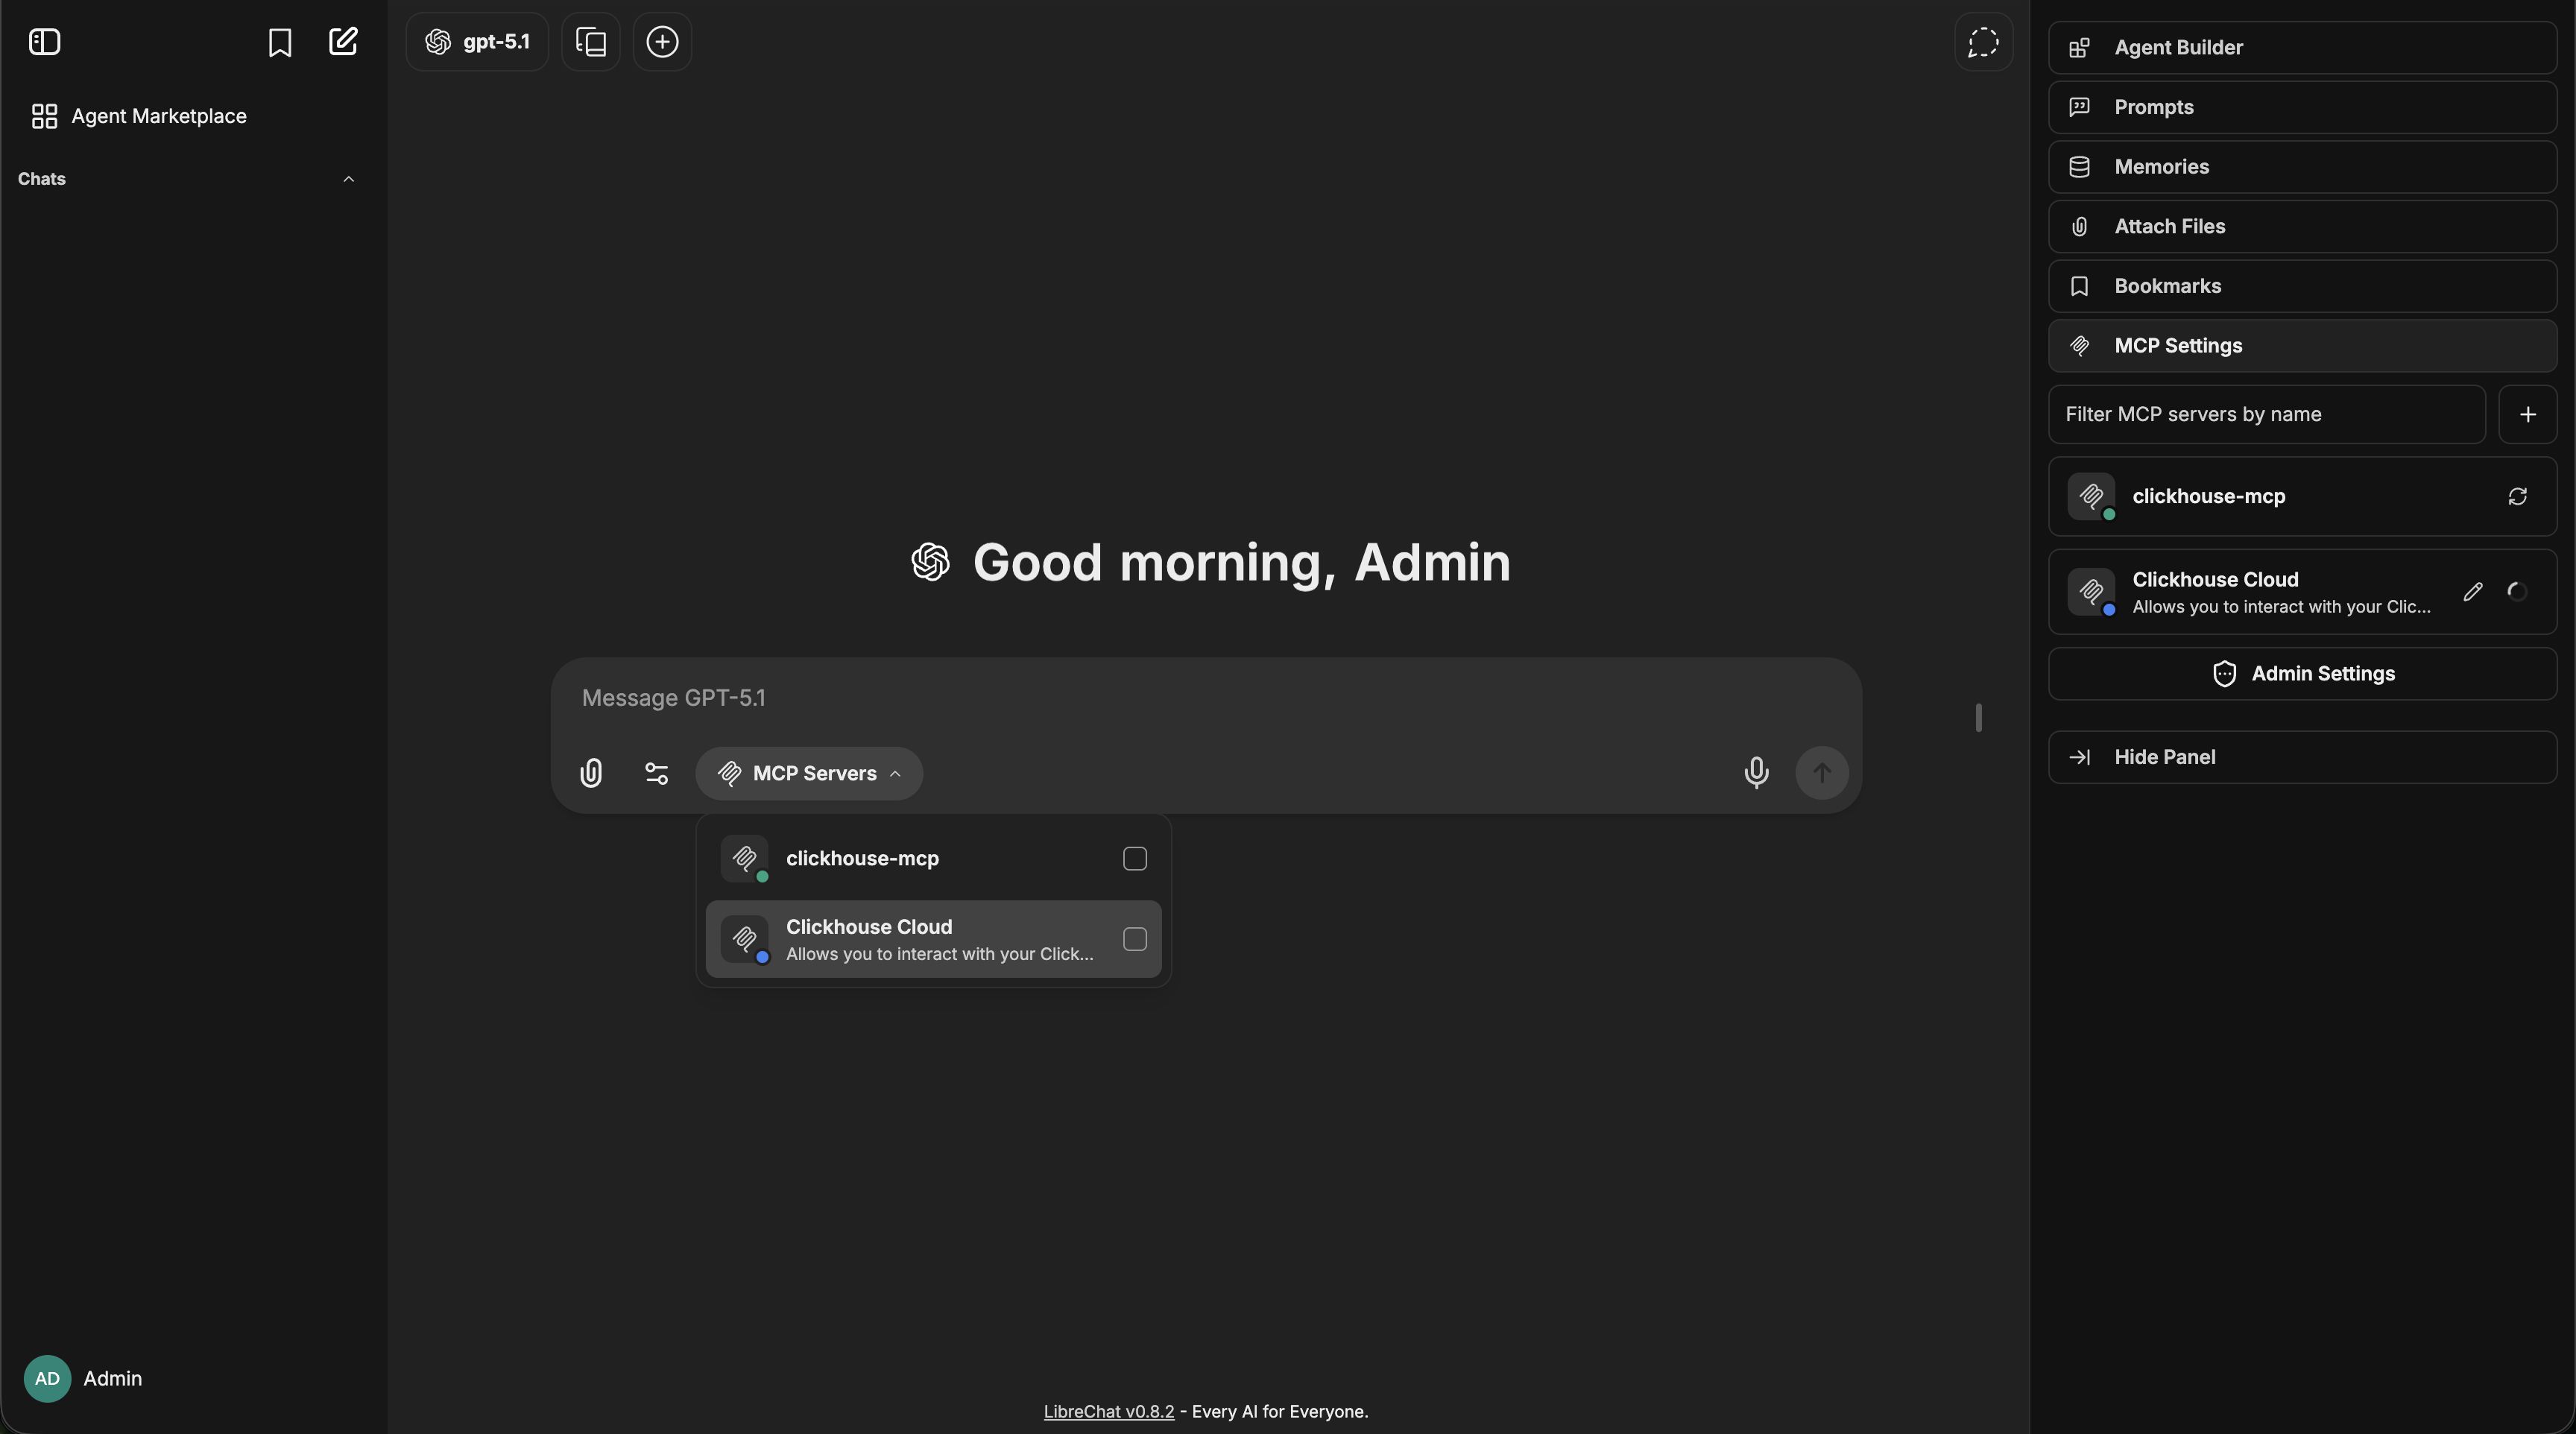
#### Step 4: Continue in the OAuth Tab
A new browser tab will open for the OAuth provider. Verify the callback URL and click **Continue** to authorize LibreChat.
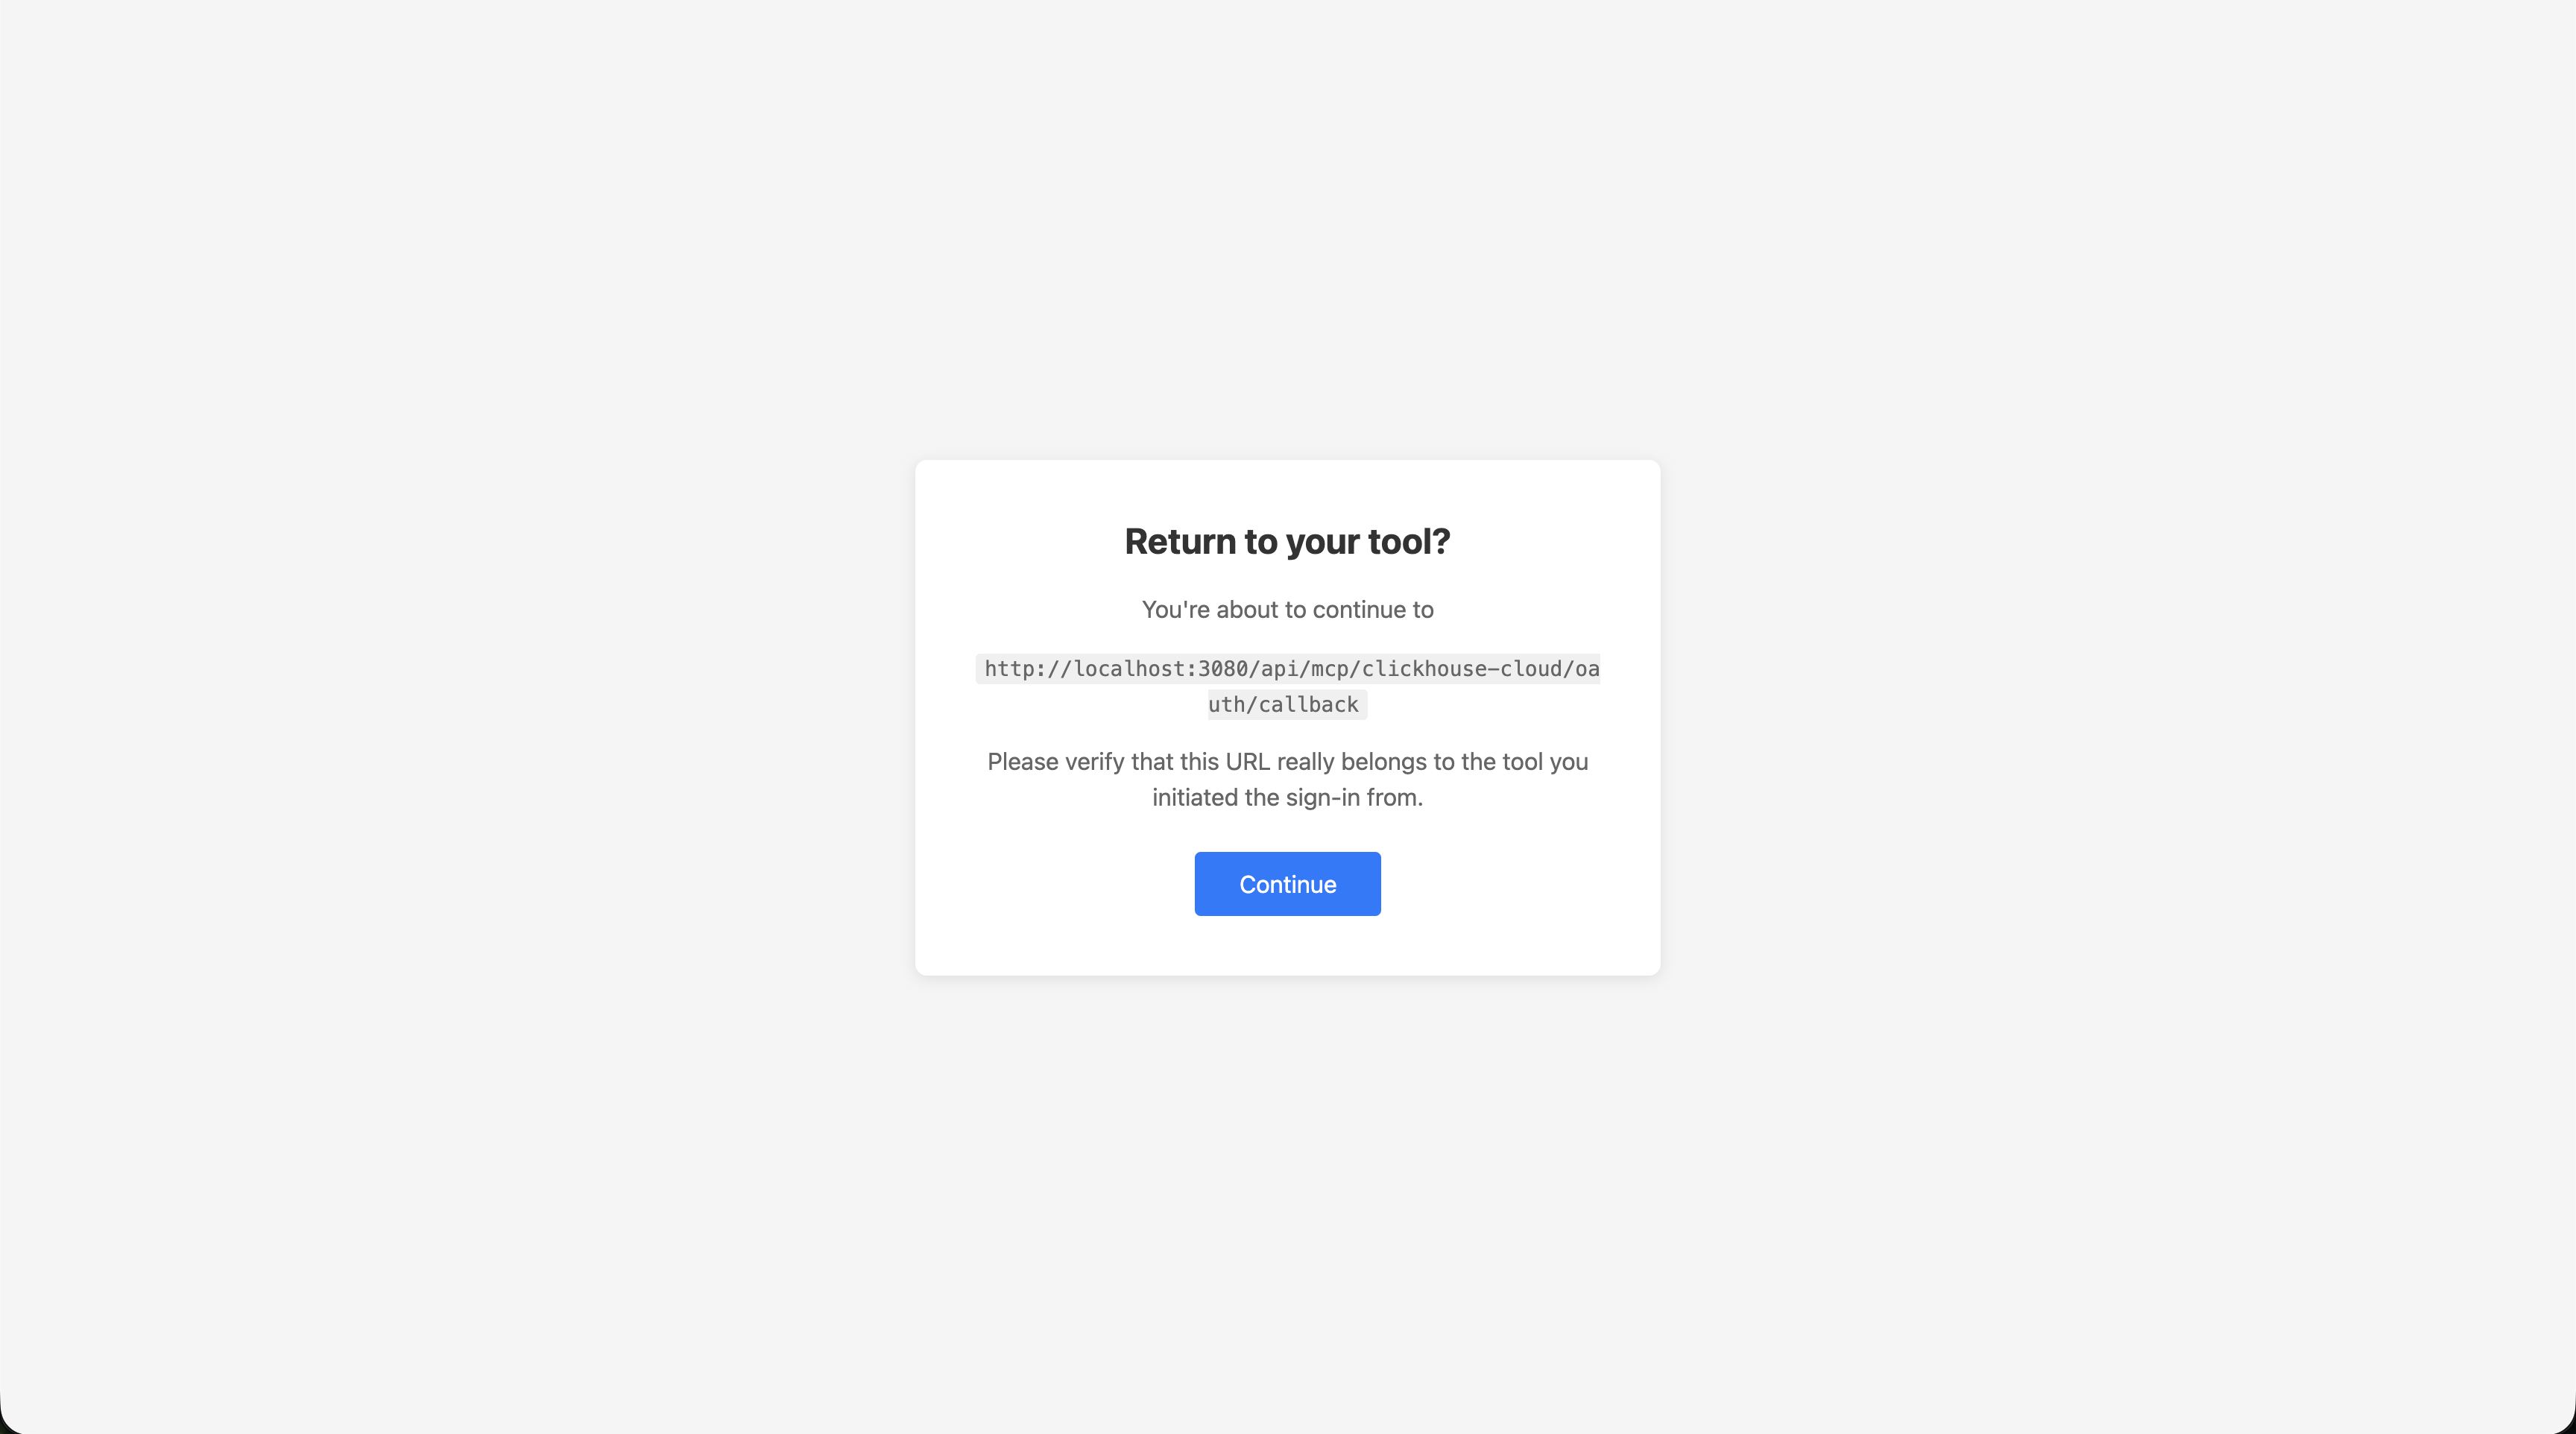
#### Step 5: Authentication Successful
After authenticating, you'll see a success confirmation. This window will automatically close and redirect you back to LibreChat.
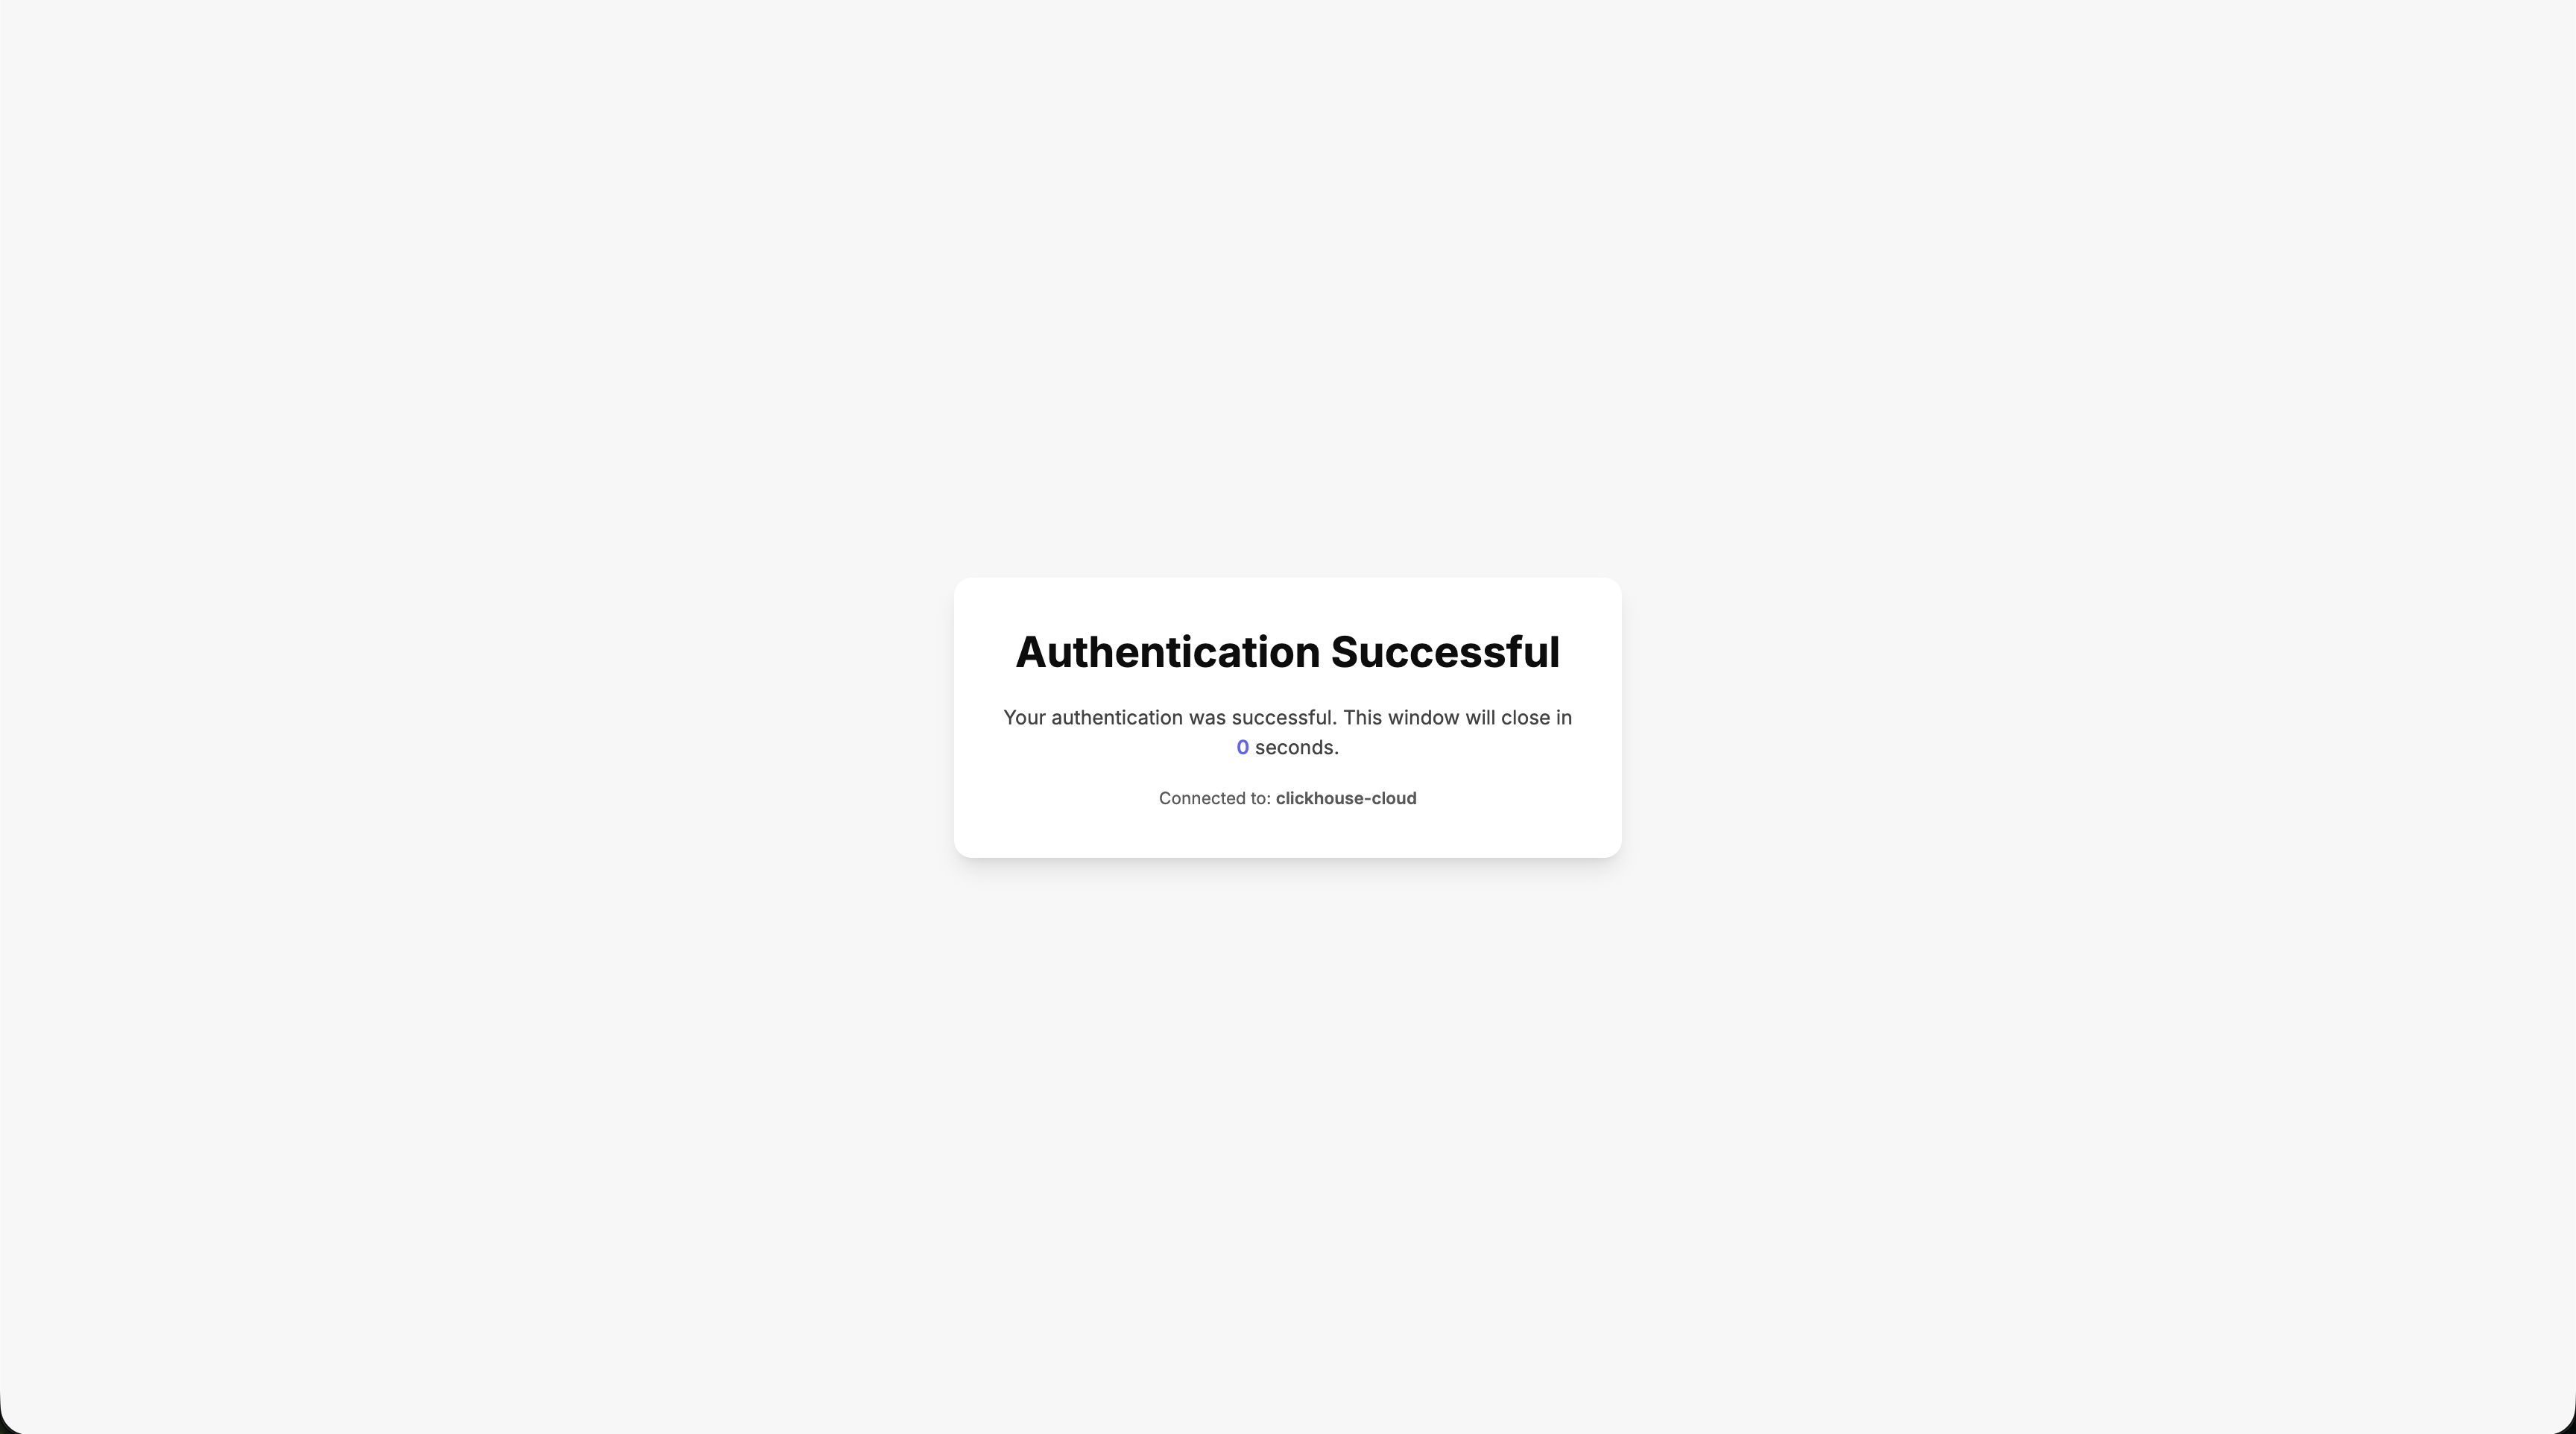
#### Step 6: Server Ready for Use
LibreChat acknowledges the successful authentication and automatically selects the MCP server for use within your conversation. The server now shows a connected status indicator and is checked in the MCP Servers dropdown.
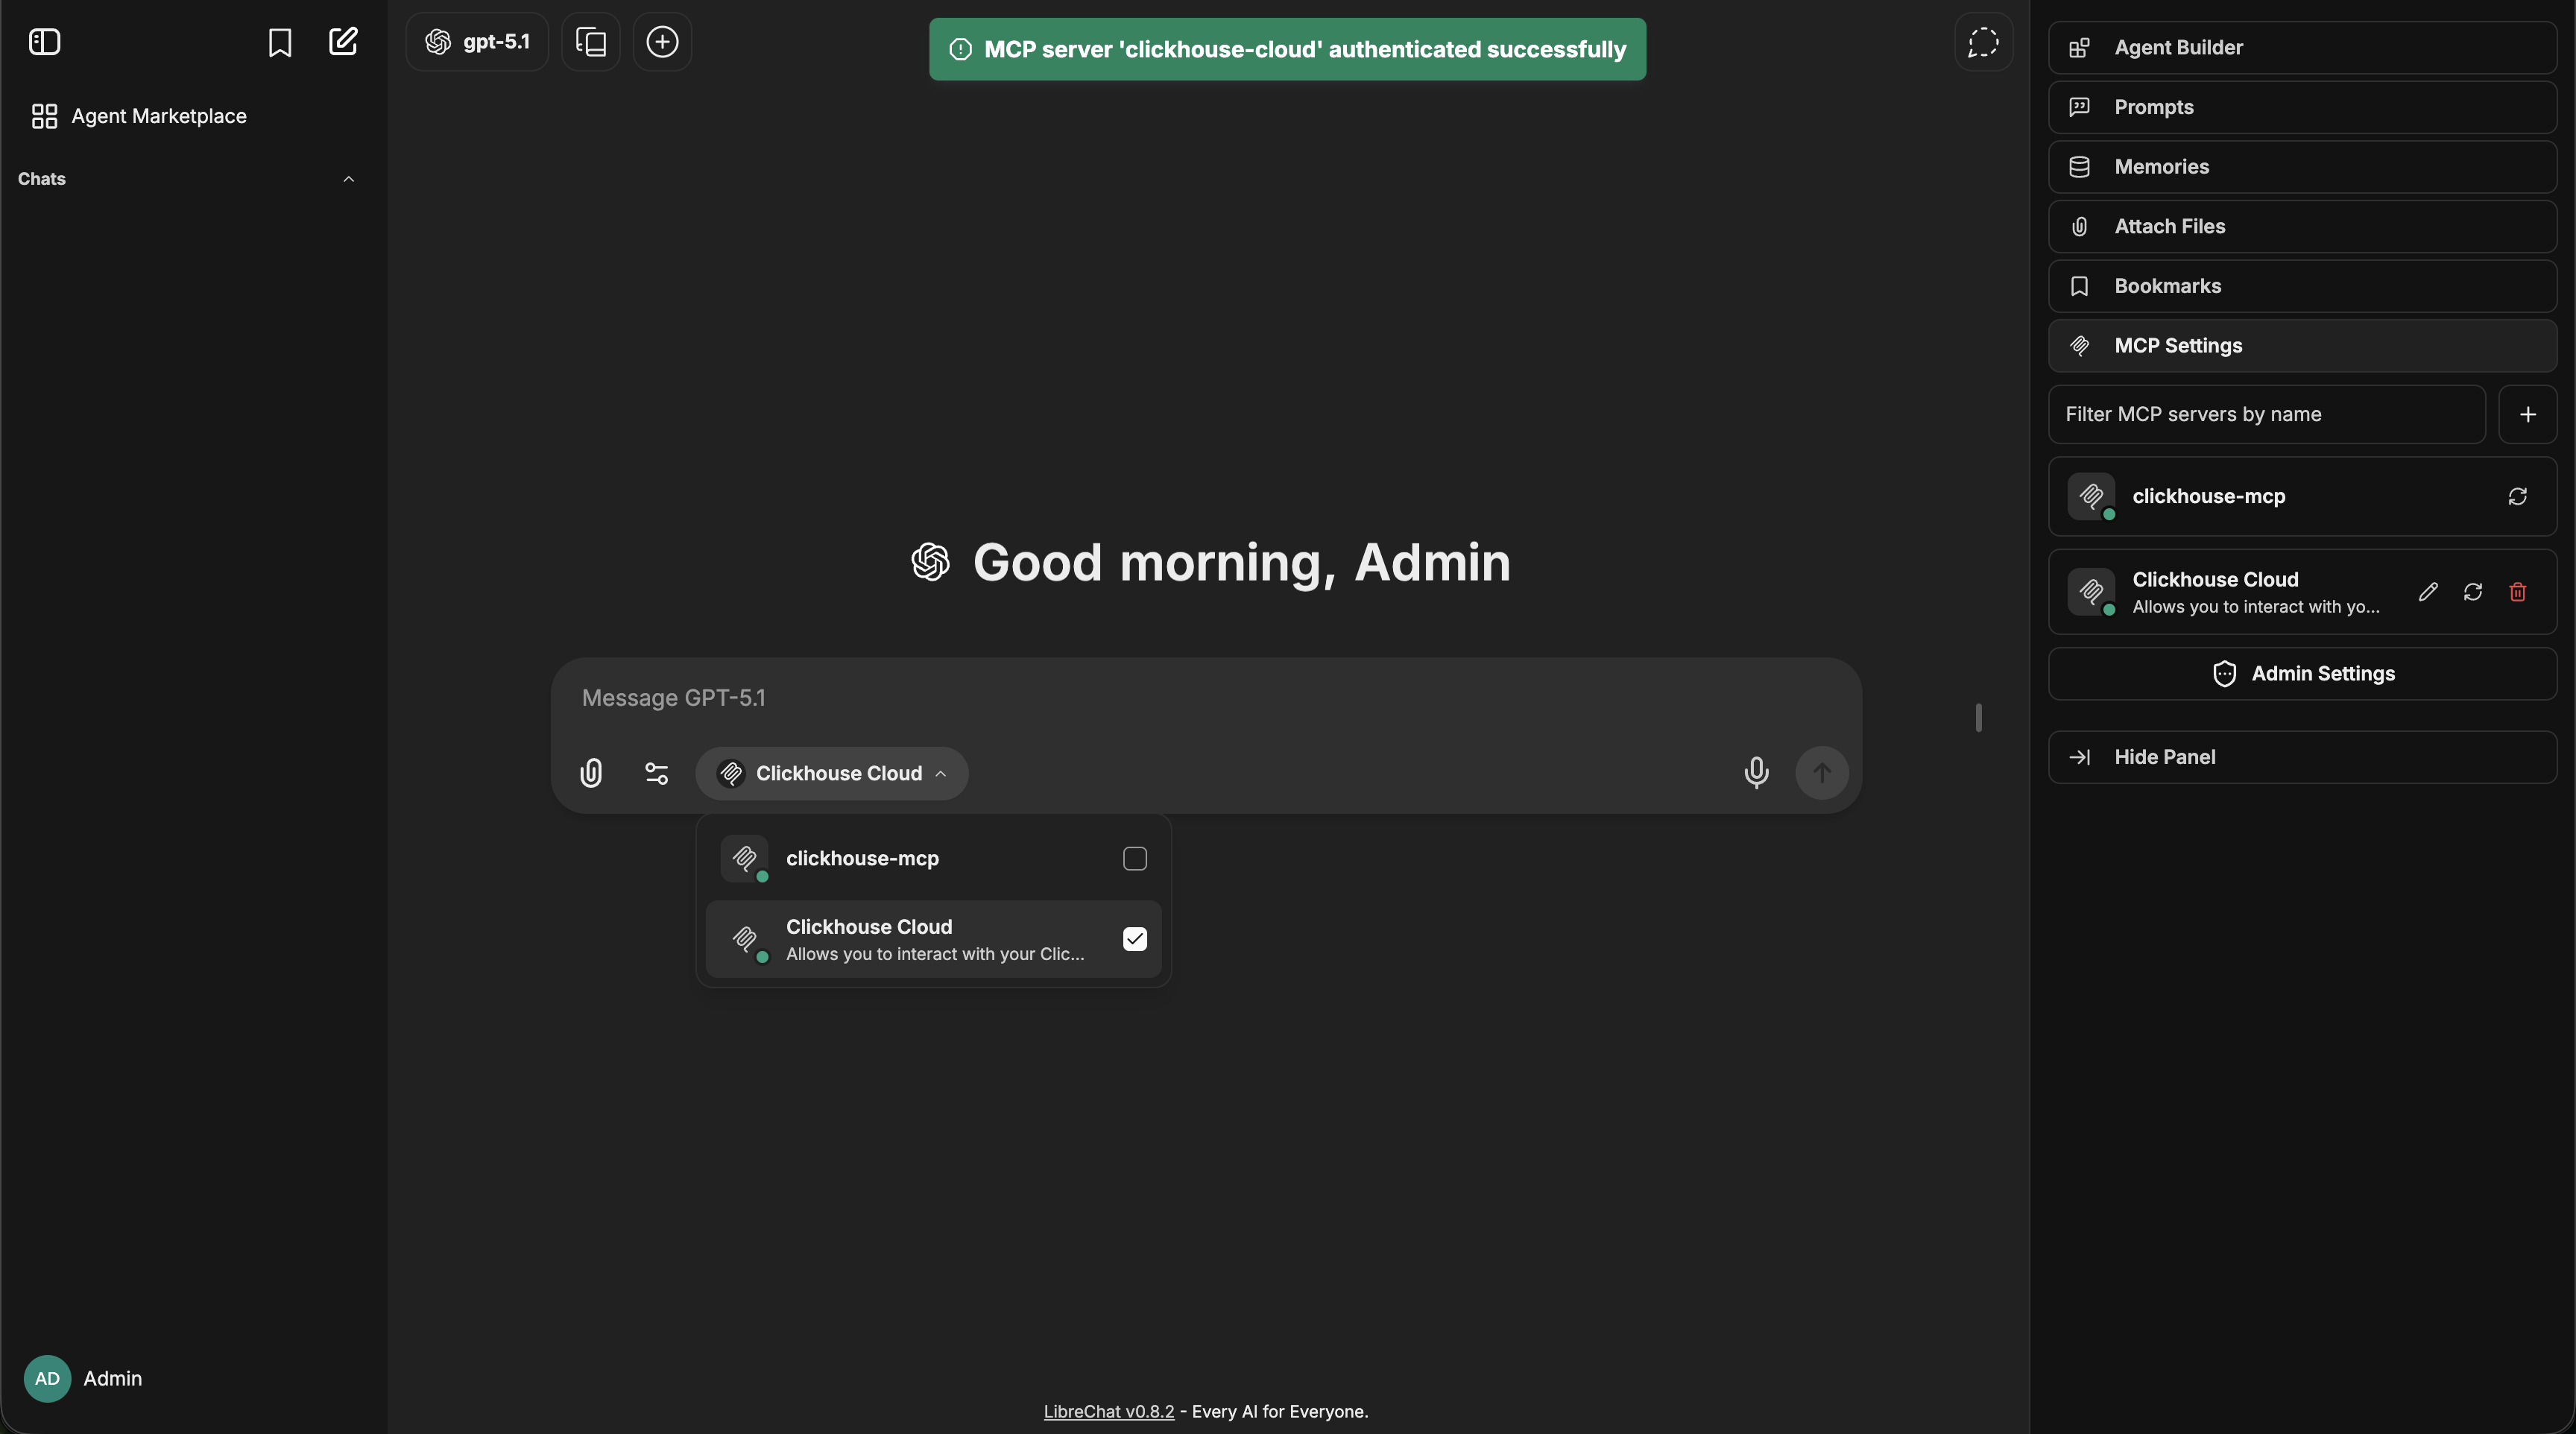
Your new MCP server is also available in the Agent Builder, where you can add its tools to any agent and customize what subset of tools are allowed.

#### Credential Variables for UI-Created Servers
When adding an MCP server through the UI, you can require users to provide their own API keys. In the Authentication section of the MCP Server Builder dialog, select "API Key" and check **"User provides key"**. Choose the header format (Bearer, Basic, or Custom) and save the server.
Behind the scenes, LibreChat automatically creates a `customUserVars` entry named `MCP_API_KEY` and configures the appropriate header template (e.g., `Authorization: Bearer {{MCP_API_KEY}}`). Each user provides their own key through the MCP Tool Select Dialog when configuring an agent — the same UI used for [YAML-defined `customUserVars`](#user-provided-credentials).
For security, UI-created (DB-sourced) MCP servers can **only** resolve `customUserVars` placeholders (`{{VAR_NAME}}`). Server-side environment variables (`${ENV_VAR}`), user profile fields (`{{LIBRECHAT_USER_*}}`), and OIDC tokens (`{{LIBRECHAT_OPENID_*}}`) are intentionally blocked to prevent unauthorized access to server secrets or other users' data. For full placeholder support, configure the server in `librechat.yaml` instead.
### Adding MCP Servers with Smithery
Smithery.ai provides a streamlined way to discover and install MCP servers for LibreChat. Follow these steps to get started:
#### Step 1: Search for MCP Servers
Visit [smithery.ai](https://smithery.ai) and search for the MCP server you want to add to your LibreChat instance.
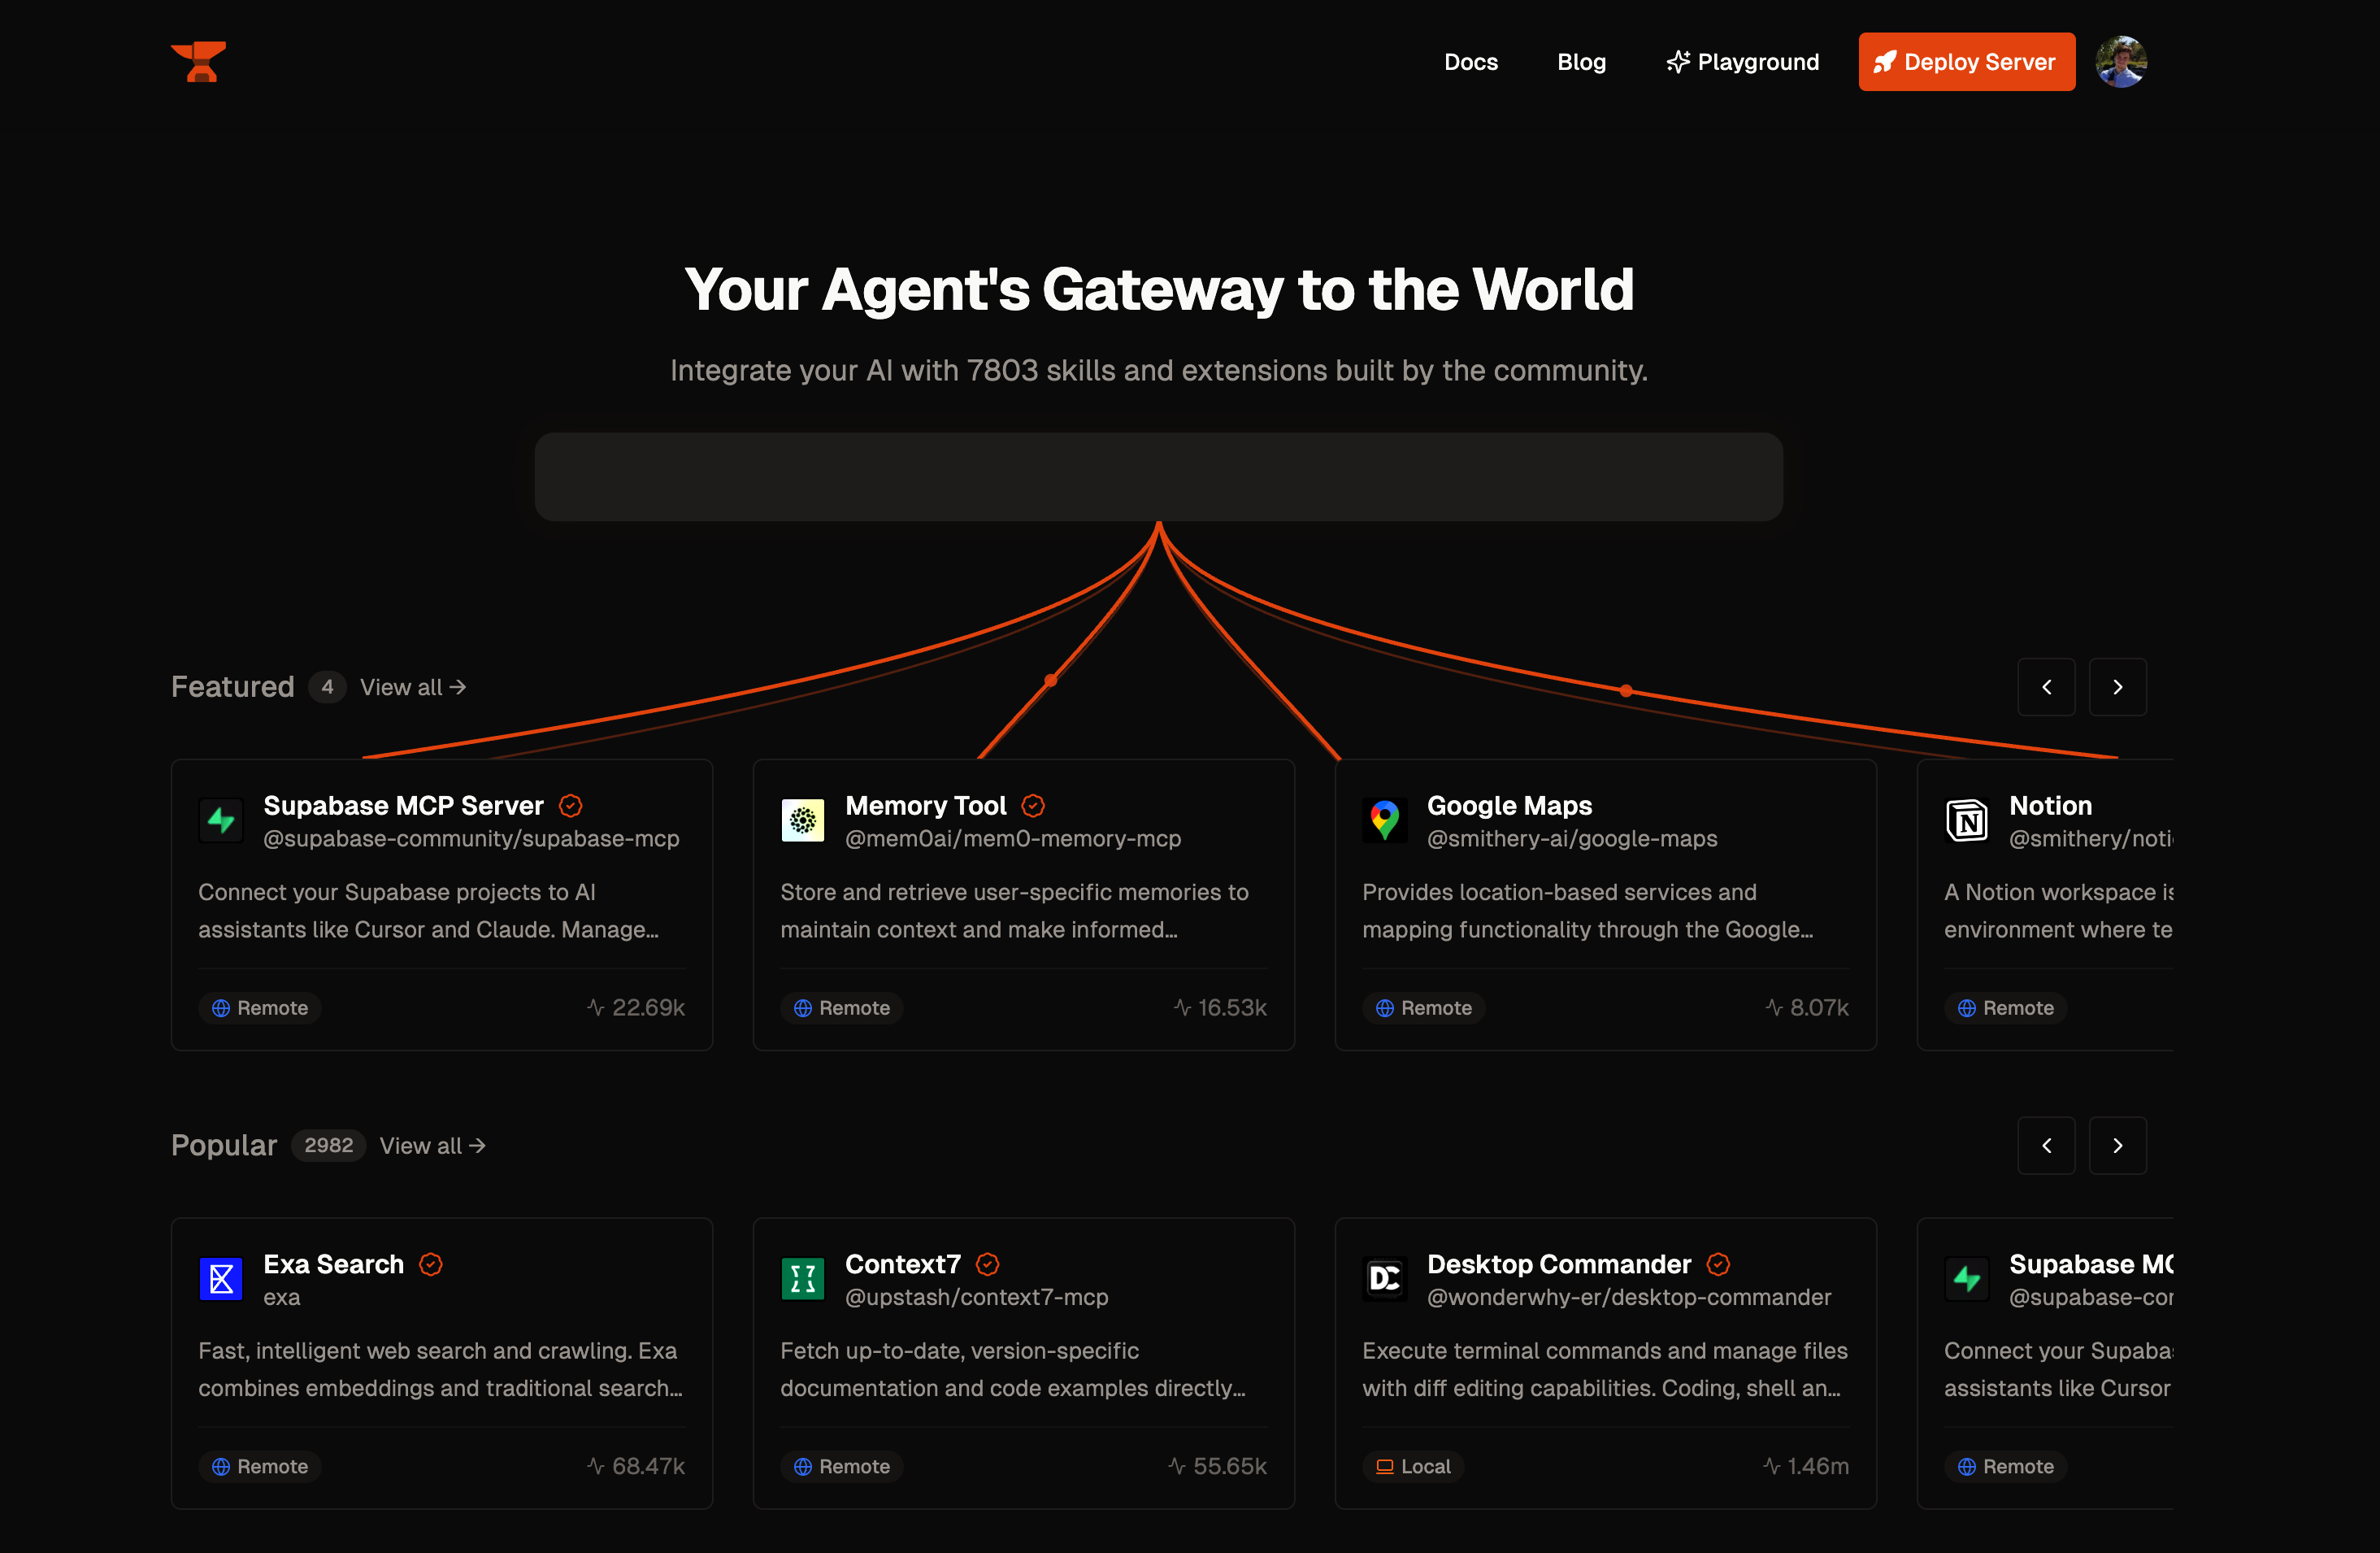
#### Step 2: Select Your MCP Server
Click on the MCP server from the search results to view details and available tools.
#### Step 3: Configure for LibreChat
Navigate to the **Auto** tab in the **Connect** section and select **LibreChat** as your desired client.
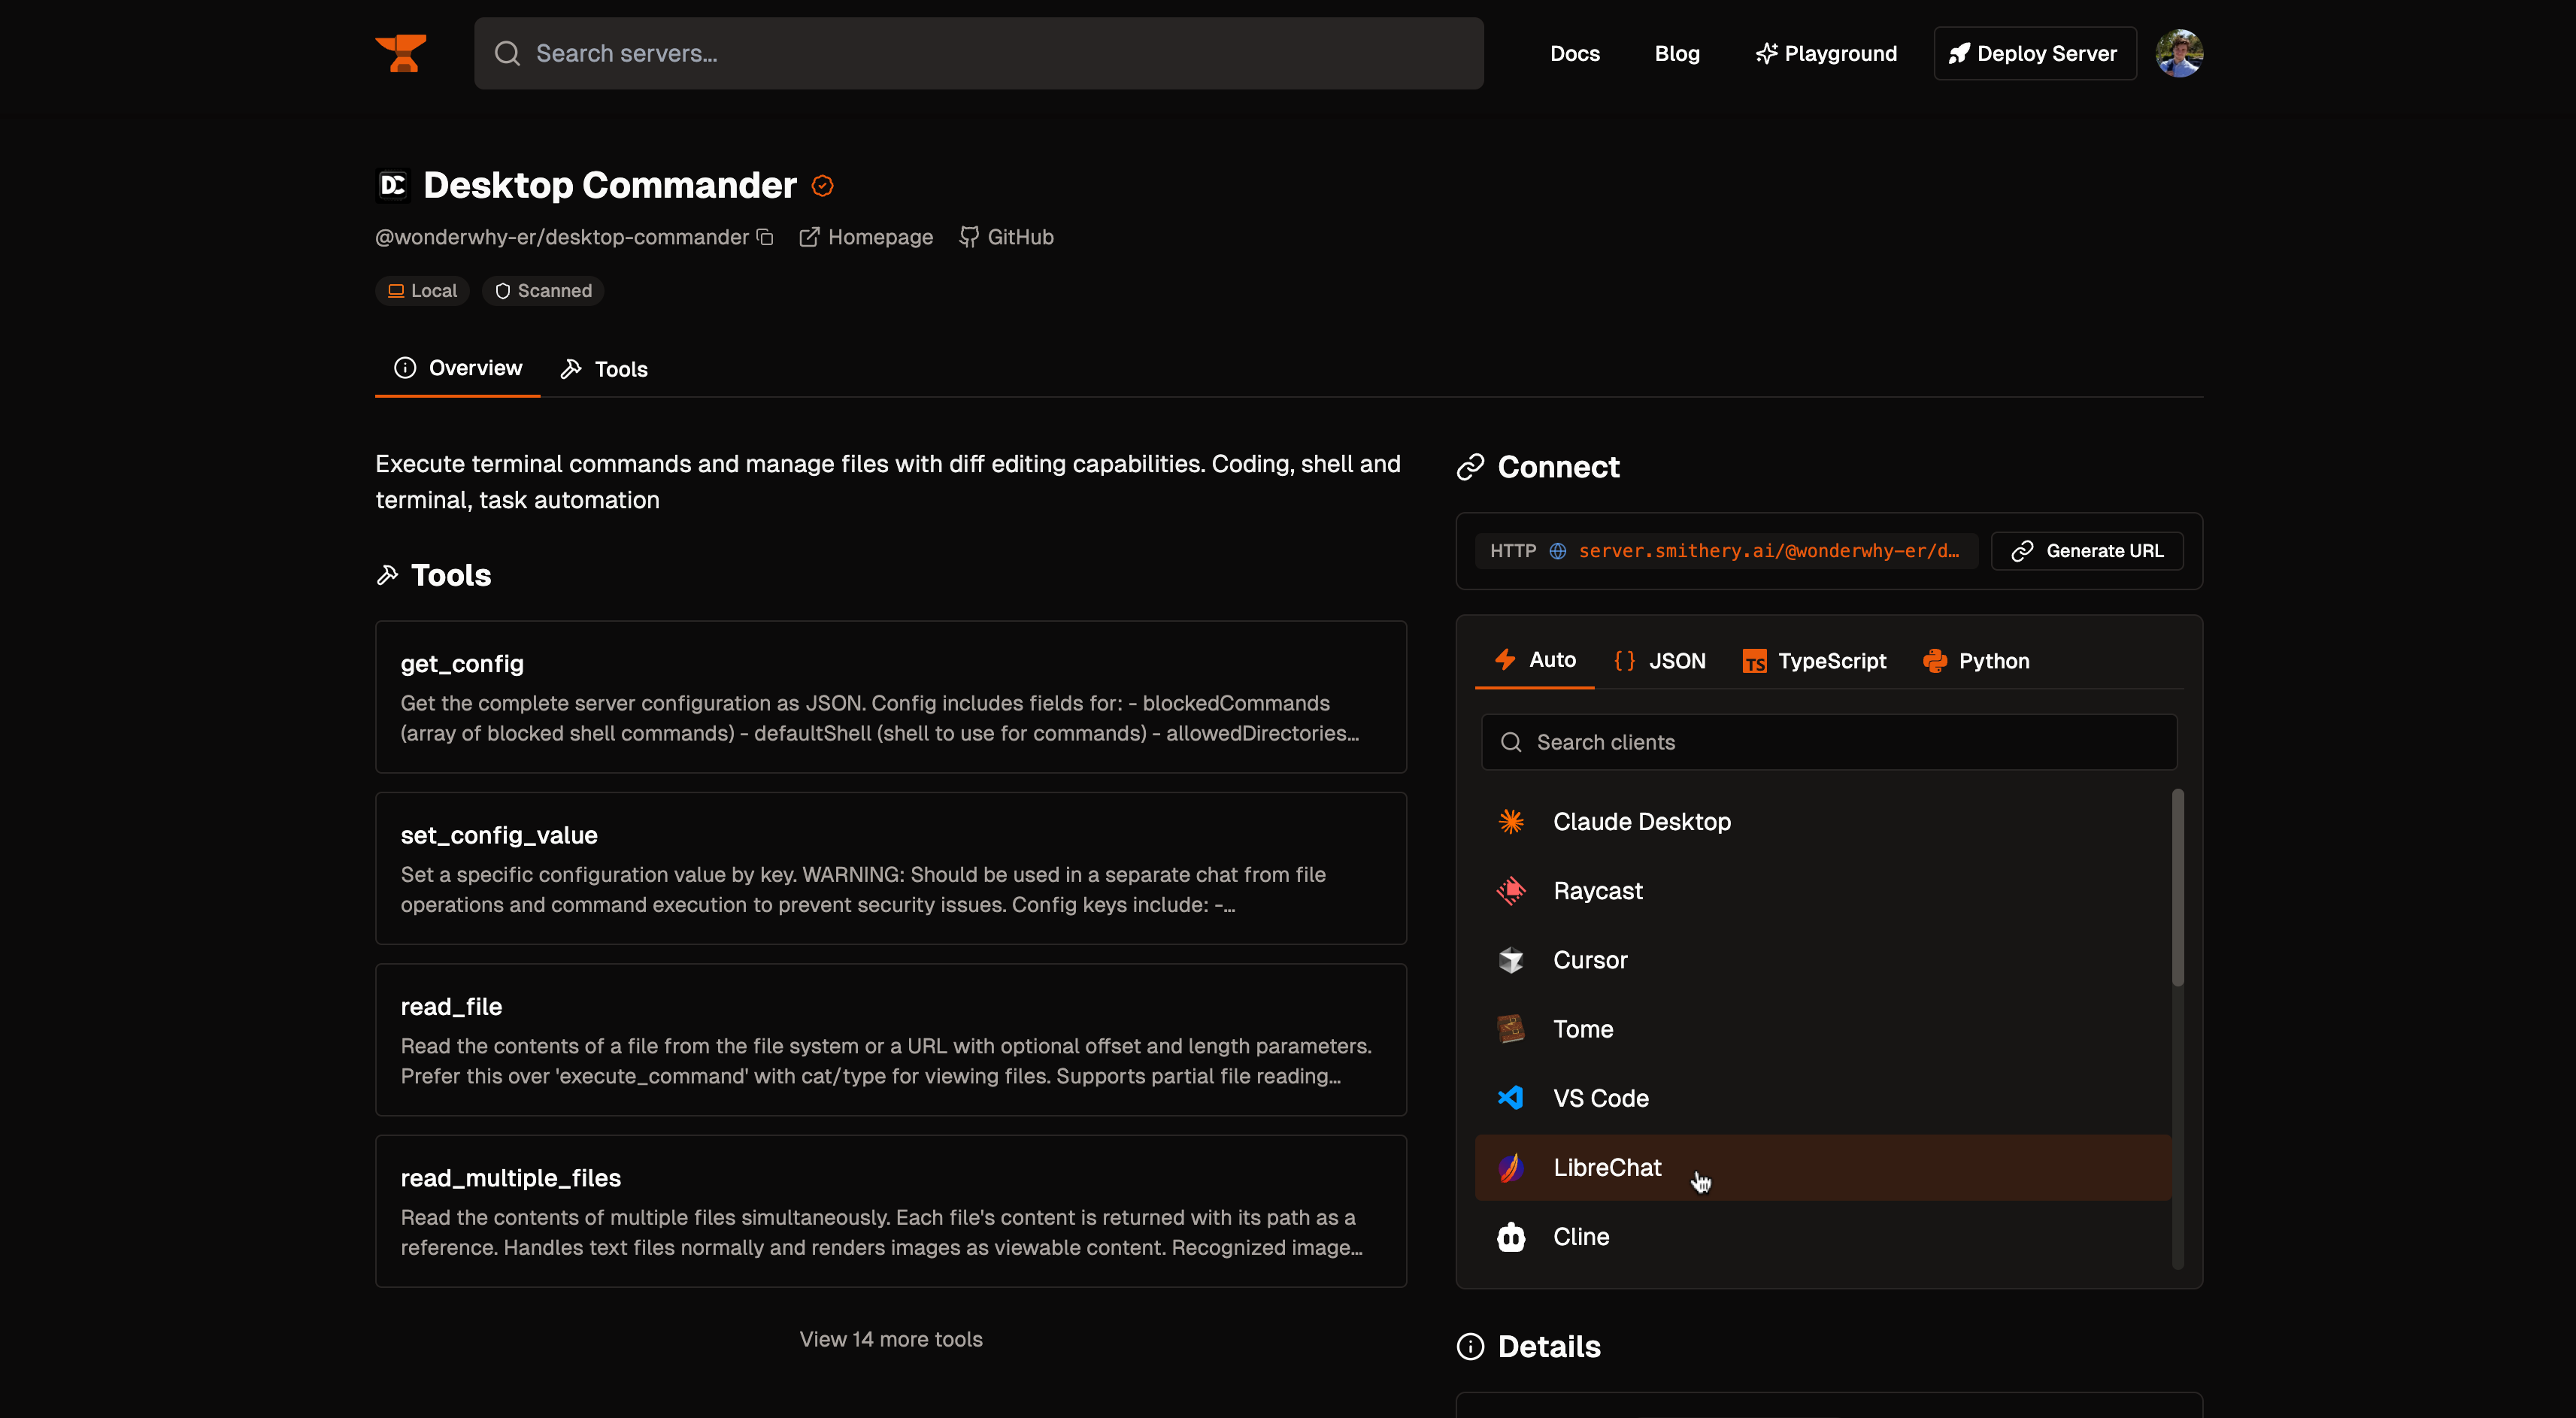
#### Step 4: Install the MCP Server
Copy and run the generated command in your terminal to install the MCP server.
#### Step 5: Restart and Verify
Your MCP server is now installed and configurable in `librechat.yaml`. Restart LibreChat to initialize the connections and start using your new MCP server.
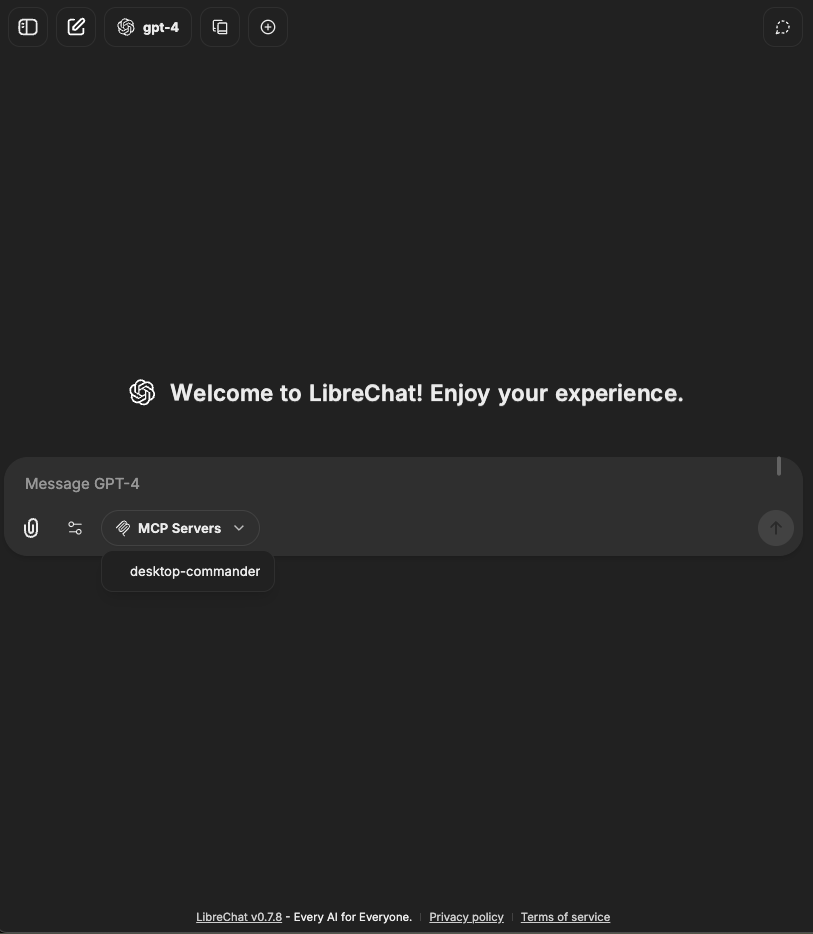
*MCP server installed through smithery.ai and ready for use in LibreChat*
For detailed configuration options and examples, see:
- [MCP Servers Configuration](/docs/configuration/librechat_yaml/object_structure/mcp_servers)
- [Agent Configuration](/docs/configuration/librechat_yaml/object_structure/agents)
- [Advanced Agent Features](/docs/features/agents#model-context-protocol-mcp)
## MCP Server Management
LibreChat provides comprehensive tools for managing MCP server connections with connection status tracking and OAuth authentication and initialization support in the UI.
### Connection Status Indicators
LibreChat displays dynamic status icons showing the current state of each MCP server in the chat dropdown and settings panel:
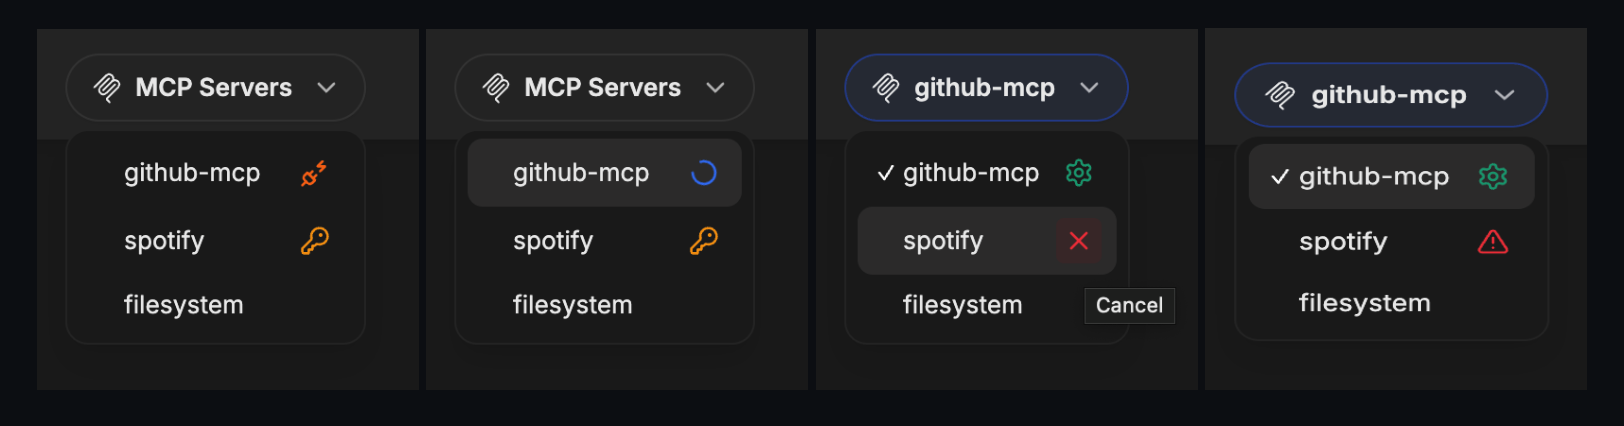
**Status Types:**
- **Connected** (green gear): Server is connected and has configurable customUserVars
- **OAuth Required** (amber key): Server requires OAuth authentication
- **Disconnected** (orange plug): Server connection failed or lost
- **Initializing** (blue loader): Server is starting up or reconnecting
- **Error** (red triangle): Server encountered an error
- **Cancelling** (red x): OAuth flow is being cancelled
### Server Initialization
You can initialize or re-initialize MCP servers directly from the interface:
**One click:**
- One-click initialization from the MCP server selection dropdown
**From MCPConfigDialog:**
- Click the status icon next to an MCP server in the Chat Dropdown to open the MCPConfigDialog
- Configure custom user variables and click the Authenticate/Initialize button depending on the server authentication type
**From MCP Settings Panel:**
- Click any server in the server list section of MCP Settings Panel to access configuration and initialization controls
- Configure custom user variables and click the Authenticate/Initialize button depending on the server authentication type
### MCP Settings Panel Visibility
The MCP Settings Panel appears in the right sidebar when LibreChat detects MCP servers that might require user intervention during their initialization. The panel will be visible when any configured server meets one of these criteria:
- **Custom User Variables**: Server has `customUserVars` defined which may contain user-provided credentials
- **OAuth Authentication**: Server is detected as requiring OAuth authentication during startup
- **Manual Initialization**: Server has `startup: false` configured, requiring manual initialization
## LibreChat-Specific Features
LibreChat's MCP implementation is designed for highly configurable, real-world, multi-user environments.
### User-Specific Connections
- Each user gets their own isolated connection to MCP servers
- User authentication and permissions are respected
- Personal data and context remain private
### Dynamic User Context
MCP servers can access user information through placeholders in **URLs and headers** (for SSE and Streamable HTTP transports):
```yaml
mcpServers:
user-api:
type: streamable-http
url: https://api.example.com/users/{{LIBRECHAT_USER_USERNAME}}/mcp
headers:
X-User-ID: "{{LIBRECHAT_USER_ID}}"
X-User-Email: "{{LIBRECHAT_USER_EMAIL}}"
X-User-Role: "{{LIBRECHAT_USER_ROLE}}"
Authorization: "Bearer ${API_TOKEN}"
```
Available placeholders include:
- `{{LIBRECHAT_USER_ID}}` - Unique user identifier
- `{{LIBRECHAT_USER_EMAIL}}` - User's email address
- `{{LIBRECHAT_USER_ROLE}}` - User role (admin, user, etc.)
- `{{LIBRECHAT_USER_USERNAME}}` - Username
- And many more (see [MCP Servers Configuration](/docs/configuration/librechat_yaml/object_structure/mcp_servers#headers) for complete list)
### Server Instructions
`serverInstructions` is a LibreChat feature that dynamically adds configured instructions when any tool from that MCP server is selected:
```yaml
mcpServers:
filesystem:
command: npx
args: ["-y", "@modelcontextprotocol/server-filesystem", "/docs"]
serverInstructions: |
When accessing files:
- Always check file permissions first
- Use absolute paths for reliability
- Handle errors gracefully
```
Options:
- `true`: Use server-provided instructions
- `false`: Disable instructions
- `string`: Custom instructions (shown above)
### Timeout Configuration
For long-running MCP operations, configure appropriate timeouts for both initialization and tool operations.
```yaml
mcpServers:
data-processor:
type: streamable-http
url: https://api.example.com/mcp
initTimeout: 15000 # 15 seconds for server initialization
timeout: 60000 # 60 seconds for tool operations
```
**Note**: If operations are still being cut short, check your proxy configuration (e.g., nginx, traefik, etc.) which may be severing connections prematurely due to default timeouts.
### User Provided Credentials
You can allow users to provide their own credentials for MCP servers through `customUserVars`. This enables secure, user-specific authentication without storing credentials in configuration files.
```yaml
mcpServers:
my-api-server:
type: streamable-http
url: "https://api.example.com/mcp"
headers:
X-Auth-Token: "{{MY_API_KEY}}" # Uses the user-provided value
customUserVars:
MY_API_KEY:
title: "API Key"
description: "Enter your personal API key from your account settings"
```
Users can configure these credentials:
- **From Chat Area**: Click the settings icon next to configurable MCP servers in the tool selection dropdown
- **From MCP Settings Panel**: Access "MCP Settings" in the right panel to manage credentials for all configured servers
#### Reinitializing MCP Servers with User Credentials
For MCP servers that require user-specific credentials before they can be used (e.g., `PAT_TOKEN`'s in [GitHub’s official MCP server](https://github.com/github/github-mcp-server)), LibreChat allows users to provide these credentials and then reinitialize the MCP server from within the UI without restarting the whole application:
1. When you select an MCP that uses `customUserVars`, you will be able to **Save** or **Revoke** a `customUserVar`'s value for the selected MCP server from within the MCP Panel.
2. After saving a value for a `customUserVar`, click the reinitialize button (an icon with circular arrows next to each server name in the MCP Panel).
3. LibreChat will attempt to connect to the server using your provided credentials and notify you with a toast whether the reinitialization process has succeeded or failed.
> _Tip: If you know a server will require credentials not available at first startup, you can add `startup: false` to its configuration. This tells LibreChat to not attempt to connect to that server until it is manually reinitialized in the UI._
**Example:**
```yaml
mcpServers:
github-mcp:
type: streamable-http
url: "https://api.githubcopilot.com/mcp/"
headers:
Authorization: "{{PAT_TOKEN}}"
customUserVars:
PAT_TOKEN:
title: "GitHub PAT Token"
description: "GitHub Personal Access Token"
startup: false
```
### OAuth Authentication
LibreChat supports OAuth authentication for MCP servers, following Anthropic's recommendation for secure MCP connections. OAuth provides a standardized, secure way to authenticate without storing long-lived credentials.
#### Supported OAuth Flows
LibreChat MCP servers support OAuth 2.0 with:
- **Authorization Code Flow with PKCE**: Recommended for maximum security
- **Client Discovery**: Automatic client registration when supported by the OAuth provider
- **Refresh Tokens**: Automatic token renewal when available
#### Configuration Examples
```yaml
mcpServers:
# Public remote MCP server for PayPal, uses OAuth Client Discovery
# ❌ Refresh Tokens: you may need to re-authenticate periodically
# More info: https://developer.paypal.com/tools/mcp-server/
paypal:
type: "sse"
initTimeout: 150000 # higher timeout to allow for initial authentication
url: "https://mcp.paypal.com/sse"
# Example self-hosted remote MCP server for Spotify, uses OAuth Client Discovery
# ✅ Refresh Tokens: refreshes token for authentication automatically
# Hosted on Cloudflare Workers, more info: https://github.com/LibreChat-AI/spotify-mcp
spotify:
type: "streamable-http"
initTimeout: 150000
url: "https://mcp-spotify-oauth-example.account.workers.dev/mcp"
```
#### OAuth Authentication Flow
When you first configure an OAuth-enabled MCP server:
1. **Initial Connection**: LibreChat attempts to connect to the MCP server
2. **Authentication Required**: If no valid token exists, you'll see an OAuth authentication indicator in the chat dropdown for that server
3. **Button Interface**: Click the authentication indicator button to open the MCPConfigDialog and begin the OAuth flow
4. **Config Dialog**: Click the Authenticate button in the MCPConfigDialog to open the OAuth authentication page in your browser
5. **Browser Redirect**: LibreChat opens the OAuth provider in your browser
6. **Return Handling**: LibreChat automatically processes the OAuth callback once you've authenticated
7. **Token Storage**: LibreChat securely stores the tokens for future use
8. **Connection Established**: Once you've authenticated, the MCP server will be connected and you can use it in your chat
#### OAuth Callback URL
When an MCP server uses OAuth, LibreChat exposes a callback endpoint that the OAuth provider redirects to after successful authorization.
The callback URL must follow this format:
`${baseUrl}/api/mcp/${serverName}/oauth/callback`
Where `${serverName}` is the MCP server key defined in your `librechat.yaml` configuration. LibreChat handles the redirect at this endpoint, completes the token exchange, and associates the credentials with the corresponding MCP server.
Given the following MCP server configuration:
```yaml
mcpServers:
# Example self-hosted remote MCP server for Spotify, uses OAuth Client Discovery
# ✅ Refresh Tokens: refreshes token for authentication automatically
# Hosted on Cloudflare Workers, more info: https://github.com/LibreChat-AI/spotify-mcp
spotify:
type: 'streamable-http'
initTimeout: 150000
url: 'https://mcp-spotify-oauth-example.account.workers.dev/mcp'
```
The callback URL would be `${baseUrl}/api/mcp/spotify/oauth/callback`.
Note:
- The callback URL must be registered exactly with the OAuth provider for the flow to work.
- Other paths such as `/api/oauth/callback` or `/api/oauth/openid/callback` are not valid for MCP OAuth flows.
#### Token Management
LibreChat handles OAuth tokens intelligently:
- **Secure Storage**: Tokens are encrypted and stored securely
- **Automatic Refresh**: When refresh tokens are available, LibreChat automatically renews expired access tokens
- **Session Management**: Each user maintains their own OAuth sessions for multi-user environments
Each user will be prompted to authenticate with their own OAuth login when they first use an OAuth-enabled MCP server. This ensures that connection and authentication details are unique to each user, maintaining security and privacy in multi-user environments.
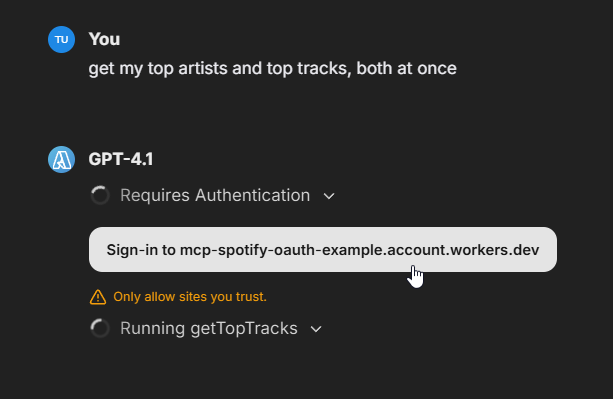
> Note: The tokens shown during app startup are for app-level initialization only and are not used for individual user connections.
Example of automatic token refresh:
```bash
[MCP][spotify] Access token missing
[MCP][spotify] Attempting to refresh token
[MCP][spotify] Successfully refreshed and stored OAuth tokens
[MCP][spotify] ✓ Initialized
```
#### Best Practices
1. **Use OAuth when available**: Prefer OAuth over API keys for better security
2. **Configure appropriate timeouts**: Set higher `initTimeout` for OAuth flows (e.g., 150000ms)
3. **Monitor token expiration**: Check logs for authentication issues
4. **Plan for re-authentication**: Some providers don't support refresh tokens
**Note**: UI-based OAuth configuration is coming soon, which will streamline the authentication process directly from the LibreChat interface.
## Server Transports
MCP servers can be configured to use different transport mechanisms:
**STDIO Servers**
- Work wells for local, single-user environments
- Not scalable for remote or cloud deployments
**Server-Sent Events (SSE) Servers**
- Remote transport mechanism but not recommended for production environment
**Streamable HTTP Servers**
- Uses HTTP POST for sending messages and supports streaming responses
- Operates as an independent process that can handle multiple client connections
- Supports both basic requests and streaming via Server-Sent Events (SSE)
- More performant alternative to the legacy HTTP+SSE transport
- Supports proper multi-user server configurations
**For production environments**, only MCP servers with ["Streamable HTTP" transports](https://modelcontextprotocol.io/specification/draft/basic/transports#streamable-http) are recommended. Unlike SSE which maintains long-running connections, Streamable HTTP offers stateless options that are better suited for scalable, multi-user deployments.
LibreChat is at the forefront of implementing flexible, scalable MCP server integrations to support diverse usage scenarios and help you build the AI workflows of tomorrow.
---
**Ready to extend your AI capabilities?** Start by configuring your first MCP server and discover how LibreChat can connect to virtually any tool or service your organization needs.
# User Memory (/docs/features/memory)
## Overview
User Memory in LibreChat is a **key/value store** that persists user-specific information across conversations. A dedicated memory agent runs at the start of **every chat request**, reading from and writing to this store to provide personalized context to the main AI response.
This is **not** semantic memory over your entire conversation history. It does not index, embed, or search past conversations. Instead, it maintains a structured set of key/value pairs (e.g., `user_preferences`, `learned_facts`) that are injected into each request as context. Think of it as a persistent notepad the AI reads before every response.
For context about previous messages within a single conversation, LibreChat already uses the standard message history window — that is separate from this feature.
Memory functionality must be explicitly configured in your `librechat.yaml` file to work. It is not enabled by default.
## Key Features
- **Runs Every Request**: The memory agent executes at the start of each chat request, ensuring stored context is always available
- **Key/Value Storage**: Information is stored as structured key/value pairs, not as raw conversation logs
- **Manual Entries**: Users can manually add, edit, or remove memory entries directly, giving full control over what the AI remembers
- **User Control**: When enabled, users can toggle memory on/off for their individual chats
- **Customizable Keys**: Restrict what categories of information can be stored using `validKeys`
- **Token Management**: Set limits on memory usage to control costs
- **Agent Integration**: Use AI agents to intelligently manage what gets remembered
## Configuration
To enable memory features, you need to add the `memory` configuration to your `librechat.yaml` file:
```yaml filename="librechat.yaml"
version: 1.3.5
cache: true
memory:
disabled: false # Set to true to completely disable memory
personalize: true # Gives users the ability to toggle memory on/off, true by default
tokenLimit: 2000 # Maximum tokens for memory storage
messageWindowSize: 5 # Number of recent messages to consider
agent:
provider: "openAI"
model: "gpt-4"
```
The provider field should match the accepted values as defined in the [Model Spec Guide](/docs/configuration/librechat_yaml/object_structure/model_specs#endpoint).
**Note:** If you are using a custom endpoint, the endpoint value must match the defined custom endpoint name exactly.
See the [Memory Configuration Guide](/docs/configuration/librechat_yaml/object_structure/memory) for detailed configuration options.
## How It Works
The memory agent runs on **every chat request** when memory is enabled. It executes concurrently with the main chat response — it begins before the main response starts and is limited to the duration of the main request plus up to 3 seconds after it finishes.
This means every message you send triggers the memory agent to:
1. **Read** the current key/value store and inject relevant entries as context
2. **Analyze** the recent message window for information worth storing or updating
3. **Write** any new or modified entries back to the store
### 1. Key/Value Storage
Memory entries are stored as key/value pairs. When memory is enabled, the system can store entries such as:
- User preferences (communication style, topics of interest)
- Important facts explicitly shared by users
- Ongoing projects or tasks mentioned
- Any category you define via `validKeys`
Users can also **manually create, edit, and delete** memory entries through the interface, giving direct control over what the AI knows about them.
### 2. Context Window
The `messageWindowSize` parameter determines how many recent messages are analyzed for memory updates. This helps the memory agent decide what information is worth storing or updating in the key/value store.
### 3. User Control
When `personalize` is set to `true`:
- Users see a memory toggle in their chat interface
- They can enable/disable memory for individual conversations
- Memory settings persist across sessions
### 4. Valid Keys
You can restrict what categories of information are stored by specifying `validKeys`:
```yaml filename="memory / validKeys"
memory:
validKeys:
- "user_preferences"
- "conversation_context"
- "learned_facts"
- "personal_information"
```
## Best Practices
### 1. Token Limits
Set appropriate token limits to balance functionality with cost:
- Higher limits allow more comprehensive memory
- Lower limits reduce processing costs
- Consider your usage patterns and budget
### 2. Custom Instructions
When using `validKeys`, provide custom instructions to the memory agent:
```yaml filename="memory / agent with instructions"
memory:
agent:
provider: "openAI"
model: "gpt-4"
instructions: |
Store information only in the specified validKeys categories.
Focus on explicitly stated preferences and important facts.
Delete outdated or corrected information promptly.
```
### 3. Privacy Considerations
- Memory stores user information across conversations
- Ensure users understand what information is being stored
- Consider implementing data retention policies
- Provide clear documentation about memory usage
## Examples
### Basic Configuration
Enable memory with default settings:
```yaml filename="Basic memory config"
memory:
tokenLimit: 2000
agent:
provider: "openAI"
model: "gpt-4.1-mini"
```
### Advanced Configuration
Full configuration with all options:
```yaml filename="Advanced memory config"
memory:
disabled: false
validKeys: ["preferences", "context", "facts"]
tokenLimit: 3000
personalize: true
messageWindowSize: 10
agent:
provider: "anthropic"
model: "claude-3-opus-20240229"
instructions: "Remember only explicitly stated preferences and key facts."
model_parameters:
temperature: 0.3
```
For valid model parameters per provider, see the [Model Spec Preset Fields](/docs/configuration/librechat_yaml/object_structure/model_specs#preset-fields).
### Using Predefined Agents
Reference an existing agent by ID:
```yaml filename="Memory with agent ID"
memory:
agent:
id: "memory-specialist-001"
```
### Custom Endpoints with Memory
Memory fully supports custom endpoints, including those with custom headers and environment variables. When using a custom endpoint, header placeholders and environment variables are properly resolved during memory processing.
```yaml filename="librechat.yaml with custom endpoint for memory"
endpoints:
custom:
- name: 'Custom Memory Endpoint'
apiKey: 'dummy'
baseURL: 'https://api.gateway.ai/v1'
headers:
x-gateway-api-key: '${GATEWAY_API_KEY}'
x-gateway-virtual-key: '${GATEWAY_OPENAI_VIRTUAL_KEY}'
X-User-Identifier: '{{LIBRECHAT_USER_EMAIL}}'
X-Application-Identifier: 'LibreChat - Test'
api-key: '${TEST_CUSTOM_API_KEY}'
models:
default:
- 'gpt-4o-mini'
- 'gpt-4o'
fetch: false
memory:
disabled: false
tokenLimit: 3000
personalize: true
messageWindowSize: 10
agent:
provider: 'Custom Memory Endpoint'
model: 'gpt-4o-mini'
```
- All [custom endpoint headers](/docs/configuration/librechat_yaml/object_structure/custom_endpoint#headers) are supported
## Troubleshooting
### Memory Not Working
1. Verify memory is configured in `librechat.yaml`
2. Check that `disabled` is set to `false`
3. Ensure the configured agent/model is available
4. Verify users have enabled memory in their chat interface
5. For custom endpoints: ensure the `provider` name matches the custom endpoint `name` exactly
### High Token Usage
1. Reduce `tokenLimit` to control costs
2. Decrease `messageWindowSize` to analyze fewer messages
3. Use `validKeys` to restrict what gets stored
4. Review and optimize agent instructions
### Inconsistent Memory
1. Check if users are toggling memory on/off
2. Verify token limits aren't being exceeded
3. Ensure consistent agent configuration
4. Review stored memory for conflicts
### Custom Endpoint Authentication Issues
1. Verify environment variables are set correctly in your `.env` file
2. Ensure custom headers use the correct syntax (`${ENV_VAR}` for environment variables, `{{LIBRECHAT_USER_*}}` for user placeholders)
3. Check that the custom endpoint is working for regular chat completions before testing with memory
4. Review server logs for authentication errors from the custom endpoint API
## Future Improvements
The current implementation runs the memory agent on every chat request unconditionally. Planned improvements include:
- **Semantic Trigger for Writes**: Detect when a user has explicitly asked the model to remember something (e.g., "Remember that I prefer Python") and only run the memory write agent in those cases, reducing unnecessary processing on routine messages.
- **Vector Similarity Recall**: Instead of injecting all stored memory entries into every request, use vector embeddings to retrieve only the entries most relevant to the current conversation context, improving both efficiency and relevance.
## Related Features
- [Agents](/docs/features/agents) - Build custom AI assistants
- [Presets](/docs/user_guides/presets) - Save conversation settings
- [Fork Messages](/docs/features/fork) - Branch conversations while maintaining context
# Automated Moderation (/docs/features/mod_system)
## Automated Moderation System (optional)
The Automated Moderation System uses a scoring mechanism to track user violations. As users commit actions like excessive logins, registrations, or messaging, they accumulate violation scores. Upon reaching a set threshold, the user and their IP are temporarily banned. This system ensures platform security by monitoring and penalizing rapid or suspicious activities.
In production, you should have Cloudflare or some other DDoS protection in place to really protect the server from excessive requests, but these changes will largely protect you from the single or several bad actors targeting your deployed instance for proxying.
### Notes
- Uses Caching for basic security and violation logging (bans, concurrent messages, exceeding rate limits)
- In the near future, I will add **Redis** support for production instances, which can be easily injected into the current caching setup
- Exceeding any of the rate limiters (login/registration/messaging) is considered a violation, default score is 1
- Non-browser origin is a violation
- Default score for each violation is configurable
- Enabling any of the limiters and/or bans enables caching/logging
- Violation logs can be found in the data folder, which is created when logging begins: `librechat/data`
- **Only violations are logged**
- `violations.json` keeps track of the total count for each violation per user
- `logs.json` records each individual violation per user
- Ban logs are stored in MongoDB under the `logs` collection. They are transient as they only exist for the ban duration
- If you would like to remove a ban manually, you would have to remove them from the database manually and restart the server
- **Redis** support is also planned for this.
### Rate Limiter Types
#### Login and Registration Rate Limiting
Prevents brute force attacks and spam registrations by limiting how many login attempts or new account registrations can be made from a single IP address within a time window.
#### Message Rate Limiting
Controls how frequently users can send messages to prevent spam and abuse:
- **Concurrent Message Limiting**: Limits how many messages a user can send simultaneously (prevents users from opening multiple tabs to bypass limits)
- **Message Frequency Limiting**: Controls how often messages can be sent, configurable by both IP address and individual user
#### Import Conversation Rate Limiting
Prevents abuse of the conversation import feature by limiting how many conversations can be imported within a time window. This helps prevent:
- Mass data imports that could overwhelm the server
- Automated scripts attempting to flood the system with imported data
- Resource exhaustion from processing large numbers of imports
Default limits:
- IP-based: 100 imports per minute
- User-based: 50 imports per minute (disabled by default)
#### Conversation Forking Rate Limiting
Controls how often users can create forks (copies) of existing conversations. This prevents:
- Excessive database growth from mass conversation duplication
- Resource exhaustion from fork operations
- Abuse of the forking feature for spam or data harvesting
Default limits:
- IP-based: 30 forks per minute
- User-based: 7 forks per minute (disabled by default)
#### File Upload Rate Limiting
Configured through the librechat.yaml file, this controls how often users can upload files to prevent storage abuse and bandwidth exhaustion.
#### Text-to-Speech (TTS) Rate Limiting
Controls how often users can request text-to-speech conversions. This prevents:
- Excessive API usage costs
- Server resource exhaustion from audio generation
- Abuse of the TTS feature for data harvesting
Configured through the librechat.yaml file with customizable limits per IP and per user.
#### Speech-to-Text (STT) Rate Limiting
Controls how often users can submit audio for transcription. This prevents:
- Excessive API usage costs
- Server resource exhaustion from audio processing
- Abuse of the STT feature for unauthorized transcription services
Configured through the librechat.yaml file with customizable limits per IP and per user.
#### Password Reset Rate Limiting
Controls how often users can request password reset emails. This prevents:
- Email bombing attacks
- Abuse of the password reset system
- Excessive email service usage
#### Email Verification Rate Limiting
Controls how often users can request email verification messages. This prevents:
- Spam attacks through the verification system
- Email service abuse
- Resource exhaustion from verification requests
#### Tool Call Rate Limiting
Controls how often users can make tool/plugin calls. This prevents:
- Excessive API usage from integrated tools
- Abuse of external service integrations
- Resource exhaustion from tool processing
#### Conversation Access Rate Limiting
Controls how often users can access or attempt to access conversations. This prevents:
- Unauthorized access attempts
- Data scraping attacks
- Excessive database queries
### Rate Limiters
The project's current rate limiters are as follows (see below under setup for default values):
- Login and registration rate limiting
- `Optional:` Concurrent Message limiting (only X messages at a time per user)
- `Optional:` Message limiting (how often a user can send a message, configurable by IP and User)
- `Optional:` Import conversation limiting (how often a user can import conversations, configurable by IP and User)
- `Optional:` Conversation forking limiting (how often a user can fork conversations, configurable by IP and User)
- `Optional:` Text-to-Speech (TTS) limiting (configurable through [`librechat.yaml` config file](/docs/configuration/librechat_yaml/object_structure/config#ratelimits))
- `Optional:` Speech-to-Text (STT) limiting (configurable through [`librechat.yaml` config file](/docs/configuration/librechat_yaml/object_structure/config#ratelimits))
- `Optional:` File Upload limiting (configurable through [`librechat.yaml` config file](/docs/configuration/librechat_yaml/object_structure/config#ratelimits))
**For further details, refer to the configuration guide provided here: [Automated Moderation](/docs/configuration/mod_system)**
# OCR for Documents (/docs/features/ocr)
OCR (Optical Character Recognition) in LibreChat is an optional enhancement for text extraction from files.
### Upload as Text
The "Upload as Text" feature (from the chat) works the same way:
- Files matching `fileConfig.ocr.supportedMimeTypes` use OCR if available
- Falls back to text parsing if OCR is not configured
- Especially useful for images with text, scanned documents, and complex PDFs
- Processing priority: **OCR > STT > text parsing**
- See the [Upload as Text](/docs/features/upload_as_text) documentation for details.
### File Context (for agents)
When you upload files through the Agent Builder's File Context section:
1. Text is extracted using text parsing by default (OCR/STT if configured and file matches)
2. Extracted text is stored as part of the agent's system instructions
3. Agent can reference this context in all conversations
4. **OCR service is optional** - the feature works without it using text parsing
Files uploaded as "File Context" are processed to extract text, which is then added to the Agent's system instructions. This is ideal for documents, code files, PDFs, or images with text where you need the full text content to be included in the agent's instructions.
**Note:** The extracted text is included in the agent's system instructions.
## Optional OCR Configuration
Both Agent File Context and Upload as Text work out-of-the-box using text parsing. To enhance extraction quality for images and scanned documents, you can optionally configure an OCR service:
```yaml
# librechat.yaml
endpoints:
agents:
capabilities:
- "context" # Enables both agent file context and upload as text
- "ocr" # Optionally enhances both with OCR
ocr:
strategy: "mistral_ocr"
apiKey: "${OCR_API_KEY}"
baseURL: "https://api.mistral.ai/v1"
mistralModel: "mistral-ocr-latest"
```
**Note:** The `context` capability is enabled by default. You only need to configure OCR (the `ocr` capability) if you want enhanced extraction quality for images and scanned documents.
## Overview of OCR Capabilities
OCR functionality in LibreChat allows:
- Extract text from images and documents
- Maintain document structure and formatting
- Process complex layouts including multi-column text
- Handle tables, equations, and other specialized content
- Work with multilingual content
## OCR Strategies
LibreChat supports multiple OCR strategies to meet different deployment needs and requirements. Choose the strategy that best fits your infrastructure and compliance requirements.
### 1. Mistral OCR (Default)
The default strategy uses Mistral's cloud API service directly. This is the simplest setup and requires only an API key from Mistral.
**Environment Variables:**
```.env
# `.env`
OCR_API_KEY=your-mistral-api-key
# OCR_BASEURL=https://api.mistral.ai/v1 # this is the default value
```
**Configuration:**
```yaml
# `librechat.yaml`
ocr:
mistralModel: "mistral-ocr-latest" # Optional: Specify Mistral model, defaults to "mistral-ocr-latest"
apiKey: "your-mistral-api-key" # Optional: Defaults to OCR_API_KEY env variable
baseURL: "https://api.mistral.ai/v1" # Optional: Defaults to OCR_BASEURL env variable, or Mistral's API if no variable set
strategy: "mistral_ocr" # Optional: Defaults to "mistral_ocr"
```
**Key Features:**
- **Document Structure Preservation**: Maintains formatting like headers, paragraphs, lists, and tables
- **Multilingual Support**: Processes text in multiple languages and scripts
- **Complex Layout Handling**: Handles multi-column text and mixed content
- **Mathematical Expression Recognition**: Accurately processes equations and formulas
- **High-Speed Processing**: Processes up to 2000 pages per minute
**Considerations:**
- **Cost**: Using Mistral OCR may incur costs as it's a paid API service (though free trials may be available)
- **Data Privacy**: Data processed through Mistral OCR is subject to Mistral's cloud environment and their terms of service
- **Document Limitations**:
- Maximum file size: 50 MB
- Maximum document length: 1,000 pages
### 2. Azure Mistral OCR
For organizations using Azure AI Foundry, you can deploy Mistral OCR models to your Azure infrastructure. Currently, the **Mistral OCR 2503** model is available for Azure deployment.
**Configuration:**
```yaml
# `librechat.yaml`
ocr:
mistralModel: "deployed-mistral-ocr-2503" # Should match your Azure deployment name
apiKey: "${AZURE_MISTRAL_OCR_API_KEY}" # Reference to your Azure API key in .env
baseURL: "https://your-deployed-endpoint.models.ai.azure.com/v1" # Your Azure endpoint
strategy: "azure_mistral_ocr" # Use Azure strategy
```
**Azure Model Information:**
You can explore the latest Mistral OCR model available on Azure AI Foundry here (requires Azure subscription):
https://ai.azure.com/explore/models/mistral-ocr-2503
### 3. Google Vertex AI Mistral OCR
For organizations using Google Cloud Platform, you can deploy Mistral OCR models to your Google Cloud Vertex AI infrastructure.
**Environment Variables:**
```bash
# `.env`
# Option 1: File path
GOOGLE_SERVICE_KEY_FILE=/path/to/your/service-account-key.json
# Option 2: URL to fetch the key
GOOGLE_SERVICE_KEY_FILE=https://your-secure-server.com/service-account-key.json
# Option 3: Base64 encoded JSON
GOOGLE_SERVICE_KEY_FILE=eyJ0eXBlIjogInNlcnZpY2VfYWNjb3VudCIsICJwcm9qZWN0X2lkIjogInlvdXItcHJvamVjdC1pZCIsIC4uLn0=
# Option 4: Raw JSON string
GOOGLE_SERVICE_KEY_FILE='{
"type": "service_account",
"project_id": "your-project-id",
"private_key_id": "...",
"private_key": "-----BEGIN PRIVATE KEY-----\n...\n-----END PRIVATE KEY-----\n",
"client_email": "...",
"client_id": "...",
"auth_uri": "https://accounts.google.com/o/oauth2/auth",
"token_uri": "https://oauth2.googleapis.com/token",
"auth_provider_x509_cert_url": "https://www.googleapis.com/oauth2/v1/certs",
"client_x509_cert_url": "..."
}'
```
**Configuration:**
```yaml
# `librechat.yaml`
ocr:
mistralModel: "mistral-ocr-2505" # Model name as deployed in Vertex AI
strategy: "vertexai_mistral_ocr" # Use Google Vertex AI strategy
```
**Setup Requirements:**
1. Deploy a Mistral OCR model to Google Vertex AI (e.g., mistral-ocr-2505)
2. Create a service account with appropriate permissions to access the Vertex AI endpoint
3. Download the service account JSON key file
4. Set the `GOOGLE_SERVICE_KEY_FILE` environment variable using one of the supported methods
### 4. Custom OCR (Planned)
Support for custom OCR providers and user-defined strategies is planned for future releases.
### 5. Upload Files to Provider (Direct)
For supported LLM Providers (**OpenAI, AzureOpenAI, Anthropic, Google, and AWS Bedrock**) and their respective models, files can now be sent directly to the provider APIs as message attachments,
allowing the provider to use their own native OCR implementations to parse files using the `Upload to Provider` option in the file attachment dropdown menu.
Currently all five of the aforementioned providers offer support for images and PDFs, with Google also including support for audio and video files when used in conjunction with compatible multimodal models. AWS Bedrock additionally supports CSV, DOC, DOCX, XLS, XLSX, HTML, TXT, and Markdown documents.
For **Azure OpenAI** endpoints, the Upload to Provider option for PDF files is only available when using the Responses API. Azure OpenAI's Chat Completions API supports images but does not support PDF file attachments.
If you do not see 'Upload to Provider' as an option for PDFs in your chat's attachment dropdown menu with Azure OpenAI, ensure that the Responses API parameter is enabled in the Parameters panel.
Note: Standard OpenAI endpoints support PDF uploads in both Chat Completions and Responses APIs.
**AWS Bedrock** supports document uploads via the Converse API for the following formats:
**PDF, CSV, DOC, DOCX, XLS, XLSX, HTML, TXT, and Markdown (.md)**
Constraints:
- Maximum file size per document: **4.5 MB**
- File names are sanitized to conform to Bedrock's naming requirements (alphanumeric, spaces, hyphens, parentheses, square brackets; max 200 characters)
For more details on Bedrock configuration, see the [AWS Bedrock setup guide](/docs/configuration/pre_configured_ai/bedrock).
## Detailed Configuration
For additional, detailed configuration options, see the [OCR Config Object Structure](/docs/configuration/librechat_yaml/object_structure/ocr).
## OCR Processing Configuration
Control which file types are processed with OCR using `fileConfig`:
```yaml
fileConfig:
ocr:
supportedMimeTypes:
- "^image/(jpeg|gif|png|webp|heic|heif)$"
- "^application/pdf$"
- "^application/vnd\\.openxmlformats-officedocument\\.(wordprocessingml\\.document|presentationml\\.presentation|spreadsheetml\\.sheet)$"
- "^application/vnd\\.ms-(word|powerpoint|excel)$"
- "^application/epub\\+zip$"
```
Files matching these patterns will use OCR when:
- Uploaded to agent file context (always, if OCR is configured)
- Uploaded as text in chat (if OCR is configured; otherwise falls back to text parsing)
For more details on file processing configuration, see [File Config Object Structure](/docs/configuration/librechat_yaml/object_structure/file_config).
## Use Cases for Agent File Context
Agent File Context is ideal for:
- **Persistent Agent Knowledge**: Add documentation, policies, or reference materials to an agent's system instructions
- **Specialized Agents**: Create agents with domain-specific knowledge from documents
- **Document-Based Assistants**: Build agents that always reference specific manuals or guides
- **Code Files**: Include code examples or libraries in agent instructions
- **Structured Data**: Add CSV, JSON, or other structured data for the agent to reference
When OCR is configured, File Context also handles:
- **Scanned Document Processing**: Extract and store text from images or scanned PDFs
- **Image Text Extraction**: Extract text from screenshots or photos of documents
For temporary document questions in chat, see [Upload as Text](/docs/features/upload_as_text).
## Limitations
- Text extraction accuracy may vary depending on file type, image quality, document complexity, and text clarity
- Some specialized formatting or unusual layouts might not be perfectly preserved
- Very large documents may be truncated due to token limitations of the underlying AI models
- For best results with images and scanned documents, configure an OCR service
## Future Enhancements
LibreChat plans to expand OCR capabilities in future releases:
- Support for custom OCR providers
- A `user_provided` strategy option that will allow users to choose their preferred OCR service
- Integration with open-source OCR solutions
- Enhanced document processing options
- More granular control over OCR settings
- Mistral plans to make their OCR API available through their cloud partners, such as GCP and AWS, and enterprise self-hosting for organizations with stringent data privacy requirements ([source](https://mistral.ai/fr/news/mistral-ocr))
- LibreChat currently does not include the parsed image content from the OCR process in its responses, even though services like [Mistral's OCR API may provide](https://docs.mistral.ai/api/#tag/ocr) these in the result. This feature may be supported in future updates.
---
For more information on configuring OCR, see the [OCR Config Object Structure](/docs/configuration/librechat_yaml/object_structure/ocr).
# Password Reset (/docs/features/password_reset)
## Overview
This feature enables email-based password reset functionality for your LibreChat server. You can configure it to work with various email services, including Mailgun API, Gmail, and custom mail servers.
## Key Features
- Supports multiple email services:
- **Mailgun API** - Recommended for servers that block SMTP ports
- **Gmail** and other predefined SMTP services
- **Custom mail servers** with advanced SMTP configuration
- Allows for basic and advanced configuration options
- Enables secure email-based password reset functionality for your LibreChat server
## Setup Options
- **Mailgun Configuration**: Use Mailgun's API for reliable email delivery, especially useful when SMTP ports are blocked
- **Basic SMTP Configuration**: Use predefined services like Gmail with minimal configuration
- **Advanced SMTP Configuration**: Configure generic SMTP services or customize settings for any mail provider
**For detailed setup instructions, refer to the configuration guide: [Email Setup](/docs/configuration/authentication/email)**
# RAG API (Chat with Files) (/docs/features/rag_api)
The **RAG (Retrieval-Augmented Generation) API** is a powerful tool that integrates with LibreChat to provide context-aware responses based on user-uploaded files.
It leverages LangChain, PostgresQL + PGVector, and Python FastAPI to index and retrieve relevant documents, enhancing the conversational experience.
**For further details, refer to the configuration guide provided here: [RAG API Configuration](/docs/configuration/rag_api)**
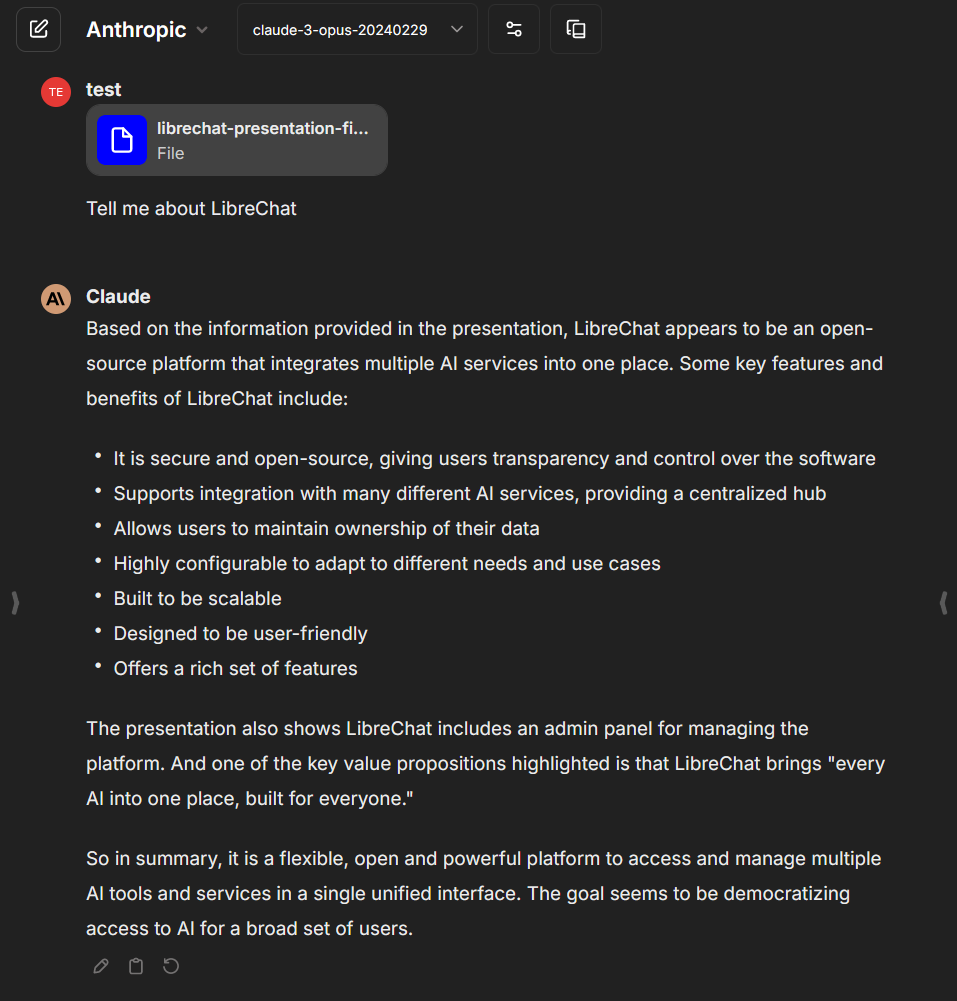
---
**Currently, this feature is available through [Agents](/docs/features/agents), as well as through Custom Endpoints, OpenAI, Azure OpenAI, Anthropic, and Google.**
OpenAI Assistants have their own implementation of RAG through the "Retrieval" capability. Learn more about it [here.](https://platform.openai.com/docs/assistants/tools/knowledge-retrieval)
It will still be useful to implement usage of the RAG API with the Assistants API since OpenAI charges for both file storage, and use of "Retrieval," and will be introduced in a future update.
**Still confused about RAG?** [Read the section I wrote below](#what-is-rag) explaining the general concept in more detail with a link to a helpful video.
## What is RAG?
RAG, or Retrieval-Augmented Generation, is an AI framework designed to improve the quality and accuracy of responses generated by large language models (LLMs). It achieves this by grounding the LLM on external sources of knowledge, supplementing the model's internal representation of information.
## Features
- **Document Indexing**: The RAG API indexes user-uploaded files, creating embeddings for efficient retrieval.
- **Semantic Search**: It performs semantic search over the indexed documents to find the most relevant information based on the user's input.
- **Context-Aware Responses**: By augmenting the user's prompt with retrieved information, the API enables LibreChat to generate more accurate and contextually relevant responses.
- **Asynchronous Processing**: The API supports asynchronous operations for improved performance and scalability.
- **Flexible Configuration**: It allows customization of various parameters such as chunk size, overlap, and embedding models.
### Key Benefits of RAG
1. **Access to up-to-date and reliable facts**: RAG ensures that the LLM has access to the most current and reliable information by retrieving relevant facts from an external knowledge base.
2. **Transparency and trust**: Users can access the model's sources, allowing them to verify the accuracy of the generated responses and build trust in the system.
3. **Reduced data leakage and hallucinations**: By grounding the LLM on a set of external, verifiable facts, RAG reduces the chances of the model leaking sensitive data or generating incorrect or misleading information.
4. **Lower computational and financial costs**: RAG reduces the need for continuous training and updating of the model's parameters, potentially lowering the computational and financial costs of running LLM-powered chatbots in an enterprise setting.
### How RAG Works
RAG consists of two main phases: retrieval and content generation.
1. **Retrieval Phase**: Algorithms search for and retrieve snippets of information relevant to the user's prompt or question from an external knowledge base. In an open-domain, consumer setting, these facts can come from indexed documents on the internet. In a closed-domain, enterprise setting, a narrower set of sources are typically used for added security and reliability.
2. **Generative Phase**: The retrieved external knowledge is appended to the user's prompt and passed to the LLM. The LLM then draws from the augmented prompt and its internal representation of its training data to synthesize a tailored, engaging answer for the user. The answer can be passed to a chatbot with links to its sources.
### Challenges and Ongoing Research
While RAG is currently one of the best-known tools for grounding LLMs on the latest, verifiable information and lowering the costs of constant retraining and updating, it's not perfect. Some challenges include:
1. **Recognizing unanswerable questions**: LLMs need to be explicitly trained to recognize questions they can't answer based on the available information. This may require fine-tuning on thousands of examples of answerable and unanswerable questions.
2. **Improving retrieval and generation**: Ongoing research focuses on innovating at both ends of the RAG process: improving the retrieval of the most relevant information possible to feed the LLM, and optimizing the structure of that information to obtain the richest responses from the LLM.
In summary, RAG is a powerful framework that enhances the capabilities of LLMs by grounding them on external, verifiable knowledge. It helps to ensure more accurate, up-to-date, and trustworthy responses while reducing the costs associated with continuous model retraining. As research in this area progresses, we can expect further improvements in the quality and efficiency of LLM-powered conversational AI systems.
For a more detailed explanation of RAG, you can watch this informative video by IBM on Youtube:
## Conclusion
The RAG API is a powerful addition to LibreChat, enabling context-aware responses based on user-uploaded files. By leveraging Langchain and FastAPI, it provides efficient document indexing, retrieval, and generation capabilities. With its flexible configuration options and seamless integration, the RAG API enhances the conversational experience in LibreChat.
For more detailed information on the RAG API, including API endpoints, request/response formats, and advanced configuration, please refer to the official RAG API documentation.
# Resumable Streams (/docs/features/resumable_streams)
LibreChat features a resilient streaming architecture that ensures you never lose AI-generated content. Whether your connection drops, you switch tabs, or you pick up on another device, your responses are always preserved and synchronized.
## Why It Matters
Traditional chat applications lose all streaming content when your connection drops. With resumable streams, LibreChat:
- **Preserves every response** — Network hiccups, browser refreshes, or server restarts won't cause data loss
- **Keeps multiple tabs in sync** — Open the same conversation in two browser tabs and watch them update together in real-time
- **Enables seamless device switching** — Start a conversation on your desktop and continue on your phone
- **Lets you multitask freely** — Start a generation, browse other tabs, and come back to a complete response
## How It Works
When you send a message to an AI model, LibreChat creates a generation job that tracks all streamed content. The magic happens when something interrupts your connection:
1. **Automatic detection** — The client detects the disconnection instantly
2. **State reconstruction** — Upon reconnecting, the server rebuilds all previously streamed content
3. **Seamless sync** — Missing content is delivered via a sync event
4. **Transparent continuation** — Streaming resumes from the current position
This all happens automatically—no user action required.
### Multi-Tab & Multi-Device Experience
One of the most powerful aspects of resumable streams is **real-time synchronization**:
- **Same chat, multiple windows** — Open a conversation in two browser tabs and both receive updates simultaneously
- **Cross-device continuity** — Start a long generation on your laptop, then check the result on your phone
- **Team collaboration** — In shared conversations, all viewers see content appear in real-time
## Deployment Modes
LibreChat supports two deployment configurations:
### Single-Instance Mode (Default)
Uses in-memory storage with Node.js `EventEmitter` for pub/sub. Perfect for:
- Local development
- Single-server deployments
- Docker Compose setups
**No configuration required** — Works out of the box.
### Redis Mode (Production)
Uses Redis Streams and Pub/Sub for cross-instance communication. Essential for:
- Horizontally scaled deployments
- Load-balanced production environments
- High-availability setups
- Kubernetes clusters
With Redis mode, a user can start a generation on one server instance and seamlessly resume on another—perfect for rolling deployments and auto-scaling.
**Note:** If you only run a single LibreChat instance, Redis for resumable streams is typically unnecessary—the in-memory mode handles everything. Redis becomes valuable when you have multiple LibreChat instances behind a load balancer. That said, Redis is still useful for other features like caching and session storage even in single-instance deployments.
## Configuration
### Enabling Redis Streams
When Redis is enabled (`USE_REDIS=true`), resumable streams automatically use Redis. You can also explicitly enable it:
```bash filename=".env"
USE_REDIS=true
REDIS_URI=redis://localhost:6379
# Resumable streams will use Redis automatically when USE_REDIS=true
# To explicitly control it:
USE_REDIS_STREAMS=true
```
### Redis Cluster Support
For Redis Cluster deployments:
```bash filename=".env"
USE_REDIS_STREAMS=true
USE_REDIS_CLUSTER=true
REDIS_URI=redis://node1:7001,redis://node2:7002,redis://node3:7003
```
LibreChat automatically uses hash-tagged keys to ensure multi-key operations stay within the same cluster slot.
## Use Cases
### Unstable Networks
On spotty WiFi or cellular connections, responses automatically resume when connectivity returns. No need to re-send your prompt.
### Mobile Users
Switch from WiFi to cellular (or vice versa) without losing your response. The stream picks up exactly where it left off.
### Long-Running Generations
For complex prompts that generate lengthy responses, feel free to check other tabs or apps. Your response will be waiting when you return.
### Multi-Device Workflows
Start a conversation on your work computer, commute home, and check the result on your phone—the full response is there.
### Production Deployments
Scale horizontally across multiple server instances while maintaining stream continuity. Rolling deployments won't interrupt active generations.
## Technical Details
### Content Reconstruction
The system aggregates all streamed delta events to rebuild:
- Message content (text, tool calls, citations)
- Agent run steps and intermediate reasoning
- Metadata and state information
### Performance Optimizations
**Memory-first approach**: When reconnecting to the same server instance, LibreChat uses local cache for zero-latency content recovery, avoiding unnecessary Redis round trips.
**Automatic cleanup**: Stale job entries are removed during queries to prevent memory leaks. Completed streams expire automatically.
**Efficient storage**: In-memory mode uses `WeakRef` for graph storage, enabling automatic garbage collection when conversations end.
### Data Flow
| Component | Storage Mechanism |
|-----------|-------------------|
| Chunks | Redis Streams (`XADD`/`XRANGE`) |
| Job metadata | Redis Hash structures |
| Real-time events | Redis Pub/Sub channels |
| Expiration | Automatic TTL after stream completion |
## Testing Resumable Streams
You can verify the feature is working:
1. Start a streaming conversation with any AI model
2. **Tab test**: Open the same chat in a new browser tab—both should sync
3. **Disconnect test**: Turn off your network briefly, then reconnect
4. **Navigation test**: Navigate away mid-stream, then return
In all cases, you should see the complete response with no data loss.
## Troubleshooting
### Streams not resuming?
**Check Redis connectivity:**
```bash
docker exec -it librechat-redis redis-cli ping
# Should return: PONG
```
**Verify environment variables:**
```bash
# Ensure USE_REDIS_STREAMS is set
echo $USE_REDIS_STREAMS
```
### Content appears duplicated?
This typically indicates a client version mismatch. Ensure you're running the latest version of LibreChat.
### High memory usage in single-instance mode?
Completed streams are automatically garbage collected. If you're seeing high memory usage, check for:
- Very long-running streams that haven't completed
- Streams that errored without proper cleanup
## Related Documentation
- [Redis Configuration](/docs/configuration/redis) — Setting up Redis for caching and horizontal scaling
- [Agents](/docs/features/agents) — AI agents with tool use capabilities
- [Docker Deployment](/docs/local/docker) — Container-based deployment guide
---
For implementation details, see [PR #10926](https://github.com/danny-avila/LibreChat/pull/10926).
# Message Search (/docs/features/search)
LibreChat has integrated **Meilisearch** to enhance the user experience by providing a fast and efficient way to search through past conversations. Meilisearch is a powerful, open-source search engine that is known for its speed and ease of use, making it an excellent choice for applications like LibreChat that require quick access to a large volume of data.
The integration allows users to:
- Perform **full-text searches** on their conversation history.
- Utilize **typo-tolerance** for more forgiving search queries.
- Experience **instant results** as they type, thanks to Meilisearch's as-you-type search capabilities.
This feature significantly improves the functionality of LibreChat, making it easier for users to find specific messages or topics within their chat history. It's a testament to the platform's commitment to providing a seamless and user-friendly experience. For those interested in the technical details or implementation, further information can be found in the [Meilisearch Configuration Guide](/docs/configuration/meilisearch).
# Shareable Links (/docs/features/shareable_links)
import Image from 'next/image'
## Overview
Shareable Links in LibreChat allow you to share your conversations with others through automatically generated links and QR codes. Whether you're collaborating with teammates, showcasing AI interactions, or sharing generated artifacts, this feature makes it easy to allow others to view your conversations with the click of a button.
## Key Features
- **Easy Sharing**: Generate shareable links with just a few clicks
- **QR Code Generation**: Quickly share conversations via QR codes for mobile access
- **Conversation Branching**: Recipients can see branched conversations in your shared links
- **Artifacts Support**: Shared conversations now include generated artifacts and interactive components
- **Customizable Appearance**: Recipients can adjust language and theme preferences
- **Link Management**: Centralized dashboard to manage all your shared links
## How to Share a Conversation
There are two ways to make a conversation shareable:
### Option 1: From the Conversation Menu
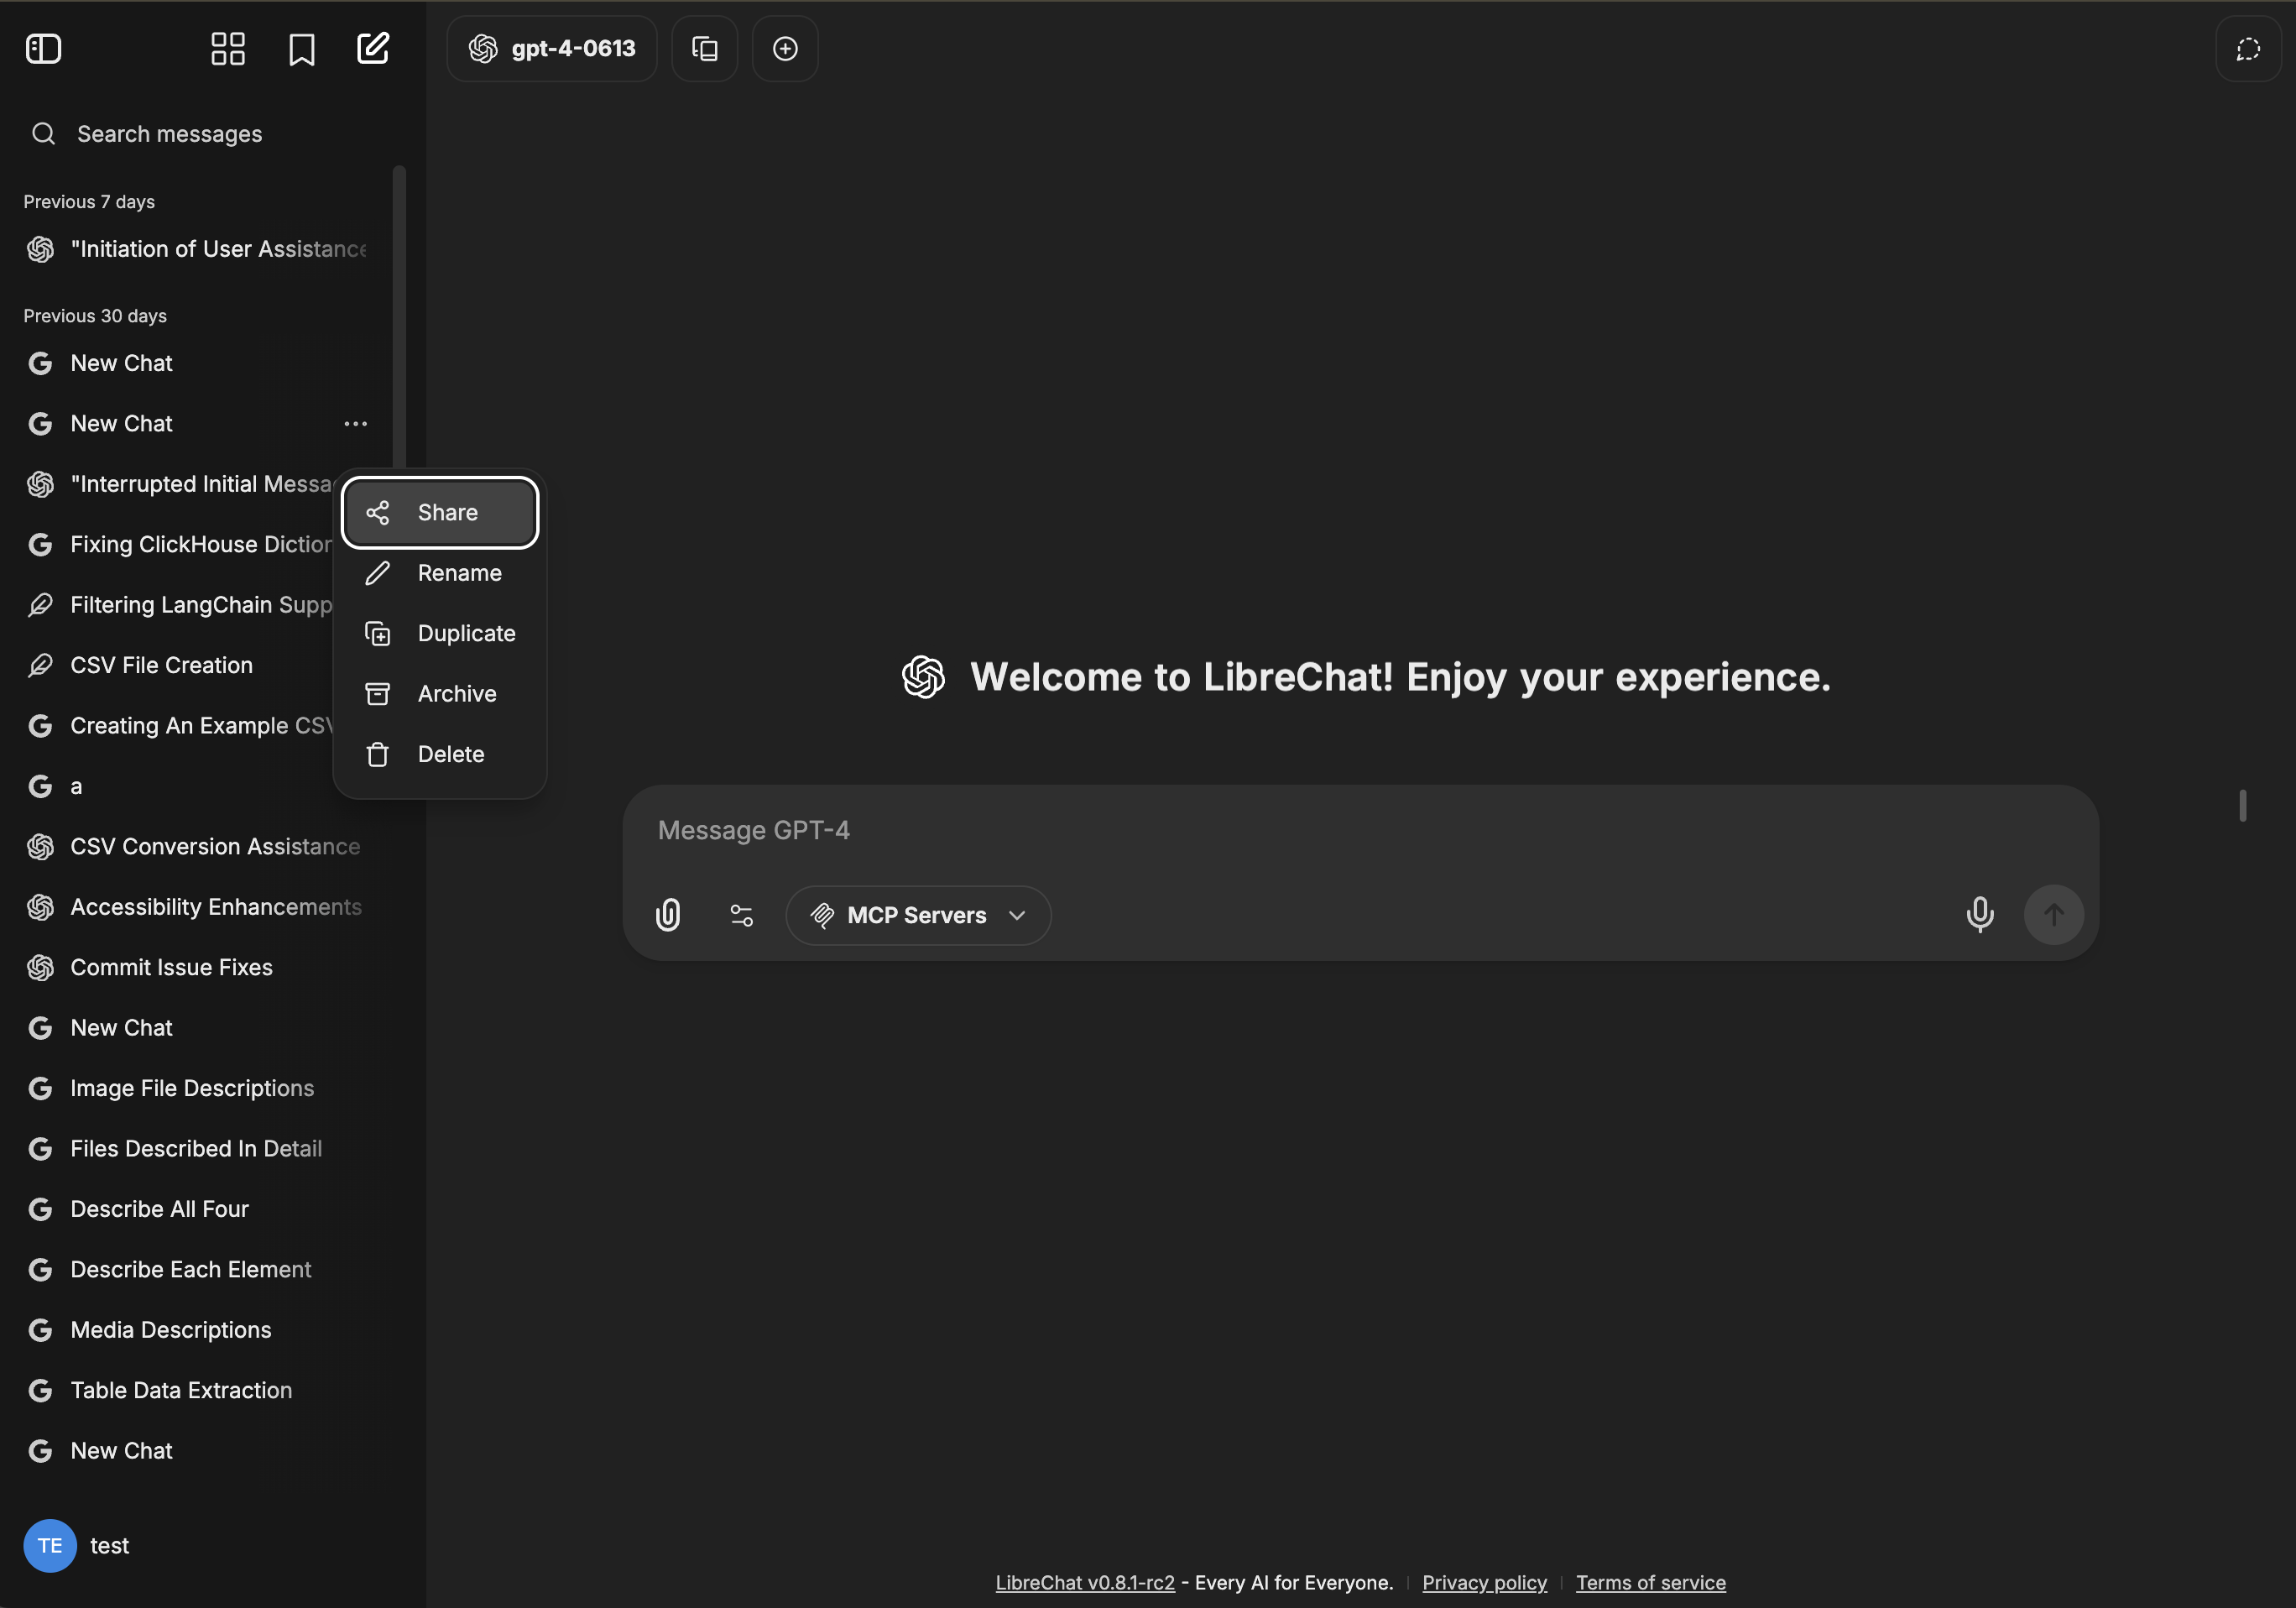
*Access the share option from the conversation menu*
### Option 2: From the Share Button
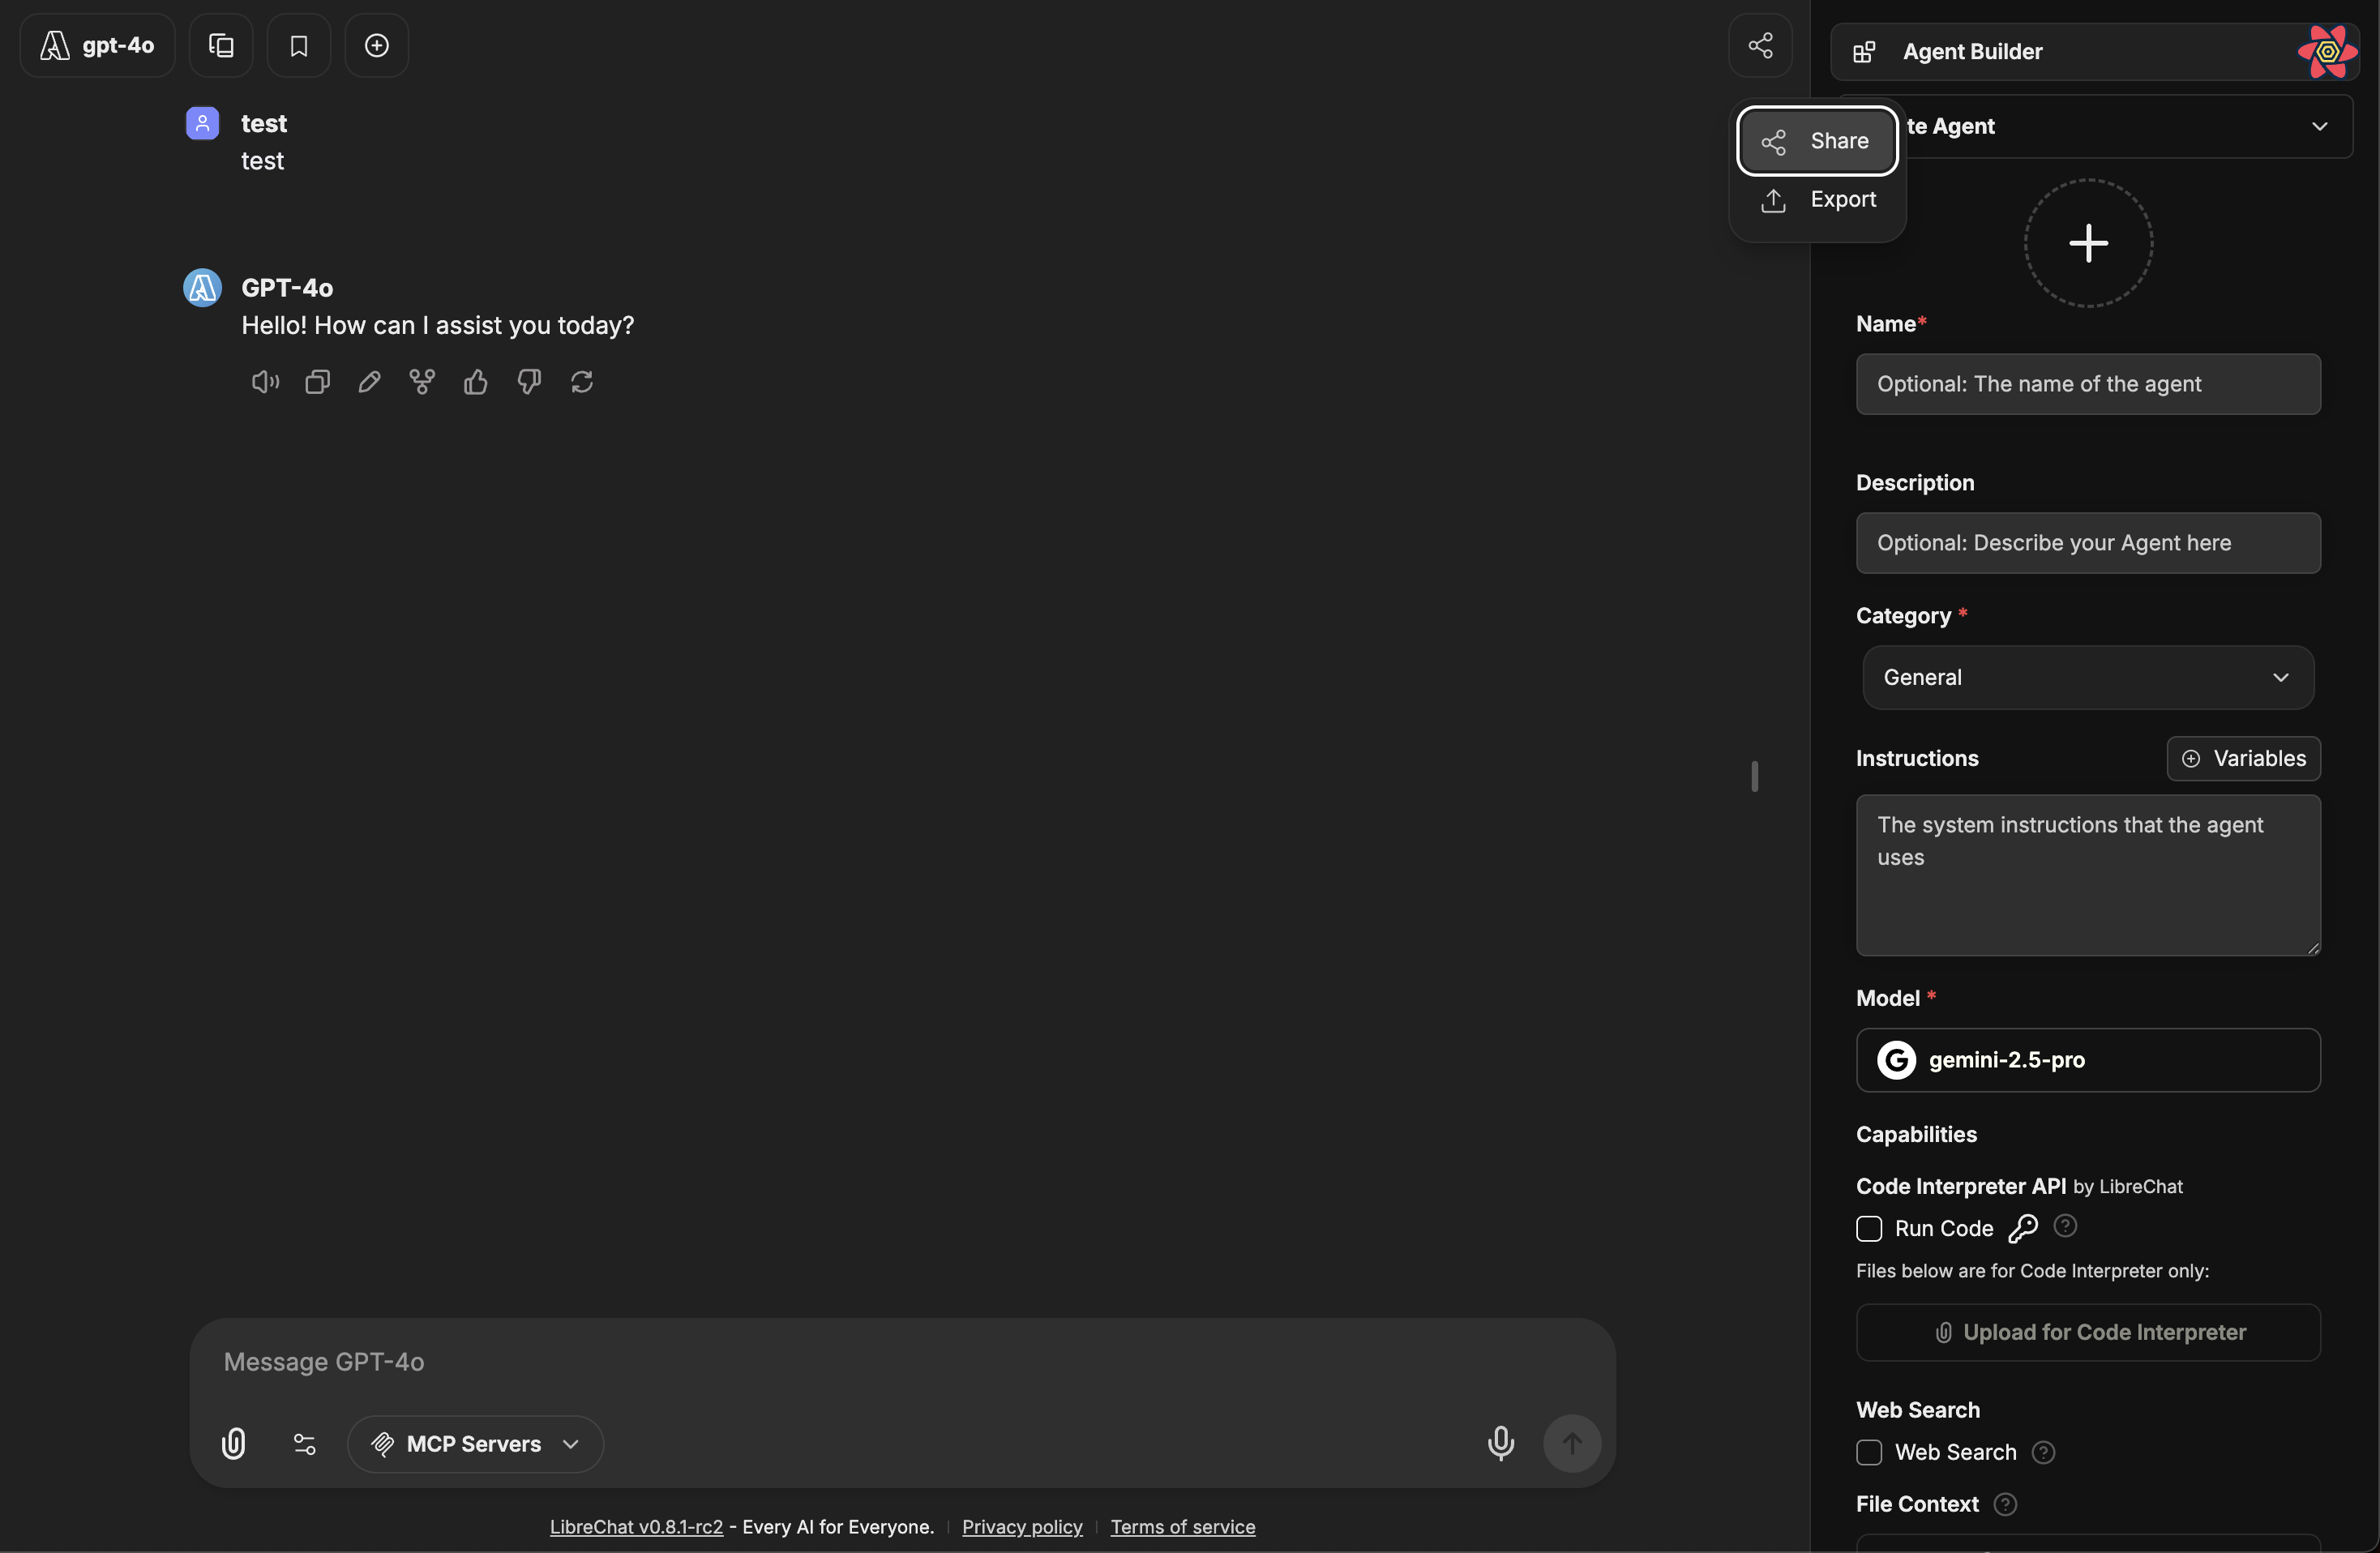
*Use the dedicated share button in your active conversation*
## Share Link Options
When you create a shareable link, you'll see a modal with several options to customize how your conversation appears to recipients.
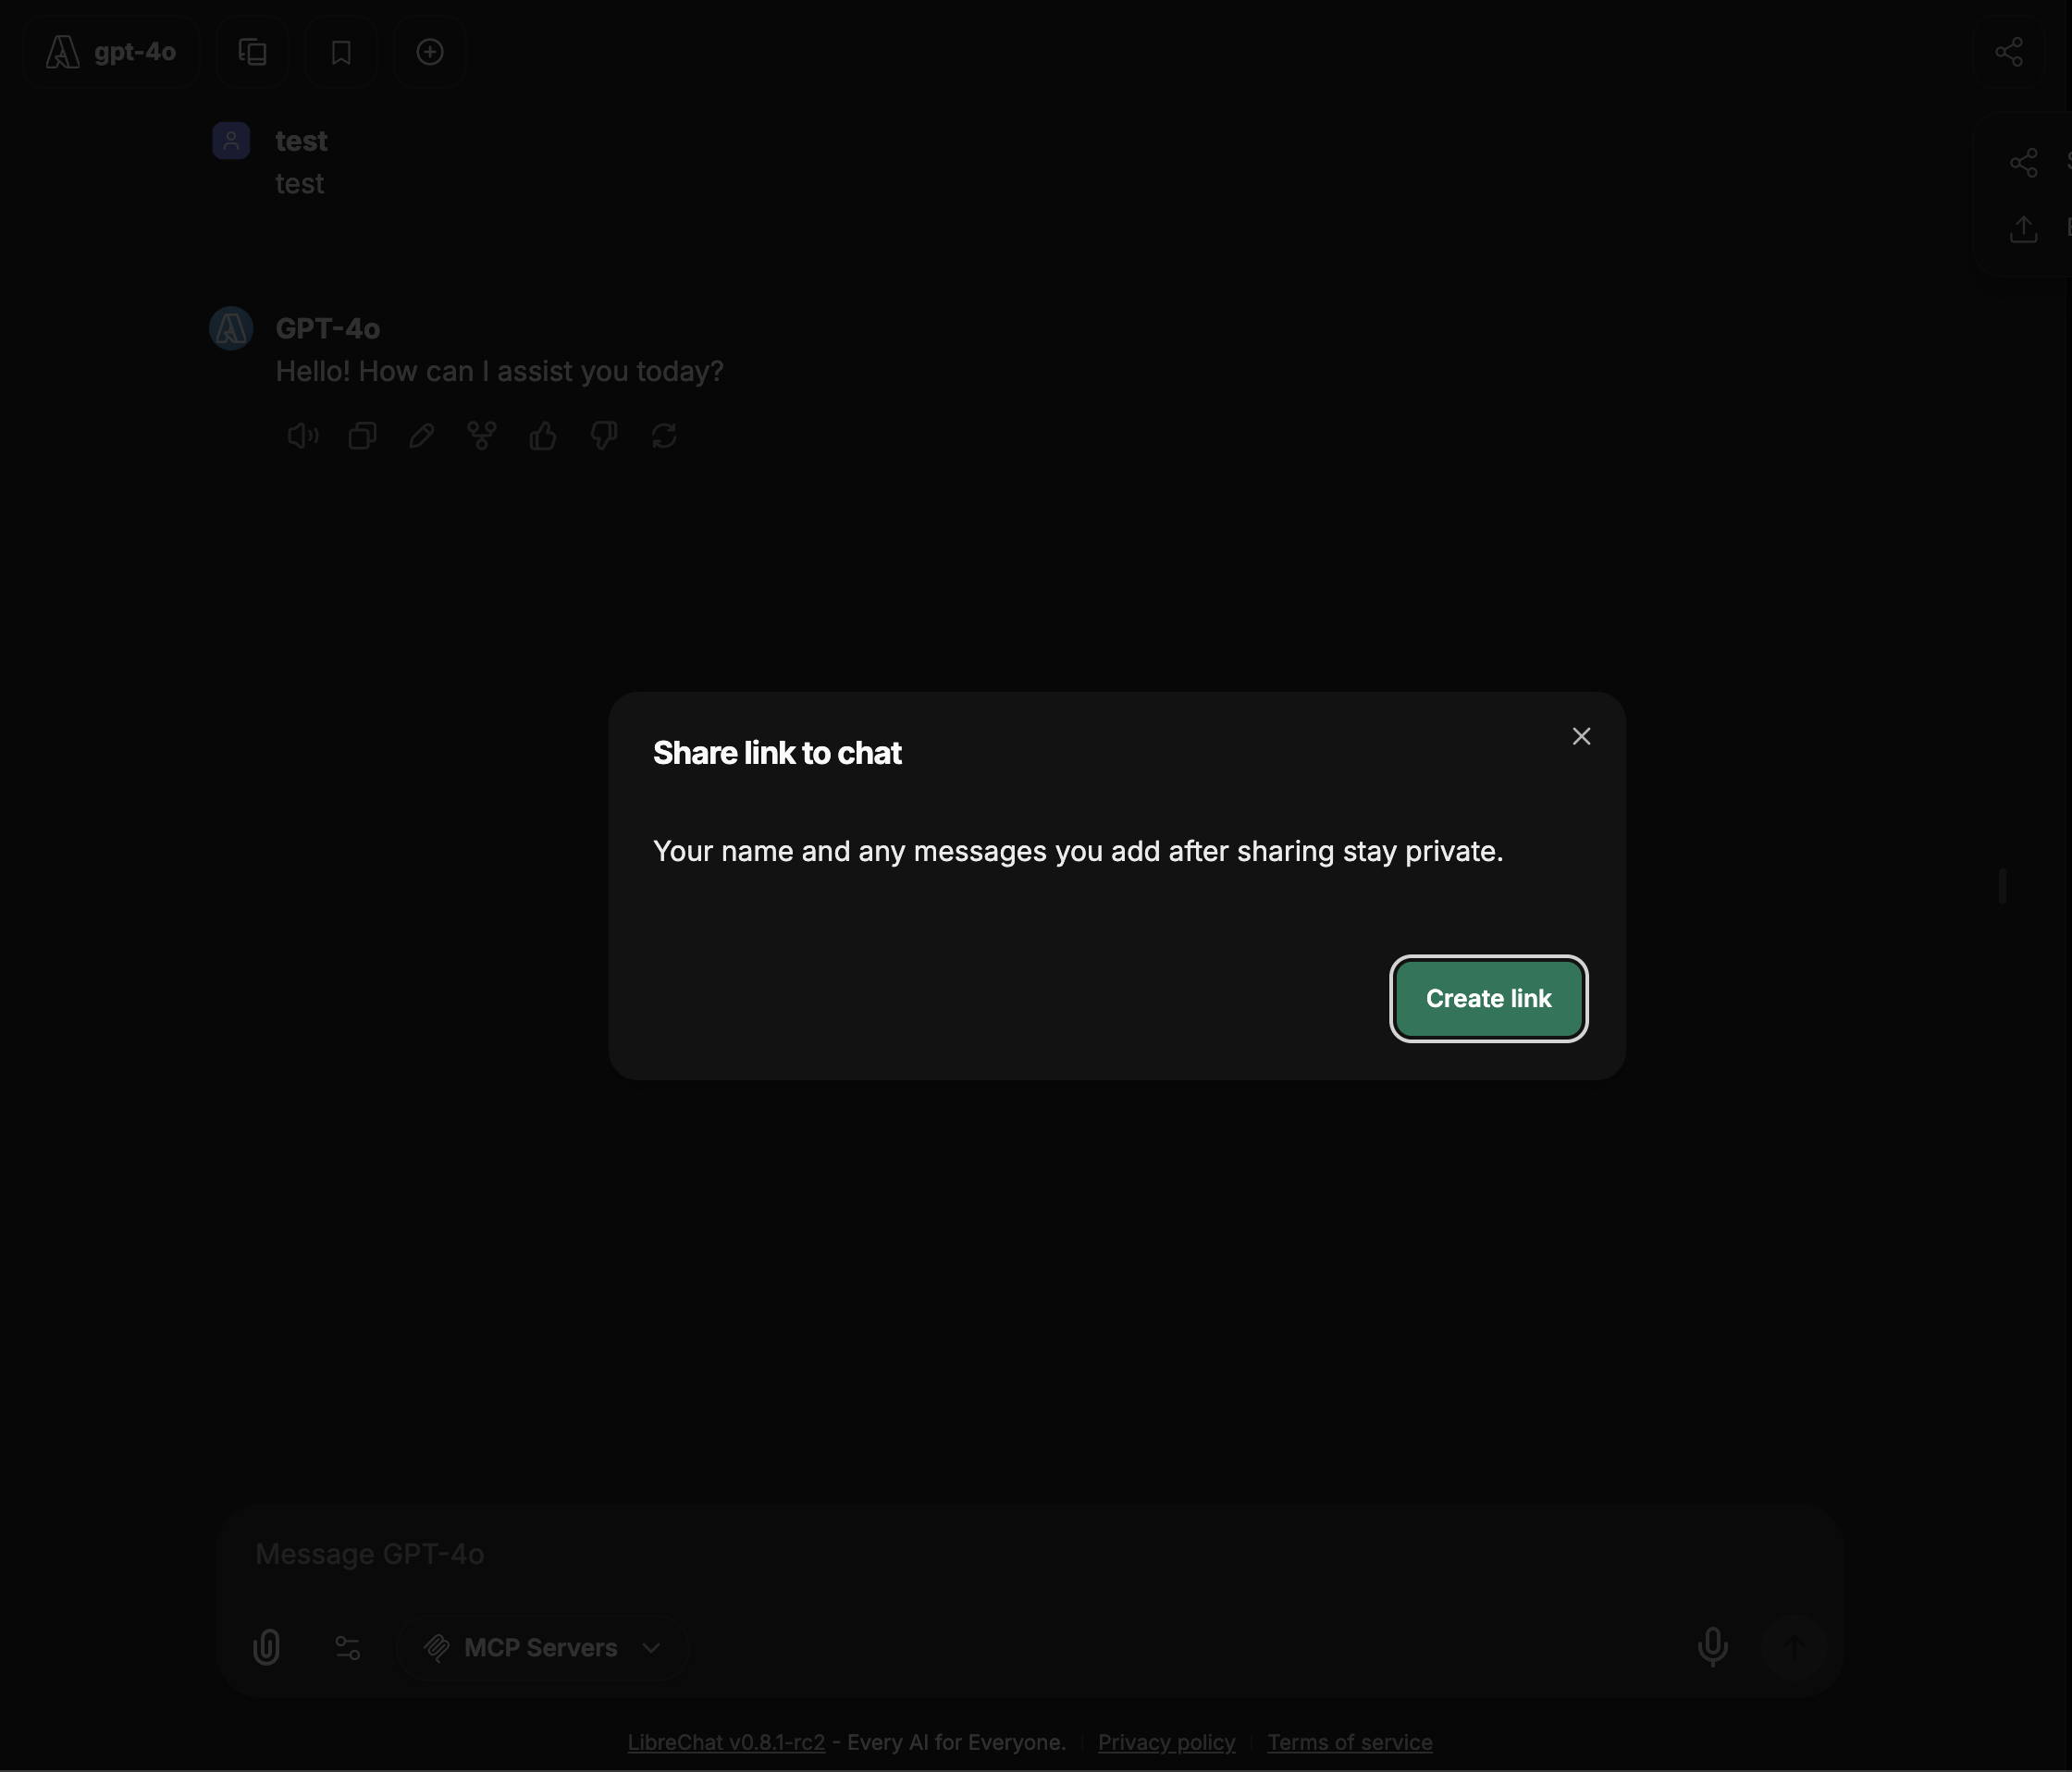
*Initial share link creation modal*
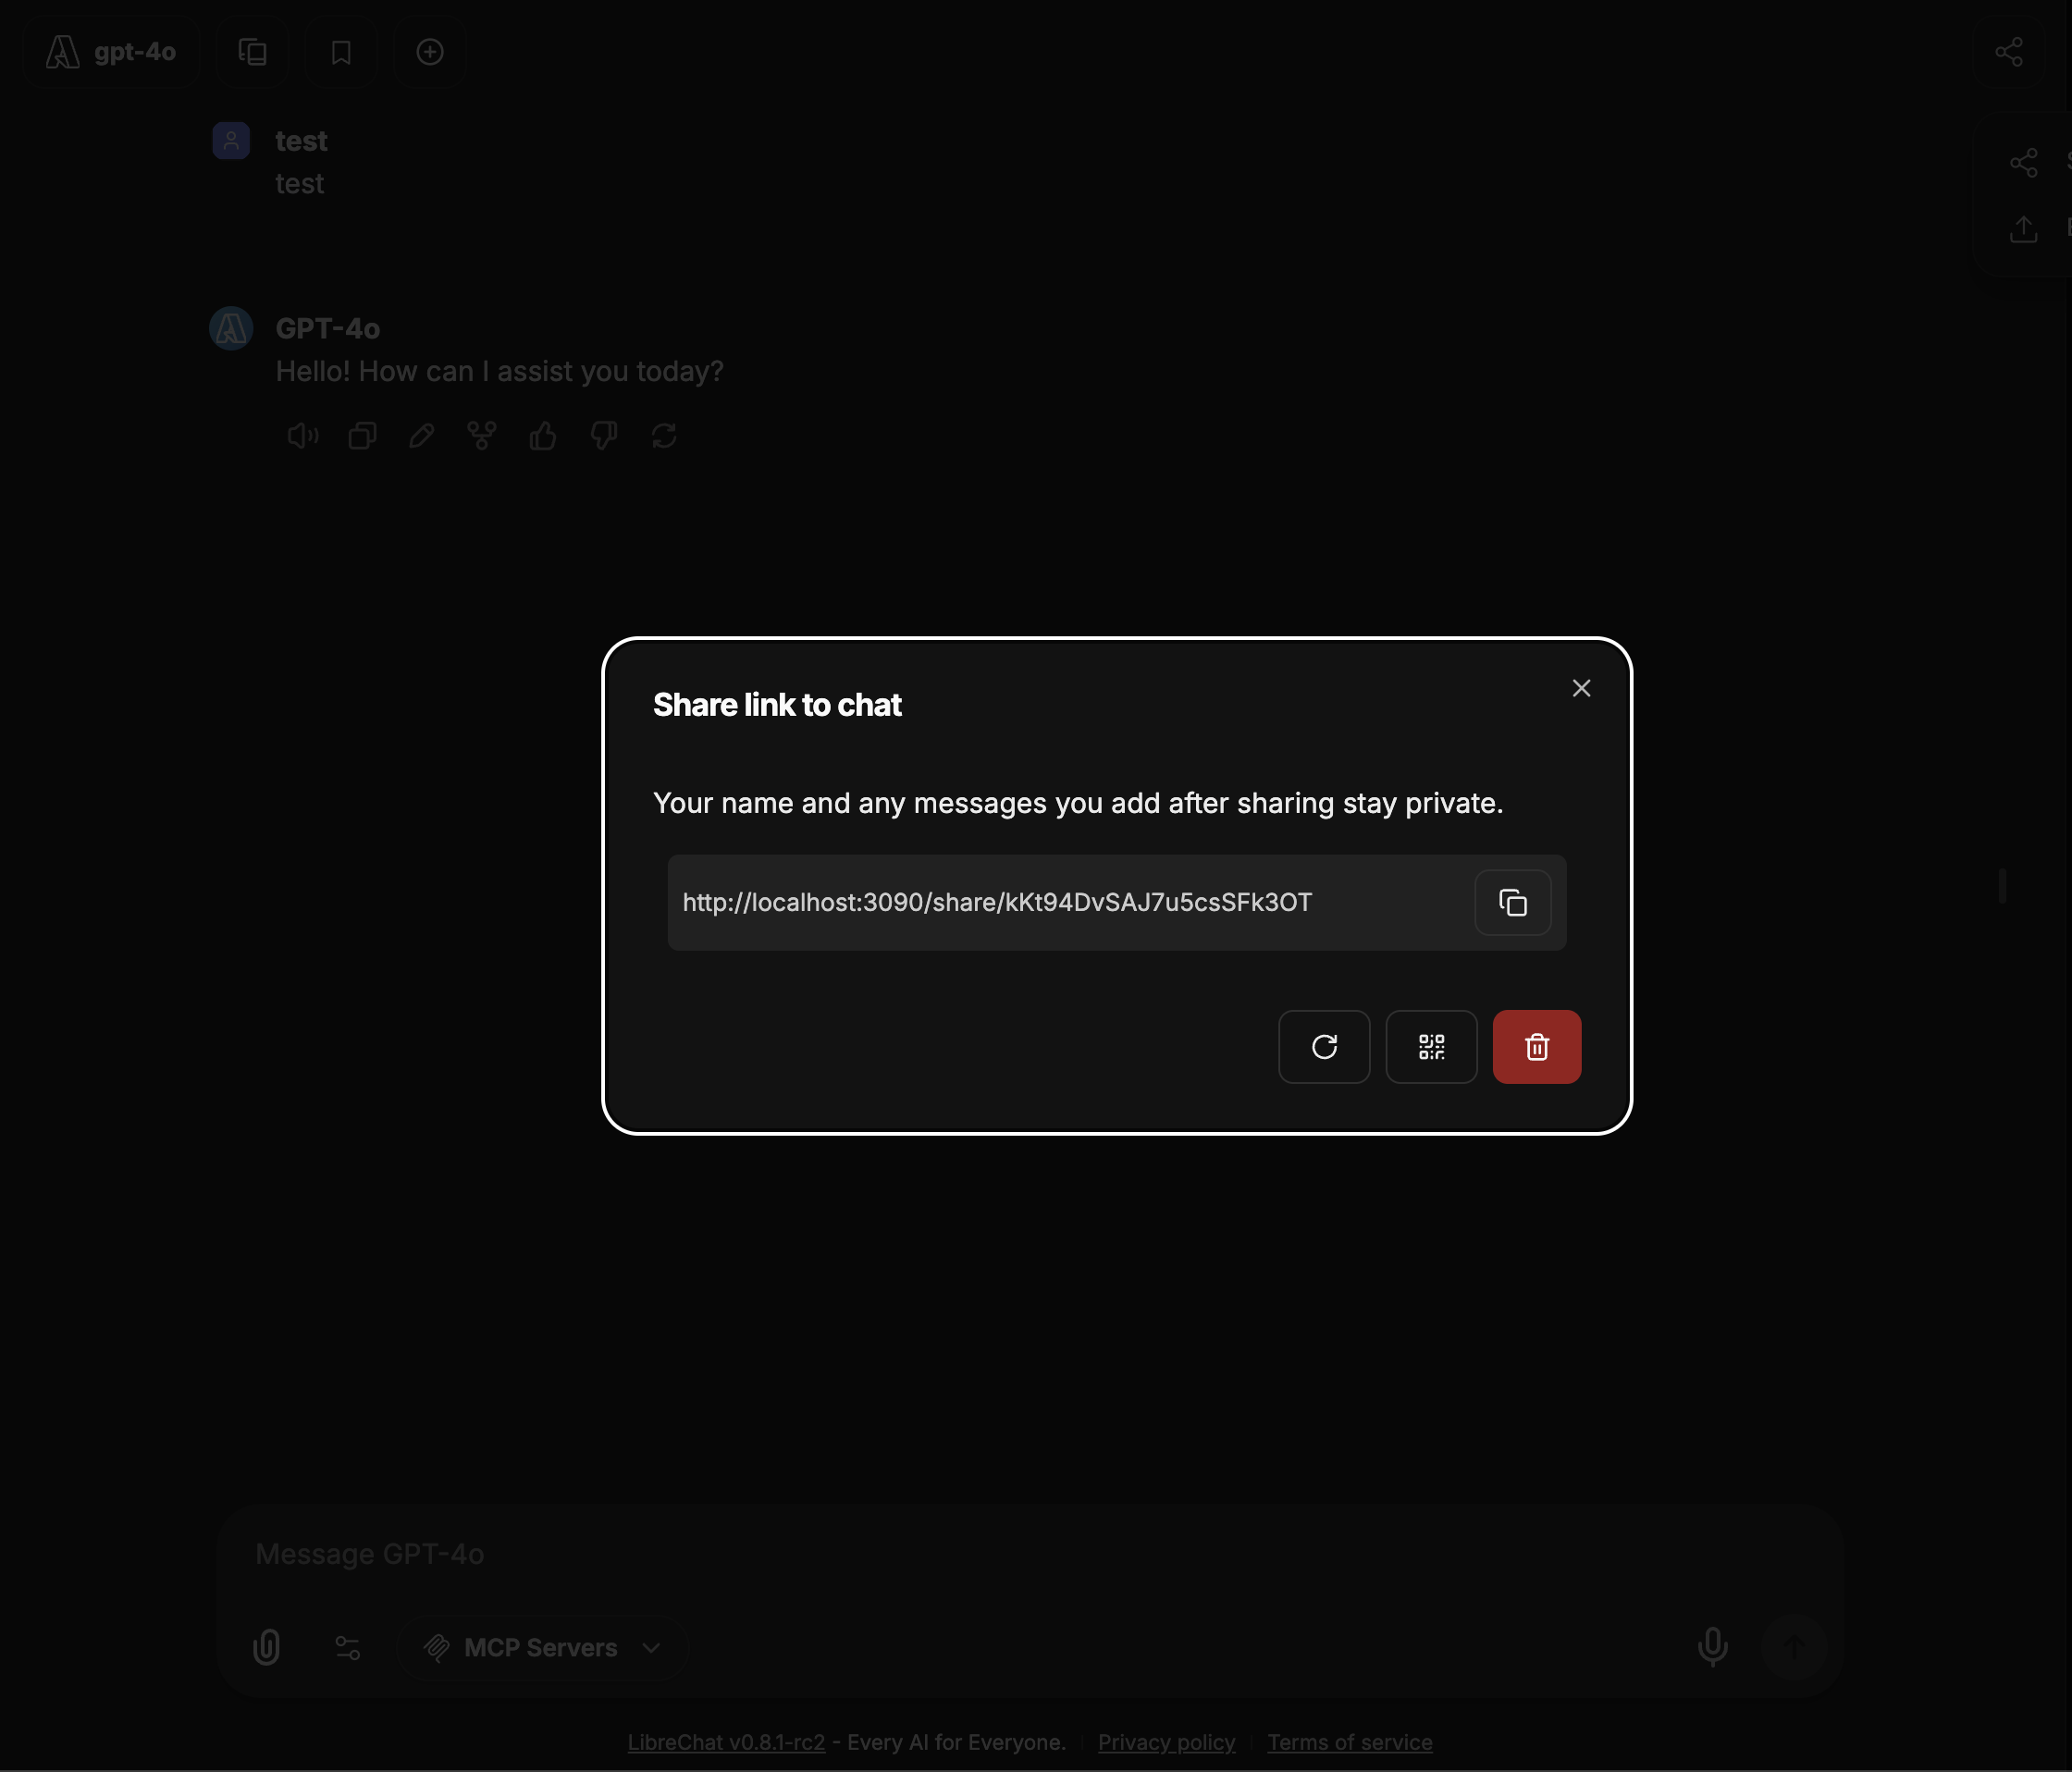
*Shared link configuration modal*
### Available Options:
- **Refresh Link**: Generate a new URL for the shared conversation
- **Generate QR code**: Create and show a QR code for easy mobile access
- **Copy Link to clipboard**: Copy the shareable URL to your clipboard
- **Delete Link**: Remove the shared link, revoking access to anyone who has it
## QR Code Feature
Generate QR codes for your shared conversations for easy mobile sharing. Simply scan the code with any smartphone camera to instantly access the conversation.
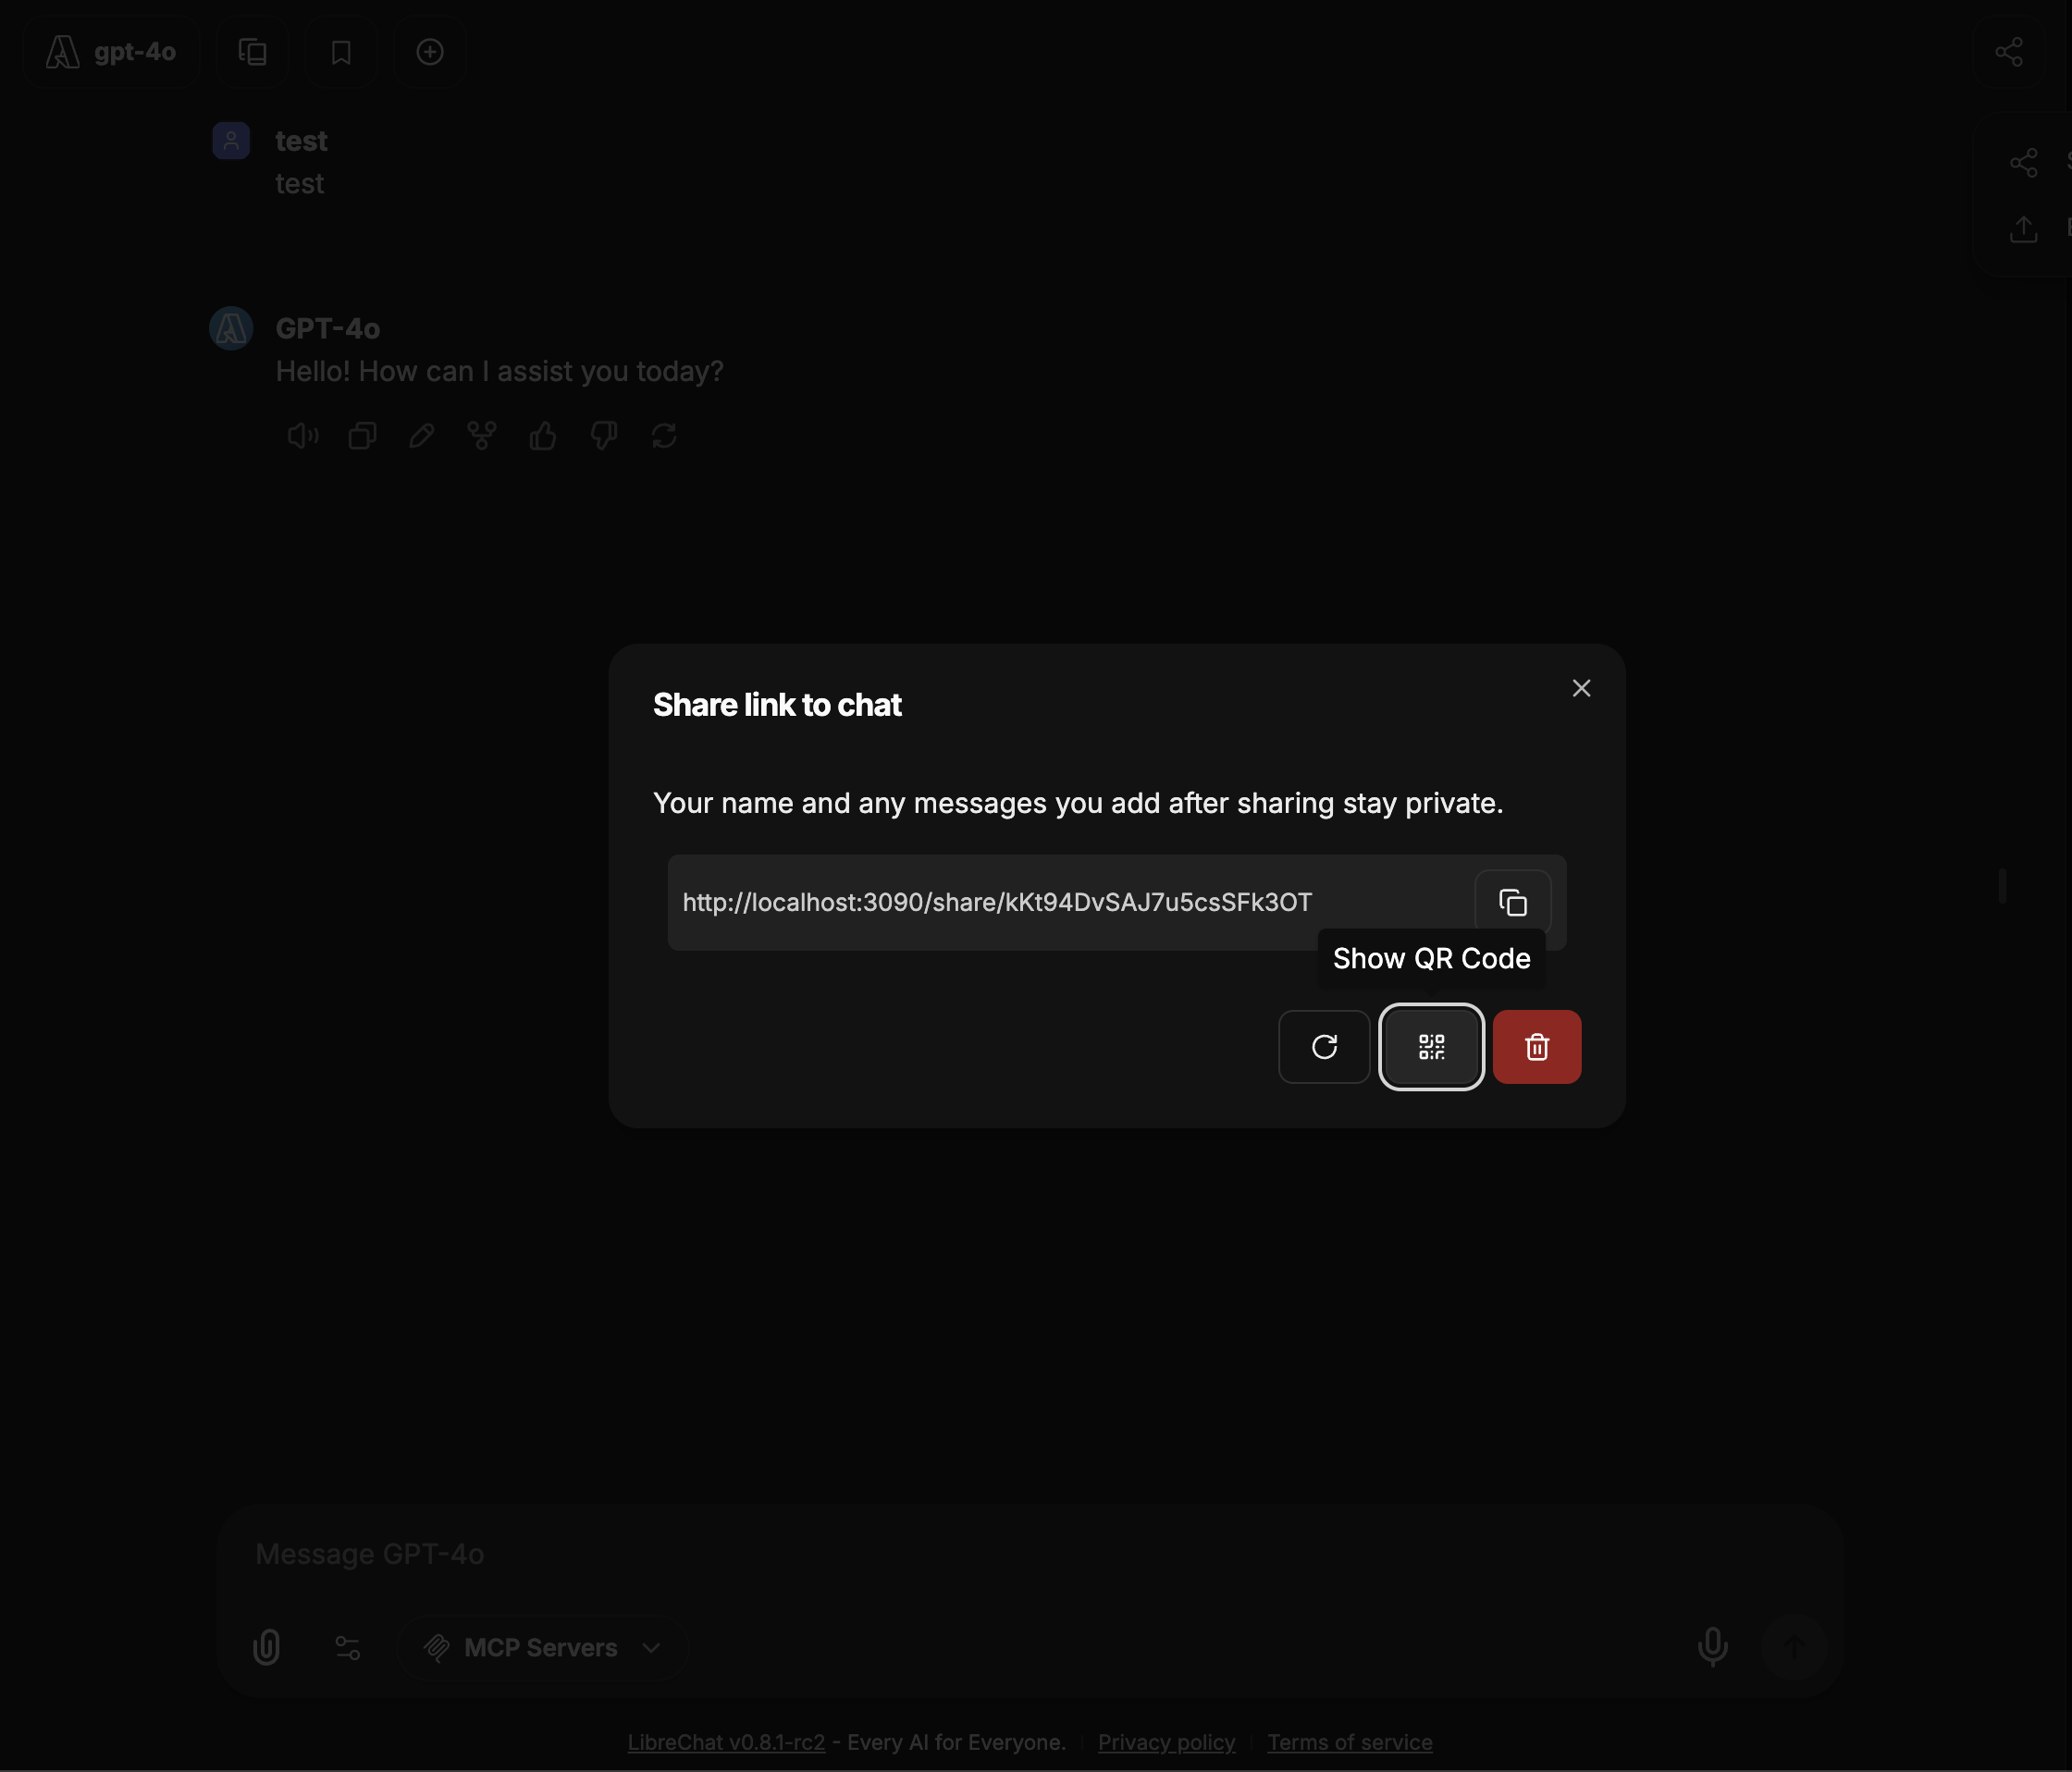
*Generate QR codes for instant mobile access to shared conversations*

*QR code will link to the shared conversation URL*
This is particularly useful for:
- Sharing during presentations
- Quick mobile access
- Offline sharing via printed materials
- Conference or event demonstrations
## Viewing Shared Conversations
When someone opens your shared link, they'll see a clean, focused view of the conversation with all the context you chose to include.
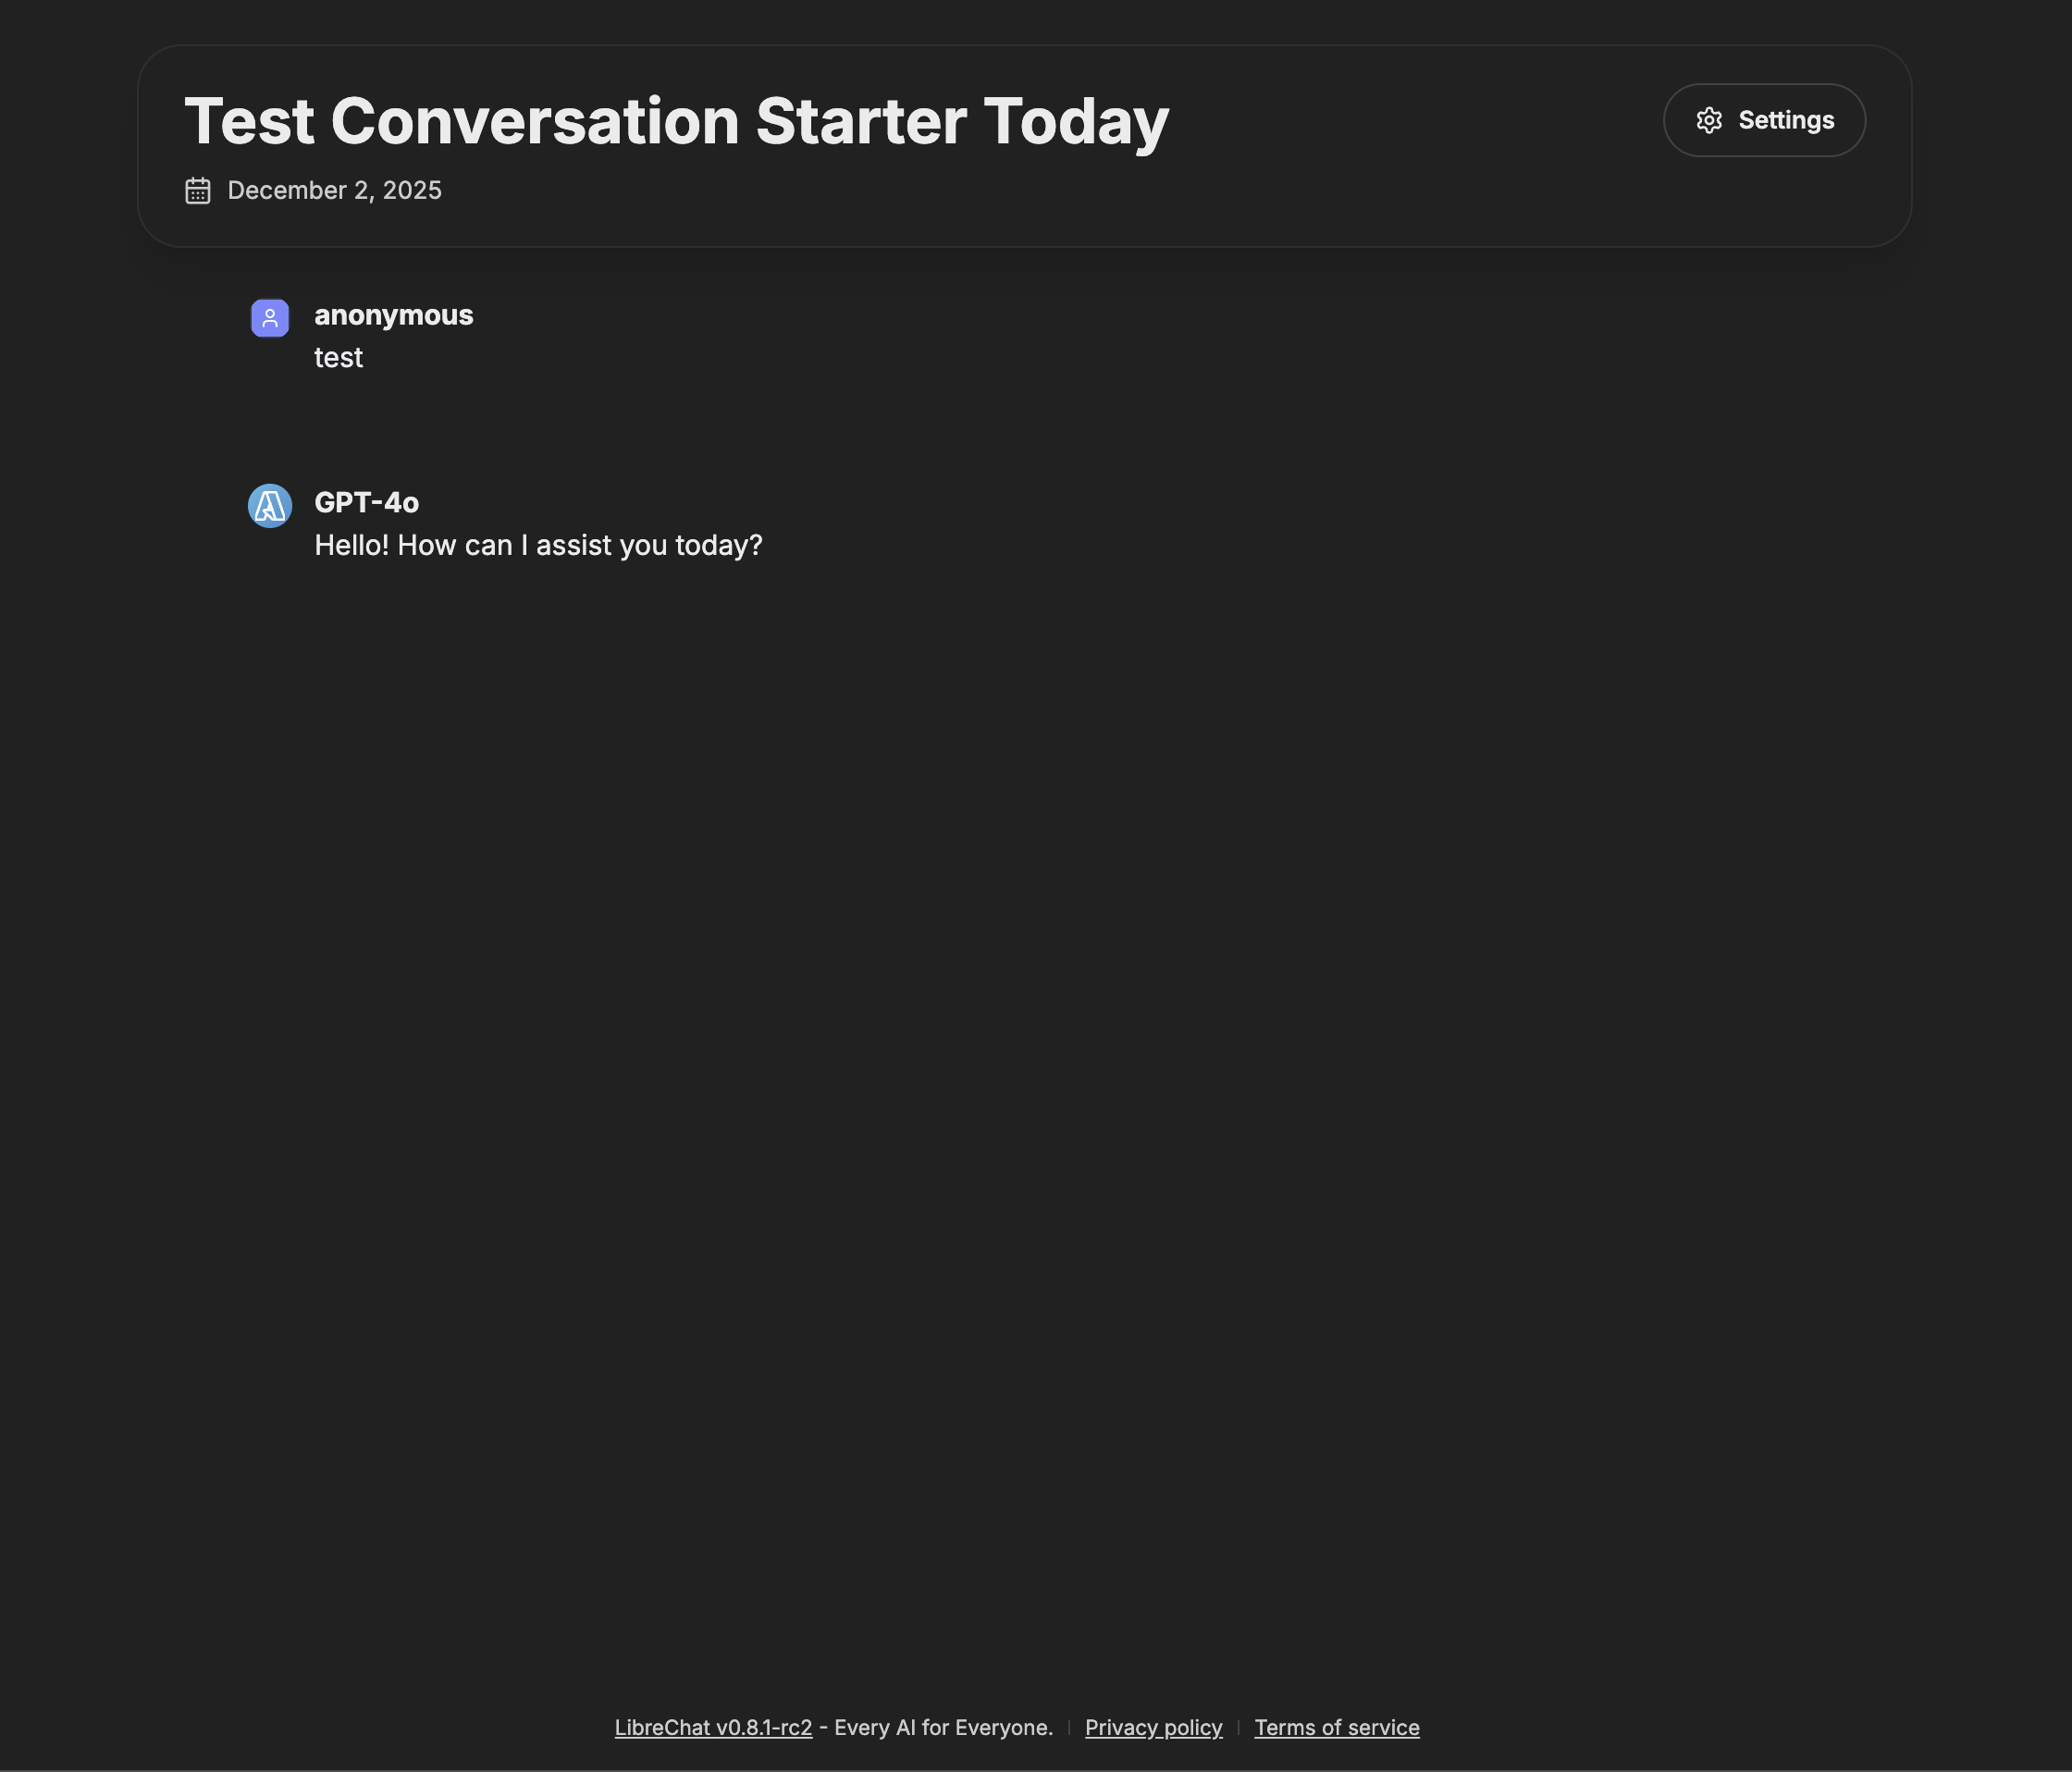
*How recipients see your shared conversation*
### Features Available to Recipients:
- The date the shareable link was published
- Ability to scroll through the entire conversation
- Access to any included artifacts or generated content
## Branching in Shared Conversations
Conversation branches are preserved in shared links, allowing recipients to explore different conversation paths and see how the discussion evolved.
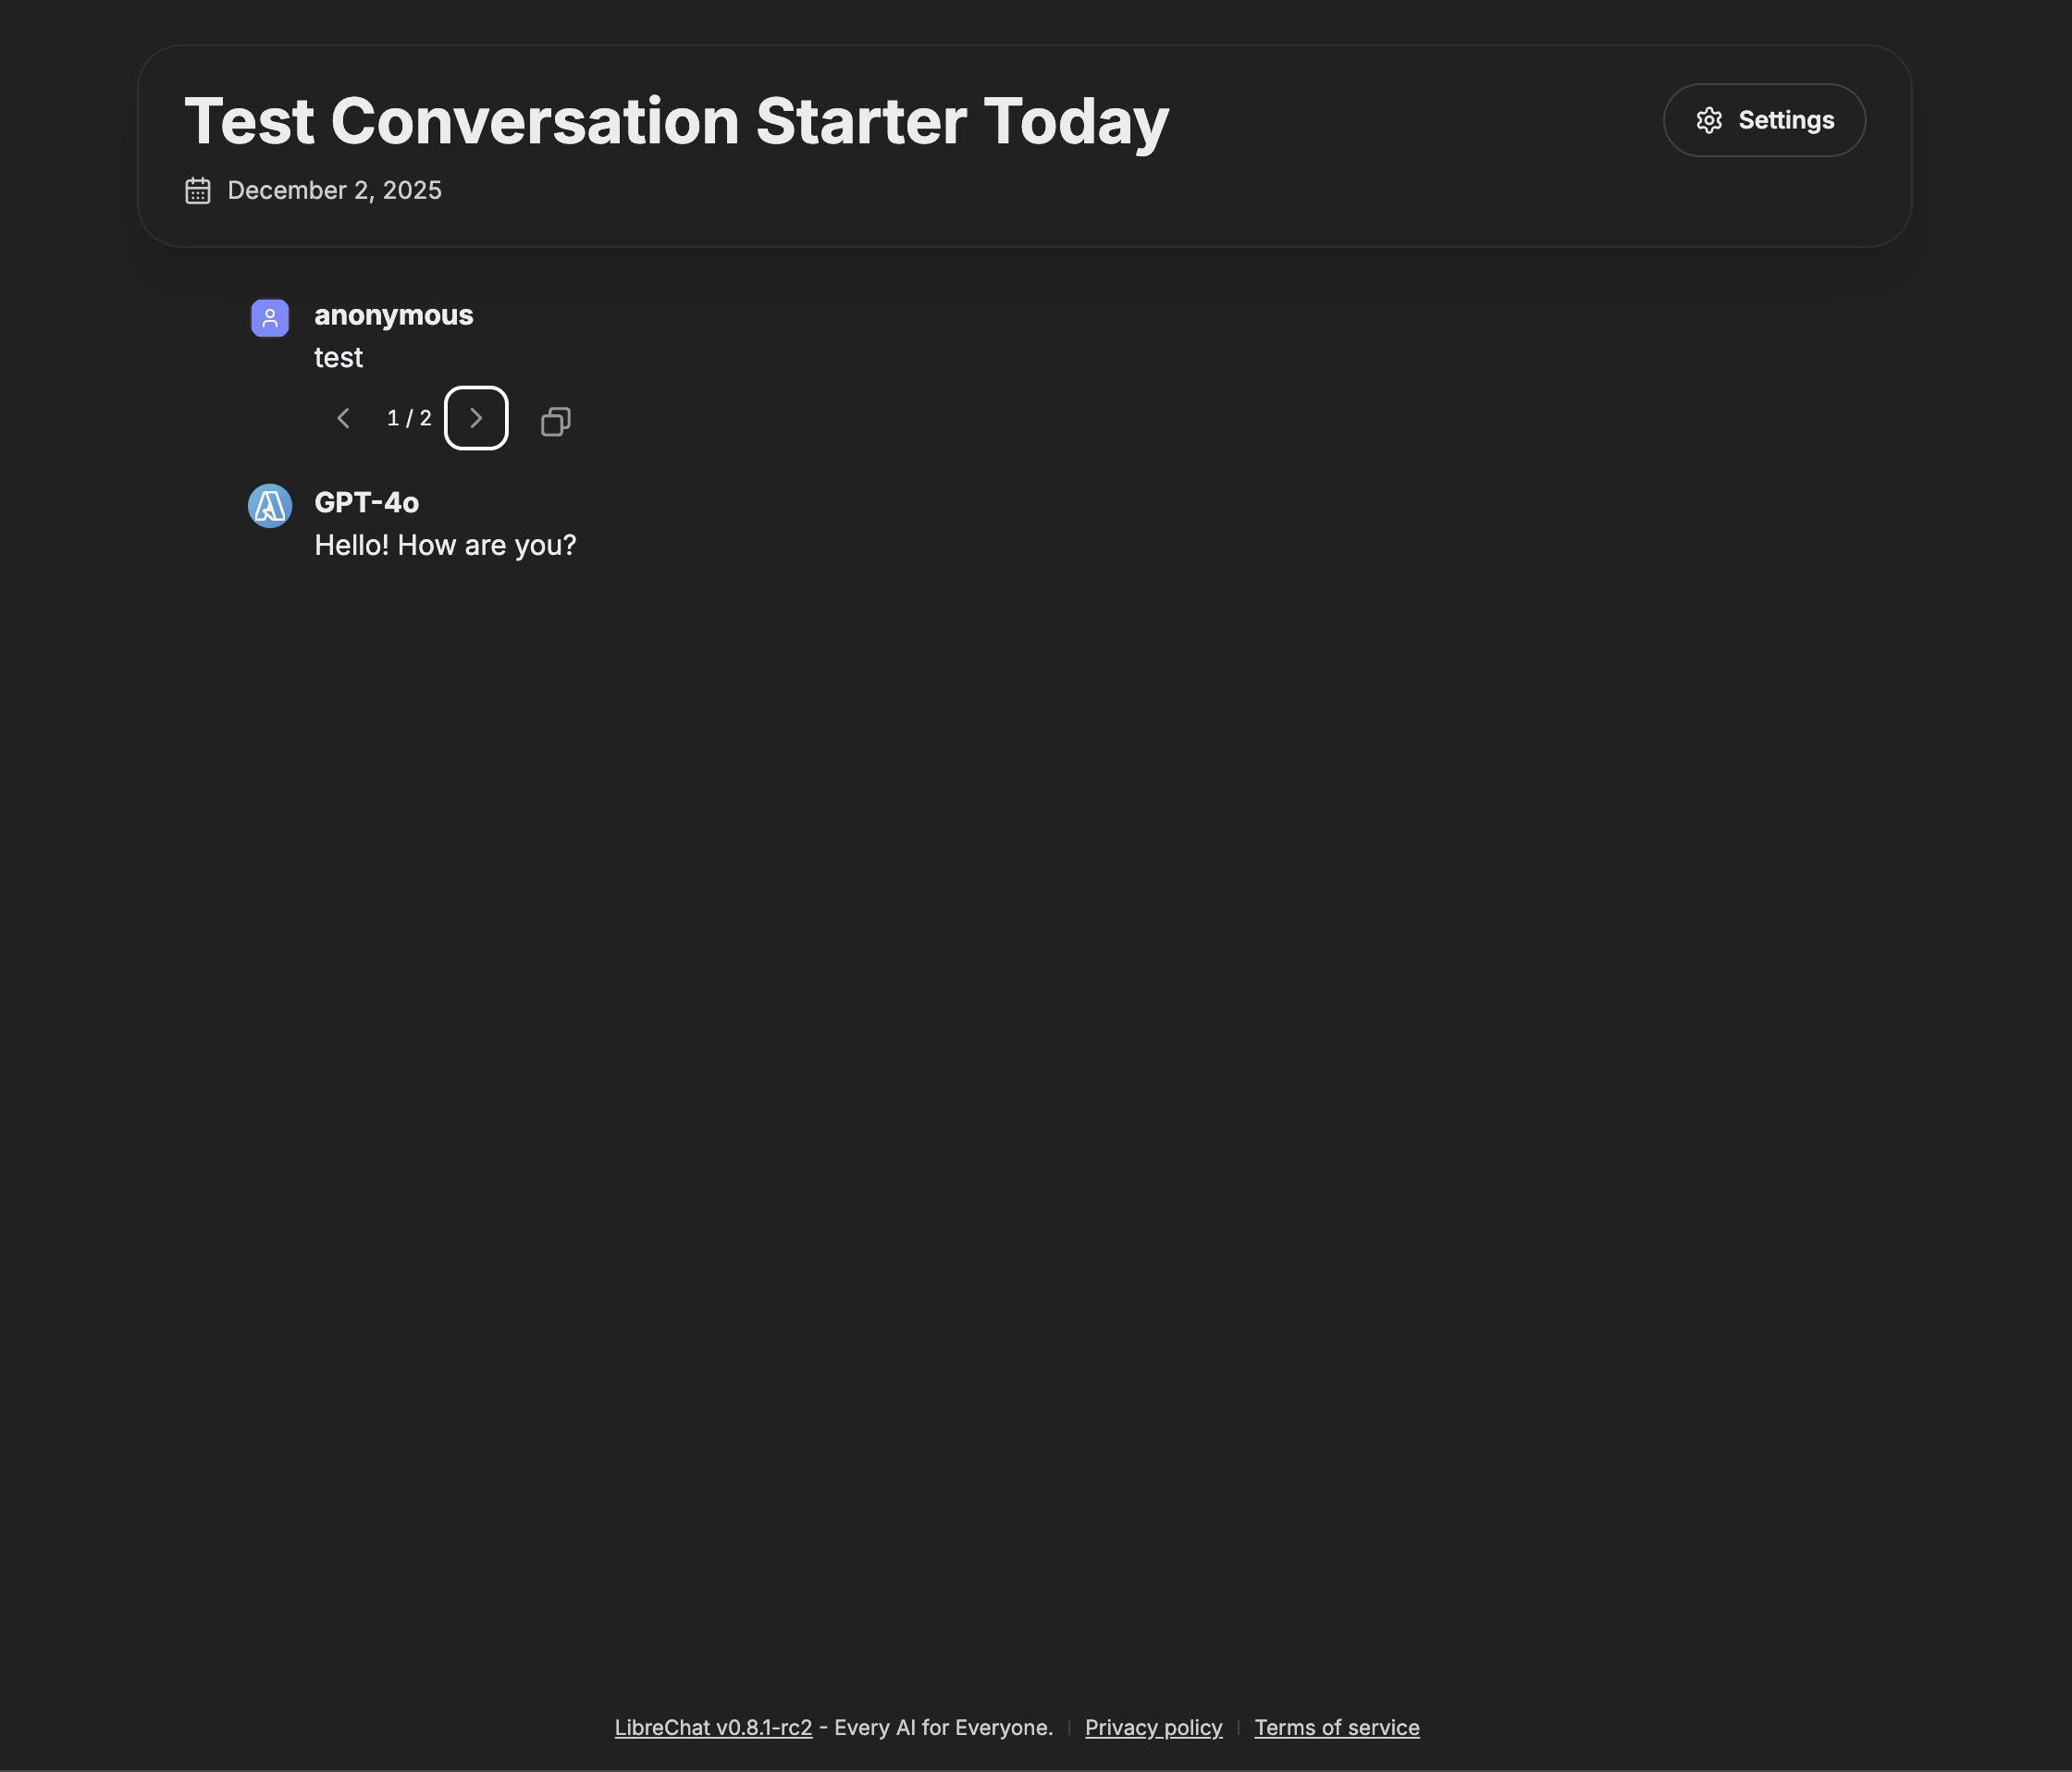
*Access different conversation branches using the branch navigation arrows*
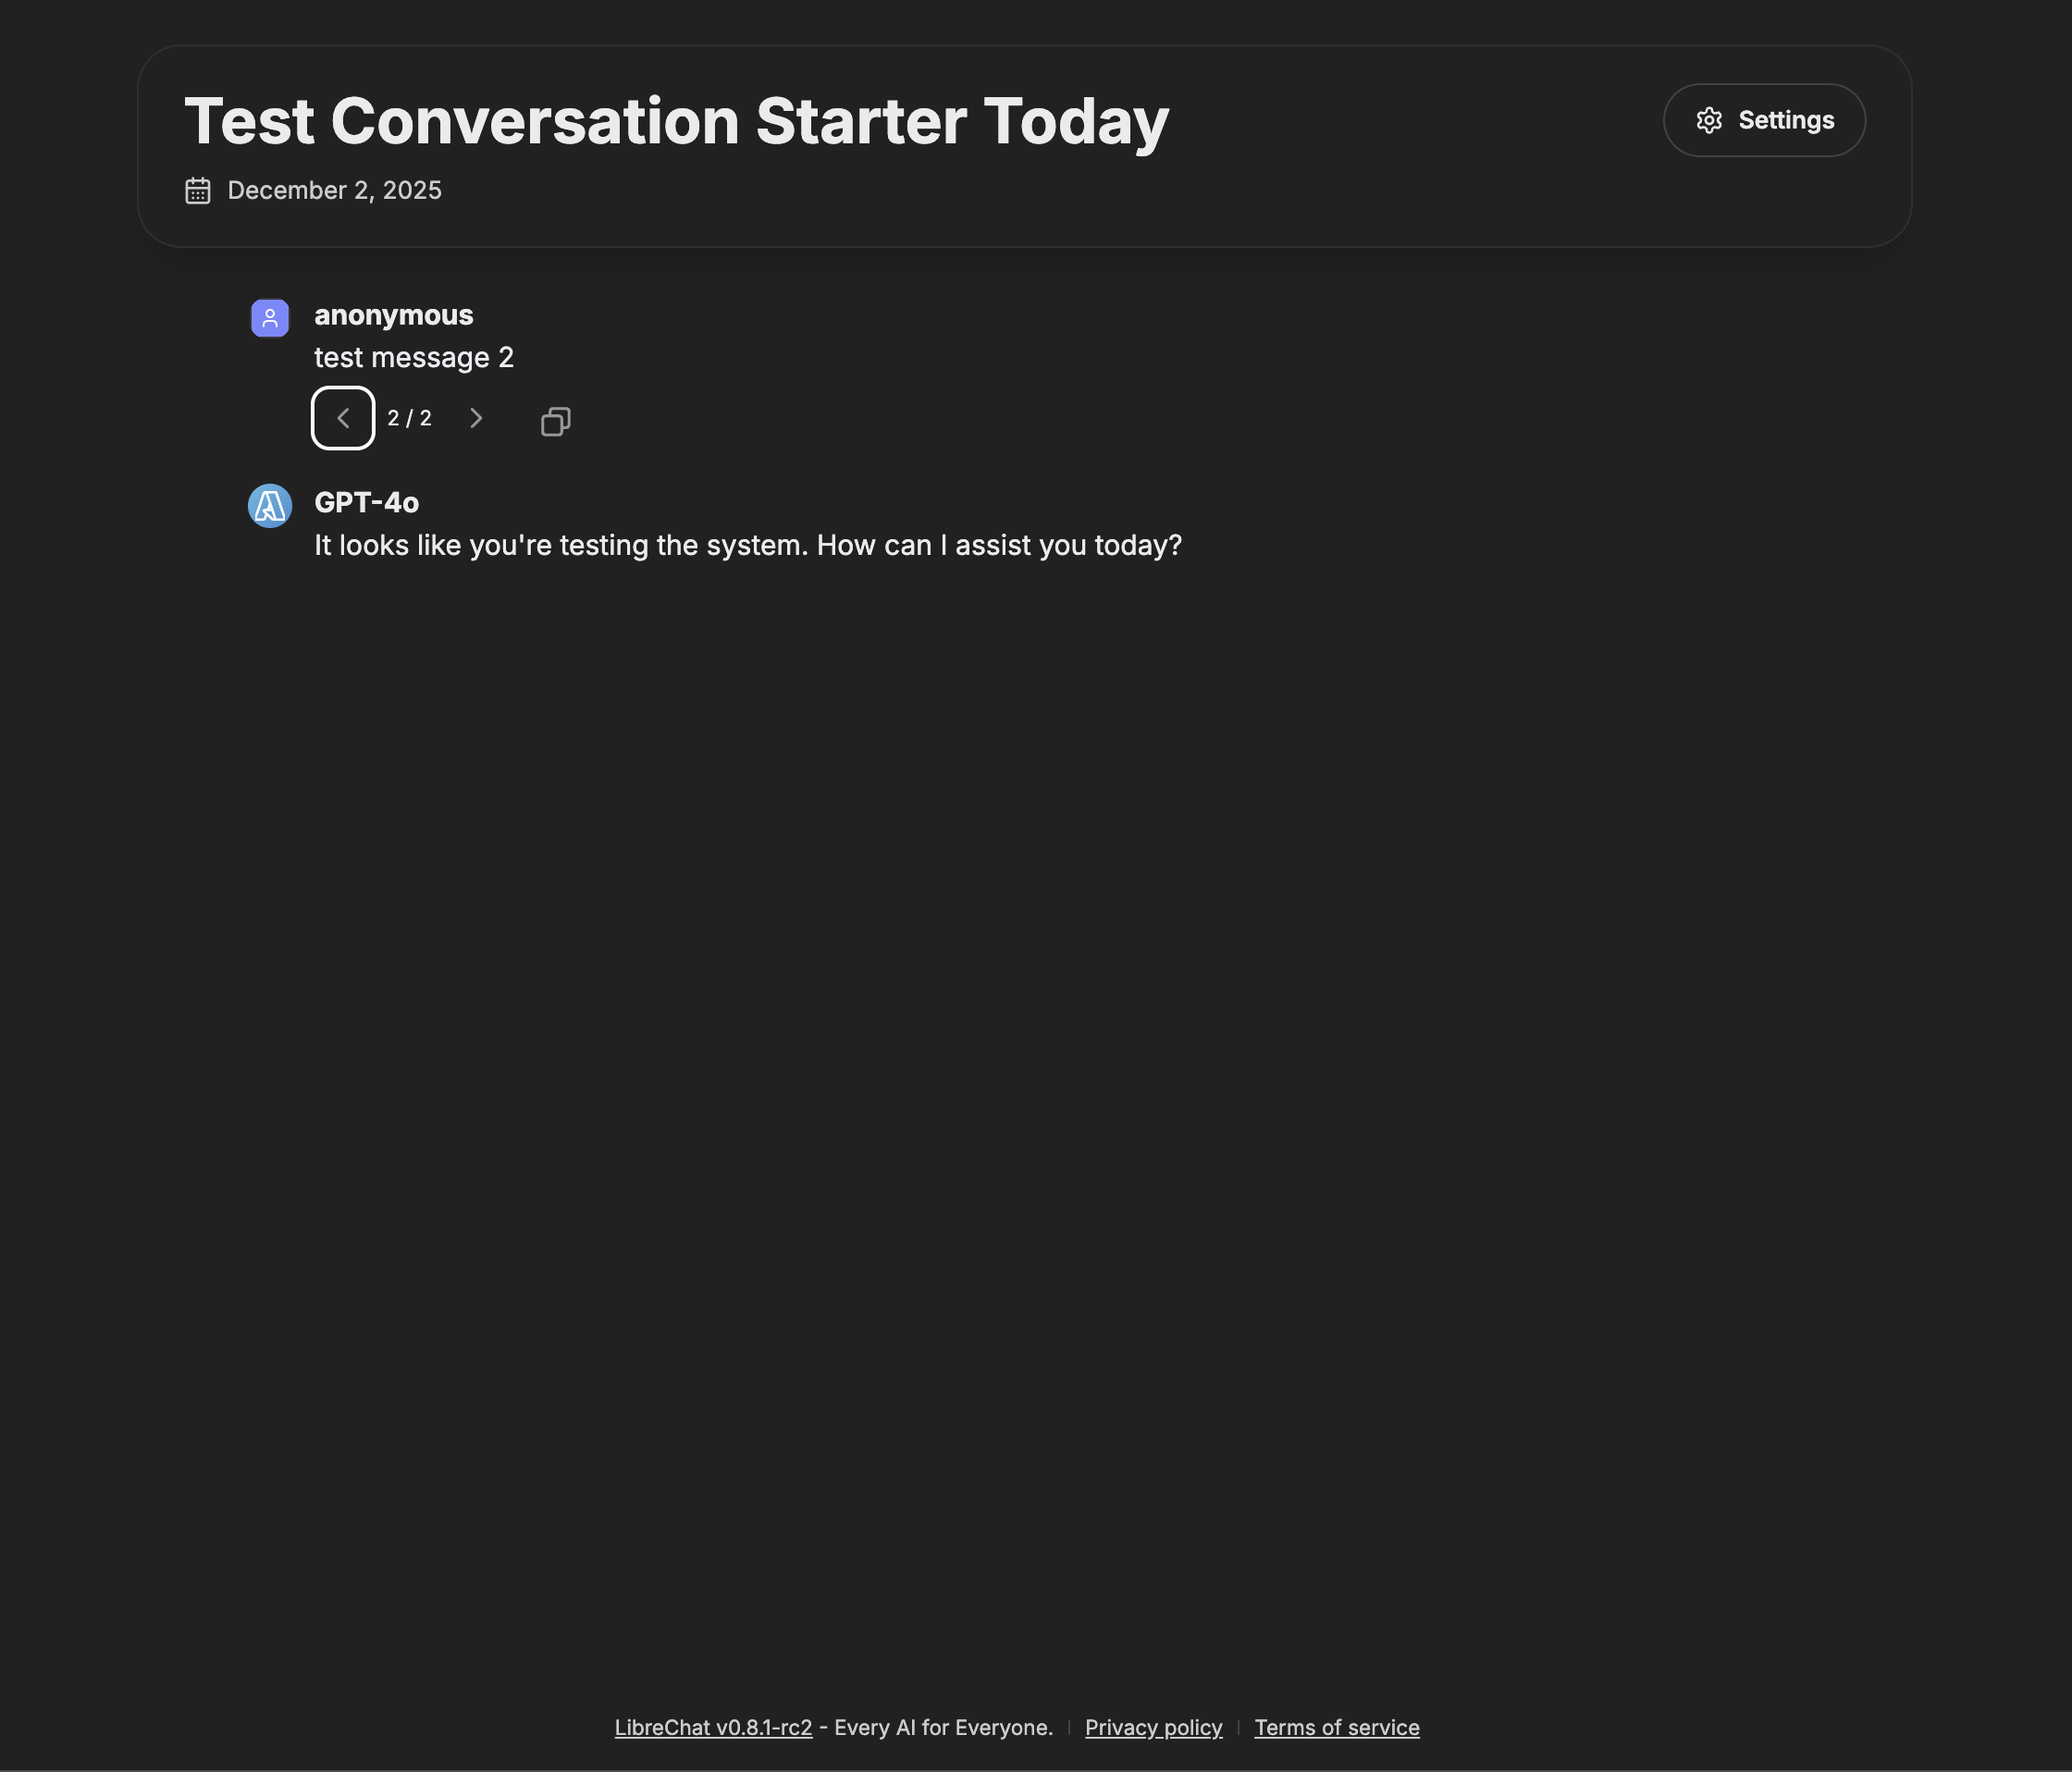
*Recipients can navigate through conversation branches in shared links*
This feature is essential for:
- Demonstrating different AI approaches to the same problem
- Illustrating how solutions and interactions can take multiple different paths depending on user input
## Artifacts in Shared Conversations
All artifacts generated during the conversation are fully functional in shared links, including React components, HTML code, and Mermaid diagrams.
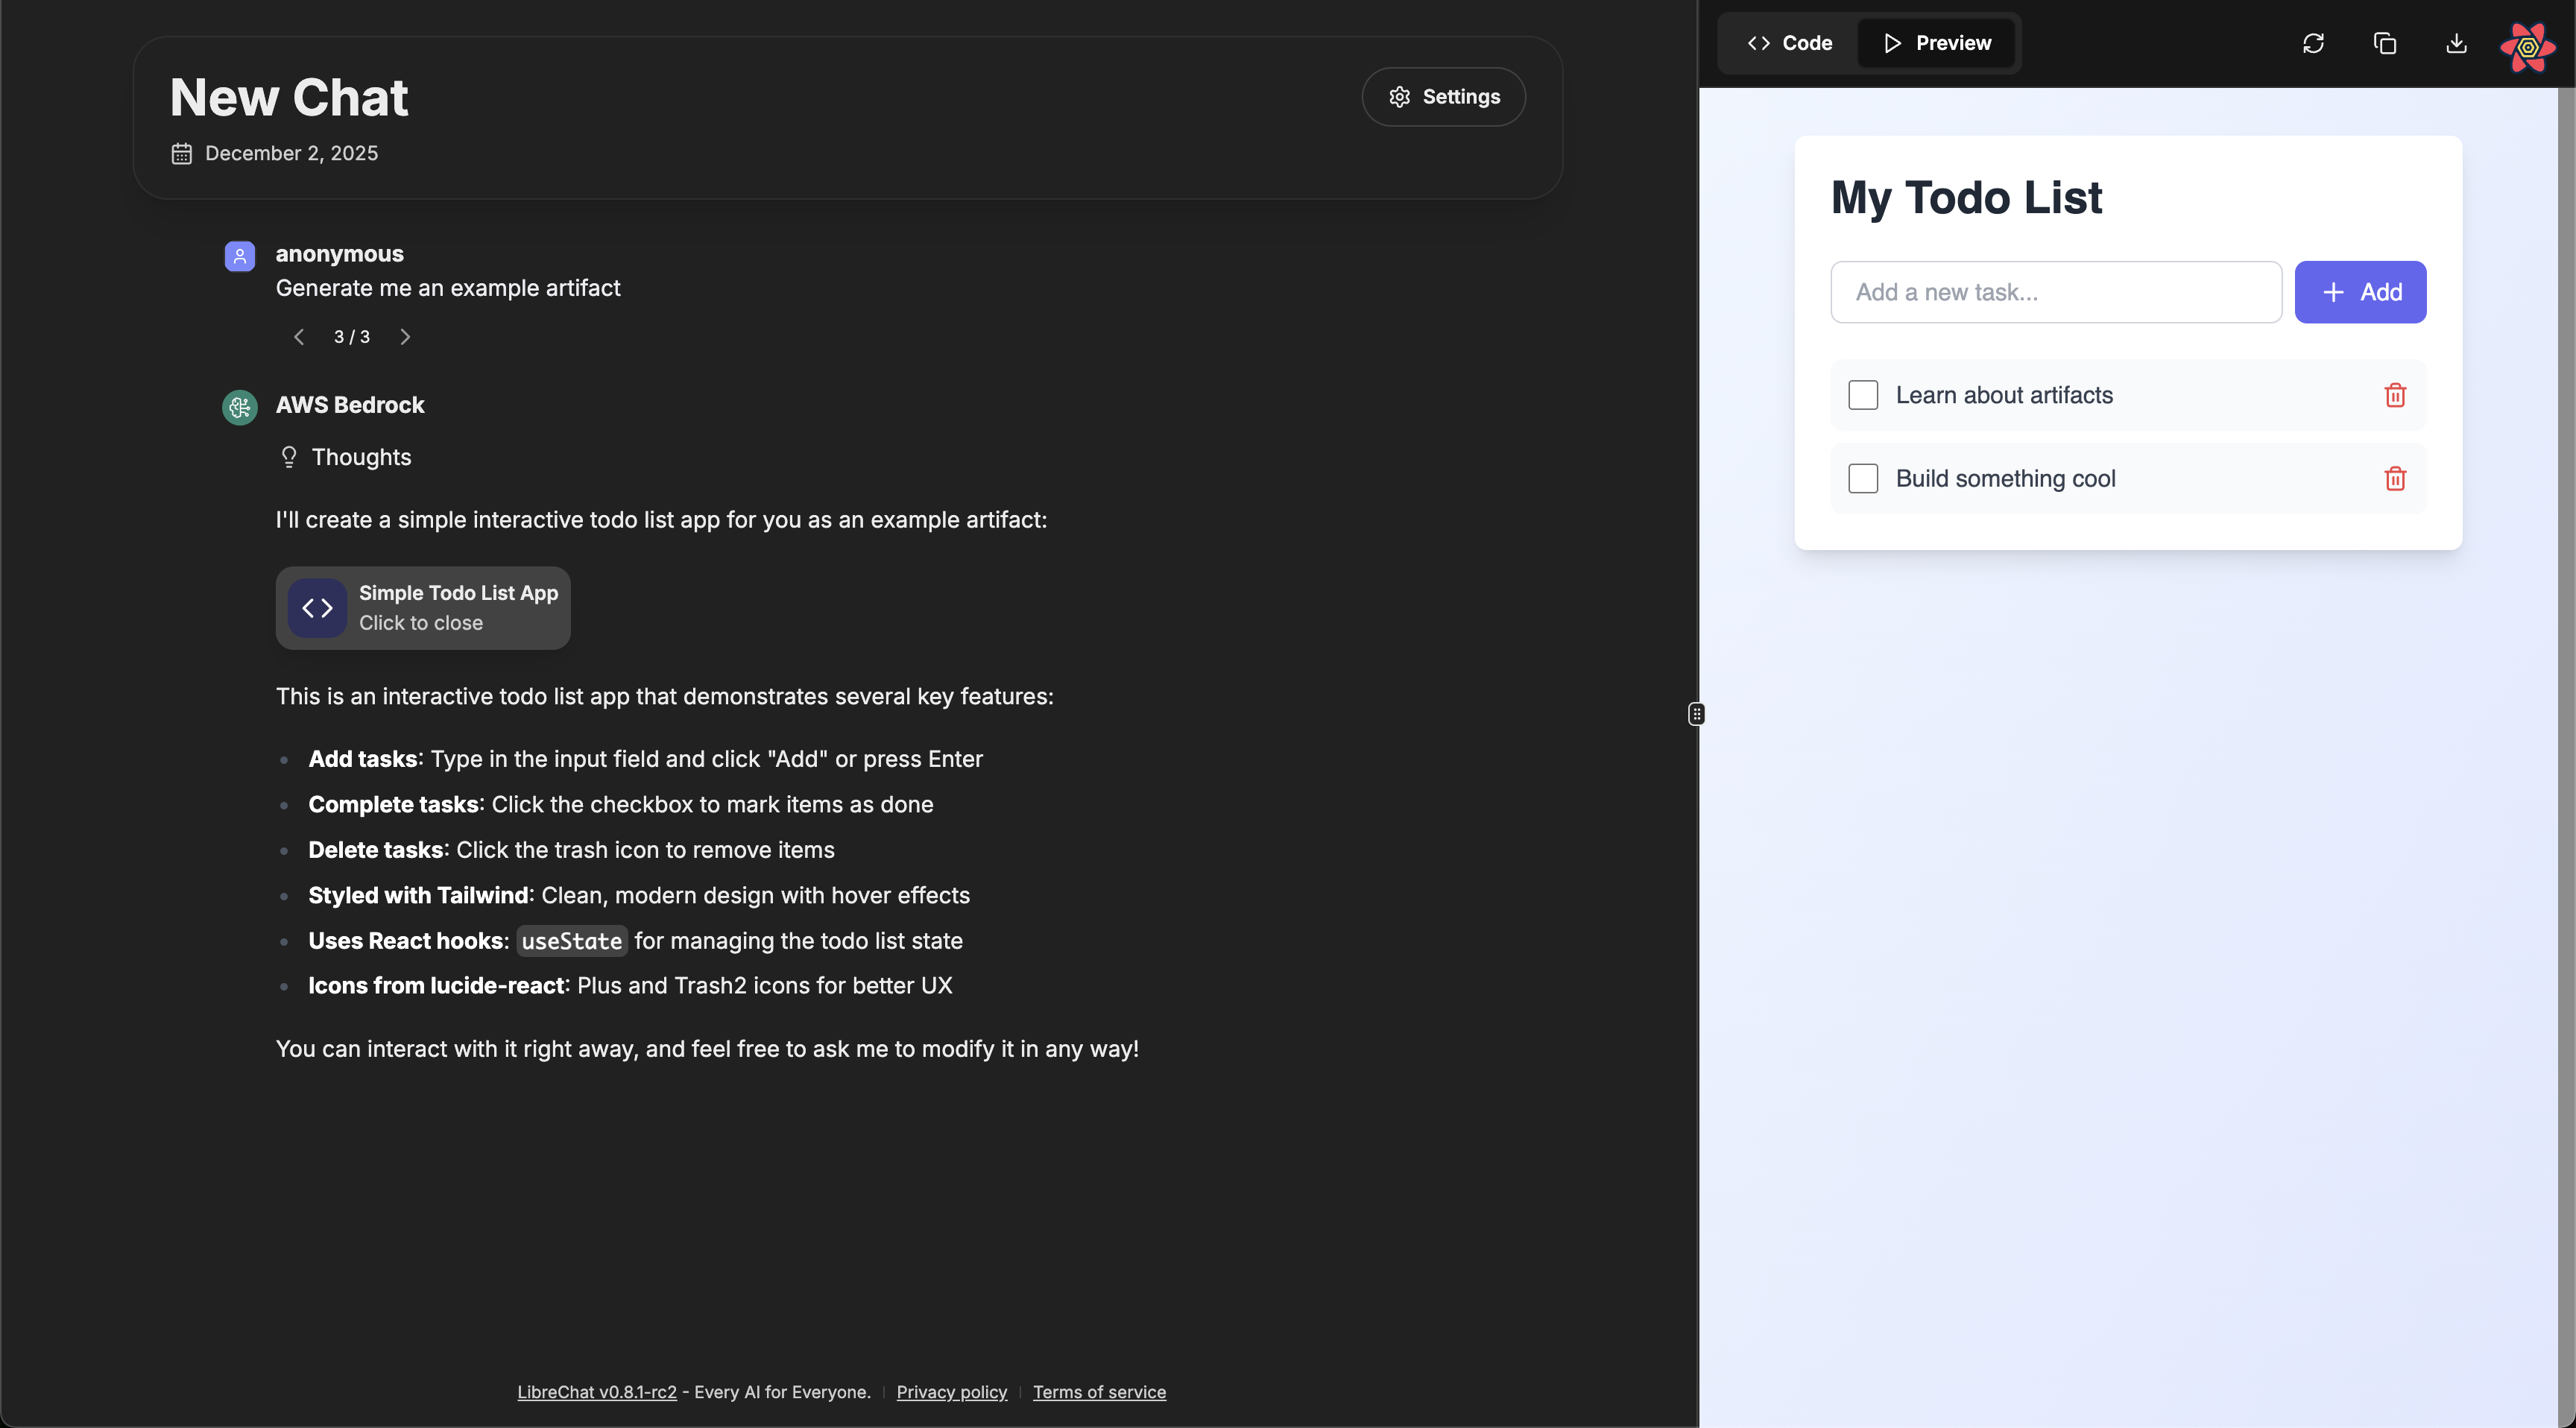
*Generated artifacts remain interactive in shared conversations*
Recipients can:
- View interactive React components
- See HTML previews
- Examine Mermaid diagrams
- Access the underlying code
- Understand the context in which artifacts were generated
## Customization Options for Recipients
Recipients can customize their viewing experience by adjusting language and theme preferences to match their preferences.
*Recipients can customize language and theme preferences*
Available customizations:
- **Theme selection**: Light, dark, or system preference
- **Language**: View the interface in their preferred language
## Managing Your Shared Links
Access the Shared Links Management dashboard under the Data Controls section of the Settings menu to view and manage all your shared conversations in one place.
*Centralized dashboard for managing all your shared links*
*View details and manage individual shared links*
### Management Features:
- **View all links**: See a list of all conversations you've shared
- **Search & filter**: Quickly find and view the content of specific shared links
- **Revoke access**: Delete links to immediately stop sharing
## Configuration
Shareable links behavior is controlled by the following environment variables in your `.env` file:
- **`ALLOW_SHARED_LINKS`** (default: `true`) — Enables or disables the shared links feature entirely. Set to `false` to prevent users from creating shared links.
- **`ALLOW_SHARED_LINKS_PUBLIC`** (default: `false`) — Controls whether shared links can be accessed without authentication. By default, recipients must be logged in to view shared conversations. Set to `true` to allow public (unauthenticated) access.
```bash
# Enable shared links (default)
ALLOW_SHARED_LINKS=true
# Require authentication to view shared links (default)
ALLOW_SHARED_LINKS_PUBLIC=false
```
> **Note:** For full environment variable reference, see the [.env Configuration](/docs/configuration/dotenv#shared-links) page.
## Frequently Asked Questions
**Q: Can recipients respond to shared conversations?**
A: No, shared links are read-only. Recipients can view the conversation but cannot add messages or interact with the AI.
**Q: What happens if I delete a conversation after sharing it?**
A: The shared link will no longer be accessible, and any user which navigates to that link will be served a page stating "Shared link not found".
**Q: Can I edit a conversation after sharing it?**
A: The shared link captures the conversation at the time of creation. Additional messages will not be reflected in the shared view - however, edits made to the existing messages will be shown.
**Q: Do shared links work offline?**
A: No, recipients need an internet connection to view shared conversations.
# Temporary Chat (/docs/features/temporary_chat)
Keep your chat history clean and focused by using temporary chats for sensitive topics, quick experiments, or anything you don't need to permanently save. These chats are excluded from search results, cannot be bookmarked, and are automatically deleted after 30 days.
## Activating Temporary Chat
1. Open the model list dropdown menu located on the top left side of LibreChat.
2. Toggle the "Temporary Chat" slider to the ON position.

3. A notification will appear above the chat input area, confirming that Temporary Chat mode is active. Pressing (x) will disable the Temporary Chat.

## What Happens When a Chat is Marked as Temporary?
* Temporary Chats do not appear in the chat history sidebar.
* Temporary Chats are excluded from search results.
* Temporary Chats cannot be bookmarked.
* Temporary Chats are stored in the database for 30 days and then automatically deleted.
# Upload Files as Text (/docs/features/upload_as_text)
# Upload Files as Text
Ever wanted to hand a PDF, a code file, or a spreadsheet to the AI and just say _"read this"_? That's exactly what **Upload as Text** does.
You attach a file, LibreChat extracts the text from it, and the full content gets pasted straight into your conversation. The AI can then read every word of it — no plugins, no vector databases, no extra services to configure. It works out of the box.
Upload as Text works immediately on any LibreChat instance. It uses built-in text parsing — you don't need OCR, a RAG pipeline, or any external service to get started.
---
## How to use it
### Click the attachment icon
In the chat input bar, click the **paperclip** (📎) icon.
### Pick "Upload as Text"
From the dropdown menu, select **Upload as Text**. This tells LibreChat to read the file contents rather than pass it as a raw attachment.
### Choose your file
Select the file from your device. LibreChat will extract the text and embed it directly into your message.
### Ask your question
Type your prompt as usual. The AI now has the full text of your file in context and can reference any part of it.
If "Upload as Text" doesn't appear, the `context` capability may have been disabled by your admin. It's on by default — but if the capabilities list was customized, `context` needs to be explicitly included. See the [configuration section](#the-context-capability) below.
---
## What happens under the hood
When you upload a file this way, LibreChat doesn't just dump raw bytes into the prompt. It runs through a processing pipeline to extract clean, readable text:
1. **MIME type detection** — LibreChat checks what kind of file you uploaded (PDF, image, audio, source code, etc.) by inspecting its MIME type.
2. **Method selection** — Based on the file type and what services are available, it picks the best extraction method using this priority:
| Priority | Method | When it's used |
|----------|--------|---------------|
| 1st | **OCR** | File is an image or scanned document, _and_ OCR is configured |
| 2nd | **STT** (Speech-to-Text) | File is audio, _and_ STT is configured |
| 3rd | **Text parsing** | File matches a known text MIME type |
| 4th | **Fallback** | None of the above matched — tries text parsing anyway |
**A `.pdf` on an instance with OCR configured:**
→ OCR kicks in. Great for scanned docs and complex layouts.
**A `.pdf` on a default instance (no OCR):**
→ Text parsing handles it. Works well for digitally-created PDFs.
**A `.py` Python file:**
→ Straight to text parsing. Source code is already text — no conversion needed.
**An `.mp3` on an instance with STT configured:**
→ Speech-to-Text transcribes it into text for the conversation.
**A `.png` screenshot with no OCR configured:**
→ Falls back to text parsing (limited results — consider setting up OCR for images).
3. **Token truncation** — The extracted text is trimmed to the `fileTokenLimit` (default: 100,000 tokens) so it doesn't blow past the model's context window.
4. **Prompt injection** — The text gets included in the conversation context, right alongside your message.
---
## Which files are supported
These are parsed directly — they're already text, so no conversion is needed.
- Plain text (`.txt`), Markdown (`.md`), CSV, JSON, XML, HTML, CSS
- Programming languages — Python, JavaScript, TypeScript, Java, C#, PHP, Ruby, Go, Rust, Kotlin, Swift, Scala, Perl, Lua
- Config files — YAML, TOML, INI
- Shell scripts, SQL files
Text parsing handles these out of the box. If OCR is configured, it takes over for better accuracy on complex layouts.
- **PDF** — digital and scanned (scanned PDFs benefit from OCR)
- **Word** — `.docx`, `.doc`
- **PowerPoint** — `.pptx`, `.ppt`
- **Excel** — `.xlsx`, `.xls`
- **EPUB** books
Images **require OCR** to produce useful text. Without it, results will be poor.
- JPEG, PNG, GIF, WebP
- HEIC, HEIF (Apple formats)
- Screenshots, photos of documents, scanned pages
Audio files **require STT** to be configured. There's no fallback — audio can't be "text parsed."
- MP3, WAV, OGG, FLAC
- M4A, WebM
- Voice recordings, podcast clips
---
## Upload as Text vs. other upload options
LibreChat has three ways to upload files. Each one works differently and suits different situations:
Extracts the full file content and drops it into the conversation. Best for smaller files where you want the AI to read everything — contracts, code files, articles. Works with all models, no extra services needed.
Indexes the file in a vector database and retrieves only the relevant chunks when you ask a question. Better for large files or collections of files where dumping everything into context would waste tokens. Requires the RAG API.
Passes the file directly to the model — used for vision models analyzing images, or code interpreter running scripts. No text extraction happens.
**Quick decision guide:**
| Situation | Best option |
|-----------|-------------|
| _"Read this 5-page contract and summarize it"_ | **Upload as Text** |
| _"I have 50 PDFs, find what mentions pricing"_ | **File Search (RAG)** |
| _"What's in this screenshot?"_ (vision model) | **Standard Upload** |
| _"Run this Python script"_ (code interpreter) | **Standard Upload** |
| _"Review this code file for bugs"_ | **Upload as Text** |
| _"Search through our company docs"_ | **File Search (RAG)** |
---
## The `context` capability
Under the hood, Upload as Text is powered by the **`context` capability**. This is what controls whether the feature appears in your chat UI.
The `context` capability is **enabled by default**. You only need to touch this if your admin has customized the capabilities list and accidentally left it out.
```yaml title="librechat.yaml"
endpoints:
agents:
capabilities:
- "context" # This is what enables "Upload as Text"
```
The same `context` capability also powers **Agent File Context** (uploading files through the Agent Builder to embed text into an agent's system instructions). The difference is _where_ the text ends up:
| | Upload as Text | Agent File Context |
|---|---|---|
| **Where** | Chat input (any conversation) | Agent Builder panel |
| **Scope** | Current conversation only | Persists in agent's instructions |
| **Use case** | One-off document questions | Building specialized agents with baked-in knowledge |
---
## Token limits and truncation
When a file is too long to fit in the model's context window, LibreChat truncates the extracted text to stay within bounds. This happens automatically — you don't need to worry about it, but it's good to know how it works.
```yaml title="librechat.yaml"
fileConfig:
fileTokenLimit: 100000 # Default: 100,000 tokens
```
If your file exceeds the limit, the text is cut off at the end. If you're getting incomplete answers, this might be why. You can increase `fileTokenLimit`, but keep in mind that larger values use more tokens per message — which increases cost and may hit the model's own context limit.
**Rules of thumb:**
- 100k tokens ≈ a 300-page book (plenty for most use cases)
- If you're working with very large files, consider [File Search (RAG)](/docs/features/rag_api) instead — it only retrieves the relevant sections rather than stuffing everything into context
---
## Optional: boosting extraction with OCR
Text parsing works fine for digitally-created documents (PDFs saved from Word, code files, plain text). But if you're uploading **scanned documents, photos of pages, or images with text**, the built-in parser won't get great results.
That's where OCR comes in. When configured, LibreChat automatically uses OCR for file types that benefit from it — you don't need to do anything differently as a user.
Point them to the [OCR configuration docs](/docs/features/ocr). The short version:
```yaml title="librechat.yaml"
ocr:
strategy: "mistral_ocr"
apiKey: "${OCR_API_KEY}"
baseURL: "https://api.mistral.ai/v1"
mistralModel: "mistral-ocr-latest"
```
Once configured, OCR automatically handles images and scanned PDFs — no changes needed on the user side.
For transcribing audio uploads, the admin needs to configure a Speech-to-Text service. See the [STT configuration reference](/docs/configuration/librechat_yaml/object_structure/file_config#stt).
---
## File handling configuration reference
This section is for admins who want to control which file types get processed by which method. The defaults work well — you only need to touch this if you want to fine-tune behavior.
```yaml title="librechat.yaml"
fileConfig:
# Max tokens extracted from a single file before truncation
fileTokenLimit: 100000
# Files matching these MIME patterns use OCR (if configured)
ocr:
supportedMimeTypes:
- "^image/(jpeg|gif|png|webp|heic|heif)$"
- "^application/pdf$"
- "^application/vnd\\.openxmlformats-officedocument\\.(wordprocessingml\\.document|presentationml\\.presentation|spreadsheetml\\.sheet)$"
- "^application/vnd\\.ms-(word|powerpoint|excel)$"
- "^application/epub\\+zip$"
# Files matching these MIME patterns use text parsing
text:
supportedMimeTypes:
- "^text/(plain|markdown|csv|json|xml|html|css|javascript|typescript|x-python|x-java|x-csharp|x-php|x-ruby|x-go|x-rust|x-kotlin|x-swift|x-scala|x-perl|x-lua|x-shell|x-sql|x-yaml|x-toml)$"
# Files matching these MIME patterns use STT (if configured)
stt:
supportedMimeTypes:
- "^audio/(mp3|mpeg|mpeg3|wav|wave|x-wav|ogg|vorbis|mp4|x-m4a|flac|x-flac|webm)$"
```
**Priority reminder:** OCR > STT > text parsing > fallback.
For the full reference, see [File Config Object Structure](/docs/configuration/librechat_yaml/object_structure/file_config).
---
## Troubleshooting
The `context` capability was likely removed from your configuration. Ask your admin to add it back:
```yaml
endpoints:
agents:
capabilities:
- "context"
```
A few things to check:
- **Scanned PDFs / images** — These need OCR to extract text properly. Without it, the parser might return garbage or nothing. Ask your admin to [configure OCR](/docs/features/ocr).
- **Audio files** — These need STT. There's no text fallback for audio.
- **Corrupted files** — Try opening the file locally to make sure it's not damaged.
- **Unsupported format** — If the MIME type doesn't match any configured pattern, LibreChat attempts a text parse fallback, which may not work for binary formats.
Your file probably exceeded the `fileTokenLimit`. The text was truncated.
**Options:**
- Ask your admin to increase `fileTokenLimit` in `librechat.yaml`
- Use [File Search (RAG)](/docs/features/rag_api) instead, which retrieves relevant chunks rather than loading the entire file
- Split the file into smaller parts and upload them separately
Without OCR, images are processed through text parsing, which can't actually "see" text in an image. You need OCR configured for this to work. See [OCR for Documents](/docs/features/ocr).
Alternatively, use a **vision model** with standard file upload — the model itself can read text in images.
---
## Related
- [OCR for Documents](/docs/features/ocr) — Set up optical character recognition for images and scans
- [RAG API (Chat with Files)](/docs/features/rag_api) — Semantic search over large document collections
- [Agents — File Context](/docs/features/agents#file-context) — Embed file content into an agent's system instructions
- [File Config reference](/docs/configuration/librechat_yaml/object_structure/file_config) — Full YAML schema for file handling
# Query Parameters (/docs/features/url_query)
LibreChat supports dynamic configuration of chat conversations through URL query parameters. This feature allows you to initiate conversations with specific settings, models, and endpoints directly from the URL.
### Chat Paths
Query parameters must follow a valid chat path:
- For new conversations: `/c/new?`
- For existing conversations: `/c/[conversation-id]?` (where conversation-id is an existing one)
Examples:
```bash
https://your-domain.com/c/new?endpoint=ollama&model=llama3%3Alatest
https://your-domain.com/c/03debefd-6a50-438a-904d-1a806f82aad4?endpoint=openAI&model=o1-mini
```
## Basic Usage
The most common parameters to use are `endpoint` and `model`. Using both is recommended for the most predictable behavior:
```bash
https://your-domain.com/c/new?endpoint=azureOpenAI&model=o1-mini
```
### URL Encoding
Special characters in query params must be properly URL-encoded to work correctly. Common characters that need encoding:
- `:` → `%3A`
- `/` → `%2F`
- `?` → `%3F`
- `#` → `%23`
- `&` → `%26`
- `=` → `%3D`
- `+` → `%2B`
- Space → `%20` (or `+`)
Example with special characters:
```ts
Original: `Write a function: def hello()`
Encoded: `/c/new?prompt=Write%20a%20function%3A%20def%20hello()`
```
You can use JavaScript's built-in `encodeURIComponent()` function to properly encode prompts:
```javascript
const prompt = "Write a function: def hello()";
const encodedPrompt = encodeURIComponent(prompt);
const url = `/c/new?prompt=${encodedPrompt}`;
console.log(url);
```
Try running the code in your browser console to see the encoded URL (browser shortcut: `Ctrl+Shift+I`).
### Endpoint Selection
The `endpoint` parameter can be used alone:
```bash
https://your-domain.com/c/new?endpoint=google
```
When only `endpoint` is specified:
- It will use the last selected model from localStorage
- If no previous model exists, it will use the first available model in the endpoint's model list
#### Notes
- The `endpoint` value must be one of the following:
```bash
openAI, azureOpenAI, google, anthropic, assistants, azureAssistants, bedrock, agents
```
- If using a [custom endpoint](/docs/quick_start/custom_endpoints), you can use its name as the value (case-insensitive)
```bash
# using `endpoint=perplexity` for a custom endpoint named `Perplexity`
https://your-domain.com/c/new?endpoint=perplexity&model=llama-3.1-sonar-small-128k-online
```
### Model Selection
The `model` parameter can be used alone:
```bash
https://your-domain.com/c/new?model=gpt-4o
```
When only `model` is specified:
- It will only select the model if it's available in the current endpoint
- The current endpoint is either the default endpoint or the last selected endpoint
### Prompt Parameter
The `prompt` parameter allows you to pre-populate the chat input field:
```bash
https://your-domain.com/c/new?prompt=Explain quantum computing
```
You can also use `q` as a shorthand, which is interchangeable with `prompt`:
```bash
https://your-domain.com/c/new?q=Explain quantum computing
```
You can combine these with other parameters:
```bash
https://your-domain.com/c/new?endpoint=anthropic&model=claude-3-5-sonnet-20241022&prompt=Explain quantum computing
```
### Automatic Prompt Submission
The `submit` parameter allows you to automatically submit the prompt without manual intervention:
```bash
https://your-domain.com/c/new?prompt=Explain quantum computing&submit=true
```
This feature is particularly useful for:
- Creating automated workflows (e.g., Raycast, Alfred, Automater)
- Building external integrations
You can combine it with other parameters for complete automation:
```bash
https://your-domain.com/c/new?endpoint=openAI&model=gpt-4&prompt=Explain quantum computing&submit=true
```
### Special Endpoints
#### Model Specs
You can select a specific model spec by name:
```bash
https://your-domain.com/c/new?spec=meeting-notes-gpt4
```
This will load all the settings defined in the model spec. When using the `spec` parameter, other model parameters in the URL will be ignored.
#### Agents
You can directly load an agent using its ID without specifying the endpoint:
```bash
https://your-domain.com/c/new?agent_id=your-agent-id
```
This will automatically set the endpoint to `agents`.
#### Assistants
Similarly, you can load an assistant directly:
```bash
https://your-domain.com/c/new?assistant_id=your-assistant-id
```
This will automatically set the endpoint to `assistants`.
## Supported Parameters
LibreChat supports a wide range of parameters for fine-tuning your conversation settings:
### LibreChat Settings
- `maxContextTokens`: Override the system-defined context window
- `resendFiles`: Control file resubmission in subsequent messages
- `promptPrefix`: Set custom instructions/system message
- `imageDetail`: 'low', 'auto', or 'high' for image quality
- Note: while this is a LibreChat-specific parameter, it only affects the following endpoints:
- OpenAI, Custom Endpoints, which are OpenAI-like, and Azure OpenAI, for which this defaults to 'auto'
- `spec`: Select a specific LibreChat [Model Spec](/docs/configuration/librechat_yaml/object_structure/model_specs) by name
- Must match the exact name of a configured model spec
- When specified, other model parameters will not take effect, only those defined by the model spec
- **Important:** If model specs are configured with `enforce: true`, using this parameter may be required for URL query params to work properly
- `fileTokenLimit`: Set maximum token limit for file processing to control costs and resource usage.
- Note: Request value overrides YAML default.
### Model Parameters
Different endpoints support various parameters:
**OpenAI, Custom, Azure OpenAI:**
```bash
# Note: these should be valid values according to the provider's API
temperature, presence_penalty, frequency_penalty, stop, top_p, max_tokens,
reasoning_effort, reasoning_summary, verbosity, useResponsesApi, web_search, disableStreaming
```
**Google, Anthropic:**
```bash
# Note: these should be valid values according to the provider's API
topP, topK, maxOutputTokens, thinking, thinkingBudget, thinkingLevel, web_search
```
**Anthropic, Bedrock (Anthropic models):**
Set this to `true` or `false` to toggle the "prompt-caching":
```bash
promptCache
```
More info: https://www.anthropic.com/news/prompt-caching, https://docs.aws.amazon.com/bedrock/latest/userguide/prompt-caching.html#prompt-caching-get-started
**Bedrock:**
```bash
# Bedrock region
region=us-west-2
# Bedrock equivalent of `max_tokens`
maxTokens=200
# Bedrock reasoning effort (for supported models like ZAI, MoonshotAI)
reasoning_effort=medium
```
**Assistants/Azure Assistants:**
```bash
# overrides existing assistant instructions for current run
instructions=your+instructions
```
```bash
# Adds the current date and time to `additional_instructions` for each run.
append_current_datetime=true
```
## More Info
For more information on any of the above, refer to [Model Spec Preset Fields](/docs/configuration/librechat_yaml/object_structure/model_specs), which shares most parameters.
**Example with multiple parameters:**
```bash
https://your-domain.com/c/new?endpoint=google&model=gemini-2.0-flash-exp&temperature=0.7&prompt=Oh hi mark
```
**Example with model spec:**
```bash
https://your-domain.com/c/new?spec=meeting-notes-gpt4&prompt=Here%20is%20the%20transcript...
```
Note: When using `spec`, other model parameters are ignored in favor of the model spec's configuration.
## ⚠️ Warning
Exercise caution when using query parameters:
- Misuse or exceeding provider limits may result in API errors
- If you encounter bad request errors, reset the conversation by clicking "New Chat"
- Some parameters may have no effect if they're not supported by the selected endpoint
## Best Practices
1. Always use both `endpoint` and `model` when possible
2. Verify parameter support for your chosen endpoint
3. Use reasonable values within provider limits
4. Test your parameter combinations before sharing URLs
## Parameter Validation
All parameters are validated against LibreChat's schema before being applied. Invalid parameters or values will be ignored, and valid settings will be applied to the conversation.
---
This feature enables powerful use cases like:
- Sharing specific conversation configurations
- Creating bookmarks for different chat settings
- Automating chat setup through URL parameters
---
#LibreChat #ChatConfiguration #AIParameters #OpenSource #URLQueryParameters
# Web Search (/docs/features/web_search)
LibreChat's web search feature allows you to search the internet and retrieve relevant information to enhance your conversations. The feature consists of three main components that work together to provide comprehensive search results.
## Quick Start
To get started with web search, you'll need to configure API keys for all three components to ensure effective search results. You can do this in two ways:
1. **Environment Variables** (Recommended for admins):
```bash
# Search Provider (Required)
SERPER_API_KEY=your_serper_api_key
# or
SEARXNG_INSTANCE_URL=your_searxng_instance_url
SEARXNG_API_KEY=your_searxng_api_key # Optional
# Scraper (Required)
FIRECRAWL_API_KEY=your_firecrawl_api_key
# Optional: Custom Firecrawl API URL
FIRECRAWL_API_URL=your_firecrawl_api_url
# Optional: Firecrawl API version (v0 or v1)
# FIRECRAWL_VERSION=v1
# Reranker (Required)
JINA_API_KEY=your_jina_api_key
# Optional: Custom Jina API URL
JINA_API_URL=your_jina_api_url
# or
COHERE_API_KEY=your_cohere_api_key
```
2. **User Interface** (If environment variables are not set):
- Users will be prompted to enter the required API keys when they first use the web search feature
- They can choose which search provider (Serper or SearXNG) and which reranker service to use (Jina or Cohere)
## Obtaining API Keys
Each component of the web search feature requires its own API key. Here's how to obtain them:
### Search Providers
#### Serper
1. Visit [Serper.dev](https://serper.dev)
2. Sign up for an account
3. Navigate to the API Key section
4. Copy your API key
5. Set it in your environment variables or provide it through the UI
#### SearXNG
1. Follow the setup instructions in the [Web Search Configuration](/docs/configuration/librechat_yaml/object_structure/web_search#setting-up-searxng) documentation
2. Set `SEARXNG_INSTANCE_URL` to your instance URL
3. Optionally set `SEARXNG_API_KEY` if your instance requires authentication
### Scraper: Firecrawl
1. Visit [Firecrawl.dev](https://docs.firecrawl.dev/introduction#api-key)
2. Sign up for an account
3. Navigate to the API Key section
4. Copy your API key
5. Set it in your environment variables or provide it through the UI
6. (Optional) If you're using a custom Firecrawl instance, you'll also need to set the API URL
### Rerankers
#### Jina
1. Visit [Jina.ai](https://jina.ai/api-dashboard/)
2. Sign up for an account
3. Navigate to the API Dashboard
4. Copy your API key
5. Set it in your environment variables or provide it through the UI
#### Cohere
1. Visit [Cohere Dashboard](https://dashboard.cohere.com/welcome/login)
2. Sign up for an account
3. Navigate to the API Keys section
4. Copy your API key
5. Set it in your environment variables or provide it through the UI
## Components
### 1. Search Providers
Search providers are responsible for performing the initial web search and returning relevant results.
**Available Providers:**
- **Serper**: A Google Search API that provides high-quality search results
- Get your API key from [Serper.dev](https://serper.dev/api-key)
- **SearXNG**: Open-source, self-hosted meta search engine
- Self-host your own instance
- Privacy-focused search results
### 2. Scrapers
Scrapers extract the actual content from web pages returned by the search provider.
**Available Scrapers:**
- **Firecrawl**: A powerful web scraping service that extracts content from web pages
- Get your API key from [Firecrawl.dev](https://docs.firecrawl.dev/introduction#api-key)
- API URL is optional (defaults to Firecrawl's hosted service)
**Planned Scrapers:**
- **Local Firecrawl**: Self-hosted version of Firecrawl
- Additional third-party scraping services
### 3. Rerankers
Rerankers analyze the scraped content to determine the most relevant parts and reorder them for better results.
**Available Rerankers:**
- **Jina**: AI-powered reranking service
- Get your API key from [Jina.ai](https://jina.ai/api-dashboard/)
- API URL is optional (defaults to Jina's hosted service)
- **Cohere**: Advanced reranking service
- Get your API key from [Cohere Dashboard](https://dashboard.cohere.com/welcome/login)
**Planned Rerankers:**
- **RAG API**: Open-source reranking using RAG (Retrieval-Augmented Generation)
- Additional third-party reranking services
## Configuration
### Admin Configuration
Admins can configure the web search feature using environment variables. The YAML configuration allows you to specify custom environment variable names for each component.
⚠️ **Important: Never put actual API keys or values in the YAML file (they won't work)- only use environment variable names.**
```yaml
webSearch:
# Search Provider Configuration
serperApiKey: "${CUSTOM_SERPER_API_KEY}" # ✅ Correct: Using environment variable name
# serperApiKey: "sk-123..." # ❌ Wrong: Never put actual API keys here
# or
searxngInstanceUrl: "${CUSTOM_SEARXNG_INSTANCE_URL}" # ✅ Correct: Using environment variable name
searxngApiKey: "${CUSTOM_SEARXNG_API_KEY}" # ✅ Correct: Using environment variable name
# searxngInstanceUrl: "http://..." # ❌ Wrong: Never put actual URLs here
# searxngApiKey: "sk-123..." # ❌ Wrong: Never put actual API keys here
# Scraper Configuration
firecrawlApiKey: "${CUSTOM_FIRECRAWL_API_KEY}"
firecrawlApiUrl: "${CUSTOM_FIRECRAWL_API_URL}"
# firecrawlApiKey: "fc-123..." # ❌ Wrong: Never put actual API keys here
# firecrawlApiUrl: "https://..." # ❌ Wrong: Never put actual URLs here
# Reranker Configuration
jinaApiKey: "${CUSTOM_JINA_API_KEY}"
jinaApiUrl: "${CUSTOM_JINA_API_URL}"
cohereApiKey: "${CUSTOM_COHERE_API_KEY}"
# jinaApiKey: "jn-123..." # ❌ Wrong: Never put actual API keys here
# jinaApiUrl: "https://..." # ❌ Wrong: Never put actual URLs here
# cohereApiKey: "ch-123..." # ❌ Wrong: Never put actual API keys here
# General Settings
safeSearch: 1 # Options: 0 (OFF), 1 (MODERATE - default), 2 (STRICT)
```
**Note:** The YAML configuration should only contain environment variable names (in the format `${VARIABLE_NAME}`). This flexibility enables:
- Using different variable names in different environments
- Supporting multiple configurations for different user groups
- Future integration with role-based configurations
If you want to restrict the system to use only specific services, you can specify the service types:
```yaml
webSearch:
# ... variable configurations ...
searchProvider: "serper" # Only use Serper for search
# searchProvider: "searxng" # Only use SearXNG for search
scraperProvider: "firecrawl" # Only use Firecrawl for scraping
rerankerType: "jina" # Only use Jina for reranking
```
### User Configuration
If the admin hasn't configured all the necessary API keys, users will be prompted to provide them through the UI. The interface allows users to:
1. Choose their preferred reranker (Jina or Cohere)
2. Enter API keys for the required services
3. Configure the Firecrawl API URL if needed (optional)
4. Configure the Jina API URL if needed (optional)
## Usage
Once configured, you can use web search in two ways:
1. **Chat Interface**: Click the web search button in the chat interface to enable web search for your conversation
2. **Agents**: Use the `web_search` capability in agents to allow them to search the web
## Notes
- All three components (search provider, scraper, and reranker) are required for effective search results
- The Firecrawl API URL is optional and defaults to their hosted service
- The Jina API URL is optional and defaults to their hosted service
- Safe search provides three levels of content filtering: OFF (0), MODERATE (1 - default), and STRICT (2)
- The scraper timeout is set to 7.5 seconds (7500ms) by default
- API keys can be revoked at any time through the UI
- Future updates will include more open-source, self-hosted options for all components
- Additional customization options are planned, including:
- Control over the number of links to scrape
- Domain allowlist/blocklist for scraping
- Custom scraping rules and filters
- Advanced result filtering and ranking options
- Rate limiting and request throttling controls
# Docker (/docs/local/docker)
For most scenarios, Docker Compose is the recommended installation method due to its simplicity, ease of use, and reliability.
## Prerequisites
- [`Git`](https://git-scm.com/downloads)
- [`Docker`](https://www.docker.com/products/docker-desktop/)
Docker Desktop is recommended for most users. For remote server installations, see the [Ubuntu Docker Deployment Guide](/docs/remote/docker_linux).
Mac computers with Apple Silicon (M1, M2, M3, M4) processors do not support AVX instructions, which are required by the default MongoDB image used in LibreChat's Docker Compose setup. If you're on an M-series Mac, MongoDB will crash on startup.
**Fix:** Create a `docker-compose.override.yml` to use an older, compatible MongoDB image:
```yaml filename="docker-compose.override.yml"
services:
mongodb:
image: mongo:4.4.18
```
See the [Docker Override guide](/docs/configuration/docker_override) for more details.
## Installation
### Clone the Repository
```bash
git clone https://github.com/danny-avila/LibreChat.git
cd LibreChat
```
### Create Your Environment File
```bash
cp .env.example .env
```
The default `.env` file works out of the box for a basic setup. For in-depth configuration, see the [.env reference](/docs/configuration/dotenv).
On Windows, use `copy .env.example .env` if `cp` is not available.
### Start LibreChat
```bash
docker compose up -d
```
The first launch pulls Docker images and may take a few minutes. Subsequent starts are much faster.
### Verify and Log In
Open your browser and visit [http://localhost:3080](http://localhost:3080). You should see the LibreChat login page.
The first account you register becomes the admin account. There are no default credentials -- you create your own username and password during registration.
Click **Register** to create your account and start using LibreChat.
## Mounting librechat.yaml
To use a custom `librechat.yaml` configuration file with Docker, you need to mount it as a volume so the container can access it.
Copy the example override file and edit it:
```bash
cp docker-compose.override.yml.example docker-compose.override.yml
```
Ensure the librechat.yaml volume mount is uncommented in `docker-compose.override.yml`:
```yaml filename="docker-compose.override.yml"
services:
api:
volumes:
- type: bind
source: ./librechat.yaml
target: /app/librechat.yaml
```
Restart for changes to take effect:
```bash
docker compose down && docker compose up -d
```
For full setup instructions including creating the file from scratch, see the [librechat.yaml guide](/docs/configuration/librechat_yaml). For more override options, see the [Docker override guide](/docs/configuration/docker_override).
## Updating LibreChat
The following commands will fetch the latest LibreChat project changes, including any necessary changes to the docker compose files, as well as the latest prebuilt images.
You may need to prefix commands with `sudo` according to your environment permissions.
```bash filename="Stop the running container(s)"
docker compose down
```
```bash filename="Remove all existing docker images"
# Linux/Mac
docker images -a | grep "librechat" | awk '{print $3}' | xargs docker rmi
# Windows (PowerShell)
docker images -a --format "{{.ID}}" --filter "reference=*librechat*" | ForEach-Object { docker rmi $_ }
```
```bash filename="Pull latest project changes"
git pull
```
```bash filename="Pull the latest LibreChat image"
docker compose pull
```
```bash filename="Start LibreChat"
docker compose up
```
## Troubleshooting
### Port Already in Use
If you see an error like `bind: address already in use` for port 3080, another application is using that port.
Either stop the conflicting application, or change the port in `docker-compose.override.yml`:
```yaml filename="docker-compose.override.yml"
services:
api:
ports:
- "3081:3080"
```
Then visit `http://localhost:3081` instead.
### Container Crashes on Startup
If containers exit immediately after starting, check the logs:
```bash
docker compose logs api
```
Common causes:
- Invalid `librechat.yaml` syntax -- validate with the [YAML Validator](/toolkit/yaml_checker)
- Missing `.env` file -- ensure `.env` exists in the project root
- Docker not running -- ensure Docker Desktop is open and running
### Missing Environment Variables
If features are not working as expected, check that required environment variables are set in your `.env` file.
```bash
docker compose exec api env | grep -i "your_variable"
```
See the [.env reference](/docs/configuration/dotenv) for all available variables and their defaults.
## Next Steps
Add OpenRouter, Ollama, and other AI providers
Understand how LibreChat's config files work together
Configure OAuth, LDAP, and other login methods
# Helm Chart (/docs/local/helm_chart)
Please follow this guidance to deploy LibreChat on Kubernetes using Helm, adjusting as needed for your specific use case. Other Helm charts contributed by the community are listed below in the [Community Helm Charts](#community-helm-charts) section.
## Prerequisites
* A running Kubernetes cluster
* _Local_ installations of `kubectl` and Helm
## Configuration
1. Use the [Credentials Generator](/toolkit/creds_generator) to generate secure values for `CREDS_KEY`, `JWT_SECRET`, `JWT_REFRESH_SECRET` and `MEILI_MASTER_KEY`.
Place them in a Kubernetes Secret like this (if you change the secret name, remember to update your Helm values):
```yaml
apiVersion: v1
kind: Secret
metadata:
name: librechat-credentials-env
namespace:
type: Opaque
stringData:
CREDS_KEY:
JWT_SECRET:
JWT_REFRESH_SECRET:
MEILI_MASTER_KEY:
```
2. Add credentials for the Kubernetes Secret (dependent on the desired provider):
```yaml
apiVersion: v1
kind: Secret
. . . .
OPENAI_API_KEY:
```
3. Apply the Secret to the Cluster:
## Install Helm Chart
To install the helm chart run:
`helm install oci://ghcr.io/danny-avila/librechat-chart/librechat`
Development version
In the repo's root directory, run:
`helm install ./helm/librechat`
Similar to other Helm charts, there exists a [values file](https://github.com/danny-avila/LibreChat/blob/main/helm/librechat/values.yaml) that outlines the default settings and indicates which configuration options can be modified.
Create a `values.yaml` file populated with the values you want to modify from the default.
Install the Helm chart: `helm install librechat oci://ghcr.io/danny-avila/librechat-chart/librechat --values `
## Uninstall the Helm Chart
To uninstall the Helm Chart: `helm uninstall `
Example: `helm uninstall librechat`
## Migrate 1.x -> 2.x
If you used the chart before version 2.x you may need to update the `value` structure.
1. Move Config to librechat.configEnv:
```diff
- env:
- ALLOW_EMAIL_LOGIN: "true"
- ALLOW_REGISTRATION: "true"
+ librechat:
+ configEnv:
+ ALLOW_REGISTRATION: "true"
+ ALLOW_EMAIL_LOGIN: "true"
```
2. Consolidate all Secret values to a single Secret as described in [Configuration Step 1](#configuration).
3. To leverage an external MongoDB instance, refer to the [values file](https://github.com/danny-avila/LibreChat/blob/main/helm/librechat/values.yaml) of the Chart, deactivate the components accordingly and change the FQDN of the Mongodb instance. This is recommended if data already exists in this externally managed MongoDB instance.
## Community Helm Charts
- [LibreChat Helm Chart by Blue Atlas Helm Charts](https://github.com/bat-bs/helm-charts/tree/main/charts/librechat) # will be depricated soon as its migrated here
- Submitted by [@dimaby](https://github.com/dimaby) on GitHub: [PR #2879](https://github.com/danny-avila/LibreChat/pull/2879)
# Local Installation (/docs/local)
# npm (/docs/local/npm)
For most scenarios, Docker Compose is the recommended installation method due to its simplicity, ease of use, and reliability. If you prefer using npm, you can follow these instructions.
## Prerequisites
- Node.js v20.19.0+ (or ^22.12.0 or >= 23.0.0): [https://nodejs.org/en/download](https://nodejs.org/en/download)
- LibreChat uses CommonJS (CJS) and requires these specific Node.js versions for compatibility with openid-client v6
- Git: https://git-scm.com/download/
- MongoDB (Atlas or Community Server)
- [MongoDB Atlas](/docs/configuration/mongodb/mongodb_atlas)
- [MongoDB Community Server](/docs/configuration/mongodb/mongodb_community)
## Installation Steps
### Preparation
Run the following commands in your terminal:
```bash filename="Clone the Repository"
git clone https://github.com/danny-avila/LibreChat.git
```
```bash filename="Navigate to the LibreChat Directory"
cd LibreChat
```
```bash filename="Create a .env File from .env.example"
cp .env.example .env
```
> **Note:** **If you're using Windows 10, you might need to use `copy` instead of `cp`.**
```bash filename="Update the MONGO_URI"
Important: Edit the newly created `.env` file to update the `MONGO_URI` with your own MongoDB instance URI.
```
Edit the newly created `.env` file to update the `MONGO_URI` with your own
### Build and Start
Once you've completed the preparation steps, run the following commands:
```bash filename="Install dependencies"
npm ci
```
```bash filename="Build the Frontend"
npm run frontend
```
```bash filename="Start LibreChat!"
npm run backend
```
**Visit [http://localhost:3080/](http://localhost:3080/)**
- Next time you want to start LibreChat, you only need to execute `npm run backend`
## Update LibreChat
To update LibreChat to the latest version, run the following commands:
First, stop LibreChat (if you haven't already).
```bash filename="Pull latest project changes"
git pull
```
```bash filename="Update dependencies"
npm ci
```
```bash filename="Rebuild the Frontend"
npm run frontend
```
```bash filename="Start LibreChat!"
npm run backend
```
## Additional Setup
Unlock additional features by exploring our configuration guides to learn how to set up:
- Meilisearch integration
- RAG API connectivity
- Custom endpoints
- Other advanced configuration options
- And more
This will enable you to customize your LibreChat experience with optional features.
**see also:**
- [User Authentication System Setup](/docs/configuration/authentication)
- [AI Setup](/docs/configuration/pre_configured_ai)
- [Custom Endpoints & Configuration](/docs/configuration/librechat_yaml)
# Custom Endpoints (/docs/quick_start/custom_endpoints)
LibreChat supports any OpenAI API-compatible service as a custom endpoint. You configure endpoints in `librechat.yaml`, store API keys in `.env`, and mount the config via `docker-compose.override.yml` for Docker deployments.
Custom endpoint setup involves three files, each with a specific role:
1. **`librechat.yaml`** -- Defines your custom endpoints (name, API URL, models, display settings)
2. **`.env`** -- Stores sensitive values like API keys (referenced from librechat.yaml using `${VAR_NAME}` syntax)
3. **`docker-compose.override.yml`** -- Mounts `librechat.yaml` into the Docker container (Docker users only)
For a full overview of how these files work together, see the [Configuration Overview](/docs/configuration).
This guide assumes you have LibreChat installed and running. If not, complete the [Docker setup](/docs/local/docker) first.
## Step 1. Mount librechat.yaml (Docker Only)
Docker users need to mount `librechat.yaml` as a volume so the container can read it. Skip this step if you are running LibreChat locally without Docker.
```bash
cp docker-compose.override.yml.example docker-compose.override.yml
```
Edit `docker-compose.override.yml` and ensure the volume mount is uncommented:
```yaml filename="docker-compose.override.yml"
services:
api:
volumes:
- type: bind
source: ./librechat.yaml
target: /app/librechat.yaml
```
Learn more: [Docker Override Guide](/docs/configuration/docker_override)
## Step 2. Configure librechat.yaml
Create a `librechat.yaml` file in the project root (if it does not exist) and add your endpoint configuration. See the [librechat.yaml guide](/docs/configuration/librechat_yaml) for detailed setup instructions.
Here is an example with **OpenRouter** and **Ollama**:
```yaml filename="librechat.yaml"
version: 1.3.5
cache: true
endpoints:
custom:
- name: "OpenRouter"
apiKey: "${OPENROUTER_KEY}"
baseURL: "https://openrouter.ai/api/v1"
models:
default: ["meta-llama/llama-3-70b-instruct"]
fetch: true
titleConvo: true
titleModel: "meta-llama/llama-3-70b-instruct"
dropParams: ["stop"]
modelDisplayLabel: "OpenRouter"
- name: "Ollama"
apiKey: "ollama"
baseURL: "http://host.docker.internal:11434/v1/"
models:
default: ["llama3:latest", "command-r", "mixtral", "phi3"]
fetch: true
titleConvo: true
titleModel: "current_model"
```
Browse all compatible providers in the [AI Endpoints](/docs/configuration/librechat_yaml/ai_endpoints) section. For the full field reference, see [Custom Endpoint Object Structure](/docs/configuration/librechat_yaml/object_structure/custom_endpoint).
When configuring API keys in custom endpoints, you have three options:
1. **Environment variable** (recommended): `apiKey: "${OPENROUTER_KEY}"` -- reads from `.env`
2. **User provided**: `apiKey: "user_provided"` -- users enter their own key in the UI
3. **Direct value** (not recommended): `apiKey: "sk-your-actual-key"` -- stored in plain text
## Step 3. Set Environment Variables
Add the API keys referenced in your `librechat.yaml` to the `.env` file:
```bash filename=".env"
OPENROUTER_KEY=your_openrouter_api_key
```
Each `${VARIABLE_NAME}` in librechat.yaml must have a matching entry in `.env`.
## Step 4. Restart and Verify
After editing configuration files, you must restart LibreChat for changes to take effect.
```bash
docker compose down && docker compose up -d
```
Stop the running process (Ctrl+C) and restart:
```bash
npm run backend
```
Open LibreChat in your browser. Your custom endpoints should appear in the endpoint selector dropdown.
Check the server logs for configuration errors:
```bash
docker compose logs api
```
Common issues: YAML syntax errors, missing env vars, or `librechat.yaml` not mounted in Docker. Validate your YAML with the [YAML Validator](/toolkit/yaml_checker).
## Next Steps
Browse all compatible AI providers with example configurations
Full setup guide and reference for the config file
# Quick Start (/docs/quick_start)
# Local Setup Guide (/docs/quick_start/local_setup)
import AdditionalLinks from '@/components/repeated/AdditionalLinks.mdx';
This is a condensed version of our [Local Installation Guide](/docs/local/)
## Step 1. Download the Project
### Manual Download
1. **Go to the Project Page**: Visit [https://github.com/danny-avila/LibreChat](https://github.com/danny-avila/LibreChat).
2. **Download the ZIP File**: Click the green "Code" button, then click "Download ZIP."
3. **Extract the ZIP File**: Find the downloaded ZIP file, right-click, and select "Extract All...".
### Using Git
Run the following [git](https://git-scm.com/) command in your terminal, from the desired parent directory:
```bash
git clone https://github.com/danny-avila/LibreChat.git
```
## Step 2. Install Docker
1. **Download**: Go to [Docker Desktop Download Page](https://www.docker.com/products/docker-desktop) and download Docker Desktop.
2. **Install**: Open the installer and follow the instructions.
3. **Run**: Open Docker Desktop to ensure it is running.
**Notes:**
- Docker Desktop is recommended for most users. If you are looking for an advanced docker/container setup, especially for a remote server installation, see our [Ubuntu Docker Deployment Guide](/docs/remote/docker_linux).
- You may need to restart your computer after installation.
## Step 3. Run the App
1. **Navigate to the Project Directory**
2. **Create and Configure .env File**:
- Copy the contents of `.env.example` to a new file named `.env`.
- Fill in any necessary values.
- For an in-depth environment configuration, see the [.env File Configuration Guide](/docs/configuration/dotenv).
3. **Start the Application**:
- Run the following command:
```bash
docker compose up -d
```
## Conclusion
**That's it!** You should now have **LibreChat** running locally on your machine. Enjoy!
---
# Cloudflare (/docs/remote/cloudflare)
## Registering Your Domain
### Step 1: Choose Your Domain Name
- Select a domain name that aligns with your brand identity and is memorable. Avoid complex spellings.
- Use online tools from domain registrars like Cloudflare, Namecheap, GoDaddy, etc., to check if your preferred domain name is available.
### Step 2: Select a Domain Registrar
- Evaluate registrars based on their pricing, customer support, additional features (such as email, SSL certificates), and user reviews.
- Pay special attention to privacy protection services (WHOIS privacy), as this helps keep your personal information private.
### Step 3: Purchase and Register the Domain
- Follow the registrar's purchase process, which involves providing your contact information and completing the payment.
- Thoroughly read the terms of service and note the domain's expiration date to avoid unexpected lapses.
## Configuring Cloudflare Tunnels
### Step 1: Add Your Domain to Cloudflare
- If your domain was purchased via Cloudflare, this step is skipped as your domain is already configured to use Cloudflare's nameservers.
- Log into your Cloudflare account and add your new domain. Follow the instructions to replace your domain's nameservers with those provided by Cloudflare, which is necessary for activating Cloudflare's services.
### Step 3: Create a Tunnel


#### Name your Tunnel

#### Install Cloudflare's `cloudflared` on Your Server

- For continuous operation, consider setting up `cloudflared` to run as a service on your system. This ensures the tunnel remains active after reboots and crashes.
- Download and install the [`cloudflared`](https://developers.cloudflare.com/cloudflare-one/connections/connect-networks/downloads/) tool from Cloudflare's official site onto your server. This software will facilitate the secure connection between your domain and the internal services.
- Authenticate `cloudflared` using your Cloudflare account credentials to link it to your domain.
#### Configure your Tunnel
- Initiate a tunnel using either the Cloudflare dashboard under the "Tunnels" section

### Step 6: Verify the Tunnel
- Test the connection by accessing your domain/subdomain in a web browser, ensuring it resolves to your server via the Cloudflare Tunnel without errors.
- Monitor your tunnel's performance and status directly from the Cloudflare dashboard under the "Tunnels" section.

## Conclusion
By securing your domain registration and configuring a Cloudflare Tunnel, you strengthen the security and reliability of connecting to your network services. Regularly review and update your domain and tunnel settings to adapt to any new requirements or changes in network configuration. Stay proactive about maintaining your online presence and security stance.
# DigitalOcean (/docs/remote/digitalocean)
> These instructions + the [docker guide]() are designed for someone starting from scratch for a Docker Installation on a remote Ubuntu server. You can skip to any point that is useful for you. There are probably more efficient/scalable ways, but this guide works really great for my personal use case.
**There are many ways to go about this, but I will present to you the best and easiest methods I'm aware of. These configurations can vary based on your liking or needs.**
Digital Ocean is a great option for deployment: you can benefit off a **free [200 USD credit](https://m.do.co/c/4486923fcf00)** (for 60 days), and one of the cheapest tiers (6 USD/mo) will work for LibreChat in a low-stress, minimal-user environment. Should your resource needs increase, you can always upgrade very easily.
Digital Ocean is also my preferred choice for testing deployment, as it comes with useful resource monitoring and server access tools right out of the box.
**Using the following Digital Ocean link will directly support the project by helping me cover deployment costs with credits!**
## **Click the banner to get a $200 credit and to directly support LibreChat!**
_You are free to use this credit as you wish!_
[](https://www.digitalocean.com/?refcode=4486923fcf00&utm_campaign=Referral_Invite&utm_medium=Referral_Program&utm_source=badge)
_Note: you will need a credit card or PayPal to sign up. I'm able to use a prepaid debit card through PayPal for my billing_
## Table of Contents
- **[Part I: Starting from Zero](#part-i-starting-from-zero)**
- [1. DigitalOcean signup](#1-click-here-or-on-the-banner-above-to-get-started-on-digitalocean)
- [2. Access console](#2-access-your-droplet-console)
- [3. Console user setup](#3-once-you-have-logged-in-immediately-create-a-new-non-root-user)
- [4. Firewall Setup](#4-firewall-setup)
- **[Part II: Installing Docker & Other Dependencies](#part-ii-installing-docker-and-other-dependencies)**
## Part I: Starting from Zero:
### **1. Get started on DigitalOcean**
[Click here](https://m.do.co/c/4486923fcf00) or on the banner above to get started.
Once you're logged in, you will be greeted with a [nice welcome screen](https://cloud.digitalocean.com/welcome).

### **a) Navigate to the Projects page**
Click on ["Explore our control panel"](https://cloud.digitalocean.com/projects) or simply navigate to the [Projects page](https://cloud.digitalocean.com/projects).
Server instances are called **"droplets"** in digitalocean, and they are organized under **"Projects."**
### **b) Click on "Spin up a Droplet" to start the setup**

Adjust these settings based on your needs, as I'm selecting the bare minimum/cheapest options that will work.
- **Choose Region/Datacenter:** closest to you and your users
- **Choose an image:** Ubuntu 22.04 (LTS) x64
- **Choose Size:** Shared CPU, Basic Plan
- CPU options: Regular, 6 USD/mo option (0.009 USD/hour, 1 GB RAM / 1 CPU / 25 GB SSD / 1000 GB transfer)
- No additional storage
- **Choose Authentication Method:** Password option is easiest but up to you
- Alternatively, you can setup traditional SSH.
- **Recommended:** Add improved metrics monitoring and alerting (free)
- You might be able to get away with the $4/mo option by not selecting this, but not yet tested
- **Finalize Details:**
- Change the hostname to whatever you like, everything else I leave default (1 droplet, no tags)
- Finally, click "Create Droplet"

After creating the droplet, it will now spin up with a progress bar.
### **2. Access your droplet console**
Once it's spun up, **click on the droplet** and click on the Console link on the right-hand side to start up the console.


Launching the Droplet console this way is the easiest method but you can also SSH if you set it up in the previous step.
To keep this guide simple, I will keep it easy and continue with the droplet console. Here is an [official DigitalOcean guide for SSH](https://docs.digitalocean.com/products/droplets/how-to/connect-with-ssh/) if you are interested.
### **3. Once you have logged in, immediately create a new, non-root user:**
**Note:** you should remove the greater/less than signs anytime you see them in this guide
```bash
# example: adduser danny
adduser
# you will then be prompted for a password and user details
```
Once you are done, run the following command to elevate the user
```bash
# example: usermod -aG sudo danny
usermod -aG sudo
```
**Make sure you have done this correctly by double-checking you have sudo permissions:**
```bash
getent group sudo | cut -d: -f4
```
**Switch to the new user**
```bash
# example: su - danny
su -
```
### **4. Firewall Setup**
It's highly recommended you setup a simple firewall for your setup.
Click on your droplet from the projects page again, and goto the Networking tab on the left-hand side under your ipv4:

Create a firewall, add your droplet to it, and add these inbound rules (will work for this guide, but configure as needed)

---
This concludes the initial setup. For the subsequent steps, please proceed to the next guide:**[Docker Deployment Guide](/docs/remote/docker_linux)**, which will walk you through the remaining installation process.
# Docker (Remote Linux) (/docs/remote/docker_linux)
In order to use this guide you need a remote computer or VM deployed. While you can use this guide with a local installation, keep in mind that it was originally written for cloud deployment.
> ⚠️ This guide was originally designed for [Digital Ocean](/docs/remote/digitalocean), so you may have to modify the instruction for other platforms, but the main idea remains unchanged.
## Part I: Installing Docker and Other Dependencies:
There are many ways to setup Docker on Linux systems. I'll walk you through the best and the recommended way [based on this guide](https://www.smarthomebeginner.com/install-docker-on-ubuntu-22-04/).
> Note that the "Best" way for Ubuntu docker installation does not mean the "fastest" or the "easiest". It means, the best way to install it for long-term benefit (i.e. faster updates, security patches, etc.).
### **1. Update and Install Docker Dependencies**
First, let's update our packages list and install the required docker dependencies.
```bash
sudo apt update
```
Then, use the following command to install the dependencies or pre-requisite packages.
```bash
sudo apt install apt-transport-https ca-certificates curl software-properties-common gnupg lsb-release
```
#### **Installation Notes**
- Input "Y" for all [Y/n] (yes/no) terminal prompts throughout this entire guide.
- After the first [Y/n] prompt, you will get the first of a few **purple screens** asking to restart services.
- Each time this happens, you can safely press ENTER for the default, already selected options:

- If at any point your droplet console disconnects, do the following and then pick up where you left off:
- Access the console again as indicated above
- Switch to the user you created with `su - `
### **2. Add Docker Repository to APT Sources**
While installing Docker Engine from Ubuntu repositories is easier, adding official docker repository gives you faster updates. Hence why this is the recommended method.
First, let us get the GPG key which is needed to connect to the Docker repository. To that, use the following command.
```bash
curl -fsSL https://download.docker.com/linux/ubuntu/gpg | sudo gpg --dearmor -o /usr/share/keyrings/docker-archive-keyring.gpg
```
Next, add the repository to the sources list. While you can also add it manually, the command below will do it automatically for you.
```bash
echo "deb [arch=$(dpkg --print-architecture) signed-by=/usr/share/keyrings/docker-archive-keyring.gpg] https://download.docker.com/linux/ubuntu $(lsb_release -cs) stable" | sudo tee /etc/apt/sources.list.d/docker.list > /dev/null
```
The above command will automatically fill in your release code name (jammy for 22.04, focal for 20.04, and bionic for 18.04).
Finally, refresh your packages again.
```bash
sudo apt update
```
If you forget to add the GPG key, then the above step would fail with an error message. Otherwise, let's get on with installing Docker on Ubuntu.
### **3. Install Docker**
> What is the difference between docker.io and docker-ce?
> docker.io is the docker package that is offered by some popular Linux distributions (e.g. Ubuntu/Debian). docker-ce on the other hand, is the docker package from official Docker repository. Typically docker-ce more up-to-date and preferred.
We will now install the docker-ce (and not docker.io package)
```bash
sudo apt install docker-ce
```
Purple screen means press ENTER. :)
Recommended: you should make sure the created user is added to the docker group for seamless use of commands:
```bash
sudo usermod -aG docker $USER
```
Now let's reboot the system to make sure all is well.
```bash
sudo reboot
```
After rebooting, if using the browser droplet console, you can click reload and wait to get back into the console.

**Reminder:** Any time you reboot with `sudo reboot`, you should switch to the user you setup as before with `su - `.
### **4. Verify that Docker is Running on Ubuntu**
There are many ways to check if Docker is running on Ubuntu. One way is to use the following command:
```bash
sudo systemctl status docker
```
You should see an output that says **active (running)** for status.

Exit this log by pressing CTRL (or CMD) + C.
### **5. Install Docker Compose**
Since we already added Docker's official repository in step 2, installing Docker Compose is straightforward using the [official Compose plugin](https://docs.docker.com/compose/install/linux/):
```bash
sudo apt install docker-compose-plugin
```
Verify the installation:
```bash
docker compose version
```
> Note: Docker Compose v2 uses the `docker compose` command (without hyphen) instead of the legacy `docker-compose`. All commands in this guide use the modern syntax.
### **6. As part of this guide, I will recommend you have git and npm installed:**
Though not technically required, having git and npm will make installing/updating very simple:
```bash
sudo apt install git nodejs npm
```
Cue the matrix lines.
You can confirm these packages installed successfully with the following:
```bash
git --version
node -v
npm -v
```

> Note: this will install some pretty old versions, for npm in particular. LibreChat requires Node.js v20.19.0+ (or ^22.12.0 or >= 23.0.0) for compatibility with openid-client v6 when using CommonJS. If you need to run LibreChat directly on the host (not using Docker), you'll need to install a compatible Node.js version. However, for this Docker-based guide, the Node.js version on the host doesn't matter as the application runs inside containers.
**Ok, now that you have set up the Droplet, you will now setup the app itself**
---
## Part II: Setup LibreChat
### **1. Clone down the repo**
From the _droplet_ commandline (as your user, not root):
```bash
# clone down the repository
git clone https://github.com/danny-avila/LibreChat.git
# enter the project directory
cd LibreChat/
```
### **2. Create LibreChat Config and Environment files**
#### Config (librechat.yaml) File
Next, we create the [LibreChat Config file](/docs/configuration/librechat_yaml), AKA `librechat.yaml`, allowing for customization of the app's settings as well as [custom endpoints](/docs/configuration/librechat_yaml/ai_endpoints).
Whether or not you want to customize the app further, it's required for the `deploy-compose.yml` file we are using, so we can create one with the bare-minimum value to start:
```bash
nano librechat.yaml
```
You will enter the editor screen, and you can paste the following:
```yaml
# For more information, see the Configuration Guide:
# https://www.librechat.ai/docs/configuration/librechat_yaml
# Configuration version (required)
version: 1.3.5
# This setting caches the config file for faster loading across app lifecycle
cache: true
```
Exit the editor with `CTRL + X`, then `Y` to save, and `ENTER` to confirm.
LibreChat will exit with an error (exit code 1) if your `librechat.yaml` file contains validation errors. This fail-fast behavior ensures configuration issues are caught early in deployment.
Before deploying, validate your configuration using the [YAML Validator](/toolkit/yaml_checker). If your CI/CD pipeline starts the server, it will fail fast on invalid configuration, preventing deployments with misconfigured settings.
#### Environment (.env) File
The default values are enough to get you started and running the app, allowing you to provide your credentials from the web app.
```bash
# Copies the example file as your global env file
cp .env.example .env
```
However, it's **highly recommended** you adjust the "secret" values from their default values for added security. The API startup logs will warn you if you don't.
For conveninence, you can run this to generate your own values:
[https://www.librechat.ai/toolkit/creds_generator](https://www.librechat.ai/toolkit/creds_generator)
```bash
nano .env
# FIND THESE VARIABLES AND REPLACE THEIR DEFAULT VALUES!
# Must be a 16-byte IV (32 characters in hex)
CREDS_IV=e2341419ec3dd3d19b13a1a87fafcbfb
# Must be 32-byte keys (64 characters in hex)
CREDS_KEY=f34be427ebb29de8d88c107a71546019685ed8b241d8f2ed00c3df97ad2566f0
JWT_SECRET=16f8c0ef4a5d391b26034086c628469d3f9f497f08163ab9b40137092f2909ef
JWT_REFRESH_SECRET=eaa5191f2914e30b9387fd84e254e4ba6fc51b4654968a9b0803b456a54b8418
```
If you'd like to provide any credentials for all users of your instance to consume, you should add them while you're still editing this file:
```bash
OPENAI_API_KEY=sk-yourKey
```
As before, exit the editor with `CTRL + X`, then `Y` to save, and `ENTER` to confirm.
**That's it!**
For thorough configuration, however, you should edit your .env file as needed, and do read the comments in the file and the resources below.
```bash
# if editing the .env file
nano .env
```
This is one such env variable to be mindful of. This disables external signups, in case you would like to set it after you've created your account.
```shell
ALLOW_REGISTRATION=false
```
**Resources:**
- [Tokens/Apis/etc](/docs/configuration/pre_configured_ai)
- [User/Auth System](/docs/configuration/authentication)
### **3. Start docker**
```bash
# should already be running, but just to be safe
sudo systemctl start docker
# confirm docker is running
docker info
```
Now we can start the app container. For the first time, we'll use the full command and later we can use a shorthand command
```bash
sudo docker compose -f ./deploy-compose.yml up -d
```

It's safe to close the terminal if you wish -- the docker app will continue to run.
> Note: this is using a special compose file optimized for this deployed environment. If you would like more configuration here, you should inspect the deploy-compose.yml and Dockerfile.multi files to see how they are setup. We are not building the image in this environment since it's not enough RAM to properly do so. Instead, we pull the latest dev-api image of librechat, which is automatically built after each push to main.
> If you are setting up a domain to be used with LibreChat, this compose file is using the nginx file located in client/nginx.conf. Instructions on this below in part V.
### **4. Once the app is running, you can access it at `http://yourserverip`**
#### Go back to the droplet page to get your server ip, copy it, and paste it into your browser!

#### Sign up, log in, and enjoy your own privately hosted, remote LibreChat :)


## Part III: Updating LibreChat
I've made this step pretty painless, provided everything above was installed successfully and you haven't edited the git history.
> Note: If you are working on an edited branch, with your own commits, for example, such as with edits to client/nginx.conf, you should inspect config/deployed-update.js to run some of the commands manually as you see fit. See part V for more on this.
Run the following for an automated update
```bash
npm run update:deployed
```
**Stopping the docker container**
```bash
npm run stop:deployed
```
> This simply runs `docker compose -f ./deploy-compose.yml down`
**Starting the docker container**
```bash
npm run start:deployed
```
> This simply runs `docker compose -f ./deploy-compose.yml up -d`
**Check active docker containers**
```bash
docker ps
```
You can update manually without the scripts if you encounter issues.
```bash filename="Stop the running container(s)""
docker compose -f ./deploy-compose.yml down
```
```bash filename="Remove all existing docker images"
# Linux/Mac
docker images -a | grep "librechat" | awk '{print $3}' | xargs docker rmi
# Windows (PowerShell)
docker images -a --format "{{.ID}}" --filter "reference=*librechat*" | ForEach-Object { docker rmi $_ }
```
```bash filename="Pull latest project changes"
git pull
```
```bash filename="Pull the latest LibreChat image""
docker compose -f ./deploy-compose.yml pull
```
```bash filename="Start LibreChat"
docker compose -f ./deploy-compose.yml up
```
## Part IV: Editing the NGINX file (for custom domains and advanced configs)
In case you would like to edit the NGINX file for whatever reason, such as pointing your server to a custom domain, use the following:
```bash filename="First, stop the active instance if running"
npm run stop:deployed
```
```bash filename="now you can safely edit"
nano client/nginx.conf
```
I won't be walking you through custom domain setup or any other changes to NGINX, you can look into the [Cloudflare guide](/docs/remote/cloudflare), the [Traefik guide](/docs/remote/traefik) or the [NGINX guide](/docs/remote/nginx) to get you started with custom domains.
However, I will show you what to edit on the LibreChat side for a custom domain with this setup.
Since NGINX is being used as a proxy pass by default, I only edit the following:
```shell
# before
server_name localhost;
# after
server_name custom.domain.com;
```
> Note: this works because the deploy-compose.yml file is using NGINX by default, unlike the main docker-compose.yml file. As always, you can configure the compose files as you need.
Now commit these changes to a separate branch:
```bash
# create a new branch
# example: git checkout -b edit
git checkout -b
# stage all file changes
git add .
```
To commit changes to a git branch, you will need to identify yourself on git. These can be fake values, but if you would like them to sync up with GitHub, should you push this branch to a forked repo of LibreChat, use your GitHub email
```bash
# these values will work if you don't care what they are
git config --global user.email "you@example.com"
git config --global user.name "Your Name"
# Now you can commit the change
git commit -m "edited nginx.conf"
```
Updating on an edited branch will work a little differently now
```bash
npm run rebase:deployed
```
You should be all set!
> **Warning** You will experience merge conflicts if you start significantly editing the branch and this is not recommended unless you know what you're doing
> Note that any changes to the code in this environment won't be reflected because the compose file is pulling the docker images built automatically by GitHub
## Part V: Use the Latest Stable Release instead of Latest Main Branch
By default, this setup will pull the latest updates to the main branch of Librechat. If you would rather have the latest "stable" release, which is defined by the [latest tags](https://github.com/danny-avila/LibreChat/releases), you will need to edit deploy-compose.yml and commit your changes exactly as above in Part V. Be aware that you won't benefit from the latest feature as soon as they come if you do so.
Let's edit `deploy-compose.yml`:
```bash
nano deploy-compose.yml
```
Change `librechat-dev-api` to `librechat-api`:
```yaml
image: registry.librechat.ai/danny-avila/librechat-api:latest
```
Stage and commit as in Part V, and you're all set!
# HuggingFace (/docs/remote/huggingface)
## Create and Configure your Database (Required)
The first thing you need is to create a MongoDB Atlas Database and get your connection string.
Follow the instructions in this document: **[MongoDB Atlas](/docs/configuration/mongodb/mongodb_atlas)**
## Getting Started
**1.** Login or Create an account on **[Hugging Face](https://huggingface.co/)**
**2.** Visit **[https://huggingface.co/spaces/LibreChat/template](https://huggingface.co/spaces/LibreChat/template)** and click on `Duplicate this Space` to copy the LibreChat template into your profile.
> Note: It is normal for this template to have a runtime error, you will have to configure it using the following guide to make it functional.

**3.** Name your Space and Fill the `Secrets` and `Variables`
>You can also decide here to make it public or private

You will need to fill these values:
| Secrets | Values |
| --- | --- |
| MONGO_URI | * use these instruction to get the string: https://librechat.ai/docs/configuration/mongodb/mongodb_atlas |
| OPENAI_API_KEY | `user_provided` |
| BINGAI_TOKEN | `user_provided` |
| CHATGPT_TOKEN | `user_provided` |
| ANTHROPIC_API_KEY | `user_provided` |
| GOOGLE_KEY | `user_provided` |
| CREDS_KEY | * see below |
| CREDS_IV | * see below |
| JWT_SECRET | * see below |
| JWT_REFRESH_SECRET | * see below |
> ⬆️ **Leave the value field blank for any endpoints that you wish to disable.**
> ⚠️ setting the API keys and token to `user_provided` allows you to provide them safely from the webUI
> * For `CREDS_KEY`, `CREDS_IV` and `JWT_SECRET` use this tool: **[Credentials Generator](/toolkit/creds_generator)**
> * Run the tool a second time and use the new `JWT_SECRET` value for the `JWT_REFRESH_SECRET`
| Variables | Values |
| --- | --- |
| APP_TITLE | LibreChat |
| ALLOW_REGISTRATION | true |
## Deployment
**1.** When you're done filling the `secrets` and `variables`, click `Duplicate Space` in the bottom of that window

**2.** The project will now build, this will take a couple of minutes

**3.** When ready, `Building` will change to `Running`

And you will be able to access LibreChat!

## Update
To update LibreChat, simply select `Factory Reboot` from the ⚙️Settings menu

## Conclusion
You can now access it with from the current URL. If you want to access it without the Hugging Face overlay, you can modify this URL template with your info:
`https://username-projectname.hf.space/`
e.g. `https://cooluser-librechat.hf.space/`
**🎉 Congratulation, you've successfully deployed LibreChat on Hugging Face! 🤗**
## Meilisearch Setup (Optional)
To enable the search functionality in LibreChat, you'll need to deploy and configure a Meilisearch instance. Here's how:
**1. Duplicate the Meilisearch Space:**
Visit this link: [https://huggingface.co/spaces/LibreChat/meilisearch](https://huggingface.co/spaces/LibreChat/meilisearch) and click "Duplicate this Space".
**2. Configure the Meilisearch Space:**
* **Visibility:** Set the visibility to "public".
* **MEILI_MASTER_KEY:** Generate a secure 16-character master key. You can use a tool like [https://randomkeygen.com/](https://randomkeygen.com/) to generate a random key. Set this key as the value for the `MEILI_MASTER_KEY` environment variable in the Meilisearch space. *Important: Keep this key secure!*
* **MEILI_ENV:** Set the `MEILI_ENV` environment variable to `production`.
**3. Duplicate the Space:**
Click the "Duplicate Space" button.
**4. Configure LibreChat to use Meilisearch:**
* **Edit the Dockerfile:** Go to your LibreChat space (the one you duplicated from the main LibreChat template). Navigate to "Files" -> "Dockerfile" and click "Edit".
* **Uncomment and Modify Lines:** Uncomment/edit the following lines in the Dockerfile. These lines will contain `ENV SEARCH` and `ENV MEILI_*`. Make sure to replace `` with the actual URL of your Meilisearch deployment on Hugging Face Spaces. It should look something like https://username-meilisearch.hf.space/. *Update the username to match your username!*
```dockerfile
ENV SEARCH=true
ENV MEILI_NO_ANALYTICS=true
ENV MEILI_HOST=
```
* **Commit Changes:** Commit your changes to the `main` branch.
**5. Add the `MEILI_MASTER_KEY` Secret to LibreChat:**
* Go to your LibreChat space's settings (the LibreChat deployment, not the Meilisearch one).
* Click "New secret".
* **Name:** Enter `MEILI_MASTER_KEY`.
* **Value:** Enter the *same* master key you used when setting up the Meilisearch space.
**6. Verify the Setup:**
After LibreChat rebuilds and starts running, you should see a search option in the top left of the LibreChat interface. If you don't see it, double-check that you've followed all the steps correctly.
# Overview (/docs/remote)
Welcome to the introductory guide for deploying LibreChat. This document provides an initial overview, featuring a comparison table and references to detailed guides, ensuring a thorough understanding of deployment strategies.
In this guide, you will explore various options to efficiently deploy LibreChat in a variety of environments, customized to meet your specific requirements.
## Minimum Requirements
The minimum requirements for running LibreChat:
- 1 GiB RAM
- 1 vCPU
**Note:** With everything enabled, you might consider increasing the RAM to 2GB for smoother operation.
## Comparative Table
> Note that the "Recommended" label indicates that these services are well-documented, widely used within the community, or have been successfully deployed by a significant number of users. As a result, we're able to offer better support for deploying LibreChat on these services
### Hosting Services
| **Service** | **Domain** | **Pros** | **Cons** | **Comments** | **Recommended** |
|--------------------------------------------|---------------------------|------------------------------------------------------------|----------------------------------------|---------------------------------------------------------|-------------------------|
| [DigitalOcean](/docs/remote/digitalocean) | Cloud Infrastructure | Intuitive interface, stable pricing | Smaller network footprint | Optimal for enthusiasts & small to medium businesses | ✅ Well Known, Reliable |
| [HuggingFace](/docs/remote/huggingface) | AI/ML Solutions | ML/NLP specialization | Focused on ML applications | Excellent for AI/ML initiatives | ✅ Free |
| [Railway](/docs/remote/railway) | App Deployment | Simplified app deployment | Limited access to containers | Very easy to get started | ✅ Easy |
### Network Services
| **Service** | **Domain** | **Pros** | **Cons** | **Comments** |
|---------------------------------------|-----------------------------|-----------------------------------------------------|--------------------------------------------------|-------------------------------------------------|
| [Cloudflare](/docs/remote/cloudflare) | Web Performance & Security | Global CDN, DDoS protection, ease of use | Customer support can be slow | Top choice for security enhancements |
| [Nginx](/docs/remote/nginx) | Web Server, Reverse Proxy | High performance, stability, resource efficiency | Manual setup, limited extensions | Widely used for hosting due to its performance |
| [ngrok](/docs/remote/ngrok) | Secure Tunneling | Easy to use, free tier available, secure tunneling | Requires client download, complex domain routing | Handy for local development tests |
| [Traefik](/docs/remote/traefik) | Reverse Proxy, Load Balancer| Automatic service discovery, native cluster support | Configuration can be complex for beginners | Ideal for microservices and dynamic environments|
**Cloudflare** is known for its extensive network that speeds up and secures internet services, with an intuitive user interface and robust security options on premium plans.
**Ngrok** is praised for its simplicity and the ability to quickly expose local servers to the internet, making it ideal for demos and testing.
**Nginx** is a high-performance web server that is efficient in handling resources and offers stability. It does, however, require manual setup and has fewer modules and extensions compared to other servers.
**Traefik** is renowned for its automatic configuration updates and ease of deployment in container environments, appealing to DevOps for its integration with various back-ends and dynamic reconfiguration. It thrives in microservices architectures but may pose challenges for those new to cloud-native technologies.
## Cloud Vendor Integration and Configuration
The integration level with cloud vendors varies: from platforms enabling single-click LibreChat deployments like [Railway](/docs/remote/railway), through platforms leveraging Infrastructure as Code tools such as Azure with Terraform, to more traditional VM setups requiring manual configuration, exemplified by [DigitalOcean](/docs/remote/digitalocean), Linode, and Hetzner.
## Essential Security Considerations
Venturing into the digital landscape reveals numerous threats to the security and integrity of your online assets. To safeguard your digital domain, it is crucial to implement robust security measures.
When deploying applications on a global scale, it is essential to consider the following key factors to ensure the protection of your digital assets:
1. Encrypting data in transit: Implementing HTTPS with SSL certificates is vital to protect your data from interception and eavesdropping attacks.
2. Global accessibility implications: Understand the implications of deploying your application globally, including the legal and compliance requirements that vary by region.
3. Secure configuration: Ensure that your application is configured securely, including the use of secure protocols, secure authentication, and authorization mechanisms.
If you choose to use IaaS or Tunnel services for your deployment, you may need to utilize a reverse proxy such as [Nginx](/docs/remote/nginx), [Traefik](/docs/remote/traefik) or [Cloudflare](/docs/remote/cloudflare) to name a few.
Investing in the appropriate security measures is crucial to safeguarding your digital assets and ensuring the success of your global deployment.
## Choosing the Cloud vendor (e.g. platform)
Choosing a cloud vendor, for the "real deployment" is crucial as it impacts cost, performance, security, and scalability. You should consider factors such as data center locations, compliance with industry standards, compatibility with existing tools, and customer support.
There is a lot of options that differ in many aspects. In this section you can find some options that the team and the community uses that can help you in your first deployment.
Once you gain more knowledge on your application usage and audience you will probably be in a position to decide what cloud vendor fits you the best for the long run.
As said the cloud providers / platforms differ in many aspects. For our purpose we can assume that in our context your main concerns is will ease of use, security and (initial) cost. In case that you have more concerns like scaling, previous experience with any of the platforms or any other specific feature then you probably know better what platform fit's you and you can jump directly to the information that you are seeking without following any specific guide.
## Choosing the Right Deployment Option for Your Needs
The deployment options are listed in order from most effort and control to least effort and control
> Each deployment option has its advantages and disadvantages, and the choice ultimately depends on the specific needs of your project.
### 1. IaaS (Infrastructure as a Service)
Infrastructure as a Service (IaaS) refers to a model of cloud computing that provides fundamental computing resources, such as virtual servers, network, and storage, on a pay-per-use basis. IaaS allows organizations to rent and access these resources over the internet, without the need for investing in and maintaining physical hardware. This model provides scalability, flexibility, and cost savings, as well as the ability to quickly and easily deploy and manage infrastructure resources in response to changing business needs.
- [DigitalOcean](/docs/remote/digitalocean): User-friendly interface with predictable pricing.
- Linode: Renowned for excellent customer support and straightforward pricing.
#### For Iaas we recommend Docker Compose
**Why Docker Compose?** We recommend Docker Compose for consistent deployments. This guide clearly outlines each step for easy deployment: [Docker - Linux remote install guide](/docs/remote/docker_linux)
**Note:** There are two docker compose files in the repo
1. **Development Oriented docker compose `docker-compose.yml`**
2. **Deployment Oriented docker compose `deploy-compose.yml`**
The main difference is that `deploy-compose.yml` includes Nginx, making its configuration internal to Docker.
> Look at the [Nginx Guide](/docs/remote/nginx) for more information
### 2. IaC (Infrastructure as Code)
Infrastructure as Code (IaC) refers to the practice of managing and provisioning computing infrastructures through machine-readable definition files, as opposed to physical hardware configuration or interactive configuration tools. This approach promotes reproducibility, disposability, and scalability, particularly in modern cloud environments. IaC allows for the automation of infrastructure deployment, configuration, and management, resulting in faster, more consistent, and more reliable provisioning of resources.
- Azure: Comprehensive services suitable for enterprise-level deployments
**Note:** Digital Ocean, Linode, Hetzner also support IaC. While we lack a specific guide, you can try to adapt the adapt the Azure Guide for Terraform and help us contribute to its enhancement.
### 3. PaaS (Platform as a Service)
Platform as a Service (PaaS) is a model of cloud computing that offers a development and deployment environment in the cloud. It provides a platform for developers to build, test, and deploy applications, without the need for managing the underlying infrastructure. PaaS typically includes a range of resources such as databases, middleware, and development tools, enabling users to deliver simple cloud-based apps to sophisticated enterprise applications. This model allows for faster time-to-market, lower costs, and easier maintenance and scaling, as the service provider is responsible for maintaining the infrastructure, and the customer can focus on building, deploying and managing their applications.
- [Hugging Face](/docs/remote/huggingface): Tailored for machine learning and NLP projects.
- Render: Simplifies deployments with integrated CI/CD pipelines.
- Heroku: Optimal for startups and quick deployment scenarios.
### 4. One Click Deployment (PaaS)
- [Railway](/docs/remote/railway): Popular one-click deployment solution
- Zeabur: Pioneering effortless one-click deployment solutions.
## Other / Network Services
### 1. Tunneling
Tunneling services allow you to expose a local development server to the internet, making it accessible via a public URL. This is particularly useful for sharing work, testing, and integrating with third-party services. It allows you to deploy your development computer for testing or for on-prem installation.
- [Ngrok](/docs/remote/ngrok): Facilitates secure local tunneling to the internet.
- [Cloudflare](/docs/remote/cloudflare): Enhances web performance and security.
### 2. DNS Service
- Cloudflare DNS service is used to manage and route internet traffic to the correct destinations, by translating human-readable domain names into machine-readable IP addresses. Cloudflare is a provider of this service, offering a wide range of features such as security, performance, and reliability. The Cloudflare DNS service provides a user-friendly interface for managing DNS records, and offers advanced features such as traffic management, DNSSEC, and DDoS protection.
see also: [Cloudflare Guide](/docs/remote/cloudflare)
## Conclusion
In conclusion, the introduction of our deployment guide provides an overview of the various options and considerations for deploying LibreChat. It is important to carefully evaluate your needs and choose the path that best aligns with your organization's goals and objectives. Whether you prioritize ease of use, security, or affordability, our guide provides the necessary information to help you successfully deploy LibreChat and achieve your desired outcome. We hope that this guide will serve as a valuable resource for you throughout your deployment journey.
Remember, our community is here to assist. Should you encounter challenges or have queries, our [Discord channel](https://discord.librechat.ai) and [troubleshooting discussion](https://github.com/danny-avila/LibreChat/discussions/categories/troubleshooting) are excellent resources for support and advice.
# NGINX (/docs/remote/nginx)
This guide covers the essential steps for securing your LibreChat deployment with an SSL/TLS certificate for HTTPS, setting up Nginx as a reverse proxy, and configuring your domain.
## Prerequisites
1. A cloud server (e.g., AWS, Google Cloud, Azure, Digital Ocean).
2. A registered domain name.
3. Terminal access to your cloud server.
4. Node.js v20.19.0+ (or ^22.12.0 or >= 23.0.0) and NPM installed on your server.
## Initial Setup
### Pointing Your Domain to Your Server
Before proceeding with certificate acquisition, point your domain to your cloud server's IP address. This step is foundational and must precede SSL certificate setup due to the time DNS records may require to propagate globally.
1. Log in to your domain registrar's control panel.
2. Navigate to DNS settings.
3. Create an `A record` pointing your domain to the IP address of your cloud server.
4. Wait for the DNS changes to propagate globally (you can check by pinging your domain: `ping your_domain.com`).
## Obtain an SSL/TLS Certificate
To secure your LibreChat application with HTTPS, you'll need an SSL/TLS certificate. Let's Encrypt offers free certificates:
1. Install Certbot:
- For Ubuntu: `sudo apt-get install certbot python3-certbot-nginx`
- For CentOS: `sudo yum install certbot python2-certbot-nginx`
2. Obtain the Certificate:
- Run `sudo certbot --nginx` to obtain and install the certificate automatically for Nginx.
- Follow the on-screen instructions. Certbot will ask for information and complete the validation process.
- Once successful, Certbot will store your certificate files.
## Set Up Nginx as a Reverse Proxy
Nginx acts as a reverse proxy, forwarding client requests to your LibreChat application. There are two deployment options:
### Option A: Using the `deploy-compose.yml` Docker Compose (Recommended)
The `deploy-compose.yml` file includes an Nginx container and uses the `client/nginx.conf` file for Nginx configuration. However, since `sudo certbot --nginx` extracts the certificate to the host configuration, you need to duplicate the certificate to the Docker containers.
1. Update `client/nginx.conf` with your domain and certificate paths.
2. Update `deploy-compose.yml` in the `client` section to mount the certificate files from the host:
```yaml
client:
# ...
volumes:
- ./client/nginx.conf:/etc/nginx/conf.d/default.conf
- /etc/letsencrypt/live/:/etc/letsencrypt/live/
- /etc/letsencrypt/archive/:/etc/letsencrypt/archive/
- /etc/letsencrypt/options-ssl-nginx.conf:/etc/letsencrypt/options-ssl-nginx.conf
- /etc/letsencrypt/ssl-dhparams.pem:/etc/letsencrypt/ssl-dhparams.pem
```
3. Stop any running instance: `npm run stop:deployed`
4. Commit the changes to a new Git branch.
5. Rebase the deployed instance: `npm run rebase:deployed`
### Option B: Host-based Deployment without Docker
If you're not using Docker, you can install and configure Nginx directly on the host:
1. Install Nginx:
- Ubuntu: `sudo apt-get install nginx`
- CentOS: `sudo yum install nginx`
2. Start Nginx: `sudo systemctl start nginx`
3. Open the Nginx configuration file: `sudo nano /etc/nginx/sites-available/default`
4. Replace the file content with the following, ensuring to replace `your_domain.com` with your domain and `app_port` with your application's port:
```nginx filename="/etc/nginx/sites-available/default"
server {
listen 80;
server_name your_domain.com;
location / {
proxy_pass http://localhost:app_port;
proxy_http_version 1.1;
proxy_set_header Upgrade $http_upgrade;
proxy_set_header Connection 'upgrade';
proxy_set_header Host $host;
proxy_cache_bypass $http_upgrade;
}
}
```
5. Check the Nginx configuration: `sudo nginx -t`
6. Reload Nginx: `sudo systemctl reload nginx`
## Run the Application
1. Navigate to your application's directory:
```bash filename="Replace 'LibreChat' with your actual application directory.
cd LibreChat
```
2. Start your application using Docker Compose:
```bash filename="Start your application"
sudo docker compose -f ./deploy-compose.yml up -d
```
## Renewing certificates when using nginx
If you set up nginx using the recommended Option A above, use these steps to renew the certificates:
1. Navigate to your application's directory
```bash filename="Replace 'LibreChat' with your actual application directory.
cd LibreChat
```
2. Stop your running Docker containers
```bash filename="Stop your application"
sudo docker compose -f ./deploy-compose.yml down -d
```
3. renew certificates
```bash
sudo certbot renew
```
4. Restart your application
```bash filename="Start your application"
sudo docker compose -f ./deploy-compose.yml up -d
```
Note: certbot might restart the host's nginx. You can kill it with `sudo pkill nginx`
## Web Application Firewall
Nginx can be configured to act as a web application firewall (WAF) by leveraging the OWASP Core Rule Set (CRS), which provides a robust set of rules to protect against common web application vulnerabilities and attacks. Using OWASP CRS with Nginx can enhance the security of your LibreChat deployment by adding an additional layer of protection.
1. Install OWASP CRS:
- Ubuntu: `sudo apt-get install nginx-modsecurity-crs`
2. Enable ModSecurity in Nginx:
- Open your Nginx configuration file (e.g., `/etc/nginx/nginx.conf`).
- Add the following lines inside the `http` block:
```yaml filename="nginx.conf"
modsecurity on;
modsecurity_rules_file /usr/share/nginx/modsecurity-crs/nginx-modsecurity.conf;
```
3. Configure OWASP CRS:
- The OWASP CRS package typically includes a configuration file (e.g., `/etc/nginx/modsecurity.d/nginx-modsecurity.conf`) where you can adjust various settings and rulesets based on your requirements.
4. Reload Nginx:
- `sudo systemctl reload nginx`
By enabling OWASP CRS in your Nginx configuration, you can leverage the comprehensive set of rules provided by the project to detect and mitigate various web application vulnerabilities and attacks, such as SQL injection, cross-site scripting (XSS), remote file inclusion, and more.
## Static File Caching and Compression
LibreChat now supports static file caching and compression natively. If you're using NGINX to handle compression, you should disable compression in LibreChat to avoid redundant processing. You can do this by setting the `DISABLE_COMPRESSION` environment variable to `true` in your LibreChat configuration.
```.env
# .env file
DISABLE_COMPRESSION=true
```
This will prevent LibreChat from compressing static files, allowing NGINX to handle compression more efficiently.
For more information on static file handling in LibreChat, including caching options, refer to the [Static File Handling](/docs/configuration/dotenv#static-file-handling) documentation.
# ngrok (/docs/remote/ngrok)
To use ngrok for tunneling your local server to the internet, follow these steps:
## Sign up
1. Go to **[https://ngrok.com/](https://ngrok.com/)** and sign up for an account.
## Docker Installation
1. Copy your auth token from: **[https://dashboard.ngrok.com/get-started/your-authtoken](https://dashboard.ngrok.com/get-started/your-authtoken)**
2. Open a terminal and run the following command: `docker run -d -it -e NGROK_AUTHTOKEN= ngrok/ngrok http 80`
## Windows Installation
1. Download the ZIP file from: **[https://ngrok.com/download](https://ngrok.com/download)**
2. Extract the contents of the ZIP file using 7zip or WinRar.
3. Run `ngrok.exe`.
4. Copy your auth token from: **[https://dashboard.ngrok.com/get-started/your-authtoken](https://dashboard.ngrok.com/get-started/your-authtoken)**
5. In the `ngrok.exe` terminal, run the following command: `ngrok config add-authtoken `
6. If you haven't done so already, start LibreChat normally.
7. In the `ngrok.exe` terminal, run the following command: `ngrok http 3080`
You will see a link that can be used to access LibreChat.

## Linux Installation
1. Copy the command from: **[https://ngrok.com/download](https://ngrok.com/download)** choosing the **correct** architecture.
2. Run the command in the terminal
3. Copy your auth token from: **[https://dashboard.ngrok.com/get-started/your-authtoken](https://dashboard.ngrok.com/get-started/your-authtoken)**
4. run the following command: `ngrok config add-authtoken `
5. If you haven't done so already, start LibreChat normally.
6. run the following command: `ngrok http 3080`
## Mac Installation
1. Download the ZIP file from: **[https://ngrok.com/download](https://ngrok.com/download)**
2. Extract the contents of the ZIP file using a suitable Mac application like Unarchiver.
3. Open Terminal.
4. Navigate to the directory where you extracted ngrok using the `cd` command.
5. Run ngrok by typing `./ngrok`.
6. Copy your auth token from: **[https://dashboard.ngrok.com/get-started/your-authtoken](https://dashboard.ngrok.com/get-started/your-authtoken)**
7. In the terminal where you ran ngrok, enter the following command: `ngrok authtoken `
8. If you haven't done so already, start LibreChat normally.
9. In the terminal where you ran ngrok, enter the following command: `./ngrok http 3080`
# Railway (one-click) (/docs/remote/railway)
Railway provides a one-click install option for deploying LibreChat, making the process even simpler. Here's how you can do it:
## Steps
### **Visit the LibreChat repository**
Go to the [LibreChat repository](https://github.com/danny-avila/LibreChat) on GitHub.
### **Create a Railway account**
[Sign up for a Railway account](https://railway.app?referralCode=HI9hWz&utm_medium=integration&utm_source=docs&utm_campaign=librechat) if you don't already have one (this link includes a referral code that supports the LibreChat project).
### **Click the "Deploy on Railway" button**

(The button is also available in the repository's README file)
### **Configure environment variables**
Railway will automatically detect the required environment variables for LibreChat. Review the configuration of the three containers and click `Save Config` after reviewing each of them.

The default configuration will get you started, but for more advanced features, you can consult our documentation on the subject: [Environment Variables](/docs/configuration/dotenv)
### **Deploy**
Once you've filled in the required environment variables, click the "Deploy" button. Railway will handle the rest, including setting up a PostgreSQL database and building/deploying your LibreChat instance.

### **Access your LibreChat instance**
After the deployment is successful, Railway will provide you with a public URL where you can access your LibreChat instance.
That's it! You have successfully deployed LibreChat on Railway using the one-click install process. You can now start using and customizing your LibreChat instance as needed.
## Additional Tips
- Regularly check the LibreChat repository for updates and redeploy your instance to receive the latest features and bug fixes.
- You can find the "redeploy" option in Railway after you login by clicking the 3 dots to the right of "view logs" button
For more detailed instructions and troubleshooting, refer to the official LibreChat documentation and the Railway guides.
# Traefik (/docs/remote/traefik)
[Traefik](https://traefik.io/) is a modern HTTP reverse proxy and load balancer that makes it easy to deploy and manage your services. If you're running LibreChat on Docker, you can use Traefik to expose your instance securely over HTTPS with automatic SSL certificate management.
## Prerequisites
- Docker and Docker Compose installed on your system
- A domain name pointing to your server's IP address
## Configuration
### Configure Traefik and LibreChat
In your docker-compose.override.yml file, add the following configuration:
```yaml filename="docker-compose.override.yml"
version: '3'
services:
api:
labels:
- "traefik.enable=true"
- "traefik.http.routers.librechat.rule=Host(`your.domain.name`)"
- "traefik.http.routers.librechat.entrypoints=websecure"
- "traefik.http.routers.librechat.tls.certresolver=leresolver"
- "traefik.http.services.librechat.loadbalancer.server.port=3080"
networks:
- librechat_default
volumes:
- ./librechat.yaml:/app/librechat.yaml
traefik:
image: traefik:v3.6
ports:
- "80:80"
- "443:443"
volumes:
- "/var/run/docker.sock:/var/run/docker.sock:ro"
- "./letsencrypt:/letsencrypt"
networks:
- librechat_default
command:
- "--log.level=DEBUG"
- "--api.insecure=true"
- "--providers.docker=true"
- "--providers.docker.exposedbydefault=false"
- "--entrypoints.web.address=:80"
- "--entrypoints.websecure.address=:443"
- "--certificatesresolvers.leresolver.acme.tlschallenge=true"
- "--certificatesresolvers.leresolver.acme.email=your@email.com"
- "--certificatesresolvers.leresolver.acme.storage=/letsencrypt/acme.json"
# other configs here #
# NOTE: This needs to be at the bottom of your docker-compose.override.yml
networks:
librechat_default:
external: true
```
Replace `your@email.com` with your email address for Let's Encrypt certificate notifications.
see: [Docker Override](/docs/configuration/docker_override) for more info.
### Start the containers
```bash filename="Start the containers"
docker compose up -d
```
This will start Traefik and LibreChat containers. Traefik will automatically obtain an SSL/TLS certificate from Let's Encrypt and expose your LibreChat instance securely over HTTPS.
You can now access your LibreChat instance at `https://your.domain.name`. Traefik will handle SSL/TLS termination and reverse proxy requests to your LibreChat container.
## Additional Notes
- The Traefik configuration listens on ports 80 and 443 for HTTP and HTTPS traffic, respectively. Ensure that these ports are open on your server's firewall.
- Traefik stores SSL/TLS certificates in the `./letsencrypt` directory on your host machine. You may want to back up this directory periodically.
- For more advanced configuration options, refer to the official Traefik documentation: [https://doc.traefik.io/](https://doc.traefik.io/)
## Static File Caching and Compression
LibreChat now supports static file caching and compression natively. If you're using Traefik to handle compression, you should disable compression in LibreChat to avoid redundant processing. You can do this by setting the `DISABLE_COMPRESSION` environment variable to `true` in your LibreChat configuration.
```.env
# .env file
DISABLE_COMPRESSION=true
```
This will prevent LibreChat from compressing static files, allowing Traefik to handle compression more efficiently.
For more information on static file handling in LibreChat, including caching options, refer to the [Static File Handling](/docs/configuration/dotenv#static-file-handling) documentation.
# Credentials Generator (/docs/toolkit/credentials-generator)
import { CredentialsGeneratorMDX } from '@/components/tools/CredentialsGeneratorMDX'
Generate cryptographically secure random values for the required secrets in your LibreChat `.env` configuration file. Click **Generate** and then copy individual values or all of them at once.
# Toolkit (/docs/toolkit)
Generate secure random values for CREDS_KEY, JWT_SECRET, and other .env variables.
Paste or drop your librechat.yaml to check for syntax errors and formatting issues.
# YAML Validator (/docs/toolkit/yaml-validator)
import { YAMLValidatorMDX } from '@/components/tools/YAMLValidatorMDX'
Paste your `librechat.yaml` content below or drag and drop a file to check for syntax errors. The validator highlights the exact line where issues occur.
# AI Overview (/docs/user_guides/ai_overview)
LibreChat allows you to configure and integrate various AI providers, APIs, and their corresponding credentials. This enables you to utilize different AI models, settings, and functionalities based on your needs and requirements.
## Key Concepts
- **Endpoints**: An endpoint refers to an AI provider, configuration, or API that determines the available models and settings for a chat request. Examples include OpenAI, Google, Plugins, Anthropic, and others.
- **Presets**: A preset is a saved combination of an endpoint, model, and conversation settings. You can create and manage multiple presets to suit different use cases.
- **Default Endpoint**: If you have multiple endpoints configured, you can specify a default endpoint to be used when creating a new conversation.
- **Default Preset**: Similarly, you can set a default preset to be used automatically when starting a new conversation.
## Functionality
1. **AI Providers**: Set up various pre-configured AI providers by providing the necessary credentials and API keys.
2. **Manage Endpoints**: Enable or disable different endpoints based on your requirements.
3. **Create and Manage Presets**: Define and save specific combinations of endpoints, models, and conversation settings as presets.
4. **Set Default Endpoint and Preset**: Specify a default endpoint and preset to streamline the process of starting new conversations. Here's a video to demonstrate: **[Setting a Default Preset](https://github.com/danny-avila/LibreChat/assets/110412045/bbde830f-18d9-4884-88e5-1bd8f7ac585d)**
5. **Customize Configurations**: Explore advanced configuration options, such as adding custom endpoints like Ollama, Mistral AI or Openrouter.
# Overview (/docs/user_guides)
Whether you are a new user or exploring advanced features, these guides help you get the most out of LibreChat.
## Guides
Understand endpoints, presets, and how AI providers work in LibreChat
Save and load predefined conversation settings
Why LibreChat uses MongoDB and how data is stored
## Popular Features
Create AI agents with custom tools and capabilities
Set up and use image generation tools in your agents
Enable AI-powered web search in conversations
Connect external tools via Model Context Protocol
# MongoDB (/docs/user_guides/mongodb)
MongoDB, a popular NoSQL database, was chosen as the core database for LibreChat due to its flexibility, scalability, and ability to handle diverse data structures efficiently. Here are some key reasons why MongoDB is an excellent fit for LibreChat:

## 1. Flexible Data Model
MongoDB's document-based data model allows for storing and retrieving data in a flexible and dynamic manner. Unlike traditional relational databases, MongoDB doesn't require a fixed schema, making it easier to adapt to changing data requirements. This flexibility is essential for LibreChat, as it needs to store various types of data, such as conversation histories, user profiles, presets, API keys, and more, without being constrained by a rigid table structure.
## 2. Efficient Storage of Conversation Histories
One of the primary use cases for LibreChat is to store and retrieve conversation histories. MongoDB's ability to store nested data structures as JSON-like documents makes it an excellent choice for storing conversation histories, which can include complex data structures like messages, timestamps, and metadata.
## 3. Secure Storage of Sensitive Data
LibreChat handles sensitive data, such as API keys and encrypted user passwords. MongoDB's built-in support for data encryption at rest and in transit ensures that this sensitive information remains secure and protected from unauthorized access.
## 4. Horizontal Scalability
As LibreChat grows and attracts more users, its data storage requirements will increase. MongoDB's horizontal scalability allows for scaling out by adding more servers to a cluster, providing the ability to handle larger amounts of data and higher traffic loads without compromising performance.
## 5. Cross-Device Accessibility
LibreChat aims to provide a seamless experience across multiple devices, allowing users to access their data and conversation histories from different devices. MongoDB's replication and sharding capabilities ensure that data is consistently available and accessible, enabling users to pick up their conversations where they left off, regardless of the device they're using.
## 6. Developer Productivity
MongoDB's intuitive query language and rich ecosystem of tools and libraries contribute to faster development cycles and increased developer productivity. This aligns well with LibreChat's goal of being an open-source project, fostering collaboration and contributions from the developer community.
By leveraging MongoDB's strengths, LibreChat can efficiently manage and store diverse data structures, ensure data security and availability, and provide a seamless cross-device experience for its users. MongoDB's flexibility, scalability, and developer-friendly features make it an ideal choice for powering the core functionalities of LibreChat.
## Note
**Note:** If you're running LibreChat on a processor that doesn't have SSE4.2, AVX support, or other required CPU features, you'll need to use an older but compatible version of MongoDB with the Docker installation. Specifically, you should use the `mongo:4.4.18` image, which is compatible with processors without these features.
To use this older MongoDB version with the LibreChat Docker installation, you'll need to utilize the `docker-compose.override.yml` file. This override file allows you to specify the MongoDB version you want to use, overriding the default version included in the main `docker-compose.yml` file.
For more information on using the `docker-compose.override.yml` file and configuring an older MongoDB version for your Docker installation, please refer to our [Docker Override Configuration Guide](/docs/configuration/docker_override).
# Presets (/docs/user_guides/presets)
# Deprecation Notice
**This feature is deprecated. Please refer to the [Agents Guide](/docs/features/agents), which acts as a successor to Presets**
The "presets" feature in our app is a powerful tool that allows users to save and load predefined settings for their conversations. Users can import and export these presets as JSON files, set a default preset, and share them with others on Discord.

## Create a Preset:
- Go in the model settings

- Choose the model, give it a name, some custom instructions, and adjust the parameters if needed

- Test it

- Go back in the model advanced settings, and tweak it if needed. When you're happy with the result, click on `Save As Preset` (from the model advanced settings)

- Give it a proper name, and click save

- Now you can select it from the preset menu!

## Parameters Explained:
- **Preset Name:**
- This is where you name your preset for easy identification.
- **Endpoint:**
- Choose the endpoint, such as openAI, that you want to use for processing the conversation.
- **Model:**
- Select the model like `gpt-3.5-turbo` that will be used for generating responses.
- **Custom Name:**
- Optionally provide a custom name for your preset. This is the name that will be shown in the UI when using it.
- **Custom Instructions:**
- Define instructions or guidelines that will be displayed before each prompt to guide the user in providing input.
- **Temperature:**
- Adjust this parameter to control the randomness of the model's output. A higher value makes the output more random, while a lower value makes it more focused and deterministic.
- **Top P:**
- Control the nucleus sampling parameter to influence the diversity of generated text. Lower values make text more focused while higher values increase diversity.
- **Frequency Penalty:**
- Use this setting to penalize frequently occurring tokens and promote diversity in responses.
- **Presence Penalty:**
- Adjust this parameter to penalize new tokens that are introduced into responses, controlling repetition and promoting consistency.
## Importing/Exporting Presets
You can easily import or export presets as JSON files by clicking on either 'Import' or 'Export' buttons respectively. This allows you to share your customized settings with others or switch between different configurations quickly.

To export a preset, first go in the preset menu, then click on the button to edit the selected preset

Then in the bottom of the preset settings you'll have the option to export it.

## Setting Default Preset
Choose a preset as default so it loads automatically whenever you start a new conversation. This saves time if you often use specific settings.


## Sharing on Discord
Join us on [discord](https://discord.librechat.ai) and see our **[#presets ](https://discord.com/channels/1086345563026489514/1093249324797935746)** channel where thousands of presets are shared by users worldwide. Check out pinned posts for popular presets!
# Email setup (/docs/configuration/authentication/email)
For a quick overview, refer to the user guide provided here: [Password Reset](/docs/features/password_reset)
## General setup
LibreChat supports multiple email providers:
- **Mailgun API** - Recommended for servers that block SMTP ports
- **SMTP Services** - Traditional email sending via Gmail, Outlook, or custom mail servers
### Common Configuration
These variables are used by both Mailgun and SMTP:
### Mailgun Configuration (Recommended)
Mailgun is particularly useful for deployments on servers that block SMTP ports to prevent spam. When both `MAILGUN_API_KEY` and `MAILGUN_DOMAIN` are set, LibreChat will use Mailgun instead of SMTP.
### SMTP Configuration
**Basic Configuration**
If you want to use one of the predefined services, configure only these variables:
For more info about supported email services: https://community.nodemailer.com/2-0-0-beta/setup-smtp/well-known-services/
If your Mailgun account is in the EU region, make sure to set `MAILGUN_HOST=https://api.eu.mailgun.net`
## Setup with Gmail
To set up Gmail, follow these steps:
1. Create a Google Account and enable 2-step verification.
2. In the **[Google Account settings](https://myaccount.google.com/)**, click on the "Security" tab and open "2-step verification."
3. Scroll down and open "App passwords." Choose "Mail" for the app and select "Other" for the device, then give it a random name.
4. Click on "Generate" to create a password, and copy the generated password.
5. In the `.env` file, modify the variables as follows:
## Setup with custom mail server
To set up a custom mail server, follow these steps:
1. Gather your SMTP login data from your provider. The steps are different for each, but they will usually list values for all variables.
2. In the `.env` file, modify the variables as follows, assuming some sensible example values:
## Complete Configuration Examples
### Example 1: Mailgun Configuration
```bash
# ===================================
# Email Configuration - Mailgun
# ===================================
# Mailgun is recommended for servers that block SMTP ports
# Required Mailgun settings
MAILGUN_API_KEY=your-mailgun-api-key
MAILGUN_DOMAIN=mg.yourdomain.com
# Optional: For EU region
# MAILGUN_HOST=https://api.eu.mailgun.net
# Common email settings
EMAIL_FROM=noreply@yourdomain.com
EMAIL_FROM_NAME=LibreChat
# Enable password reset functionality
ALLOW_PASSWORD_RESET=true
```
### Example 2: Gmail SMTP Configuration
```bash
# ===================================
# Email Configuration - Gmail SMTP
# ===================================
# Traditional SMTP configuration
# Gmail service configuration
EMAIL_SERVICE=gmail
EMAIL_USERNAME=your-email@gmail.com
EMAIL_PASSWORD=your-app-password
# Common email settings
EMAIL_FROM=your-email@gmail.com
EMAIL_FROM_NAME=LibreChat
# Enable password reset functionality
ALLOW_PASSWORD_RESET=true
```
### Example 3: Custom SMTP Server Configuration
```bash
# ===================================
# Email Configuration - Custom SMTP
# ===================================
# For custom mail servers
# SMTP server details
EMAIL_HOST=smtp.example.com
EMAIL_PORT=587
EMAIL_ENCRYPTION=starttls
EMAIL_USERNAME=username@example.com
EMAIL_PASSWORD=your-password
# Optional settings
# EMAIL_ENCRYPTION_HOSTNAME=
# EMAIL_ALLOW_SELFSIGNED=false
# Common email settings
EMAIL_FROM=noreply@example.com
EMAIL_FROM_NAME=LibreChat
# Enable password reset functionality
ALLOW_PASSWORD_RESET=true
```
## Troubleshooting
### Mailgun Issues
1. **Authentication Failed**: Ensure your Mailgun API key is correct and has sending permissions
2. **Domain Not Found**: Verify your Mailgun domain is correctly configured in your Mailgun account
3. **EU Region Issues**: If your Mailgun account is in the EU region, make sure to set `MAILGUN_HOST=https://api.eu.mailgun.net`
4. **Fallback to SMTP**: If only one of `MAILGUN_API_KEY` or `MAILGUN_DOMAIN` is set, the system will fall back to SMTP configuration
### SMTP Issues
1. **Connection Refused**: Check if your server allows outbound SMTP connections on the specified port
2. **Authentication Failed**: Verify your username and password are correct
3. **Gmail App Password**: For Gmail, you must use an app-specific password, not your regular password
4. **Self-signed Certificates**: If your mail server uses self-signed certificates, set `EMAIL_ALLOW_SELFSIGNED=true`
### General Issues
1. **No Emails Sent**: Check the LibreChat logs for error messages
2. **Unsecured Password Reset**: This occurs when neither Mailgun nor SMTP is properly configured
3. **From Address Issues**: Ensure the `EMAIL_FROM` address is valid and authorized to send from your mail service
# Authentication System (/docs/configuration/authentication)
## General
For a quick overview, refer to the user guide provided here: [Authentication](/docs/features/authentication)
Here's an overview of the general configuration.
> **Note:** OpenID and SAML do not support the ability to disable only registration.
Quick Tips:
- Even with registration disabled, you can add users directly to the database using [the create-user script](#create-user-script) detailed below.
- To delete a user, you can use [the delete-user script](#delete-user-script) also detailed below.


## Session Expiry and Refresh Token
- Default values: session expiry: 15 minutes, refresh token expiry: 7 days
- For more information: **[GitHub PR #927 - Refresh Token](https://github.com/danny-avila/LibreChat/pull/927)**
``` mermaid
sequenceDiagram
Client->>Server: Login request with credentials
Server->>Passport: Use authentication strategy (e.g., 'local', 'google', etc.)
Passport-->>Server: User object or false/error
Note over Server: If valid user...
Server->>Server: Generate access and refresh tokens
Server->>Database: Store hashed refresh token
Server-->>Client: Access token and refresh token
Client->>Client: Store access token in HTTP Header and refresh token in HttpOnly cookie
Client->>Server: Request with access token from HTTP Header
Server-->>Client: Requested data
Note over Client,Server: Access token expires
Client->>Server: Request with expired access token
Server-->>Client: Unauthorized
Client->>Server: Request with refresh token from HttpOnly cookie
Server->>Database: Retrieve hashed refresh token
Server->>Server: Compare hash of provided refresh token with stored hash
Note over Server: If hashes match...
Server-->>Client: New access token and refresh token
Client->>Server: Retry request with new access token
Server-->>Client: Requested data
```
## JWT Secret and Refresh Secret
- You should use new secure values. The examples given are 32-byte keys (64 characters in hex).
- Use this tool to generate some quickly: **[JWT Keys](/toolkit/creds_generator)**
---
## Automated Moderation System (optional)
The Automated Moderation System is enabled by default. It uses a scoring mechanism to track user violations. As users commit actions like excessive logins, registrations, or messaging, they accumulate violation scores. Upon reaching a set threshold, the user and their IP are temporarily banned. This system ensures platform security by monitoring and penalizing rapid or suspicious activities.
To set up the mod system, review [the setup guide](/docs/configuration/mod_system).
> *Please Note: If you want this to work in development mode, you will need to create a file called `.env.development` in the root directory and set `DOMAIN_CLIENT` to `http://localhost:3090` or whatever port is provided by vite when runnning `npm run frontend-dev`*
## User Management Scripts
### Create User Script
The create-user script allows you to add users directly to the database, even when registration is disabled. Here's how to use it:
1. For the default `docker-compose.yml` (if you use `docker compose up` to start the app):
```bash
docker compose exec api npm run create-user
```
2. For the `deploy-compose.yml` (if you followed the [Ubuntu Docker Guide](/docs/remote/docker_linux)):
```bash
docker exec -it LibreChat-API /bin/sh -c "cd .. && npm run create-user"
```
3. For local development (from project root):
```bash
npm run create-user
```
Follow the prompts to enter the new user's email and password.
### Delete User Script
To delete a user, you can use the delete-user script:
1. For the default `docker-compose.yml` (if you use `docker compose up` to start the app):
```bash
docker compose exec api npm run delete-user email@domain.com
```
2. For the `deploy-compose.yml` (if you followed the [Ubuntu Docker Guide](/docs/remote/docker_linux)):
```bash
docker exec -it LibreChat-API /bin/sh -c "cd .. && npm run delete-user email@domain.com"
```
3. For local development (from project root):
```bash
npm run delete-user email@domain.com
```
Replace `email@domain.com` with the email of the user you want to delete.
# LDAP/AD (/docs/configuration/authentication/ldap)
You can use a Lightweight Directory Access Protocol (LDAP) authentication server to authenticate users.
## LDAP/AD Server Configuration
**Basic Configuration**
- `LDAP_URL` and `LDAP_USER_SEARCH_BASE` are required.
- `LDAP_SEARCH_FILTER` is optional; if not specified, the `mail` attribute is used by default. If specified, use the literal `{{username}}` to use the given username for the search.
**Field Mappings**
You can specify a mapping between the attributes of LibreChat users and those of LDAP users. Use these settings if the default mappings do not work properly.
**Username or Email**
By default, LibreChat uses an email address and password for authentication.
This may sometimes cause problem with LDAP and you may want to use a username instead.
Set the `LDAP_SEARCH_FILTER` to filter for the username instead (e.g. `LDAP_SEARCH_FILTER=uid={{username}}`
and configure LibreChat to request login via username:
**Active Directory over SSL**
To connect via SSL (ldaps://), such as a company using Windows AD, specify the path to the internal CA certificate.
`LDAP_TLS_REJECT_UNAUTHORIZED` is optional;if not specified LibreChat will reject TLS/SSL connections if the LDAP server's certificate cannot be verified.
set `LDAP_TLS_REJECT_UNAUTHORIZED` to false (not recommended for production environments)
to allow Librechat to accept TLS/SSL connections even if the LDAP server's certificate cannot be verified,
**LDAP StartTLS**
Enabling LDAP StartTLS allows LibreChat to upgrade an insecure connection to a secure TLS connection. This is useful if you want to secure the connection without switching to ldaps://.
# Azure Blob Storage (/docs/configuration/cdn/azure)
{/* Adding a table of contents for better navigation */}
## Production Setup
Azure Blob Storage offers scalable, secure object storage for files in LibreChat. Follow these steps to configure your Azure Blob Storage.
## 1. Create an Azure Storage Account
1. **Sign in to Azure:**
- Open the [Azure Portal](https://portal.azure.com/) and sign in with your Microsoft account.
2. **Create a Storage Account:**
- Click on **"Create a resource"** and search for **"Storage account"**.
- Click **"Create"** and fill in the required details:
- **Subscription & Resource Group:** Choose your subscription and either select an existing resource group or create a new one.
- **Storage Account Name:** Enter a unique name (e.g., `mylibrechatstorage`).
- **Region:** Select the region closest to your users.
- **Performance & Redundancy:** Choose the performance tier and redundancy level that best suit your needs.
- Click **"Review + Create"** and then **"Create"**. Wait until the deployment completes.
## 2. Set Up Authentication
You have two options for authenticating with your Azure Storage Account:
### Option A: Using a Connection String
1. **Navigate to Access Keys:**
- In your newly created storage account, go to **"Access keys"** in the sidebar.
2. **Copy Connection String:**
- Copy one of the connection strings provided. This string includes the credentials required to connect to your Blob Storage account.
### Option B: Using Managed Identity
If your LibreChat application is running on an Azure service that supports Managed Identity (such as an Azure VM, App Service, or AKS), you can use that instead of a connection string.
1. **Assign Managed Identity:**
- Ensure your Azure resource (VM, App Service, or AKS) has a system-assigned or user-assigned Managed Identity enabled.
2. **Grant Storage Permissions:**
- In your storage account, assign the **Storage Blob Data Contributor** (or a similarly scoped role) to your Managed Identity. This allows your application to access Blob Storage without a connection string.
## 3. Update Your Environment Variables
Create or update your `.env` file in your project’s root with the following configuration:
```bash filename=".env"
# Option A: Using a Connection String
AZURE_STORAGE_CONNECTION_STRING=DefaultEndpointsProtocol=https;AccountName=yourAccountName;AccountKey=yourAccountKey;EndpointSuffix=core.windows.net
# Option B: Using Managed Identity (do not set the connection string if using Managed Identity)
AZURE_STORAGE_ACCOUNT_NAME=yourAccountName
AZURE_STORAGE_PUBLIC_ACCESS=false
AZURE_CONTAINER_NAME=files
```
- **AZURE_STORAGE_CONNECTION_STRING:** Set this if you are using Option A.
- **AZURE_STORAGE_ACCOUNT_NAME:** Set this if you are using Option B (Managed Identity). Do not set both.
- **AZURE_STORAGE_PUBLIC_ACCESS:** Set to `false` if you do not want your blobs to be publicly accessible by default. Set to `true` if you need public access (for example, for publicly viewable images).
- **AZURE_CONTAINER_NAME:** This is the container name your application will use (e.g., `files`). The application will automatically create this container if it doesn’t exist.
## 4. Configure LibreChat to Use Azure Blob Storage
Update your LibreChat configuration file (`librechat.yaml`) to specify that the application should use Azure Blob Storage for file handling:
```yaml filename="librechat.yaml"
version: 1.3.5
cache: true
fileStrategy: "azure_blob"
```
Azure Blob Storage stores and serves files directly from origin — it is not a CDN. Images and avatars are best served through a CDN for optimal performance and global delivery. Currently, [Firebase](/docs/configuration/cdn/firebase) is the only CDN-backed storage option.
You can use `fileStrategies` to route only avatars and images to Firebase while keeping documents on Azure Blob Storage:
```yaml filename="librechat.yaml"
fileStrategies:
avatar: "firebase"
image: "firebase"
document: "azure_blob"
```
---
## Summary
1. **Create a Storage Account:**
Sign in to the Azure Portal, create a storage account, and wait for deployment to finish.
2. **Set Up Authentication:**
- **Option A:** Retrieve the connection string from **"Access keys"** in your storage account.
- **Option B:** Use Managed Identity by enabling it on your Azure resource and granting it appropriate storage permissions.
3. **Update Environment Variables:**
In your `.env` file, set either:
- `AZURE_STORAGE_CONNECTION_STRING` (for Option A), or
- `AZURE_STORAGE_ACCOUNT_NAME` (for Option B), along with:
- `AZURE_STORAGE_PUBLIC_ACCESS` and
- `AZURE_CONTAINER_NAME`.
4. **Configure LibreChat:**
Set `fileStrategy` to `"azure_blob"` in your `librechat.yaml` configuration file.
With these steps, your LibreChat application will automatically create the container (if it doesn't exist) and manage file uploads, downloads, and deletions using Azure Blob Storage. Managed Identity provides a secure alternative by eliminating the need for long-term credentials.
## Local Development with Azurite
For local development and testing, you can use [Azurite](https://github.com/Azure/Azurite), an Azure Storage emulator that provides a local environment for testing your Azure Blob Storage integration without needing an actual Azure account.
### 1. Set Up Azurite
You can run Azurite in several ways:
#### Option A: Using VS Code Extension (Recommended for Development)
1. Install the [Azurite extension](https://marketplace.visualstudio.com/items?itemName=Azurite.azurite) for VS Code
2. Open the command palette (Ctrl+Shift+P or Cmd+Shift+P)
3. Search for and select "Azurite: Start"
This will start Azurite in the background with default settings.
#### Option B: Using Docker
```bash
docker run -p 10000:10000 -p 10001:10001 -p 10002:10002 mcr.microsoft.com/azure-storage/azurite
```
#### Option C: Using npm
```bash
npm install -g azurite
azurite --silent --location /path/to/azurite/workspace --debug /path/to/debug/log
```
### 2. Configure Environment Variables for Local Development
Add the following environment variables to your `.env` file:
```bash filename=".env"
# Azurite connection string for local development
AZURE_STORAGE_CONNECTION_STRING="DefaultEndpointsProtocol=http;AccountName=devstoreaccount1;AccountKey=Eby8vdM02xNOcqFlqUwJPLlmEtlCDXJ1OUzFT50uSRZ6IFsuFq2UVErCz4I6tq/K1SZFPTOtr/KBHBeksoGMGw==;BlobEndpoint=http://127.0.0.1:10000/devstoreaccount1;"
AZURE_STORAGE_PUBLIC_ACCESS=true
AZURE_CONTAINER_NAME=files
```
Notes:
- The `AccountKey` value is the default development key used by Azurite
- The connection uses `http` protocol instead of `https` for local development
- The `BlobEndpoint` points to the local Azurite instance running on port 10000
### 3. Verify the Connection
To verify that your application can connect to the local Azurite instance:
1. Start your LibreChat application
2. Attempt to upload a file through the interface
3. Check the Azurite logs to confirm the connection and operations
If you're using the VS Code extension, you can view the Azurite logs in the Output panel by selecting "Azurite Blob" from the dropdown.
The default Azurite account key is a fixed value used for development purposes only. Never use this key in production environments. Always ensure that your connection string remains secure and never commit it to a public repository.
# Firebase CDN (/docs/configuration/cdn/firebase)
Firebase Storage integrates with Firebase Hosting's global CDN, allowing you to serve files stored in Firebase Storage through edge locations around the world. This makes it the only true CDN-backed file storage option in LibreChat.
## Steps to Set Up Firebase
1. Open the [Firebase website](https://firebase.google.com/).
2. Click on "Get started."
3. Sign in with your Google account.
### Create a New Project
- Name your project (you can use the same project as Google OAuth).

- Optionally, you can disable Google Analytics.

- Wait for 20/30 seconds for the project to be ready, then click on "Continue."

- Click on "All Products."

- Select "Storage."

- Click on "Get Started."

- Click on "Next."

- Select your "Cloud Storage location."

- Return to the Project Overview.

- Click on "+ Add app" under your project name, then click on "Web."

- Register the app.

- Save all this information in a text file.

- Fill all the `firebaseConfig` variables in the `.env` file.
```bash
FIREBASE_API_KEY=api_key #apiKey
FIREBASE_AUTH_DOMAIN=auth_domain #authDomain
FIREBASE_PROJECT_ID=project_id #projectId
FIREBASE_STORAGE_BUCKET=storage_bucket #storageBucket
FIREBASE_MESSAGING_SENDER_ID=messaging_sender_id #messagingSenderId
FIREBASE_APP_ID=1:your_app_id #appId
```
- Return one last time to the Project Overview.

- Select `Storage`

- Select `Rules` and delete `: if false;` on this line: `allow read, write: if false;`
- your updated rules should look like this:
```bash
rules_version = '2';
service firebase.storage {
match /b/{bucket}/o {
match /images/{userId}/{fileName} {
allow read, write: if true;
}
}
}
```

- Publish your updated rules

### Configure `fileStrategy` in `librechat.yaml`
Finally, to enable the app use Firebase, you must set the following in your `librechat.yaml` config file.
```yaml
version: 1.3.5
cache: true
fileStrategy: "firebase"
```
For more information about the `librechat.yaml` config file, see the guide here: [Custom Endpoints & Configuration](/docs/configuration/librechat_yaml).
### Step-by-Step Guide to Set Up CORS for Firebase Storage
---
#### **Step 1: Create the CORS Configuration File**
- Open a text editor of your choice.
- Create a new file and name it `cors.json`.
- Add the following configuration to allow access from "https://ai.example.com":
```json
[
{
"origin": ["https://ai.example.com"],
"method": ["GET", "POST", "DELETE", "PUT"],
"maxAgeSeconds": 3600
}
]
```
- Save the file.
---
#### **Step 2: Apply the CORS Configuration**
- Open your terminal or command prompt.
- Navigate to the directory where you saved the `cors.json` file.
- Execute the following command, replacing `` with the name of your Firebase Storage bucket:
```shell
gsutil cors set cors.json gs://
```
---
#### **Step 3: Verify the CORS Settings**
- To confirm that the CORS settings have been applied correctly, you can retrieve the current CORS configuration with the following command:
```shell
gsutil cors get gs://
```
- The output should reflect the settings you specified in the `cors.json` file.
---
#### **Step 4: Test the Configuration**
- Try exporting a convo as png from the allowed origin ("https://ai.example.com").
- If everything is set up correctly, you should not encounter any CORS issues.
---
> **Note:** Always ensure that you're applying CORS settings only for trusted origins to maintain the security of your application. Adjust the allowed methods and headers according to your specific needs.
---
That's it! You've successfully configured CORS for your Firebase Storage bucket to allow requests from a specific origin. Remember to replace `` with your actual bucket name and `https://ai.example.com` with your own domain when applying the configuration.
# File Storage & CDN (/docs/configuration/cdn)
LibreChat supports multiple file storage backends and one CDN option. Amazon S3 and Azure Blob Storage are object/file storage solutions, while Firebase is the only true CDN option with global edge delivery. Choose the one that best meets your deployment requirements.
## File Storage
### Amazon S3
- [Amazon S3](/docs/configuration/cdn/s3)
### Azure Blob Storage
- [Azure Blob Storage](/docs/configuration/cdn/azure)
## CDN
### Firebase
- [Firebase CDN](/docs/configuration/cdn/firebase)
# Amazon S3 (/docs/configuration/cdn/s3)
Amazon S3 is a scalable, secure object storage service that can be used as a file storage backend for LibreChat. Follow these steps to configure your S3 bucket.
## 1. Create an AWS Account and Configure an IAM User (or Use IRSA)
### Option A: Using an IAM User with Explicit Credentials
1. **Sign in to AWS:**
- Open the [AWS Management Console](https://aws.amazon.com/console/) and sign in with your account.
2. **Create or Use an Existing IAM User:**
- Navigate to the **IAM (Identity and Access Management)** section.
- Create a new IAM user with **Programmatic Access** or select an existing one.
- Attach an appropriate policy (for example, `AmazonS3FullAccess` or a custom policy with limited S3 permissions).
- After creating the user, you will receive an **AWS_ACCESS_KEY_ID** and **AWS_SECRET_ACCESS_KEY**. Store these securely.
### Option B: Using IRSA (IAM Roles for Service Accounts) in Kubernetes
If you are deploying LibreChat on Kubernetes (e.g. on EKS), you can use IRSA to assign AWS permissions to your pods without having to provide explicit credentials. To use IRSA:
1. **Create a Trust Policy** for your EKS service account (example below):
```json
{
"Version": "2012-10-17",
"Statement": [
{
"Effect": "Allow",
"Principal": {
"Federated": "arn:aws:iam::{AWS_ACCOUNT}:oidc-provider/oidc.eks.us-east-1.amazonaws.com/id/{EKS_OIDC}"
},
"Action": "sts:AssumeRoleWithWebIdentity",
"Condition": {
"StringEquals": {
"oidc.eks.us-east-1.amazonaws.com/id/{EKS_OIDC}:sub": "system:serviceaccount:librechat:librechat",
"oidc.eks.us-east-1.amazonaws.com/id/{EKS_OIDC}:aud": "sts.amazonaws.com"
}
}
}
]
}
```
2. **Create a Policy** that grants necessary S3 permissions (example below):
```json
{
"Version": "2012-10-17",
"Statement": [
{
"Sid": "VisualEditor0",
"Effect": "Allow",
"Action": [
"s3:PutObject",
"s3:GetObjectAcl",
"s3:GetObject",
"s3:ListBucket",
"s3:DeleteObject"
],
"Resource": [
"arn:aws:s3:::my-example-librechat-bucket/*",
"arn:aws:s3:::my-example-librechat-bucket"
]
}
]
}
```
3. **Annotate your Kubernetes ServiceAccount:**
Ensure your LibreChat pods use a service account annotated for IRSA. This way, the AWS SDK in your application (using our updated S3 initialization code) will automatically use the temporary credentials provided by IRSA without needing the environment variables for AWS credentials.
## 2. Create an S3 Bucket
1. **Open the S3 Console:**
- Go to the [Amazon S3 console](https://s3.console.aws.amazon.com/s3/).
2. **Create a New Bucket:**
- Click **"Create bucket"**.
- **Bucket Name:** Enter a unique name (e.g., `mylibrechatbucket`).
- **Region:** Select the AWS region closest to your users (for example, `us-east-1` or `eu-west-1`).
- **Configure Options:** Set other options as needed, then click **"Create bucket"**.
## 3. Update Your Environment Variables
If you are **not** using IRSA, create or update your `.env` file in your project’s root directory with the following configuration:
```bash filename=".env"
AWS_ACCESS_KEY_ID=your_access_key_id
AWS_SECRET_ACCESS_KEY=your_secret_access_key
AWS_REGION=your_selected_region
AWS_BUCKET_NAME=your_bucket_name
AWS_ENDPOINT_URL=your_endpoint_url
# AWS_FORCE_PATH_STYLE=false
```
- **AWS_ACCESS_KEY_ID:** Your IAM user's access key.
- **AWS_SECRET_ACCESS_KEY:** Your IAM user's secret key.
- **AWS_REGION:** The AWS region where your S3 bucket is located.
- **AWS_BUCKET_NAME:** The name of the S3 bucket you created.
- **AWS_ENDPOINT_URL:** (Optional) The custom AWS endpoint URL. Required for S3-compatible services such as MinIO, Cloudflare R2, Hetzner Object Storage, and Backblaze B2.
- **AWS_FORCE_PATH_STYLE:** (Optional) Set to `true` for providers that require path-style URLs (`endpoint/bucket/key`) rather than virtual-hosted-style (`bucket.endpoint/key`). Required for Hetzner Object Storage, MinIO, and similar providers whose SSL certificates don't cover bucket subdomains. Not needed for AWS S3 or Cloudflare R2. Default: `false`.
If you are using **IRSA** on Kubernetes, you do **not** need to set `AWS_ACCESS_KEY_ID` and `AWS_SECRET_ACCESS_KEY` in your environment. The AWS SDK will automatically obtain temporary credentials via the service account assigned to your pod. Ensure that `AWS_REGION` and `AWS_BUCKET_NAME` are still provided.
## 4. Configure LibreChat to Use Amazon S3
Update your LibreChat configuration file (`librechat.yaml`) to specify that the application should use Amazon S3 for file handling:
```yaml filename="librechat.yaml"
version: 1.3.5
cache: true
fileStrategy: "s3"
```
S3 does not serve files through a CDN. LibreChat accesses S3 files via **presigned URLs**, which are temporary signed tokens with a configurable expiry (`S3_URL_EXPIRY_SECONDS`). AWS caps presigned URL lifetime at 7 days for IAM user credentials, and just a few hours when using temporary credentials (STS/IAM roles such as IRSA). Once a URL expires, the image or avatar it references will appear broken in the UI until the page is refreshed and a new URL is generated.
The refresh logic in LibreChat is not applied consistently — for example, the agent list endpoint returns stored (potentially stale) URLs, while the single-agent endpoint refreshes them. This causes visible broken avatar images in the model selector and chat UI. See the [related discussion](https://github.com/danny-avila/LibreChat/discussions/10280#discussioncomment-14803903) for full context.
**S3 is well-suited for document storage** (PDFs, text files, code) where short-lived presigned download URLs are appropriate. For images and avatars that need to render persistently across the UI, use [Firebase](/docs/configuration/cdn/firebase) or configure `fileStrategies` to route only those types to a CDN-backed strategy:
```yaml filename="librechat.yaml"
fileStrategies:
avatar: "firebase"
image: "firebase"
document: "s3"
```
CloudFront (Amazon's CDN for S3, which eliminates presigned URLs entirely) is planned and in active development.
## Summary
1. **Create an AWS Account & IAM User (or configure IRSA):**
- For traditional deployments, create an IAM user with programmatic access and obtain your access keys.
- For Kubernetes deployments (e.g., on EKS), set up IRSA so that your pods automatically obtain temporary credentials.
2. **Create an S3 Bucket:**
- Use the Amazon S3 console to create a bucket, choosing a unique name and region.
3. **Update Environment Variables:**
- For non-IRSA: set `AWS_ACCESS_KEY_ID`, `AWS_SECRET_ACCESS_KEY`, `AWS_REGION`, and `AWS_BUCKET_NAME` in your `.env` file.
- For IRSA: set only `AWS_REGION` and `AWS_BUCKET_NAME`; ensure your pod’s service account is correctly annotated.
4. **Configure LibreChat:**
- Set `fileStrategy` to `"s3"` in your `librechat.yaml` configuration file.
With these steps, your LibreChat application will use Amazon S3 to handle file uploads, downloads, and deletions. Additionally, with IRSA support, your application can run securely on Kubernetes without embedding long-term AWS credentials.
Always ensure your AWS credentials remain secure. Do not commit them to a public repository. Adjust IAM policies to follow the principle of least privilege as needed.
# Example (/docs/configuration/librechat_yaml/example)
## Clean Example
This example config includes all documented endpoints (Except Azure, LiteLLM, MLX, and Ollama, which all require additional configurations)
```yaml filename="librechat.yaml"
version: 1.3.5
cache: true
interface:
# MCP Servers UI configuration
mcpServers:
placeholder: 'MCP Servers'
# Privacy policy settings
privacyPolicy:
externalUrl: 'https://librechat.ai/privacy-policy'
openNewTab: true
# Terms of service
termsOfService:
externalUrl: 'https://librechat.ai/tos'
openNewTab: true
registration:
socialLogins: ["discord", "facebook", "github", "google", "openid"]
endpoints:
custom:
# Anyscale
- name: "Anyscale"
apiKey: "${ANYSCALE_API_KEY}"
baseURL: "https://api.endpoints.anyscale.com/v1"
models:
default: [
"meta-llama/Llama-2-7b-chat-hf",
]
fetch: true
titleConvo: true
titleModel: "meta-llama/Llama-2-7b-chat-hf"
summarize: false
summaryModel: "meta-llama/Llama-2-7b-chat-hf"
modelDisplayLabel: "Anyscale"
# APIpie
- name: "APIpie"
apiKey: "${APIPIE_API_KEY}"
baseURL: "https://apipie.ai/v1/"
models:
default: [
"gpt-4",
"gpt-4-turbo",
"gpt-3.5-turbo",
"claude-3-opus",
"claude-3-sonnet",
"claude-3-haiku",
"llama-3-70b-instruct",
"llama-3-8b-instruct",
"gemini-pro-1.5",
"gemini-pro",
"mistral-large",
"mistral-medium",
"mistral-small",
"mistral-tiny",
"mixtral-8x22b",
]
fetch: false
titleConvo: true
titleModel: "gpt-3.5-turbo"
dropParams: ["stream"]
#cohere
- name: "cohere"
apiKey: "${COHERE_API_KEY}"
baseURL: "https://api.cohere.ai/v1"
models:
default: ["command-r","command-r-plus","command-light","command-light-nightly","command","command-nightly"]
fetch: false
modelDisplayLabel: "cohere"
titleModel: "command"
dropParams: ["stop", "user", "frequency_penalty", "presence_penalty", "temperature", "top_p"]
# Fireworks
- name: "Fireworks"
apiKey: "${FIREWORKS_API_KEY}"
baseURL: "https://api.fireworks.ai/inference/v1"
models:
default: [
"accounts/fireworks/models/mixtral-8x7b-instruct",
]
fetch: true
titleConvo: true
titleModel: "accounts/fireworks/models/llama-v2-7b-chat"
summarize: false
summaryModel: "accounts/fireworks/models/llama-v2-7b-chat"
modelDisplayLabel: "Fireworks"
dropParams: ["user"]
# groq
- name: "groq"
apiKey: "${GROQ_API_KEY}"
baseURL: "https://api.groq.com/openai/v1/"
models:
default: [
"llama2-70b-4096",
"llama3-70b-8192",
"llama3-8b-8192",
"mixtral-8x7b-32768",
"gemma-7b-it",
]
fetch: false
titleConvo: true
titleModel: "mixtral-8x7b-32768"
modelDisplayLabel: "groq"
# Mistral AI API
- name: "Mistral"
apiKey: "${MISTRAL_API_KEY}"
baseURL: "https://api.mistral.ai/v1"
models:
default: [
"mistral-tiny",
"mistral-small",
"mistral-medium",
"mistral-large-latest"
]
fetch: true
titleConvo: true
titleModel: "mistral-tiny"
modelDisplayLabel: "Mistral"
dropParams: ["stop", "user", "frequency_penalty", "presence_penalty"]
# OpenRouter.ai
- name: "OpenRouter"
apiKey: "${OPENROUTER_KEY}"
baseURL: "https://openrouter.ai/api/v1"
models:
default: ["openai/gpt-3.5-turbo"]
fetch: true
titleConvo: true
titleModel: "gpt-3.5-turbo"
summarize: false
summaryModel: "gpt-3.5-turbo"
modelDisplayLabel: "OpenRouter"
# Perplexity
- name: "Perplexity"
apiKey: "${PERPLEXITY_API_KEY}"
baseURL: "https://api.perplexity.ai/"
models:
default: [
"mistral-7b-instruct",
"sonar-small-chat",
"sonar-small-online",
"sonar-medium-chat",
"sonar-medium-online"
]
fetch: false # fetching list of models is not supported
titleConvo: true
titleModel: "sonar-medium-chat"
summarize: false
summaryModel: "sonar-medium-chat"
dropParams: ["stop", "frequency_penalty"]
modelDisplayLabel: "Perplexity"
# ShuttleAI API
- name: "ShuttleAI"
apiKey: "${SHUTTLEAI_API_KEY}"
baseURL: "https://api.shuttleai.app/v1"
models:
default: [
"shuttle-1", "shuttle-turbo"
]
fetch: true
titleConvo: true
titleModel: "gemini-pro"
summarize: false
summaryModel: "llama-summarize"
modelDisplayLabel: "ShuttleAI"
dropParams: ["user"]
# together.ai
- name: "together.ai"
apiKey: "${TOGETHERAI_API_KEY}"
baseURL: "https://api.together.xyz"
models:
default: [
"zero-one-ai/Yi-34B-Chat",
"Austism/chronos-hermes-13b",
"DiscoResearch/DiscoLM-mixtral-8x7b-v2",
"Gryphe/MythoMax-L2-13b",
"lmsys/vicuna-13b-v1.5",
"lmsys/vicuna-7b-v1.5",
"lmsys/vicuna-13b-v1.5-16k",
"codellama/CodeLlama-13b-Instruct-hf",
"codellama/CodeLlama-34b-Instruct-hf",
"codellama/CodeLlama-70b-Instruct-hf",
"codellama/CodeLlama-7b-Instruct-hf",
"togethercomputer/llama-2-13b-chat",
"togethercomputer/llama-2-70b-chat",
"togethercomputer/llama-2-7b-chat",
"NousResearch/Nous-Capybara-7B-V1p9",
"NousResearch/Nous-Hermes-2-Mixtral-8x7B-DPO",
"NousResearch/Nous-Hermes-2-Mixtral-8x7B-SFT",
"NousResearch/Nous-Hermes-Llama2-70b",
"NousResearch/Nous-Hermes-llama-2-7b",
"NousResearch/Nous-Hermes-Llama2-13b",
"NousResearch/Nous-Hermes-2-Yi-34B",
"openchat/openchat-3.5-1210",
"Open-Orca/Mistral-7B-OpenOrca",
"togethercomputer/Qwen-7B-Chat",
"snorkelai/Snorkel-Mistral-PairRM-DPO",
"togethercomputer/alpaca-7b",
"togethercomputer/falcon-40b-instruct",
"togethercomputer/falcon-7b-instruct",
"togethercomputer/GPT-NeoXT-Chat-Base-20B",
"togethercomputer/Llama-2-7B-32K-Instruct",
"togethercomputer/Pythia-Chat-Base-7B-v0.16",
"togethercomputer/RedPajama-INCITE-Chat-3B-v1",
"togethercomputer/RedPajama-INCITE-7B-Chat",
"togethercomputer/StripedHyena-Nous-7B",
"Undi95/ReMM-SLERP-L2-13B",
"Undi95/Toppy-M-7B",
"WizardLM/WizardLM-13B-V1.2",
"garage-bAInd/Platypus2-70B-instruct",
"mistralai/Mistral-7B-Instruct-v0.1",
"mistralai/Mistral-7B-Instruct-v0.2",
"mistralai/Mixtral-8x7B-Instruct-v0.1",
"teknium/OpenHermes-2-Mistral-7B",
"teknium/OpenHermes-2p5-Mistral-7B",
"upstage/SOLAR-10.7B-Instruct-v1.0"
]
fetch: false # fetching list of models is not supported
titleConvo: true
titleModel: "togethercomputer/llama-2-7b-chat"
summarize: false
summaryModel: "togethercomputer/llama-2-7b-chat"
modelDisplayLabel: "together.ai"
```
## Example with Comments
This example configuration file sets up LibreChat with detailed options across several key areas:
- **Caching**: Enabled to improve performance.
- **File Handling**:
- **File Strategy**: Commented out but hints at possible integration with Firebase for file storage.
- **File Configurations**: Customizes file upload limits and allowed MIME types for different endpoints, including a global server file size limit and a specific limit for user avatar images.
- **Rate Limiting**: Defines thresholds for the maximum number of file uploads allowed per IP and user within a specified time window, aiming to prevent abuse.
- **Registration**:
- Allows registration from specified social login providers and email domains, enhancing security and user management.
- **Endpoints**:
- **Assistants**: Configures the assistants' endpoint with a polling interval and a timeout for operations, and provides an option to disable the builder interface.
- **Custom Endpoints**:
- Configures two external AI service endpoints, Mistral and OpenRouter, including API keys, base URLs, model handling, and specific feature toggles like conversation titles, summarization, and parameter adjustments.
- For Mistral, it enables dynamic model fetching, applies additional parameters for safe prompts, and explicitly drops unsupported parameters.
- For OpenRouter, it sets up a basic configuration without dynamic model fetching and specifies a model for conversation titles.
```yaml filename="librechat.yaml"
# For more information, see the Configuration Guide:
# https://www.librechat.ai/docs/configuration/librechat_yaml
# Configuration version (required)
version: 1.3.5
# Cache settings: Set to true to enable caching
cache: true
# Custom interface configuration
interface:
# MCP Servers UI configuration
mcpServers:
placeholder: 'MCP Servers'
# Privacy policy settings
privacyPolicy:
externalUrl: 'https://librechat.ai/privacy-policy'
openNewTab: true
# Terms of service
termsOfService:
externalUrl: 'https://librechat.ai/tos'
openNewTab: true
# Example Registration Object Structure (optional)
registration:
socialLogins: ['github', 'google', 'discord', 'openid', 'facebook']
# allowedDomains:
# - "gmail.com"
# rateLimits:
# fileUploads:
# ipMax: 100
# ipWindowInMinutes: 60 # Rate limit window for file uploads per IP
# userMax: 50
# userWindowInMinutes: 60 # Rate limit window for file uploads per user
# conversationsImport:
# ipMax: 100
# ipWindowInMinutes: 60 # Rate limit window for conversation imports per IP
# userMax: 50
# userWindowInMinutes: 60 # Rate limit window for conversation imports per user
# Definition of custom endpoints
endpoints:
# assistants:
# disableBuilder: false # Disable Assistants Builder Interface by setting to `true`
# pollIntervalMs: 750 # Polling interval for checking assistant updates
# timeoutMs: 180000 # Timeout for assistant operations
# # Should only be one or the other, either `supportedIds` or `excludedIds`
# supportedIds: ["asst_supportedAssistantId1", "asst_supportedAssistantId2"]
# # excludedIds: ["asst_excludedAssistantId"]
# Only show assistants that the user created or that were created externally (e.g. in Assistants playground).
# # privateAssistants: false # Does not work with `supportedIds` or `excludedIds`
# # (optional) Models that support retrieval, will default to latest known OpenAI models that support the feature
# retrievalModels: ["gpt-4-turbo-preview"]
# # (optional) Assistant Capabilities available to all users. Omit the ones you wish to exclude. Defaults to list below.
# capabilities: ["code_interpreter", "retrieval", "actions", "tools", "image_vision"]
custom:
# Groq Example
- name: 'groq'
apiKey: '${GROQ_API_KEY}'
baseURL: 'https://api.groq.com/openai/v1/'
models:
default: [
"llama3-70b-8192",
"llama3-8b-8192",
"llama2-70b-4096",
"mixtral-8x7b-32768",
"gemma-7b-it",
]
fetch: false
titleConvo: true
titleModel: 'mixtral-8x7b-32768'
modelDisplayLabel: 'groq'
# Mistral AI Example
- name: 'Mistral' # Unique name for the endpoint
# For `apiKey` and `baseURL`, you can use environment variables that you define.
# recommended environment variables:
apiKey: '${MISTRAL_API_KEY}'
baseURL: 'https://api.mistral.ai/v1'
# Models configuration
models:
# List of default models to use. At least one value is required.
default: ['mistral-tiny', 'mistral-small', 'mistral-medium']
# Fetch option: Set to true to fetch models from API.
fetch: true # Defaults to false.
# Optional configurations
# Title Conversation setting
titleConvo: true # Set to true to enable title conversation
# Title Method: Choose between "completion" or "functions".
# titleMethod: "completion" # Defaults to "completion" if omitted.
# Title Model: Specify the model to use for titles.
titleModel: 'mistral-tiny' # Defaults to "gpt-3.5-turbo" if omitted.
# Summarize setting: Set to true to enable summarization.
# summarize: false
# Summary Model: Specify the model to use if summarization is enabled.
# summaryModel: "mistral-tiny" # Defaults to "gpt-3.5-turbo" if omitted.
# The label displayed for the AI model in messages.
modelDisplayLabel: 'Mistral' # Default is "AI" when not set.
# Add additional parameters to the request. Default params will be overwritten.
# addParams:
# safe_prompt: true # This field is specific to Mistral AI: https://docs.mistral.ai/api/
# Drop Default params parameters from the request. See default params in guide linked below.
# NOTE: For Mistral, it is necessary to drop the following parameters or you will encounter a 422 Error:
dropParams: ['stop', 'user', 'frequency_penalty', 'presence_penalty']
# OpenRouter Example
- name: 'OpenRouter'
# For `apiKey` and `baseURL`, you can use environment variables that you define.
# recommended environment variables:
# Known issue: you should not use `OPENROUTER_API_KEY` as it will then override the `openAI` endpoint to use OpenRouter as well.
apiKey: '${OPENROUTER_KEY}'
baseURL: 'https://openrouter.ai/api/v1'
models:
default: ['meta-llama/llama-3-70b-instruct']
fetch: true
titleConvo: true
titleModel: 'meta-llama/llama-3-70b-instruct'
# Recommended: Drop the stop parameter from the request as Openrouter models use a variety of stop tokens.
dropParams: ['stop']
modelDisplayLabel: 'OpenRouter'
# fileConfig:
# endpoints:
# assistants:
# fileLimit: 5
# fileSizeLimit: 10 # Maximum size for an individual file in MB
# totalSizeLimit: 50 # Maximum total size for all files in a single request in MB
# supportedMimeTypes:
# - "image/.*"
# - "application/pdf"
# openAI:
# disabled: true # Disables file uploading to the OpenAI endpoint
# default:
# totalSizeLimit: 20
# YourCustomEndpointName:
# fileLimit: 2
# fileSizeLimit: 5
# serverFileSizeLimit: 100 # Global server file size limit in MB
# avatarSizeLimit: 2 # Limit for user avatar image size in MB
# See the Custom Configuration Guide for more information:
# https://www.librechat.ai/docs/configuration/librechat_yaml
```
# Custom Config (/docs/configuration/librechat_yaml)
## What is librechat.yaml?
The `librechat.yaml` file is LibreChat's main configuration file for custom AI endpoints, model settings, interface options, and advanced features like MCP servers and agents. It is optional -- LibreChat works with sensible defaults if the file does not exist.
Follow the steps below to create the file, mount it for your deployment type, and verify it works.
## Setup
### Locate or Create the File
Create a new `librechat.yaml` in your project root (the same directory as your `.env` file):
```bash
touch librechat.yaml
```
You can also copy the [example config](/docs/configuration/librechat_yaml/example) as a starting point:
```bash
cp librechat.example.yaml librechat.yaml
```
You can set a custom file path using the `CONFIG_PATH` environment variable:
```bash filename=".env"
CONFIG_PATH="/alternative/path/to/librechat.yaml"
```
### Mount the Config File
Docker needs a volume mount to access your `librechat.yaml` file inside the container.
**Copy the example override file:**
```bash
cp docker-compose.override.yml.example docker-compose.override.yml
```
**Edit `docker-compose.override.yml`** and ensure the librechat.yaml volume mount is uncommented:
```yaml filename="docker-compose.override.yml"
services:
api:
volumes:
- type: bind
source: ./librechat.yaml
target: /app/librechat.yaml
```
This uses the [docker-compose.override.yml](/docs/configuration/docker_override) pattern -- Docker Compose automatically merges it with the main `docker-compose.yml`, so your customizations survive updates.
Place `librechat.yaml` in the project root directory (the same directory as your `.env` file). No additional mounting is needed for local installations.
### Restart LibreChat
```bash
docker compose down && docker compose up -d
```
Stop the running process (Ctrl+C) and restart:
```bash
npm run backend
```
### Verify It Works
Open LibreChat in your browser. If your configuration includes custom endpoints, you should see them in the model selector dropdown.
If the server fails to start, check the logs for validation errors:
```bash
docker compose logs api
```
## Example: Adding OpenRouter
This example walks through adding [OpenRouter](https://openrouter.ai/) as a custom endpoint -- one of the most popular configurations.
**1. Get an API key** from [openrouter.ai/keys](https://openrouter.ai/keys).
**2. Add the key to your `.env` file:**
```bash filename=".env"
OPENROUTER_KEY=sk-or-v1-your-key-here
```
Use `OPENROUTER_KEY`, not `OPENROUTER_API_KEY`. Using `OPENROUTER_API_KEY` will override the OpenAI endpoint to use OpenRouter as well.
**3. Add the endpoint to `librechat.yaml`:**
```yaml filename="librechat.yaml"
version: 1.3.5
cache: true
endpoints:
custom:
- name: "OpenRouter"
apiKey: "${OPENROUTER_KEY}"
baseURL: "https://openrouter.ai/api/v1"
models:
default: ["meta-llama/llama-3-70b-instruct"]
fetch: true
titleConvo: true
titleModel: "meta-llama/llama-3-70b-instruct"
dropParams: ["stop"]
modelDisplayLabel: "OpenRouter"
```
**4. Restart LibreChat** (see restart commands above) and select OpenRouter from the model selector.
For the full annotated config file with more endpoint examples, see the [example configuration](/docs/configuration/librechat_yaml/example).
## Reference
For detailed field-level documentation, see the reference pages below.
Compatible AI providers and example endpoint configurations
Complete field reference for every librechat.yaml option
## Troubleshooting
### Configuration Validation
LibreChat exits with an error (exit code 1) if `librechat.yaml` contains validation errors. This fail-fast behavior catches configuration issues early.
To validate your YAML syntax before restarting, use the [YAML Validator](/toolkit/yaml_checker) or [yamlchecker.com](https://yamlchecker.com/).
### Server Exits Immediately on Startup
If your server exits immediately after starting, this is likely a configuration validation error.
**To diagnose:**
1. Check server logs: `docker compose logs api`
2. Validate your YAML syntax with the [YAML Validator](/toolkit/yaml_checker)
3. Common errors: incorrect indentation, missing colons, unknown keys, invalid values
**Temporary workaround** (not recommended for production):
```bash filename=".env"
CONFIG_BYPASS_VALIDATION=true
```
`CONFIG_BYPASS_VALIDATION=true` causes the server to skip validation and use default configuration. Always fix the validation errors instead.
# MongoDB Atlas (/docs/configuration/mongodb/mongodb_atlas)
## 1. Create a MongoDB Atlas Account
1. Open a new tab in your web browser and go to [account.mongodb.com/account/register](https://account.mongodb.com/account/register).
2. Fill out the required information and create your account.
## 2. Create a New Project
1. After setting up your account, click on the "New Project" button and give it a name (e.g., "LibreChat").
## 3. Build a Database
1. Click on the "Build a Database" button.
## 4. Choose the Free Tier
1. Select the "Shared Clusters" option, which is the free tier.
## 5. Name Your Cluster
1. Give your cluster a name (e.g., "LibreChat-Cluster") and click "Create Cluster".
## 6. Set Up Database Credentials
1. Click on the "Database Access" option in the sidebar.
2. Click on the "Add New Database User" button.
3. Enter a username and a secure password, then click "Add User".
## 7. Configure Network Access
1. Click on the "Network Access" option in the sidebar.
2. Click on the "Add IP Address" button.
3. Select "Allow Access from Anywhere" and click "Confirm".
## 8. Get Your Connection String
1. Click on the "Databases" option in the sidebar.
2. Click on the "Connect" button.
3. Select "Connect Your Application".
4. Copy the connection string provided.
5. Replace `` in the connection string with the password you set in Step 6. Remove the `<>` characters around the password.
6. Remove `&w=majority` from the end of the connection string.
7. Add your desired database name (e.g., "LibreChat") after the host name in the connection string.
Your final connection string should look something like this:
```sh filename="Connection String"
mongodb+srv://username:password@cluster-url.mongodb.net/LibreChat?retryWrites=true
```
## 9. Update the .env File
1. In your LibreChat project, open the `.env` file.
2. Find the `MONGO_URI` variable and paste your connection string:
```sh filename=".env"
MONGO_URI=mongodb+srv://username:password@cluster-url.mongodb.net/LibreChat?retryWrites=true
```
That's it! You've now set up an online MongoDB database for LibreChat using MongoDB Atlas, and you've updated your LibreChat application to use this database connection. Your application should now be able to connect to the online MongoDB database.
## Note about Docker
**Note:** If you're using LibreChat with Docker, you'll need to utilize the `docker-compose.override.yml` file. This override file allows you to prevent the installation of the included MongoDB instance. Instead, your LibreChat Docker container will use the online MongoDB Atlas database you've just set up. For more information on using the override file, please refer to our [Docker Override Guide](/docs/configuration/docker_override).
# MongoDB Authentication (/docs/configuration/mongodb/mongodb_auth)
This guide will demonstrate how to use the `docker-compose.override.yml` file to allows us to enable explicit authentication for MongoDB.
For more info about the override file, please consult: [Docker Compose Override](/docs/configuration/docker_override)
**Notes:**
- The default configuration is secure by blocking external port access, but we can take it a step further with access credentials.
- As noted by the developers of MongoDB themselves, authentication in MongoDB is fairly complex. We will be taking a simple approach that will be good enough for most cases, especially for existing configurations of LibreChat. To learn more about how mongodb authentication works with docker, see here: https://hub.docker.com/_/mongo/
- This guide focuses exclusively on terminal-based setup procedures.
- While the steps outlined may also be applicable to Docker Desktop environments, or with non-Docker, local MongoDB, or other container setups, details specific to those scenarios are not provided.
**There are 3 basic steps:**
- Create an admin user within your mongodb container
- Enable authentication and create a "readWrite" user for "LibreChat"
- Configure the MONGO_URI with newly created user
## TL;DR
These are all the necessary commands if you'd like to run through these quickly or for reference:
```bash filename="Shut down container initially"
docker compose down
```
```bash filename="Start MongoDB container"
docker compose up -d mongodb
```
```bash filename="Open MongoDB shell on 'chat-mongodb' container"
docker exec -it chat-mongodb mongosh
```
```bash filename="Switch to admin database"
use admin
```
```bash filename="Create new admin user"
db.createUser({ user: "adminUser", pwd: "securePassword", roles: ["userAdminAnyDatabase", "readWriteAnyDatabase"] })
```
```bash filename="Exit MongoDB shell"
exit
```
```bash filename="Shut down container after setup"
docker compose down
```
```bash filename="Restart MongoDB container with authentication"
docker compose up -d mongodb
```
```bash filename="Log into MongoDB shell with credentials"
docker exec -it chat-mongodb mongosh -u adminUser -p securePassword --authenticationDatabase admin
```
```bash filename="Switch to LibreChat database"
use LibreChat
```
```bash filename="Create user in LibreChat database"
db.createUser({ user: 'user', pwd: 'userpasswd', roles: [ { role: "readWrite", db: "LibreChat" } ] });
```
```bash filename="Exit MongoDB shell after creating user"
exit
```
```bash filename="Shut down container after user creation"
docker compose down
```
```bash filename="Start all services with final settings"
docker compose up
```
### Example
Example `docker-compose.override.yml` file using the [`librechat.yaml` config file](/docs/configuration/librechat_yaml), [MongoDB Authentication](/docs/configuration/mongodb/mongodb_auth), and `mongo-express` for [managing your MongoDB database](/blog/2023-11-30_mongoexpress):
```yaml filename="docker-compose.override.yml"
version: '3.4'
services:
api:
volumes:
- ./librechat.yaml:/app/librechat.yaml
environment:
- MONGO_URI=mongodb://user:userpasswd@mongodb:27017/LibreChat
mongodb:
command: mongod --auth
mongo-express:
image: mongo-express
container_name: mongo-express
environment:
ME_CONFIG_MONGODB_SERVER: mongodb
ME_CONFIG_BASICAUTH_USERNAME: admin
ME_CONFIG_BASICAUTH_PASSWORD: password
ME_CONFIG_MONGODB_URL: 'mongodb://adminUser:securePassword@mongodb:27017'
ME_CONFIG_MONGODB_ADMINUSERNAME: adminUser
ME_CONFIG_MONGODB_ADMINPASSWORD: securePassword
ports:
- '8081:8081'
depends_on:
- mongodb
restart: always
```
## Step 1: Creating an Admin User
First, we must stop the default containers from running, and only run the mongodb container.
```bash filename="Stop all running containers"
docker compose down
```
```bash filename="Start mongodb container in detached mode"
docker compose up -d mongodb
```
> Note: The `-d` flag detaches the current terminal instance as the container runs in the background. If you would like to see the mongodb log outputs, omit it and continue in a separate terminal.
Once running, we will enter the container's terminal and execute `mongosh`:
```bash filename="Connect to the MongoDB shell"
docker exec -it chat-mongodb mongosh
```
You should see the following output:
```bash filename="Output"
~/LibreChat$ docker exec -it chat-mongodb mongosh
Current Mongosh Log ID: 65bfed36f7d7e3c2b01bcc3d
Connecting to: mongodb://127.0.0.1:27017/?directConnection=true&serverSelectionTimeoutMS=2000&appName=mongosh+2.1.1
Using MongoDB: 7.0.4
Using Mongosh: 2.1.1
For mongosh info see: https://docs.mongodb.com/mongodb-shell/
test>
```
Optional: While we're here, we can disable telemetry for mongodb if desired, which is anonymous usage data collected and sent to MongoDB periodically:
Execute the command below.
> Notes:
> - All subsequent commands should be run in the current terminal session, regardless of the environment (Docker, Linux, `mongosh`, etc.)
> - I will represent the actual terminal view with # example input/output or simply showing the output in some cases
Command:
```bash filename="Disable Telemetry"
disableTelemetry()
```
Example input/output:
```bash filename="example input/output"
test> disableTelemetry()
Telemetry is now disabled.
```
Now, we must access the admin database, which mongodb creates by default to create our admin user:
```bash filename="Switch to Admin Database"
use admin
```
> switched to db admin
Replace the credentials as desired and keep in your secure records for the rest of the guide.
Run command to create the admin user:
```bash filename="Create Admin User"
db.createUser({ user: "adminUser", pwd: "securePassword", roles: ["userAdminAnyDatabase", "readWriteAnyDatabase"] })
```
You should see an "ok" output.
You can also confirm the admin was created by running `show users`:
```bash filename="example input/output"
admin> show users
[
{
_id: 'admin.adminUser',
userId: UUID('86e90441-b5b7-4043-9662-305540dfa6cf'),
user: 'adminUser',
db: 'admin',
roles: [
{ role: 'userAdminAnyDatabase', db: 'admin' },
{ role: 'readWriteAnyDatabase', db: 'admin' }
],
mechanisms: [ 'SCRAM-SHA-1', 'SCRAM-SHA-256' ]
}
]
```
:warning: **Important:** if you are using `mongo-express` to [manage your database (guide here)](../../features/manage_your_database.md), you need the additional permissions for the `mongo-express` service to run correctly:
```bash filename="Grant Roles to Admin User"
db.grantRolesToUser("adminUser", ["clusterAdmin", "readAnyDatabase"])
```
Exit the Mongosh/Container Terminal by running `exit`:
```bash filename="Exit the Mongosh/Container Terminal"
admin> exit
```
And shut down the running container:
```bash filename="Shut down the running container"
docker compose down
```
## Step 2: Enabling Authentication and Creating a User with `readWrite` Access
We must now create/edit the `docker-compose.override.yml` file to enable authentication for our mongodb container. You can use this configuration to start or reference:
```yaml filename="docker-compose.override.yml"
version: '3.4'
services:
api:
volumes:
- ./librechat.yaml:/app/librechat.yaml # Optional for using the librechat config file.
mongodb:
command: mongod --auth # <--- Add this to enable authentication
```
After configuring the override file as above, run the mongodb container again:
```bash filename="Start the MongoDB container"
docker compose up -d mongodb
```
And access mongosh as the admin user:
```bash filename="Connect to MongoDB container using mongo shell"
docker exec -it chat-mongodb mongosh -u adminUser -p securePassword --authenticationDatabase admin
```
Confirm you are authenticated:
```bash filename="Check MongoDB Connection Status Command"
db.runCommand({ connectionStatus: 1 })
```
```bash filename="example input/output"
test> db.runCommand({ connectionStatus: 1 })
{
authInfo: {
authenticatedUsers: [ { user: 'adminUser', db: 'admin' } ],
authenticatedUserRoles: [
{ role: 'readWriteAnyDatabase', db: 'admin' },
{ role: 'userAdminAnyDatabase', db: 'admin' }
]
},
ok: 1
}
test>
```
Switch to the "LibreChat" database
> Note: This the default database unless you changed it via the MONGO_URI; default URI: `MONGO_URI=mongodb://mongodb:27017/LibreChat`
```bash filename="Switch to the LibreChat database"
use LibreChat
```
Now we'll create the actual credentials to be used by our Mongo connection string, which will be limited to read/write access of the "LibreChat" database. As before, replace the example with your desired credentials:
`db.createUser({ user: 'user', pwd: 'userpasswd', roles: [ { role: "readWrite", db: "LibreChat" } ] });`
You should see an "ok" output again.
You can verify the user creation with the `show users` command.
Exit the Mongosh/Container Terminal again with `exit`, and bring the container down:
```bash filename="End the current shell session"
exit
```
```bash filename="Stop the current Docker Compose services"
docker compose down
```
I had an issue where the newly created user would not persist after creating it. To solve this, I simply repeated the steps to ensure it was created. Here they are for your convenience:
```bash filename="Shut down container"
docker compose down
```
```bash filename="Start Mongo container"
docker compose up -d mongodb
```
```bash filename="Access MongoDB shell as admin"
docker exec -it chat-mongodb mongosh -u adminUser -p securePassword --authenticationDatabase admin
```
```bash filename="Switch to LibreChat database"
use LibreChat
```
```bash filename="Show current users in LibreChat database"
show users
```
```bash filename="Create a new user in LibreChat database"
db.createUser({ user: 'user', pwd: 'userpasswd', roles: [ { role: "readWrite", db: "LibreChat" } ] });
```
If it's still not persisting, you can try running the commands with all containers running, but note that the `LibreChat` container will be in an error/retrying state.
## Step 3: Update the `MONGO_URI` to Use the New Credentials
Finally, we add the new connection string with our newly created credentials to our `docker-compose.override.yml` file under the `api` service:
```yaml filename="docker-compose.override.yml"
environment:
- MONGO_URI=mongodb://user:userpasswd@mongodb:27017/LibreChat
```
So our override file looks like this now:
```yaml filename="docker-compose.override.yml"
version: '3.4'
services:
api:
volumes:
- ./librechat.yaml:/app/librechat.yaml
environment:
- MONGO_URI=mongodb://user:userpasswd@mongodb:27017/LibreChat
mongodb:
command: mongod --auth
```
You should now run `docker compose up` successfully authenticated with read/write access to the LibreChat database
Example successful connection:
```bash filename="successful connection example"
LibreChat | 2024-02-04 20:59:43 info: Server listening on all interfaces at port 3080. Use http://localhost:3080 to access it
chat-mongodb | {"t":{"$date":"2024-02-04T20:59:53.880+00:00"},"s":"I", "c":"NETWORK", "id":22943, "ctx":"listener","msg":"Connection accepted","attr":{"remote":"192.168.160.4:58114","uuid":{"uuid":{"$uuid":"027bdc7b-a3f4-429a-80ee-36cd172058ec"}},"connectionId":17,"connectionCount":10}}
```
If you're having Authentication errors, run the last part of Step 2 again. I'm not sure why it's finicky but it will work after a few tries.
# MongoDB Community Server (/docs/configuration/mongodb/mongodb_community)
## 1. Download MongoDB Community Server
- Go to the official MongoDB website: [https://www.mongodb.com/try/download/community](https://www.mongodb.com/try/download/community)
- Select your operating system and download the appropriate package.
## 2. Install MongoDB Community Server
Follow the installation instructions for your operating system to install MongoDB Community Server.
## 3. Create a Data Directory
MongoDB requires a data directory to store its data files. Create a directory on your system where you want to store the MongoDB data files (e.g., `/path/to/data/directory`).
## 4. Start the MongoDB Server
- Open a terminal or command prompt.
- Navigate to the MongoDB installation directory (e.g., `/path/to/mongodb/bin`).
- Run the following command to start the MongoDB server, replacing `/path/to/data/directory` with the path to the data directory you created in Step 3:
```sh filename="Start the MongoDB Server"
./mongod --dbpath=/path/to/data/directory
```
## 5. Configure MongoDB for Remote Access (Optional)
If you plan to access the MongoDB server from a remote location (e.g., a different machine or a LibreChat instance hosted elsewhere), you need to configure MongoDB for remote access:
- Create a configuration file (e.g., `/path/to/mongodb/config/mongodb.conf`) with the following content:
```yaml filename="mongodb.conf"
# Network interfaces
net:
port: 27017
bindIp: 0.0.0.0
```
- Stop the MongoDB server if it's running.
- Start the MongoDB server with the configuration file:
```yaml filename="Start the MongoDB server"
./mongod --config /path/to/mongodb/config/mongodb.conf
```
## 6. Get the Connection String
The connection string for your MongoDB Community Server will be in the following format:
```sh filename="Connection String"
mongodb://[hostname]:[port]
```
Replace `[hostname]` with the IP address or hostname of the machine where MongoDB is running, and `[port]` with the port number (usually 27017).
## 7. Update the .env File
- In your LibreChat project, open the `.env` file.
- Find the `MONGO_URI` variable and paste your connection string:
```sh filename=".env"
MONGO_URI=mongodb://[hostname]:[port]
```
That's it! You've now set up a MongoDB Community Server for LibreChat. Your LibreChat application should be able to connect to the local MongoDB instance using the connection string you provided.
## Note about Docker
**Note:** If you're using LibreChat with Docker, you'll need to utilize the `docker-compose.override.yml` file. This override file allows you to prevent the installation of the included MongoDB instance. Instead, your LibreChat Docker container will use the local MongoDB Community Server database you've just set up. For more information on using the override file, please refer to our [Docker Override Guide](/docs/configuration/docker_override).
**Example:**
```yaml filename="docker-compose.override.yml"
services:
api:
environment:
- MONGO_URI=mongodb://user:pass@host1:27017,host2:27017,host3:27017/LibreChat?authSource=admin&replicaSet=setname
```
# Anthropic (/docs/configuration/pre_configured_ai/anthropic)
- Create an account at **[https://platform.claude.com/](https://platform.claude.com/)**
- Go to **[https://platform.claude.com/settings/keys](https://platform.claude.com/settings/keys)** and get your api key
- You will need to set the following environment variable to your key or you can set it to `user_provided` for users to provide their own.
```bash filename=".env"
ANTHROPIC_API_KEY=user_provided
```
- You can determine which models you would like to have available with `ANTHROPIC_MODELS`.
```bash filename=".env"
ANTHROPIC_MODELS=claude-3-opus-20240229,claude-3-sonnet-20240229,claude-3-haiku-20240307,claude-2.1,claude-2,claude-1.2,claude-1,claude-1-100k,claude-instant-1,claude-instant-1-100k
```
**Notes:**
- Anthropic endpoint supports all [Shared Endpoint Settings](/docs/configuration/librechat_yaml/object_structure/shared_endpoint_settings) via the `librechat.yaml` configuration file, including `streamRate`, `titleModel`, `titleMethod`, `titlePrompt`, `titlePromptTemplate`, and `titleEndpoint`
---
## Vertex AI
LibreChat supports running Anthropic Claude models through **Google Cloud Vertex AI**. This is useful if you:
- Already have Google Cloud infrastructure
- Want to use your existing GCP billing and credentials
- Need to comply with regional data residency requirements
### Quick Setup (Environment Variables)
Set the following environment variables to enable Anthropic via Vertex AI:
```bash filename=".env"
# Enable Vertex AI mode for Anthropic
ANTHROPIC_USE_VERTEX=true
# Vertex AI region (optional, defaults to 'us-east5')
# Available regions: global, us-east5, us-central1, europe-west1, europe-west4, asia-southeast1
ANTHROPIC_VERTEX_REGION=global
# Path to Google service account key file (optional)
# If not specified, uses default path: api/data/auth.json
GOOGLE_SERVICE_KEY_FILE=/path/to/service-account.json
```
### Prerequisites
1. **Google Cloud Project** with Vertex AI API enabled
2. **Service Account** with the following roles:
- `Vertex AI User` (`roles/aiplatform.user`)
- Or `Vertex AI Administrator` for full access
3. **Claude models** enabled in your Vertex AI Model Garden
4. **Service Account Key** (JSON file) downloaded and accessible to LibreChat
### Advanced Configuration
For model name mapping and advanced settings (similar to Azure OpenAI configuration), use the `librechat.yaml` file:
```yaml filename="librechat.yaml"
endpoints:
anthropic:
vertex:
region: us-east5
models:
claude-opus-4.5:
deploymentName: claude-opus-4-5@20251101
claude-sonnet-4:
deploymentName: claude-sonnet-4-20250514
claude-3.5-haiku:
deploymentName: claude-3-5-haiku@20241022
```
For detailed YAML configuration options, see [Anthropic Vertex AI Configuration](/docs/configuration/librechat_yaml/object_structure/anthropic_vertex).
# Assistants (/docs/configuration/pre_configured_ai/assistants)
- The [Assistants API by OpenAI](https://platform.openai.com/docs/assistants/overview) has a dedicated endpoint.
- The Assistants API enables the creation of AI assistants, offering functionalities like code interpreter, knowledge retrieval of files, and function execution.
- [Read here for an in-depth documentation](https://platform.openai.com/docs/assistants/overview) of the feature, how it works, what it's capable of.
- As with the regular [OpenAI API](/docs/configuration/pre_configured_ai/openai), go to **[https://platform.openai.com/account/api-keys](https://platform.openai.com/account/api-keys)** to get a key.
- You will need to set the following environment variable to your key or you can set it to `user_provided` for users to provide their own.
```bash filename=".env"
ASSISTANTS_API_KEY=your-key
```
- You can determine which models you would like to have available with `ASSISTANTS_MODELS`; otherwise, the models list fetched from OpenAI will be used (only Assistants API compatible models will be shown).
```bash filename=".env"
ASSISTANTS_MODELS=gpt-3.5-turbo-0125,gpt-3.5-turbo-16k-0613,gpt-3.5-turbo-16k,gpt-3.5-turbo,gpt-4,gpt-4-0314,gpt-4-32k-0314,gpt-4-0613,gpt-3.5-turbo-0613,gpt-3.5-turbo-1106,gpt-4-0125-preview,gpt-4-turbo-preview,gpt-4-1106-preview
```
- If necessary, you can also set an alternate base URL instead of the official one with `ASSISTANTS_BASE_URL`, which is similar to the OpenAI counterpart `OPENAI_REVERSE_PROXY`
```bash filename=".env"
ASSISTANTS_BASE_URL=http://your-alt-baseURL:3080/
```
- There is additional, optional configuration, depending on your needs, such as disabling the assistant builder UI, that are available via the `librechat.yaml` [custom config file](/docs/configuration/librechat_yaml/object_structure/assistants_endpoint):
- Control the visibility and use of the builder interface for assistants. [More info](/docs/configuration/librechat_yaml/object_structure/assistants_endpoint#disablebuilder)
- Specify the polling interval in milliseconds for checking run updates or changes in assistant run states. [More info](/docs/configuration/librechat_yaml/object_structure/assistants_endpoint#pollintervalms)
- Set the timeout period in milliseconds for assistant runs. Helps manage system load by limiting total run operation time. [More info](/docs/configuration/librechat_yaml/object_structure/assistants_endpoint#timeoutms)
- Specify which assistant Ids are supported or excluded [More info](/docs/configuration/librechat_yaml/object_structure/assistants_endpoint#supportedids)
## Strict function calling
With librechat you can add add the 'x-strict': true flag at operation-level in the openapi spec for actions.
This will automatically generate function calls with 'strict' mode enabled.
Note that strict mode supports only a partial subset of json. Read https://platform.openai.com/docs/guides/structured-outputs/some-type-specific-keywords-are-not-yet-supported for details.
For example:
```json filename="mathapi.json"
{
"openapi": "3.1.0",
"info": {
"title": "Math.js API",
"description": "API for performing mathematical operations, such as addition, subtraction, etc.",
"version": "1.0.0"
},
"servers": [
{
"url": "https://api.mathjs.org/v4"
}
],
"paths": {
"/": {
"post": {
"summary": "Evaluate a mathematical expression",
"description": "Sends a mathematical expression in the request body to evaluate.",
"operationId": "math",
"x-strict": true,
"parameters": [
"requestBody": {
"required": true,
"content": {
"application/json": {
"schema": {
"type": "object",
"properties": {
"expr": {
"type": "string",
"description": "The mathematical expression to evaluate (e.g., `2+3`)."
}
},
"required": ["expr"]
}
}
}
},
"responses": {
"200": {
"description": "The result of the evaluated expression.",
"content": {
"application/json": {
"schema": {
"type": "object",
"properties": {
"result": {
"type": "number",
"description": "The evaluated result of the expression."
}
}
}
}
}
},
"400": {
"description": "Invalid expression provided.",
"content": {
"application/json": {
"schema": {
"type": "object",
"properties": {
"error": {
"type": "string",
"description": "Error message describing the invalid expression."
}
}
}
}
}
}
}
}
}
}
}
```
**Notes:**
- At the time of writing, only the following models support the [Retrieval](https://platform.openai.com/docs/assistants/tools/knowledge-retrieval) capability:
- gpt-3.5-turbo-0125
- gpt-4-0125-preview
- gpt-4-turbo-preview
- gpt-4-1106-preview
- gpt-3.5-turbo-1106
- Vision capability is not yet supported.
- If you have previously set the [`ENDPOINTS` value in your .env file](./dotenv.md#endpoints), you will need to add the value `assistants`
# AWS Bedrock (/docs/configuration/pre_configured_ai/bedrock)
Head to the [AWS docs](https://docs.aws.amazon.com/bedrock/latest/userguide/getting-started.html) to sign up for AWS and setup your credentials.
You’ll also need to turn on model access for your account, which you can do by [following these instructions](https://docs.aws.amazon.com/bedrock/latest/userguide/model-access.html).
## Authentication
- You will need to set the following environment variables:
```bash filename=".env"
BEDROCK_AWS_DEFAULT_REGION=us-east-1
BEDROCK_AWS_ACCESS_KEY_ID=your_access_key_id
BEDROCK_AWS_SECRET_ACCESS_KEY=your_secret_access_key
```
**Note:** You can also omit the access keys in order to use the default AWS credentials chain but you must set the default region:
```bash filename=".env"
BEDROCK_AWS_DEFAULT_REGION=us-east-1
```
Doing so prompts the credential provider to find credentials from the following sources (listed in order of precedence):
- Environment variables exposed via process.env
- SSO credentials from token cache
- Web identity token credentials
- Shared credentials and config ini files
- The EC2/ECS Instance Metadata Service
The default credential provider will invoke one provider at a time and only continue to the next if no credentials have been located.
For example, if the process finds values defined via the `AWS_ACCESS_KEY_ID` and `AWS_SECRET_ACCESS_KEY` environment variables, the files at ~/.aws/credentials and ~/.aws/config will not be read, nor will any messages be sent to the Instance Metadata Service.
## Configuring models
- You can optionally specify which models you want to make available with `BEDROCK_AWS_MODELS`:
```bash filename=".env"
BEDROCK_AWS_MODELS=anthropic.claude-3-5-sonnet-20240620-v1:0,meta.llama3-1-8b-instruct-v1:0
```
Note: If omitted, all known, supported model IDs will be included automatically.
- See all Bedrock model IDs here:
- **[https://docs.aws.amazon.com/bedrock/latest/userguide/model-ids.html#model-ids-arns](https://docs.aws.amazon.com/bedrock/latest/userguide/model-ids.html#model-ids-arns)**
## Additional Configuration
You can further configure the Bedrock endpoint in your [`librechat.yaml`](/docs/configuration/librechat_yaml/) file:
```yaml
endpoints:
bedrock:
availableRegions:
- "us-east-1"
- "us-west-2"
streamRate: 35
titleModel: 'anthropic.claude-3-haiku-20240307-v1:0'
guardrailConfig:
guardrailIdentifier: "abc123xyz"
guardrailVersion: "1"
trace: "enabled"
```
- `streamRate`: (Optional) Set the rate of processing each new token in milliseconds.
- This can help stabilize processing of concurrent requests and provide smoother frontend stream rendering.
- `titleModel`: (Optional) Specify the model to use for generating conversation titles.
- Recommended: `anthropic.claude-3-haiku-20240307-v1:0`.
- Omit or set as `current_model` to use the same model as the chat.
- `availableRegions`: (Optional) Specify the AWS regions you want to make available.
- If provided, users will see a dropdown to select the region. If not selected, the default region is used.
- 
- `guardrailConfig`: (Optional) Configure AWS Bedrock Guardrails for content filtering.
- `guardrailIdentifier`: The guardrail ID or ARN from your AWS Bedrock Console.
- `guardrailVersion`: The guardrail version number (e.g., `"1"`) or `"DRAFT"`.
- `trace`: (Optional) Enable trace logging: `"enabled"`, `"disabled"`, or `"enabled_full"`.
- See [AWS Bedrock Guardrails documentation](https://docs.aws.amazon.com/bedrock/latest/userguide/guardrails-how.html) for creating and managing guardrails.
## Inference Profiles
AWS Bedrock inference profiles let you create custom routing configurations for foundation models, enabling cross-region load balancing, cost allocation, and compliance controls. You can map model IDs to custom inference profile ARNs in your `librechat.yaml`:
```yaml
endpoints:
bedrock:
inferenceProfiles:
"us.anthropic.claude-3-7-sonnet-20250219-v1:0": "${BEDROCK_CLAUDE_37_PROFILE}"
```
For the full guide on creating profiles, configuring LibreChat, setting up logging, and troubleshooting, see **[Bedrock Inference Profiles](/docs/configuration/pre_configured_ai/bedrock_inference_profiles)**.
For the YAML field reference, see **[AWS Bedrock Object Structure](/docs/configuration/librechat_yaml/object_structure/aws_bedrock#inferenceprofiles)**.
## Document Uploads
Bedrock supports uploading documents directly to the provider via the `Upload to Provider` option in the file attachment dropdown menu. Documents are sent to the Bedrock Converse API as native document attachments.
**Supported formats:** PDF, CSV, DOC, DOCX, XLS, XLSX, HTML, TXT, and Markdown (.md)
**Limitations:**
- Maximum file size per document: **4.5 MB**
- File names are automatically sanitized to conform to Bedrock's naming requirements (alphanumeric, spaces, hyphens, parentheses, square brackets; max 200 characters)
For more information on file upload options, see the [OCR for Documents](/docs/features/ocr#5-upload-files-to-provider-direct) documentation.
## Notes
- The following models are not supported due to lack of streaming capability:
- ai21.j2-mid-v1
- The following models are not supported due to lack of conversation history support:
- ai21.j2-ultra-v1
- cohere.command-text-v14
- cohere.command-light-text-v14
- AWS Bedrock endpoint supports all [Shared Endpoint Settings](/docs/configuration/librechat_yaml/object_structure/shared_endpoint_settings) via the `librechat.yaml` configuration file, including `streamRate`, `titleModel`, `titleMethod`, `titlePrompt`, `titlePromptTemplate`, and `titleEndpoint`
# Bedrock Inference Profiles (/docs/configuration/pre_configured_ai/bedrock_inference_profiles)
This guide explains how to configure and use AWS Bedrock custom inference profiles with LibreChat, allowing you to route model requests through custom application inference profiles for better control, cost allocation, and cross-region load balancing.
## Overview
AWS Bedrock inference profiles allow you to create custom routing configurations for foundation models. When you create a custom (application) inference profile, AWS generates a unique ARN that doesn't contain model name information:
```
arn:aws:bedrock:us-east-1:123456789012:application-inference-profile/abc123def456
```
LibreChat's inference profile mapping feature allows you to:
1. Map friendly model IDs to custom inference profile ARNs
2. Route requests through your custom profiles while maintaining model capability detection
3. Use environment variables for secure ARN management
## Why Use Custom Inference Profiles?
| Benefit | Description |
|---------|-------------|
| **Cross-Region Load Balancing** | Automatically distribute requests across multiple AWS regions |
| **Cost Allocation** | Tag and track costs per application or team |
| **Throughput Management** | Configure dedicated throughput for your applications |
| **Compliance** | Route requests through specific regions for data residency |
| **Monitoring** | Track usage per inference profile in CloudWatch |
## Prerequisites
Before you begin, ensure you have:
1. **AWS Account** with Bedrock access enabled
2. **AWS CLI** installed and configured
3. **IAM Permissions**:
- `bedrock:CreateInferenceProfile`
- `bedrock:ListInferenceProfiles`
- `bedrock:GetInferenceProfile`
- `bedrock:InvokeModel` / `bedrock:InvokeModelWithResponseStream`
4. **LibreChat** with Bedrock endpoint configured (see [AWS Bedrock Setup](/docs/configuration/pre_configured_ai/bedrock))
## Creating Custom Inference Profiles
> **Important**: Custom inference profiles can only be created via API (AWS CLI, SDK, etc.) and cannot be created from the AWS Console.
### Method 1: AWS CLI (Recommended)
#### Step 1: List Available System Inference Profiles
```bash
# List all inference profiles
aws bedrock list-inference-profiles --region us-east-1
# Filter for Claude models
aws bedrock list-inference-profiles --region us-east-1 \
--query "inferenceProfileSummaries[?contains(inferenceProfileId, 'claude')]"
```
#### Step 2: Create a Custom Inference Profile
```bash
# Get the system inference profile ARN to copy from
export SOURCE_PROFILE_ARN=$(aws bedrock list-inference-profiles --region us-east-1 \
--query "inferenceProfileSummaries[?inferenceProfileId=='us.anthropic.claude-3-7-sonnet-20250219-v1:0'].inferenceProfileArn" \
--output text)
# Create your custom inference profile
aws bedrock create-inference-profile \
--inference-profile-name "MyApp-Claude-3-7-Sonnet" \
--description "Custom inference profile for my application" \
--model-source copyFrom="$SOURCE_PROFILE_ARN" \
--region us-east-1
```
#### Step 3: Verify Creation
```bash
# List your custom profiles
aws bedrock list-inference-profiles --type-equals APPLICATION --region us-east-1
# Get details of a specific profile
aws bedrock get-inference-profile \
--inference-profile-identifier "arn:aws:bedrock:us-east-1:123456789012:application-inference-profile/abc123" \
--region us-east-1
```
### Method 2: Python Script
```python
import boto3
AWS_REGION = 'us-east-1'
def create_inference_profile(profile_name: str, source_model_id: str):
"""
Create a custom inference profile for LibreChat.
Args:
profile_name: Name for your custom profile
source_model_id: The system inference profile ID to copy from
(e.g., 'us.anthropic.claude-3-7-sonnet-20250219-v1:0')
"""
bedrock = boto3.client('bedrock', region_name=AWS_REGION)
profiles = bedrock.list_inference_profiles()
source_arn = None
for profile in profiles['inferenceProfileSummaries']:
if profile['inferenceProfileId'] == source_model_id:
source_arn = profile['inferenceProfileArn']
break
if not source_arn:
raise ValueError(f"Source profile {source_model_id} not found")
response = bedrock.create_inference_profile(
inferenceProfileName=profile_name,
description=f'Custom inference profile for {profile_name}',
modelSource={'copyFrom': source_arn},
tags=[
{'key': 'Application', 'value': 'LibreChat'},
{'key': 'Environment', 'value': 'Production'}
]
)
print(f"Created profile: {response['inferenceProfileArn']}")
return response['inferenceProfileArn']
if __name__ == "__main__":
create_inference_profile(
"LibreChat-Claude-3-7-Sonnet",
"us.anthropic.claude-3-7-sonnet-20250219-v1:0"
)
create_inference_profile(
"LibreChat-Claude-Sonnet-4-5",
"us.anthropic.claude-sonnet-4-5-20250929-v1:0"
)
```
## Configuring LibreChat
### librechat.yaml Configuration
Add the `bedrock` endpoint configuration to your `librechat.yaml`. For full field reference, see [AWS Bedrock Object Structure](/docs/configuration/librechat_yaml/object_structure/aws_bedrock).
```yaml filename="librechat.yaml"
endpoints:
bedrock:
# List the models you want available in the UI
models:
- "us.anthropic.claude-3-7-sonnet-20250219-v1:0"
- "us.anthropic.claude-sonnet-4-5-20250929-v1:0"
- "global.anthropic.claude-opus-4-5-20251101-v1:0"
# Map model IDs to their custom inference profile ARNs
inferenceProfiles:
# Using environment variable (recommended for security)
"us.anthropic.claude-3-7-sonnet-20250219-v1:0": "${BEDROCK_CLAUDE_37_PROFILE}"
# Using direct ARN
"us.anthropic.claude-sonnet-4-5-20250929-v1:0": "arn:aws:bedrock:us-east-1:123456789012:application-inference-profile/abc123"
# Another env variable example
"global.anthropic.claude-opus-4-5-20251101-v1:0": "${BEDROCK_OPUS_45_PROFILE}"
# Optional: Configure available regions for cross-region inference
availableRegions:
- "us-east-1"
- "us-west-2"
```
### Environment Variables
Add your AWS credentials and inference profile ARNs to your `.env` file:
```bash filename=".env"
#===================================#
# AWS Bedrock Configuration #
#===================================#
# AWS Credentials
BEDROCK_AWS_ACCESS_KEY_ID=AKIAIOSFODNN7EXAMPLE
BEDROCK_AWS_SECRET_ACCESS_KEY=wJalrXUtnFEMI/K7MDENG/bPxRfiCYEXAMPLEKEY
BEDROCK_AWS_DEFAULT_REGION=us-east-1
# Optional: Session token for temporary credentials
# BEDROCK_AWS_SESSION_TOKEN=your-session-token
# Inference Profile ARNs
BEDROCK_CLAUDE_37_PROFILE=arn:aws:bedrock:us-east-1:123456789012:application-inference-profile/abc123
BEDROCK_OPUS_45_PROFILE=arn:aws:bedrock:us-east-1:123456789012:application-inference-profile/def456
```
## Setting Up Logging
To verify that your inference profiles are being used correctly, enable AWS Bedrock model invocation logging.
### 1. Create CloudWatch Log Group
```bash
aws logs create-log-group \
--log-group-name /aws/bedrock/model-invocations \
--region us-east-1
```
### 2. Create IAM Role for Bedrock Logging
Create the trust policy file (`bedrock-logging-trust.json`):
```json filename="bedrock-logging-trust.json"
{
"Version": "2012-10-17",
"Statement": [
{
"Effect": "Allow",
"Principal": {
"Service": "bedrock.amazonaws.com"
},
"Action": "sts:AssumeRole",
"Condition": {
"StringEquals": {
"aws:SourceAccount": "YOUR_ACCOUNT_ID"
},
"ArnLike": {
"aws:SourceArn": "arn:aws:bedrock:us-east-1:YOUR_ACCOUNT_ID:*"
}
}
}
]
}
```
Create the role:
```bash
aws iam create-role \
--role-name BedrockLoggingRole \
--assume-role-policy-document file://bedrock-logging-trust.json
```
Attach CloudWatch Logs permissions:
```bash
aws iam put-role-policy \
--role-name BedrockLoggingRole \
--policy-name BedrockLoggingPolicy \
--policy-document '{
"Version": "2012-10-17",
"Statement": [
{
"Effect": "Allow",
"Action": [
"logs:CreateLogStream",
"logs:PutLogEvents"
],
"Resource": "arn:aws:logs:us-east-1:YOUR_ACCOUNT_ID:log-group:/aws/bedrock/model-invocations:*"
}
]
}'
```
Create S3 bucket for large data (required):
```bash
aws s3 mb s3://bedrock-logs-YOUR_ACCOUNT_ID --region us-east-1
aws iam put-role-policy \
--role-name BedrockLoggingRole \
--policy-name BedrockS3Policy \
--policy-document '{
"Version": "2012-10-17",
"Statement": [
{
"Effect": "Allow",
"Action": ["s3:PutObject"],
"Resource": "arn:aws:s3:::bedrock-logs-YOUR_ACCOUNT_ID/*"
}
]
}'
```
### 3. Enable Model Invocation Logging
```bash
aws bedrock put-model-invocation-logging-configuration \
--logging-config '{
"cloudWatchConfig": {
"logGroupName": "/aws/bedrock/model-invocations",
"roleArn": "arn:aws:iam::YOUR_ACCOUNT_ID:role/BedrockLoggingRole",
"largeDataDeliveryS3Config": {
"bucketName": "bedrock-logs-YOUR_ACCOUNT_ID",
"keyPrefix": "large-data"
}
},
"textDataDeliveryEnabled": true,
"imageDataDeliveryEnabled": true,
"embeddingDataDeliveryEnabled": true
}' \
--region us-east-1
```
Verify logging is enabled:
```bash
aws bedrock get-model-invocation-logging-configuration --region us-east-1
```
## Verifying Your Configuration
### View Logs via CLI
After making a request through LibreChat, check the logs:
```bash
# Tail logs in real-time
aws logs tail /aws/bedrock/model-invocations --follow --region us-east-1
# View recent logs
aws logs tail /aws/bedrock/model-invocations --since 5m --region us-east-1
```
### What to Look For
In the log output, look for the `modelId` field:
```json
{
"timestamp": "2026-01-16T16:56:15Z",
"accountId": "123456789012",
"region": "us-east-1",
"requestId": "a8b9d8c9-87b3-41ea-8a02-e8bfdba7782f",
"operation": "ConverseStream",
"modelId": "arn:aws:bedrock:us-east-1:123456789012:application-inference-profile/abc123",
"inferenceRegion": "us-west-2"
}
```
**Success indicators:**
- `modelId` shows your custom inference profile ARN (contains `application-inference-profile`)
- `inferenceRegion` may vary (shows cross-region routing is working)
**If mapping isn't working:**
- `modelId` will show the raw model ID instead of the ARN
### View Logs via AWS Console
1. Open **CloudWatch** in the AWS Console
2. Navigate to **Logs** > **Log groups**
3. Select `/aws/bedrock/model-invocations`
4. Click on the latest log stream
5. Search for your inference profile ID
## Monitoring Usage
### CloudWatch Metrics
View Bedrock metrics in CloudWatch:
```bash
aws cloudwatch list-metrics --namespace AWS/Bedrock --region us-east-1
```
### AWS Console
1. **Bedrock Console** > **Inference profiles** > **Application** tab
2. Click on your custom profile
3. View invocation metrics and usage statistics
## Troubleshooting
### Common Issues
| Issue | Cause | Solution |
|-------|-------|----------|
| Model not recognized | Missing model in `models` array | Add the model ID to `models` in librechat.yaml |
| ARN not being used | Model ID doesn't match | Ensure the model ID in `inferenceProfiles` exactly matches what's in `models` |
| Env variable not resolved | Typo or not set | Check `.env` file and ensure variable name matches `${VAR_NAME}` |
| Access Denied | Missing IAM permissions | Add `bedrock:InvokeModel*` permissions for the inference profile ARN |
| Profile not found | Wrong region | Ensure you're creating/using profiles in the same region |
### Debug Checklist
1. Model ID is in the `models` array
2. Model ID in `inferenceProfiles` exactly matches (case-sensitive)
3. Environment variable is set (if using `${VAR}` syntax)
4. AWS credentials have permission to invoke the inference profile
5. LibreChat has been restarted after config changes
### Verify Config Loading
Check that your config is being read correctly by examining the server logs when LibreChat starts.
## Complete Example
### librechat.yaml
```yaml filename="librechat.yaml"
version: 1.3.5
endpoints:
bedrock:
models:
- "us.anthropic.claude-3-7-sonnet-20250219-v1:0"
- "us.anthropic.claude-sonnet-4-5-20250929-v1:0"
- "global.anthropic.claude-opus-4-5-20251101-v1:0"
- "us.amazon.nova-pro-v1:0"
inferenceProfiles:
"us.anthropic.claude-3-7-sonnet-20250219-v1:0": "${BEDROCK_CLAUDE_37_PROFILE}"
"us.anthropic.claude-sonnet-4-5-20250929-v1:0": "${BEDROCK_SONNET_45_PROFILE}"
"global.anthropic.claude-opus-4-5-20251101-v1:0": "${BEDROCK_OPUS_45_PROFILE}"
availableRegions:
- "us-east-1"
- "us-west-2"
```
### .env
```bash filename=".env"
# AWS Bedrock
BEDROCK_AWS_ACCESS_KEY_ID=AKIAIOSFODNN7EXAMPLE
BEDROCK_AWS_SECRET_ACCESS_KEY=wJalrXUtnFEMI/K7MDENG/bPxRfiCYEXAMPLEKEY
BEDROCK_AWS_DEFAULT_REGION=us-east-1
# Inference Profiles
BEDROCK_CLAUDE_37_PROFILE=arn:aws:bedrock:us-east-1:123456789012:application-inference-profile/abc123
BEDROCK_SONNET_45_PROFILE=arn:aws:bedrock:us-east-1:123456789012:application-inference-profile/def456
BEDROCK_OPUS_45_PROFILE=arn:aws:bedrock:us-east-1:123456789012:application-inference-profile/ghi789
```
### Quick Setup Script
```bash filename="setup-bedrock-profiles.sh"
#!/bin/bash
REGION="us-east-1"
ACCOUNT_ID=$(aws sts get-caller-identity --query Account --output text)
# Create inference profiles
for MODEL in "us.anthropic.claude-3-7-sonnet-20250219-v1:0" "us.anthropic.claude-sonnet-4-5-20250929-v1:0"; do
PROFILE_NAME="LibreChat-${MODEL//[.:]/-}"
SOURCE_ARN=$(aws bedrock list-inference-profiles --region $REGION \
--query "inferenceProfileSummaries[?inferenceProfileId=='$MODEL'].inferenceProfileArn" \
--output text)
if [ -n "$SOURCE_ARN" ]; then
echo "Creating profile for $MODEL..."
aws bedrock create-inference-profile \
--inference-profile-name "$PROFILE_NAME" \
--model-source copyFrom="$SOURCE_ARN" \
--region $REGION
fi
done
# List created profiles
echo ""
echo "Your custom inference profiles:"
aws bedrock list-inference-profiles --type-equals APPLICATION --region $REGION \
--query "inferenceProfileSummaries[].{Name:inferenceProfileName,ARN:inferenceProfileArn}" \
--output table
```
## Related Resources
- [AWS Bedrock Inference Profiles Documentation](https://docs.aws.amazon.com/bedrock/latest/userguide/inference-profiles.html)
- [AWS Bedrock Object Structure](/docs/configuration/librechat_yaml/object_structure/aws_bedrock) - YAML config field reference
- [AWS Bedrock Setup](/docs/configuration/pre_configured_ai/bedrock) - Basic Bedrock configuration
- [AWS Bedrock Model Invocation Logging](https://docs.aws.amazon.com/bedrock/latest/userguide/model-invocation-logging.html)
# Google (/docs/configuration/pre_configured_ai/google)
For the Google Endpoint, you can either use the **Generative Language API** (for Gemini models), or the **Vertex AI API** (for Gemini, PaLM2 & Codey models).
The Generative Language API uses an API key, which you can get from **Google AI Studio**.
For Vertex AI, you need a Service Account JSON key file, with appropriate access configured.
Instructions for both are given below.
## Generative Language API (Gemini)
**[See here for Gemini API pricing and rate limits](https://ai.google.dev/pricing)**
⚠️ While Google models are free, they are using your input/output to help improve the model, with data de-identified from your Google Account and API key.
⚠️ During this period, your messages “may be accessible to trained reviewers.”
To use Gemini models through Google AI Studio, you'll need an API key. If you don't already have one, create a key in Google AI Studio.
Get an API key here: **[aistudio.google.com](https://aistudio.google.com/app/apikey)**
Once you have your key, provide the key in your .env file, which allows all users of your instance to use it.
```bash filename=".env"
GOOGLE_KEY=mY_SeCreT_w9347w8_kEY
```
Or, you can make users provide it from the frontend by setting the following:
```bash filename=".env"
GOOGLE_KEY=user_provided
```
Some reverse proxies do not support the `X-goog-api-key` header. You can configure LibreChat to use the `Authorization` header instead:
```bash filename=".env"
GOOGLE_AUTH_HEADER=true
```
Since fetching the models list isn't yet supported, you should set the models you want to use in the .env file.
For your convenience, these are the latest models as of 5/18/24 that can be used with the Generative Language API:
```bash filename=".env"
GOOGLE_MODELS=gemini-1.5-flash-latest,gemini-1.0-pro,gemini-1.0-pro-001,gemini-1.0-pro-latest,gemini-1.0-pro-vision-latest,gemini-1.5-pro-latest,gemini-pro,gemini-pro-vision
```
Notes:
- A gemini-pro model or `gemini-pro-vision` are required in your list for attaching images.
- Using LibreChat, PaLM2 and Codey models can only be accessed through Vertex AI, not the Generative Language API.
- Only models that support the `generateContent` method can be used natively with LibreChat + the Gen AI API.
- Selecting `gemini-pro-vision` for messages with attachments is not necessary as it will be switched behind the scenes for you
- Since `gemini-pro-vision`does not accept non-attachment messages, messages without attachments are automatically switched to use `gemini-pro` (otherwise, Google responds with an error)
- With the Google endpoint, you cannot use both Vertex AI and Generative Language API at the same time. You must choose one or the other.
- Some PaLM/Codey models and `gemini-pro-vision` may fail when `maxOutputTokens` is set to a high value. If you encounter this issue, try reducing the value through the conversation parameters.
Setting `GOOGLE_KEY=user_provided` in your .env file sets both the Vertex AI Service Account JSON key file and the Generative Language API key to be provided from the frontend like so:

## Vertex AI
**[See here for Vertex API pricing and rate limits](https://cloud.google.com/vertex-ai/generative-ai/pricing)**
To setup Google LLMs (via Google Cloud Vertex AI), first, signup for Google Cloud: **[cloud.google.com](https://cloud.google.com/)**
You can usually get **$300 starting credit**, which makes this option free for 90 days.
1. Once signed up, Enable the Vertex AI API on Google Cloud:
- Go to **[Vertex AI page on Google Cloud console](https://console.cloud.google.com/vertex-ai)**
- Click on `Enable API` if prompted
2. Create a Service Account with Vertex AI role:
- **[Click here to create a Service Account](https://console.cloud.google.com/projectselector/iam-admin/serviceaccounts/create?walkthrough_id=iam--create-service-account#step_index=1)**
- **Select or create a project**
- Enter a service account ID (required), name and description are optional
- 
- Click on "Create and Continue" to give at least the "Vertex AI User" role
- 
- **Click on "Continue/Done"**
3. Create a JSON key to Save in your Project Directory:
- **Go back to [the Service Accounts page](https://console.cloud.google.com/projectselector/iam-admin/serviceaccounts)**
- **Select your service account**
- Click on "Keys"
- 
- Click on "Add Key" and then "Create new key"
- 
- **Choose JSON as the key type and click on "Create"**
- **Download the key file and rename it as 'auth.json'**
- **Save it within the project directory, in `/api/data/`**
- 
Instead of saving the key file to `/api/data/auth.json`, you can use the `GOOGLE_SERVICE_KEY_FILE` environment variable to specify the path to your service account key file. This provides more flexibility in how you manage your credentials. See the environment variable section below for more details.
**Saving your JSON key file in the project directory which allows all users of your LibreChat instance to use it.**
Alternatively, you can make users provide it from the frontend by setting the following:
```bash filename=".env"
# Note: this configures both the Vertex AI Service Account JSON key file
# and the Generative Language API key to be provided from the frontend.
GOOGLE_KEY=user_provided
```
You can also specify the service account key file using the `GOOGLE_SERVICE_KEY_FILE` environment variable:
```bash filename=".env"
# Path to the service account JSON key file
GOOGLE_SERVICE_KEY_FILE=/path/to/auth.json
# Or provide as a URL
GOOGLE_SERVICE_KEY_FILE=https://example.com/path/to/auth.json
# Or provide as stringified JSON
GOOGLE_SERVICE_KEY_FILE='{"type":"service_account","project_id":"your-project",...}'
# Or provide as base64 encoded JSON
GOOGLE_SERVICE_KEY_FILE=eyJ0eXBlIjogInNlcnZpY2VfYWNjb3VudCIsICJwcm9qZWN0X2lkIjogInlvdXItcHJvamVjdC1pZCIsIC4uLn0=
```
This is particularly useful for features that require Vertex AI authentication, such as OCR capabilities.
You can also specify the Google Cloud location for Vertex AI API requests:
```bash filename=".env"
# Google Cloud region for Vertex AI
GOOGLE_LOC=us-central1
# Alternative region for Gemini Image Generation (defaults to global)
GOOGLE_CLOUD_LOCATION=global
```
Since fetching the models list isn't yet supported, you should set the models you want to use in the .env file.
For your convenience, these are the latest models as of 5/18/24 that can be used with the Generative Language API:
```bash filename=".env"
GOOGLE_MODELS=gemini-1.5-flash-preview-0514,gemini-1.5-pro-preview-0514,gemini-1.0-pro-vision-001,gemini-1.0-pro-002,gemini-1.0-pro-001,gemini-pro-vision,gemini-1.0-pro
```
If you're using docker and want to provide the `auth.json` file, you will need to also mount the volume in docker-compose.override.yml
```yaml filename="docker-compose.override.yml"
version: '3.4'
services:
api:
volumes:
- type: bind
source: ./api/data/auth.json
target: /app/api/data/auth.json
```
## Google Safety Settings
To set safety settings for both Vertex AI and Generative Language API, you can set the following in your .env file:
```bash filename=".env"
GOOGLE_SAFETY_SEXUALLY_EXPLICIT=BLOCK_ONLY_HIGH
GOOGLE_SAFETY_HATE_SPEECH=BLOCK_ONLY_HIGH
GOOGLE_SAFETY_HARASSMENT=BLOCK_ONLY_HIGH
GOOGLE_SAFETY_DANGEROUS_CONTENT=BLOCK_ONLY_HIGH
GOOGLE_SAFETY_CIVIC_INTEGRITY=BLOCK_ONLY_HIGH
```
You can also exclude safety settings by setting the following in your .env file, which will use the provider defaults. This can be helpful if you are having issues with specific safety settings.
```bash filename=".env"
GOOGLE_EXCLUDE_SAFETY_SETTINGS=true
```
NOTE: You do not have access to the BLOCK_NONE setting by default.
To use this restricted `HarmBlockThreshold` setting, you will need to either:
- (a) Get access through an allowlist via your Google account team
- (b) Switch your account type to monthly invoiced billing following this instruction:
https://cloud.google.com/billing/docs/how-to/invoiced-billing
**Notes:**
- Google endpoint supports all [Shared Endpoint Settings](/docs/configuration/librechat_yaml/object_structure/shared_endpoint_settings) via the `librechat.yaml` configuration file, including `streamRate`, `titleModel`, `titleMethod`, `titlePrompt`, `titlePromptTemplate`, and `titleEndpoint`
# AI Setup (/docs/configuration/pre_configured_ai)
This section provides detailed configuration guides to help you set up various AI providers and their respective APIs and credentials in LibreChat.
## Endpoints Configuration
The term "Endpoints" refers to the AI provider, configuration, or API that you need to set up and integrate with LibreChat. Each endpoint has its own configuration process, which may involve obtaining API keys, credentials, or following specific setup instructions.
The following guides are available to help you configure different endpoints:
- **[AWS Bedrock](/docs/configuration/pre_configured_ai/bedrock)**
- Setup AWS Bedrock integration
- **[Anthropic](/docs/configuration/pre_configured_ai/anthropic)**
- Integrate Anthropic AI models
- **[OpenAI](/docs/configuration/pre_configured_ai/openai)**
- Set up OpenAI API integration
- **[Google](/docs/configuration/pre_configured_ai/google)**
- Configure Google AI services
- **[Assistants](/docs/configuration/pre_configured_ai/assistants)**
- Enable and configure OpenAI's Assistants
## Custom Endpoint Configuration
The **[librechat.yaml Configuration Guides](/docs/configuration/librechat_yaml)** provides detailed instructions on how to configure custom endpoints within LibreChat.
In addition to the pre-configured endpoints, the librechat config file allows you to add and configure custom endpoints. This includes integrating with AI providers like Ollama, Mistral AI, Openrouter, and a multitude of other third-party services.
By following these configuration guides, you can seamlessly integrate various AI providers, unlock their capabilities, and enhance your LibreChat experience with the power of multiple AI models and services.
# OpenAI (/docs/configuration/pre_configured_ai/openai)
To get your OpenAI API key, you need to:
- Go to **[https://platform.openai.com/account/api-keys](https://platform.openai.com/account/api-keys)**
- Create an account or log in with your existing one
- Add a payment method to your account
- Go to https://platform.openai.com/api-keys to get a key.
- You will need to set the following environment variable to your key, or you can set it to `user_provided` for users to provide their own.
```bash filename=".env"
OPENAI_API_KEY=user_provided
```
- You can determine which models you would like to have available with `OPENAI_MODELS`
- When `OPENAI_API_KEY` is set to `user_provided` → only the models put in this list will be available
- ⚠️New models won't automatically show up; you'll need to add them to this list first
- When `OPENAI_API_KEY` is set to the actual API key value → as long as `OPENAI_MODELS` is left commented-out, it will do an API call to find out what models are available, which should include any new ones
```bash filename=".env"
OPENAI_MODELS=gpt-3.5-turbo-0125,gpt-3.5-turbo-0301,gpt-3.5-turbo,gpt-4,gpt-4-0613,gpt-4-vision-preview,gpt-3.5-turbo-0613,gpt-3.5-turbo-16k-0613,gpt-4-0125-preview,gpt-4-turbo-preview,gpt-4-1106-preview,gpt-3.5-turbo-1106,gpt-3.5-turbo-instruct,gpt-3.5-turbo-instruct-0914,gpt-3.5-turbo-16k
```
**Notes:**
- Selecting a vision model for messages with attachments is not necessary as it will be switched behind the scenes for you. If you didn't outright select a vision model, it will only be used for the vision request and you should still see the non-vision model you had selected after the request is successful
- OpenAI Vision models allow for messages without attachments
- OpenAI endpoint supports all [Shared Endpoint Settings](/docs/configuration/librechat_yaml/object_structure/shared_endpoint_settings) via the `librechat.yaml` configuration file, including `streamRate`, `titleModel`, `titleMethod`, `titlePrompt`, `titlePromptTemplate`, and `titleEndpoint`
# Azure AI Search (/docs/configuration/tools/azure_ai_search)
Through the plugins endpoint, you can use Azure AI Search for answers to your questions with assistance from GPT.
## Configurations
### Required
To get started, you need to get a Azure AI Search endpoint URL, index name, and a API Key. You can then define these as follows in your `.env` file:
```env
AZURE_AI_SEARCH_SERVICE_ENDPOINT="..."
AZURE_AI_SEARCH_INDEX_NAME="..."
AZURE_AI_SEARCH_API_KEY="..."
```
Or you need to get an Azure AI Search endpoint URL, index name, and an API Key. You can define them during the installation of the plugin.
### AZURE_AI_SEARCH_SERVICE_ENDPOINT
This is the URL of the search endpoint. It can be obtained from the top page of the search service in the Cognitive Search management console (e.g., `https://example.search.windows.net`).
### AZURE_AI_SEARCH_INDEX_NAME
This is the name of the index to be searched (e.g., `hotels-sample-index`).
### AZURE_AI_SEARCH_API_KEY
This is the authentication key to use when utilizing the search endpoint. Please issue it from the management console. Use the Value, not the name of the authentication key.
# Introduction to tutorial
## Create or log in to your account on Azure Portal
**1.** Visit **[https://azure.microsoft.com/en-us/](https://azure.microsoft.com/en-us/)** and click on `Get started` or `Try Azure for Free` to create an account and sign in.
**2.** Choose pay per use or Azure Free with $200.

## Create the Azure AI Search service
**1.** Access your control panel.
**2.** Click on `Create a resource`.

**3.** Search for `Azure Search` in the bar and press enter.
**4.** Now, click on `Create`.
**5.** Configure the basics settings, create a new or select an existing Resource Group, name the Service Name with a name of your preference, and then select the location.
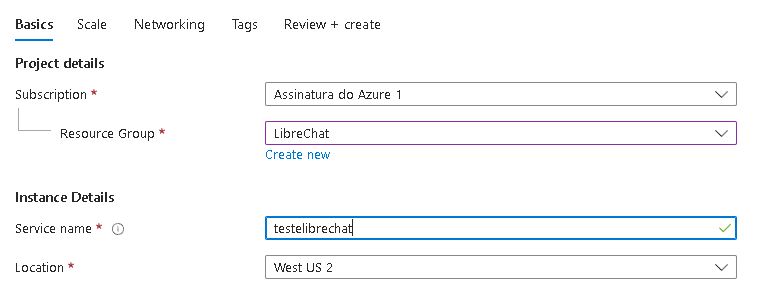
**6.** Click on `Change Pricing Tier`.

Now select the free option or select your preferred option (may incur charges).

**7.** Click on `Review + create` and wait for the resource to be created.

## Create your index
**1.** Click on `Import data`.
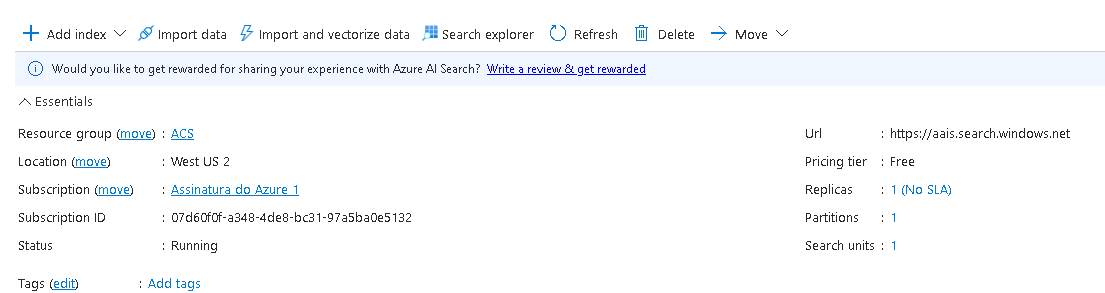
**2.** Follow the Microsoft tutorial: **[https://learn.microsoft.com/en-us/azure/search/search-get-started-portal](https://learn.microsoft.com/en-us/azure/search/search-get-started-portal)**, after finishing, save the name given to the index somewhere.
**3.** Now you have your `AZURE_AI_SEARCH_INDEX_NAME`, copy and save it in a local safe place.
## Get the Endpoint
**1.** In the `Url:` you have your `AZURE_AI_SEARCH_SERVICE_ENDPOINT`, copy and save it in a local safe place.

**2.** On the left panel, click on `keys`.
**3.** Click on `Add` and insert a name for your key.
**4.** Copy the key to get `AZURE_AI_SEARCH_API_KEY`.
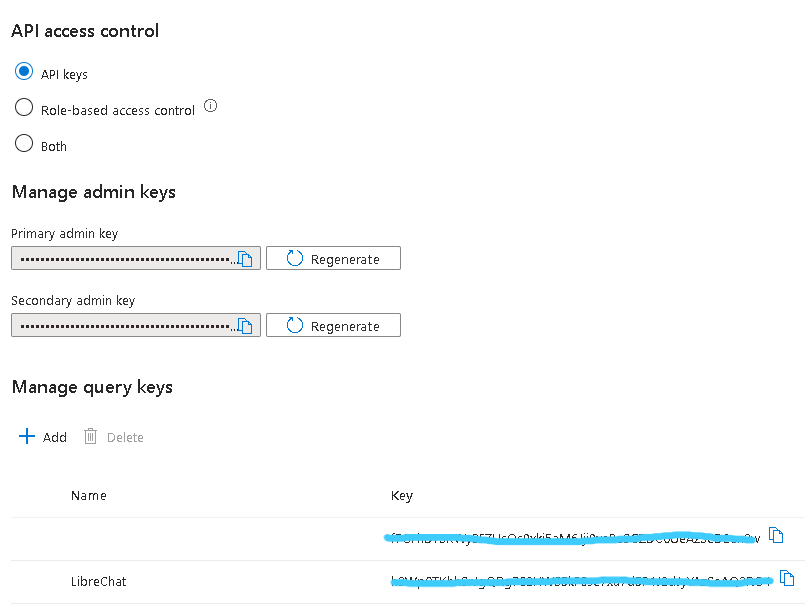
# Configure in LibreChat:
**1.** Access the Plugins and click to install Azure AI Search.
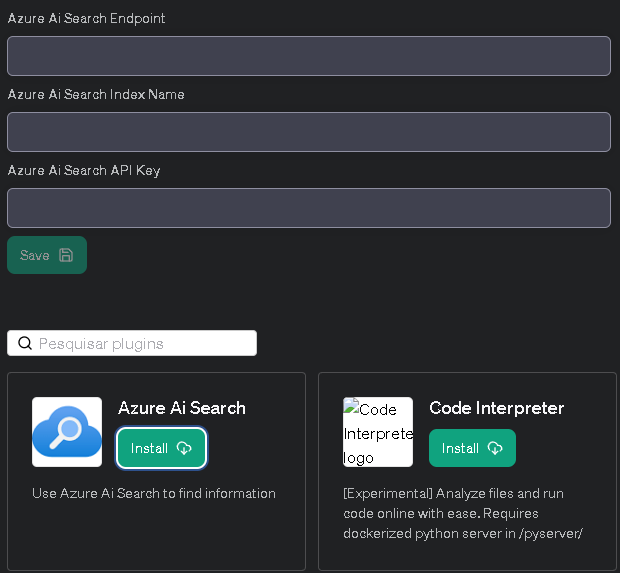
**2.** Fill in the Endpoint, Index Name, and API Key, and click on `Save`.
# Conclusion
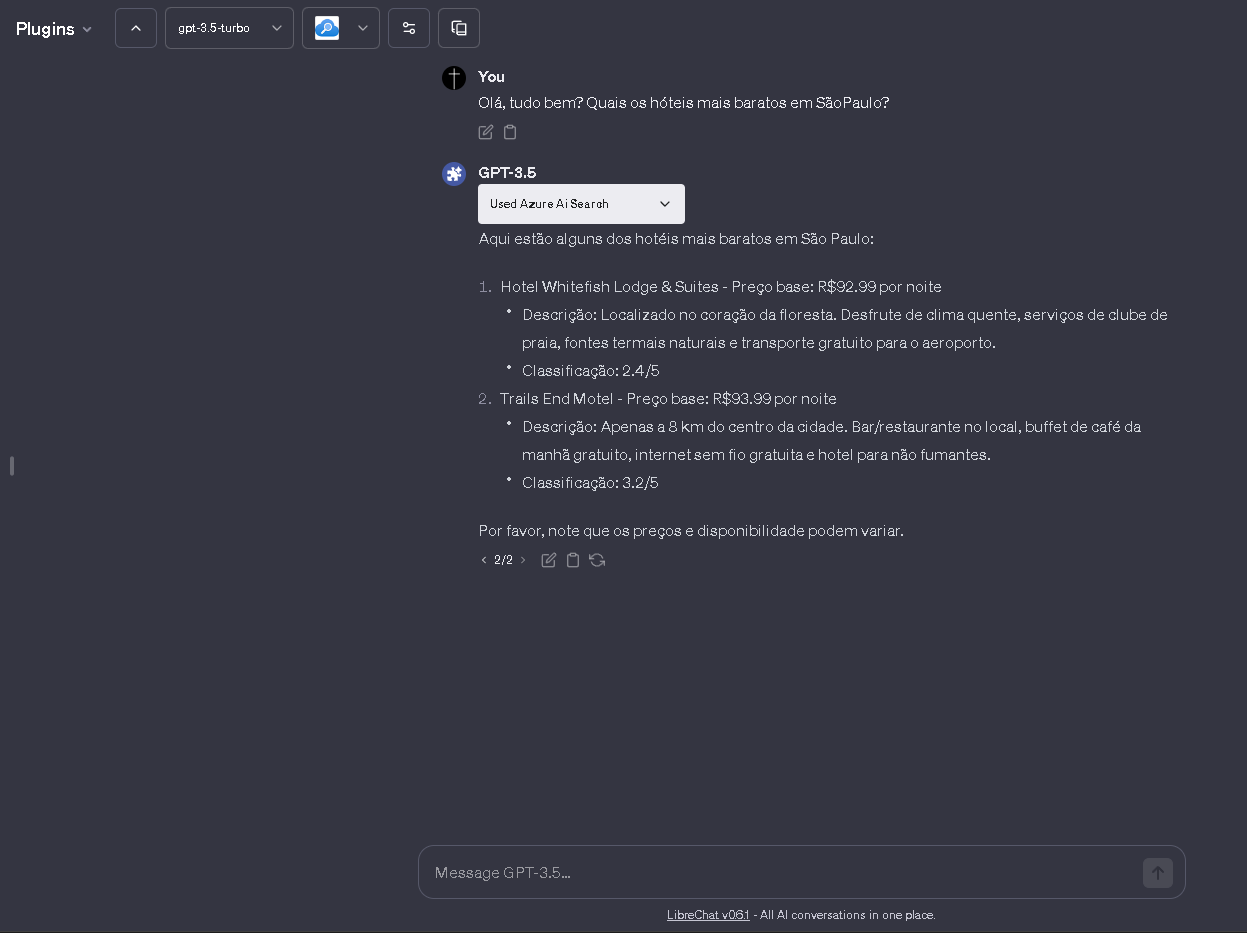
Now, you will be able to conduct searches using Azure AI Search. Congratulations! 🎉🎉
## Optional
The following are configuration values that are not required but can be specified as parameters during a search.
If there are concerns that the search result data may be too large and exceed the prompt size, consider reducing the size of the search result data by using AZURE_AI_SEARCH_SEARCH_OPTION_TOP and AZURE_AI_SEARCH_SEARCH_OPTION_SELECT.
For details on each parameter, please refer to the following document:
**[https://learn.microsoft.com/en-us/rest/api/searchservice/search-documents](https://learn.microsoft.com/en-us/rest/api/searchservice/search-documents)**
```env
AZURE_AI_SEARCH_API_VERSION=2023-10-01-Preview
AZURE_AI_SEARCH_SEARCH_OPTION_QUERY_TYPE=simple
AZURE_AI_SEARCH_SEARCH_OPTION_TOP=3
AZURE_AI_SEARCH_SEARCH_OPTION_SELECT=field1, field2, field3
```
#### AZURE_AI_SEARCH_API_VERSION
Specify the version of the search API. When using new features such as semantic search or vector search, you may need to specify the preview version. The default value is `2023-11-1`.
#### AZURE_AI_SEARCH_SEARCH_OPTION_QUERY_TYPE
Specify `simple` or `full`. The default value is `simple`.
#### AZURE_AI_SEARCH_SEARCH_OPTION_TOP
Specify the number of items to search for. The default value is 5.
#### AZURE_AI_SEARCH_SEARCH_OPTION_SELECT
Specify the fields of the index to be retrieved, separated by commas. Please note that these are not the fields to be searched.
# Flux Image Generation (/docs/configuration/tools/flux)
Flux is a powerful image generation tool that can create high-quality images from text descriptions. It supports various artistic styles and offers extensive customization options.
## Setup Instructions
1. Get your API key from [bfl.ml](https://bfl.ml)
2. Set the `FLUX_API_KEY` environment variable in your `.env` file:
```bash
FLUX_API_KEY=your_api_key_here
```
## Features
### Core Capabilities
- Generate high-quality images from detailed text descriptions
- Support for multiple artistic styles
- Customizable image dimensions
- Adjustable generation parameters
- Multiple endpoint options for different use cases
- Batch generation support (up to 24 images)
### Available Endpoints
- `/v1/flux-pro` - Standard endpoint (default)
- `/v1/flux-pro-1.1` - Enhanced version
- `/v1/flux-dev` - Development version
- `/v1/flux-pro-1.1-ultra` - Premium quality endpoint
### Parameters
The Flux tool supports three main actions:
1. **generate** - Create a new image from a text prompt
2. **generate_finetuned** - Create an image using a fine-tuned model
3. **list_finetunes** - List available custom models for the user
For `generate` action:
• **prompt** – Text description for the image (required)
• **width** – Width in pixels (multiple of 32)
• **height** – Height in pixels (multiple of 32)
• **prompt_upsampling** – Whether to perform upsampling on the prompt (default: false)
• **steps** – Number of diffusion steps (1-50, default: 40)
• **seed** – Optional seed for reproducibility
• **safety_tolerance** – Tolerance level for moderation (0-6, default: 6)
• **endpoint** – Model endpoint to use:
- `/v1/flux-pro-1.1` (default)
- `/v1/flux-pro`
- `/v1/flux-dev`
- `/v1/flux-pro-1.1-ultra`
• **raw** – Generate less processed images (only for ultra endpoint, default: false)
For `generate_finetuned` action:
• All parameters from `generate` plus:
• **finetune_id** – ID of the fine-tuned model (required)
• **finetune_strength** – Strength of the fine-tuning effect (0.1-1.2, default: 1.1)
• **guidance** – Guidance scale (default: 2.5)
• **aspect_ratio** – Aspect ratio for ultra models (default: "16:9")
• **endpoint** – Must be one of:
- `/v1/flux-pro-finetuned` (default)
- `/v1/flux-pro-1.1-ultra-finetuned`
## Best Practices
### Prompt Writing
1. Be specific and detailed in descriptions
2. Include key elements:
- Subject matter
- Style and artistic approach
- Composition details
- Lighting and atmosphere
- Color preferences
- Technical specifications
### Tips for Best Results
- Write prompts in English
- Balance specificity with creative freedom
- Avoid conflicting concepts
- Focus on visual descriptions
- Consider composition layers (foreground, middle ground, background)
## Technical Details
### Image Processing
- Images are automatically saved and managed
- Supports PNG output format
- Includes built-in moderation and safety features
- Asynchronous generation with status tracking
### Integration Features
- Seamless integration with chat interfaces
- Markdown-formatted output
- Built-in error handling and logging
- Support for batch processing
## Usage Examples
Here are some example prompts that work well with Flux:
> A serene mountain landscape at sunset, with snow-capped peaks reflected in a crystal-clear alpine lake. Warm golden light illuminates wispy clouds, creating a dramatic atmosphere. Photorealistic style with rich colors and sharp details.
> A futuristic cityscape at night, featuring neon-lit skyscrapers and flying vehicles. Cyberpunk style with deep blues and purples, accented by bright neon colors. Rain-slicked streets reflect the city lights, creating a moody atmosphere.
## Error Handling
Common error messages and solutions:
- API key issues: Verify your API key is correctly set in environment variables
- Generation failures: Check prompt length and content guidelines
- Timeout errors: May occur during high server load, retry after a brief wait
## Rate Limits and Usage
- Free tier includes generous usage limits
- Multiple images can be generated in a single request
- Consider using lower step counts for faster generations during testing
# Gemini Image Generation (/docs/configuration/tools/gemini_image_gen)
Gemini Image Generation is a powerful tool that integrates Google's Gemini Image Models for high-quality text-to-image generation and image context-aware editing. It supports both the simple Gemini API and Google Cloud Vertex AI.
## Setup Instructions
You can use either the Gemini API (recommended for most users) or Vertex AI with a service account.
### Option 1: Gemini API (Recommended)
1. Get your API key from [Google AI Studio](https://aistudio.google.com/app/apikey)
2. Set the `GEMINI_API_KEY` environment variable in your `.env` file:
```bash
GEMINI_API_KEY=your_api_key_here
```
### Option 2: Vertex AI (For Enterprise/GCP Users)
1. Create a service account in Google Cloud Console with Vertex AI permissions
2. Download the service account JSON key file
3. Place the JSON file in the project (e.g., `api/data/auth.json`) or set the path:
```bash
# Path to your service account JSON file (default: api/data/auth.json)
GOOGLE_SERVICE_KEY_FILE=/path/to/service-account.json
# Optional: Set the location (default: global)
GOOGLE_CLOUD_LOCATION=us-central1
```
When no `GEMINI_API_KEY` or `GOOGLE_KEY` is configured, the tool automatically falls back to Vertex AI using the service account file.
## Configuration Options
### Model Selection
You can choose which Gemini image model to use via environment variable:
```bash
# Default model
GEMINI_IMAGE_MODEL=gemini-2.5-flash-image
# Or use the newer Gemini 3 Pro Image model
GEMINI_IMAGE_MODEL=gemini-3-pro-image-preview
```
### Available Models
| Model | Description |
|-------|-------------|
| `gemini-2.5-flash-image` | Default model, fast and efficient |
| `gemini-3-pro-image-preview` | Higher quality, more detailed generations |
## Features
### Core Capabilities
- **Text-to-Image Generation**: Create images from detailed text descriptions
- **Image Context Support**: Use existing images as context/inspiration for new generations
- **Image Editing**: Generate new images based on modifications to existing ones
- **Safety Filtering**: Built-in content safety with user-friendly error messages
### Parameters
The Gemini Image Gen tool accepts the following parameters:
- **prompt** (required) – A detailed text description of the desired image, up to 32,000 characters
- **image_ids** (optional) – Array of image IDs to use as visual context for generation
## Best Practices
### Prompt Writing
1. **Be specific and detailed** in your descriptions
2. **Start with the image type**: photo, oil painting, watercolor, illustration, cartoon, drawing, vector, render, etc.
3. **Include key elements**:
- Subject matter and composition
- Style and artistic approach
- Lighting and atmosphere
- Color palette preferences
- Technical specifications
### Image Editing Tips
When editing existing images:
1. **Include the original image ID** in the `image_ids` array
2. **Use direct editing instructions**:
- "Remove the background from this image"
- "Add sunglasses to the person in this image"
- "Change the color of the car to red"
3. **Don't reconstruct the original prompt** – use simple, direct modification instructions
## Usage Examples
### Basic Image Generation
> A serene Japanese garden at golden hour, featuring a traditional red bridge over a koi pond. Cherry blossom trees frame the scene with soft pink petals falling. Photorealistic style with warm, diffused lighting and rich colors.
### Image with Context
When you have an existing image and want to create something inspired by it:
1. Reference the image ID in the `image_ids` parameter
2. Describe what you want: "Create a winter version of this landscape scene with snow-covered trees and a frozen lake"
### Image Editing
To modify an existing image:
1. Include the image ID in `image_ids`
2. Describe the change: "Remove the person from the background of this image"
## Error Handling
### Common Issues
| Error | Solution |
|-------|----------|
| "Image blocked by content safety filters" | Modify your prompt to avoid content that violates safety policies |
| "No image was generated" | Try a different prompt or simplify your request |
| "GEMINI_API_KEY or service account required" | Ensure you've configured either the API key or Vertex AI credentials |
### Safety Filtering
Gemini includes built-in safety filters. If your image is blocked:
- Review your prompt for potentially problematic content
- Try rephrasing to be more specific about artistic intent
- Avoid requests for harmful, violent, or explicit content
## Technical Details
### Storage Integration
Generated images are automatically saved using your configured file strategy (local, S3, Azure, or Firebase). This is handled by the framework — the tool returns image data and the agent callback system persists it as a message attachment.
### Image Format
- Output format defaults to PNG, configurable via the app's `imageOutputType` setting
- Images include unique identifiers for reference in subsequent requests
## Rate Limits
Rate limits depend on your API tier:
- **Gemini API**: Check [Google AI Studio](https://aistudio.google.com/) for current limits
- **Vertex AI**: Based on your Google Cloud project quotas
# Google Search (/docs/configuration/tools/google_search)
This page covers the **Google Custom Search** tool (agent plugin). For LibreChat's built-in **Web Search** feature (Serper/SearXNG + Firecrawl + Jina), see [Web Search](/docs/features/web_search).
The Google Search tool lets your agents query Google using the Custom Search JSON API. You will need a Google Custom Search Engine ID and an API key.
## Setup
### Create a Programmable Search Engine
Go to the [Programmable Search Engine control panel](https://programmablesearchengine.google.com/controlpanel/all) and sign in with your Google account.
Click **Add** to create a new search engine. Fill in a name, select **Search the entire web**, and click **Create**.

### Copy Your Search Engine ID
After creating the engine, you will see your **Search engine ID**. Copy it -- you will add it to your `.env` file as `GOOGLE_CSE_ID`.

### Get a Google Search API Key
Go to the [Custom Search JSON API introduction page](https://developers.google.com/custom-search/v1/introduction) and click **Get a Key**.

Name your project, agree to the Terms of Service, and copy the API key.

### Add Environment Variables
Add both values to your `.env` file:
```bash filename=".env"
GOOGLE_SEARCH_API_KEY=your-api-key-here
GOOGLE_CSE_ID=your-search-engine-id-here
```
### Add the Tool to an Agent
In LibreChat, go to the **Agents** panel and create or edit an agent. In the agent's **Tools** list, select **Google Search**.
### Restart and Test
| Deployment | Command |
|------------|---------|
| Docker | `docker compose down && docker compose up -d` |
| Local | Stop (Ctrl+C) then `npm run backend` |
Send a message like "Search for the latest news about AI" to your agent. The agent will use Google Custom Search to find and return relevant results.
If search returns no results, verify that your Programmable Search Engine is set to **Search the entire web** (not restricted to specific sites). Also confirm that both `GOOGLE_SEARCH_API_KEY` and `GOOGLE_CSE_ID` are set in your `.env` file and that you have restarted LibreChat after making changes.
## Related Pages
LibreChat's built-in web search feature (Serper, SearXNG, Firecrawl)
All available agent tools and their configuration
Create and configure AI agents with custom tools
# Tools and Plugins (/docs/configuration/tools)
**Note:** A new approach has been devised to revamp the handling of tools and plugins from scratch. The plan is to prioritize implementation for Assistants initially, followed by creating a new agent system that seamlessly integrates with various endpoints such as Anthropic, Google, and others.
## Setup Instructions:
### Azure AI Search
- [Azure AI Search](/docs/configuration/tools/azure_ai_search)
### Google Search
- [Google Search](/docs/configuration/tools/google_search)
### OpenWeather
- [OpenWeather](/docs/configuration/tools/openweather)
### Stable Diffusion
- [Stable Diffusion](/docs/features/image_gen#3--stable-diffusion-local)
### Flux
- [Flux Image Generation](/docs/features/image_gen#4--flux)
### Wolfram|Alpha
- [Wolfram|Alpha](/docs/configuration/tools/wolfram)
### DALL-E
- You just need an OpenAI key, and it's made distinct from your main API key to make Chats but it can be the same one
### Zapier
- You need a Zapier account. Get your **[API key from here](https://nla.zapier.com/credentials/)** after you've made an account
- Create allowed actions - Follow step 3 in this **[Start Here guide](https://nla.zapier.com/start/)** from Zapier
- ⚠️ NOTE: zapier is known to be finicky with certain actions. I found that writing email drafts is probably the best use of it
### Browser/Scraper
- This is not to be confused with 'browsing' on chat.openai.com (which is technically a plugin suite or multiple plugins)
- This plugin uses OpenAI embeddings so an OpenAI key is necessary, similar to DALL-E, and it's made distinct from your main API key to make Chats but it can be the same one
- This plugin will simply scrape html, and will not work with dynamic Javascript pages as that would require a more involved solution
- A better solution for 'browsing' is planned but can't guarantuee when
- This plugin is best used in combination with google so it doesn't hallucinate webpages to visit
### SerpAPI
- An alternative to Google search but not as performant in my opinion
- You can get an API key here: **[https://serpapi.com/dashboard](https://serpapi.com/dashboard)**
- For free tier, you are limited to 100 queries/month
- With google, you are limited to 100/day for free, which is a better deal, and any after may cost you a few pennies
# OpenWeather (/docs/configuration/tools/openweather)
The OpenWeather plugin allows you to get weather data including current conditions, forecasts, historical data, and daily summaries using OpenWeather's One Call API 3.0.
## Prerequisites
- An OpenWeather account
- An OpenWeather API key (specifically for the One Call API 3.0)
## Getting an API Key
1. Sign up for an OpenWeather account at [OpenWeather](https://home.openweathermap.org/users/sign_up)
2. After signing in, go to your [API keys](https://home.openweathermap.org/api_keys) page
3. Generate a new API key if you don't have one
4. Subscribe to the [One Call API 3.0](https://openweathermap.org/api/one-call-3) plan
5. Wait for your API key to be activated (can take up to 2 hours)
## Configuration
### Environment Variables
Add the following to your `.env` file:
```bash
OPENWEATHER_API_KEY=your_api_key_here
```
### Plugin Configuration
Add the plugin to any [agent](https://www.librechat.ai/docs/features/agents)
## Usage
The OpenWeather plugin supports the following actions:
- `current_forecast`: Get current weather and forecast data
- `timestamp`: Get historical weather data for a specific date
- `daily_aggregation`: Get aggregated weather data for a specific date
- `overview`: Get a human-readable weather summary
### Example Prompts
```
What's the current weather in London?
What was the weather like in Paris on 2023-01-01?
Give me a weather summary for Tokyo.
What's the temperature in New York in Fahrenheit?
```
### Parameters
- `city`: Name of the city (if lat/lon not provided)
- `lat`: Latitude coordinate (optional if city provided)
- `lon`: Longitude coordinate (optional if city provided)
- `units`: Temperature units ("Celsius", "Kelvin", or "Fahrenheit")
- `lang`: Language code for weather descriptions (e.g., "en", "fr", "es")
- `date`: Date in YYYY-MM-DD format (required for timestamp and daily_aggregation actions)
- `tz`: Timezone (optional, for daily_aggregation action)
## Troubleshooting
Common issues and solutions:
1. **403 Unauthorized Error**
- Verify your API key is correct
- Check if your API key has been activated (wait 2 hours after creation)
- Ensure you have subscribed to the One Call API 3.0
2. **City Not Found**
- Check the spelling of the city name
- Try adding the country code (e.g., "London,UK")
- Use latitude and longitude coordinates instead
3. **Invalid Date Format**
- Ensure dates are in YYYY-MM-DD format
- Historical data is only available from 1979-01-01
- Future data is limited to 1.5 years ahead
## API Limits
- Check your [OpenWeather subscription](https://home.openweathermap.org/subscriptions) for your specific limits
- Consider implementing rate limiting in high-traffic environments
## Support
For issues with the plugin:
- You may open an issue at https://github.com/jmaddington/LibreChat/issues or
- Check the [LibreChat Issues](https://github.com/danny-avila/LibreChat/issues)
- Review OpenWeather's [API documentation](https://openweathermap.org/api/one-call-3)
- Contact OpenWeather [support](https://openweathermap.org/support) for API-specific issues
## Notes
- Temperature values are automatically rounded to the nearest degree
- Default temperature unit is Celsius if not specified
# Stable Diffusion (/docs/configuration/tools/stable_diffusion)
To use Stable Diffusion with this project, you will either need to download and install **[AUTOMATIC1111 - Stable Diffusion WebUI](https://github.com/AUTOMATIC1111/stable-diffusion-webui)** or, for a dockerized deployment, you can also use **[stable-diffusion-webui-docker](https://github.com/AbdBarho/stable-diffusion-webui-docker)**
With the docker deployment you can skip step 2 and step 3, use the setup instructions from their repository instead.
- Note: you need a compatible GPU ("CPU-only" is possible but very slow). Nvidia is recommended, but there is no clear resource on incompatible GPUs. Any decent GPU should work.
### 1. Follow download and installation instructions from **[stable-diffusion-webui readme](https://github.com/AUTOMATIC1111/stable-diffusion-webui)**
### 2. Edit your run script settings
#### Windows
- Edit your **webui-user.bat** file by adding the following line before the call command:
- `set COMMANDLINE_ARGS=--api`
- Your .bat file should like this with all other settings default
```shell
@echo off
set PYTHON=
set GIT=
set VENV_DIR=
set COMMANDLINE_ARGS=--api
call webui.bat
```
#### Others (not tested but should work)
- Edit your **webui-user.sh** file by adding the following line:
- `export COMMANDLINE_ARGS="--api"`
- Your .sh file should like this with all other settings default
```bash
export COMMANDLINE_ARGS="--api"
#!/bin/bash
#########################################################
# Uncomment and change the variables below to your need:#
#########################################################
# ...rest
```
### 3. Run Stable Diffusion (either .sh or .bat file according to your operating system)
### 4. In the app, select the plugins endpoint, open the plugins store, and install Stable Diffusion
> **Note: The default port for Gradio is `7860`. If you changed it, please update the value accordingly.**
#### Docker Install
- Use `SD_WEBUI_URL=http://host.docker.internal:7860` in the `.env` file
- Or `http://host.docker.internal:7860` from the webui
#### Local Install
- Use `SD_WEBUI_URL=http://127.0.0.1:7860` in the `.env` file
- Or `http://127.0.0.1:7860` from the webui
#### Add the tool to an Agent
See the [Agents](/docs/features/agents#tools) section for more information on how to add the tool to an Agent.
# Wolfram|Alpha (/docs/configuration/tools/wolfram)
An AppID must be supplied in all calls to the Wolfram|Alpha API.
- Note: Wolfram API calls are limited to 100 calls/day and 2000/month for regular users.
### Make an account
- Visit: **[products.wolframalpha.com/api/](https://products.wolframalpha.com/api/)** to create your account
### Get your AppID
- Visit the **[Developer Portal](https://developer.wolframalpha.com/portal/myapps/)** and click on `Get an AppID`
- Select `LLM API` as the `API` and copy the key
#### Add the tool to an Agent
See the [Agents](/docs/features/agents#tools) section for more information on how to add the tool to an Agent.
# Apple (/docs/configuration/authentication/OAuth2-OIDC/apple)
## Prerequisites
Before you begin, ensure you have the following:
- **Apple Developer Account:** If you don't have one, enroll [here](https://developer.apple.com/programs/enroll/).
---
## Creating a New App ID
### 1. Log in to the Apple Developer Console
- **Action:**
- Visit [Apple Developer](https://developer.apple.com/) and sign in with your Apple ID.
### 2. Navigate to Identifiers
- Go to **Certificates, Identifiers & Profiles**.
- Click on **Identifiers** in the sidebar.
### 3. Create a New App ID
1. Click the **"+"** button to add a new identifier.
2. Select **App IDs** and click **Continue**.
3. Choose **App** and click **Continue**.
4. Enter a **Description** for your App ID (e.g., `LibreChat App ID`).
5. Set the **Bundle ID** (e.g., `com.yourdomain.librechat`).
6. Click **Continue** and then **Register**.
- **Image References:**
- 
*Figure 1: Creating a New App ID*
- 
*Figure 2: Selecting App Identifier*
### 4. Enable "Sign in with Apple"
1. After creating the App ID, click on it to edit.
2. Under **Capabilities**, find and check **Sign in with Apple**.
3. Click **Save**.
- **Image Reference:**
- 
*Figure 3: Enabling "Sign in with Apple"*
---
## Creating a Services ID
### 1. Navigate to Identifiers
- In the **Certificates, Identifiers & Profiles** section, click on **Identifiers**.
### 2. Create a New Services ID
1. Click the **"+"** button.
2. Select **Services IDs** and click **Continue**.
3. Enter a **Description** (e.g., `LibreChat Services ID`).
4. Enter an **Identifier** (e.g., `com.yourdomain.librechat.services`).
5. Click **Continue** and then **Register**.
- **Image References:**
- 
*Figure 4: Selecting Services ID*
- 
*Figure 5: Creating Services ID*
### 3. Configure "Sign in with Apple"
1. Click on the newly created Services ID.
2. Under **Capabilities**, click **Configure** next to **Sign in with Apple**.
3. Enter your **Domains** (e.g., `your-domain.com`) and **Return URLs** (e.g., `https://your-domain.com/oauth/apple/callback`).
4. Click **Next** and then **Register**.
- **Image Reference:**
- 
*Figure 6: Configuring "Sign in with Apple" for Services ID*
- 
*Figure 7: Web Authentication Configuration*
- 
*Figure 8: Save edit Services ID Configuration*
---
## Creating a Key
### 1. Navigate to Keys
- In the **Certificates, Identifiers & Profiles** section, click on **Keys**.
### 2. Create a New Key
1. Click the **"+"** button to add a new key.
2. Enter a **Key Name** (e.g., `LibreChatSignInWithApple`).
3. Select **Sign in with Apple** under **Capabilities**.
4. Click **Configure** and select the created App ID (e.g., `com.yourdomain.librechat`), then click **Save**.
5. Click **Continue** and then **Register**.
- **Image References:**
- 
*Figure 8: Creating a New Key*
- 
*Figure 9: Configuring the Key with App ID*
- 
*Figure 10: Registering the Key*
### 3. Download the Private Key
1. After creating the key, click **Download**.
2. **Important:** Save the `.p8` file securely. You will not be able to download it again.
3. Note the **Key ID**; you'll need it for the `.env` file.
- **Image Reference:**
- 
*Figure 11: Downloading the Private Key*
---
## Configuring LibreChat
### 1. Update `.env` Configuration
Add the following Apple OAuth2 configuration to your `.env` file:
```env filename=".env"
DOMAIN_CLIENT=https://your-domain.com # use http://localhost:3080 if not using a custom domain
DOMAIN_SERVER=https://your-domain.com # use http://localhost:3080 if not using a custom domain
# Apple
APPLE_CLIENT_ID=com.yourdomain.librechat.services
APPLE_TEAM_ID=YOUR_TEAM_ID
APPLE_KEY_ID=YOUR_KEY_ID
APPLE_PRIVATE_KEY_PATH=/path/to/AuthKey.p8 # Absolute path to your downloaded .p8 file
APPLE_CALLBACK_URL=/oauth/apple/callback
```
> **Note:**
> - Replace `com.yourdomain.librechat.services` with your actual Services ID.
> - Replace `YOUR_TEAM_ID` and `YOUR_KEY_ID` with the respective values from your Apple Developer account.
> - If using Docker, ensure the `.p8` file is accessible within your Docker container and update the `APPLE_PRIVATE_KEY_PATH` accordingly.
### 2. Restart LibreChat
After updating the `.env` file, restart LibreChat to apply the changes.
- **If using Docker:**
```bash
docker compose up -d
```
---
## Troubleshooting
If you encounter issues during the setup, consider the following solutions:
- **Invalid Redirect URI:**
- Ensure that the redirect URI in your Apple Developer Console (`https://your-domain.com/oauth/apple/callback`) matches exactly with the one specified in your `.env` file (`APPLE_CALLBACK_URL`).
- **Private Key Issues:**
- Verify that the path to your `.p8` file (`APPLE_PRIVATE_KEY_PATH`) is correct.
- Ensure that LibreChat has read permissions for the `.p8` file.
- **Team ID and Key ID Errors:**
- Double-check that the `APPLE_TEAM_ID` and `APPLE_KEY_ID` in your `.env` file match those in your Apple Developer Account.
- **Domain Verification Failed:**
- Ensure that the verification file is correctly uploaded to the root of your domain.
- Verify that there are no typos in the domain name entered during configuration.
- **Docker Configuration Issues:**
- If using Docker, confirm that the `.p8` file is properly mounted and the path in `APPLE_PRIVATE_KEY_PATH` is accessible within the container.
- **Check Logs:**
- Review LibreChat logs for any error messages related to Apple authentication. This can provide specific insights into what might be going wrong.
# Auth0 (/docs/configuration/authentication/OAuth2-OIDC/auth0)
This guide walks you through configuring Auth0 as an OpenID Connect provider for LibreChat.
## Overview
Auth0 can be used as an OpenID Connect provider for LibreChat. When using Auth0 with token reuse enabled (`OPENID_REUSE_TOKENS=true`), you must configure the `OPENID_AUDIENCE` environment variable to prevent authentication issues.
## Prerequisites
- An Auth0 account with an active tenant
- Admin access to create applications and APIs in Auth0
- LibreChat instance ready for configuration
## Configuration Steps
### Step 1: Create an Auth0 Application
1. Go to **Auth0 Dashboard** → **Applications** → **Applications**
2. Click **"Create Application"**
3. Configure the application:
- **Name**: `LibreChat` (or your preferred name)
- **Application Type**: Select **"Single Page Application"**
4. Click **"Create"**
### Step 2: Configure Application Settings
Auth0 does not allow `http://localhost` URLs in production applications. For local development/testing, you'll need to use HTTPS. You can use services like:
- **ngrok**: `ngrok http 3080` (provides HTTPS tunnel to localhost)
- **Caddy**: Local HTTPS proxy server
- **localtunnel**: Similar to ngrok
Example with ngrok:
```bash
ngrok http 3080
# This will give you a URL like: https://abc123.ngrok.io
```
1. In your application's **Settings** tab:
2. Set **Allowed Callback URLs**:
```bash
https://your-domain.ngrok.io/oauth/openid/callback
```
(Use your ngrok URL for testing, or your production HTTPS URL)
3. Set **Allowed Logout URLs** (if using end session):
```bash
https://your-domain.ngrok.io
```
4. Set **Allowed Web Origins**:
```bash
https://your-domain.ngrok.io
```
5. Save the changes
### Step 3: Create an Auth0 API (Required for Token Reuse)
This step is **required** when using `OPENID_REUSE_TOKENS=true`. Without it, Auth0 will return opaque tokens that cannot be validated by LibreChat, causing infinite refresh loops.
1. **Go to Auth0 Dashboard** → **Applications** → **APIs**
2. **Click "Create API"**
3. **Configure the API:**
- **Name**: `LibreChat API` (or your preferred name)
- **Identifier**: `https://api.librechat.ai` (or your preferred identifier)
- **Note**: This is just a unique identifier, not an actual URL. It doesn't need to be accessible.
- Common patterns: `https://api.yourdomain.com`, `https://librechat.yourdomain.com`, etc.
- **Signing Algorithm**: RS256 (recommended)
4. **Click "Create"**
### Step 4: Configure Offline Access
1. **Go to your API's Settings** → **Access Settings**
2. Enable **"Allow Offline Access"**
3. Save the changes
### Step 5: Gather Configuration Values
In your Auth0 Application's **Basic Information** section, you'll find:
- **Domain**: Shows as `dev-example.us.auth0.com` (you'll need to add `https://` prefix)
- **Client ID**: A long alphanumeric string
- **Client Secret**: Hidden by default (click to reveal)
The **Domain** shown in Auth0 doesn't include the `https://` prefix. You must add it when configuring the `OPENID_ISSUER`.
Example: If Auth0 shows `dev-abc123.us.auth0.com`, use `https://dev-abc123.us.auth0.com`
### Step 6: Configure LibreChat Environment Variables
Add the following environment variables to your `.env` file:
```bash
# OpenID Connect Configuration
# Domain from Basic Information (add https:// prefix)
OPENID_ISSUER=https://dev-abc123.us.auth0.com
# Client ID from Basic Information
OPENID_CLIENT_ID=your_long_alphanumeric_client_id
# Client Secret from Basic Information (click to reveal)
OPENID_CLIENT_SECRET=your_client_secret_from_basic_information
# Callback URL (must match what's configured in Auth0)
OPENID_CALLBACK_URL=/oauth/openid/callback
# Token Configuration
OPENID_REUSE_TOKENS=true
OPENID_SCOPE=openid profile email offline_access
# IMPORTANT: Your Auth0 API identifier (from Step 3)
OPENID_AUDIENCE=https://api.librechat.ai
# Security Settings (recommended)
OPENID_USE_PKCE=true
# Session Configuration (generate a secure random string)
OPENID_SESSION_SECRET=your-secure-session-secret-32-chars-or-more
# Optional: Custom button appearance
OPENID_BUTTON_LABEL=Continue with Auth0
# OPENID_IMAGE_URL=https://path-to-auth0-logo.png
# If using ngrok for testing, also update:
# DOMAIN_CLIENT=https://your-domain.ngrok.io
# DOMAIN_SERVER=https://your-domain.ngrok.io
```
## Understanding OPENID_AUDIENCE
### The Problem
When using Auth0 with `OPENID_REUSE_TOKENS=true`:
- Auth0 returns **opaque access tokens** (JWE format) by default
- LibreChat expects **signed JWT tokens** (JWS format) that can be validated
- Without proper configuration, this mismatch causes authentication failures and infinite refresh loops
### The Solution
The `OPENID_AUDIENCE` environment variable:
- Must be set to your Auth0 API identifier (created in Step 3)
- Forces Auth0 to issue signed JWT access tokens instead of opaque tokens
- Enables LibreChat to validate tokens using Auth0's JWKS endpoint
### How It Works
When `OPENID_AUDIENCE` is configured:
1. LibreChat includes the `audience` parameter in authorization requests
2. Auth0 recognizes the audience as a registered API
3. Auth0 issues JWT access tokens that can be validated
4. LibreChat successfully validates tokens and authentication works properly
## Environment Variable Reference
## Troubleshooting
### Infinite Refresh Loop
**Symptoms**: Page reloads continuously after clicking "Continue with OpenID"
**Solution**:
1. Ensure `OPENID_AUDIENCE` is set to your Auth0 API identifier
2. Verify the API was created in Auth0 and offline access is enabled
3. Check that the audience value matches exactly
### Invalid Token Errors
**Symptoms**: Authentication fails with token validation errors
**Solution**:
1. Enable debug logging: `DEBUG_OPENID_REQUESTS=true`
2. Verify Auth0 is returning JWT tokens (not opaque tokens)
3. Check JWKS endpoint is accessible
### Missing Refresh Token
**Symptoms**: No refresh token in authentication response
**Solution**:
1. Ensure `offline_access` is included in `OPENID_SCOPE`
2. Verify "Allow Offline Access" is enabled in your Auth0 API settings
## Best Practices
1. **Always use HTTPS** - Auth0 requires HTTPS for all callback URLs
2. **Testing locally** - Use ngrok or similar services to create HTTPS tunnels to localhost
3. **Secure your session secret** - Use a strong, random value for `OPENID_SESSION_SECRET`
4. **Enable PKCE** - Set `OPENID_USE_PKCE=true` for enhanced security
5. **Restrict callback URLs** - Only allow your actual domain in Auth0 settings
6. **Monitor logs** - Use `DEBUG_OPENID_REQUESTS=true` during setup
7. **API Identifier** - Remember it's just an identifier, not an actual endpoint that needs to exist
## Additional Resources
- [Auth0 Documentation](https://auth0.com/docs)
- [Auth0 Access Tokens](https://auth0.com/docs/secure/tokens/access-tokens/get-access-tokens)
- [LibreChat OpenID Token Reuse](/docs/configuration/authentication/OAuth2-OIDC/token-reuse)
# Authelia (/docs/configuration/authentication/OAuth2-OIDC/authelia)
- Generate a client secret using:
```
docker run --rm authelia/authelia:latest authelia crypto hash generate pbkdf2 --variant sha512 --random --random.length 72 --random.charset rfc3986
```
- Then in your `configuration.yml` add the following in the oidc section:
```bash filename="configuration.yml"
- client_id: 'librechat'
client_name: 'LibreChat'
client_secret: '$pbkdf2-GENERATED_SECRET_KEY_HERE'
public: false
authorization_policy: 'two_factor'
redirect_uris:
- 'https://LIBRECHAT.URL/oauth/openid/callback'
scopes:
- 'openid'
- 'profile'
- 'email'
userinfo_signing_algorithm: 'none'
```
- Then restart Authelia
# LibreChat
- Open the `.env` file in your project folder and add the following variables:
```bash filename=".env"
ALLOW_SOCIAL_LOGIN=true
OPENID_BUTTON_LABEL='Log in with Authelia'
OPENID_ISSUER=https://auth.example.com/.well-known/openid-configuration
OPENID_CLIENT_ID=librechat
OPENID_CLIENT_SECRET=ACTUAL_GENERATED_SECRET_HERE
OPENID_SESSION_SECRET=ANY_RANDOM_STRING
OPENID_CALLBACK_URL=/oauth/openid/callback
OPENID_SCOPE="openid profile email"
OPENID_IMAGE_URL=https://www.authelia.com/images/branding/logo-cropped.png
# Optional: redirects the user to the end session endpoint after logging out
OPENID_USE_END_SESSION_ENDPOINT=true
```
# Authentik (/docs/configuration/authentication/OAuth2-OIDC/authentik)
1. **Access Authentik Admin Interface:**
- Open the Authentik Admin Interface in your browser. Can be found at a URL such as: `https://authentik.example.com/if/admin/#/administration/overview`.
> We will use `https://authentik.example.com` as an example URL. Replace this with the URL of your Authentik instance.
2. **Create a new Application and Provider using the wizard:**
- Click on the Applications tab in the left sidebar and click on Applications again.
- At the top of the page you should see a button that says `Create with Wizard`. Click on it.
> Note: You can also create an application and provider manually just be sure to link them afterwards.
- You can name the application whatever you want. For this example, we will name it `LibreChat` and click next.
- Choose the `OAuth2/OIDC` provider and click next.
- Choose your authentication and authorization flows.
- Scroll down and take note of the `Client ID` and `Client Secret`. You will need these later.
- Under Advanced protocol settings change Subject mode to `Based on the User's Email`.
- Click Submit.
- Add the new application you created to an Outpost.
> Note: You should also apply any policies for access control that you want to apply to LibreChat at this point.
3. **Gather Information for .env:**
- You will need the following information from Authentik:
- `Client ID`
- `Client Secret`
- `OpenID Configuration URL`
> All of these can be found by clicking on the provider you just created.
3. **Configure LibreChat:**
- Open the `.env` file and add the following variables:
```bash filename=".env"
OPENID_ISSUER=https://authentik.example.com/application/o/librechat/.well-known/openid-configuration
OPENID_CLIENT_ID=[YourClientID]
OPENID_CLIENT_SECRET=[YourClientSecret]
OPENID_SESSION_SECRET=[JustGenerateARandomSessionSecret]
OPENID_CALLBACK_URL=/oauth/openid/callback
OPENID_SCOPE=openid profile email
# Optional customization below
OPENID_BUTTON_LABEL=Login with Authentik
OPENID_IMAGE_URL=https://cdn.jsdelivr.net/gh/selfhst/icons/png/authentik.png
# Generate nonce for federated identity providers that require it, i.e. Cognito configured with Entra as an OIDC provider.
OPENID_GENERATE_NONCE=true
# Redirects the user to the end session endpoint after logging out
OPENID_USE_END_SESSION_ENDPOINT=true
```
> Note: Make sure nothing is wrapped in quotes in your .env and you have allowed social login.
4. **Check Configuration:**
- Restart LibreChat to apply the changes.
- Open an Icognito window and navigate to your LibreChat instance.
- Underneath the form login there should be a new button that says `Login with Authentik`.
- You should be redirected to Authentik to login.
- After logging in you should be redirected back to LibreChat and be logged in.
- If you are not redirected back to LibreChat, check Authentik logs for any errors.
# AWS Cognito (/docs/configuration/authentication/OAuth2-OIDC/aws)
## Create a new User Pool in Cognito
- Visit: **[https://console.aws.amazon.com/cognito/](https://console.aws.amazon.com/cognito/)**
- Sign in as Root User
- Click on `Create user pool`

## Configure sign-in experience
Your Cognito user pool sign-in options should include `User Name` and `Email`.

## Configure Security Requirements
You can configure the password requirements now if you desire

## Configure sign-up experience
Choose the attributes required at signup. The minimum required is `name`. If you want to require users to use their full name at sign up use: `given_name` and `family_name` as required attributes.

## Configure message delivery
Send email with Cognito can be used for free for up to 50 emails a day

## Integrate your app
Select `Use Cognitio Hosted UI` and chose a domain name

Set the app type to `Confidential client`
Make sure `Generate a client secret` is set.
Set the `Allowed callback URLs` to `https://YOUR_DOMAIN/oauth/openid/callback`

Under `Advanced app client settings` make sure `Profile` is included in the `OpenID Connect scopes` (in the bottom)

## Review and create
You can now make last minute changes, click on `Create user pool` when you're done reviewing the configuration


## Get your environment variables
1. Open your User Pool

2. The `User Pool ID` and your AWS region will be used to construct the `OPENID_ISSUER` (see below)


3. Go to the `App Integrations` tab

4. Open the app client

5. Toggle `Show Client Secret`

- Use the `Client ID` for `OPENID_CLIENT_ID`
- Use the `Client secret` for `OPENID_CLIENT_SECRET`
- Generate a random string for the `OPENID_SESSION_SECRET`
> The `OPENID_SCOPE` and `OPENID_CALLBACK_URL` are pre-configured with the correct values
6. Open the `.env` file at the root of your LibreChat folder and add the following variables with the values you copied:
```bash filename=".env"
DOMAIN_CLIENT=https://your-domain.com # use http://localhost:3080 if not using a custom domain
DOMAIN_SERVER=https://your-domain.com # use http://localhost:3080 if not using a custom domain
OPENID_CLIENT_ID=Your client ID
OPENID_CLIENT_SECRET=Your client secret
OPENID_ISSUER=https://cognito-idp.[AWS REGION].amazonaws.com/[USER POOL ID]/.well-known/openid-configuration
OPENID_SESSION_SECRET=Any random string
OPENID_SCOPE=openid profile email
OPENID_CALLBACK_URL=/oauth/openid/callback
# Optional: redirects the user to the end session endpoint after logging out
OPENID_USE_END_SESSION_ENDPOINT=true
# Optional: generates the nonce url parameter.
OPENID_GENERATE_NONCE=true
```
> [!WARNING]
> If Cognito is configured with an OIDC provider, i.e. federation to Entra, the `OPENID_GENERATE_NONCE=true` is required. Otherwise Cognito will generate it regardless and the claims validation will fail since the client didn't provide one.
7. Save the .env file
> Note: If using docker, run `docker compose up -d` to apply the .env configuration changes
# Azure Entra (/docs/configuration/authentication/OAuth2-OIDC/azure)
1. Go to the [Azure Portal](https://portal.azure.com/) and sign in with your account.
2. In the search box, type "Azure Entra" and click on it.
3. On the left menu, click on App registrations and then on New registration.
4. Give your app a name and select Web as the platform type.
5. In the Redirect URI field, enter `http://localhost:3080/oauth/openid/callback` and click on Register.

6. You will see an Overview page with some information about your app. Copy the Application (client) ID and the
Directory (tenant) ID and save them somewhere.

7. On the left menu, click on Authentication and check the boxes for Access tokens and ID tokens under Implicit
grant and hybrid flows.

8. On the left menu, click on Certificates & Secrets and then on New client secret. Give your secret a
name and an expiration date and click on Add. You will see a Value column with your secret. Copy it and
save it somewhere. Don't share it with anyone!

9. If you want to restrict access by groups you should add the groups claim to the token. To do this, go to
Token configuration and click on Add group claim. Select the groups you want to include in the token and click on Add.

10. Open the .env file in your project folder and add the following variables with the values you copied:
```bash filename=".env"
DOMAIN_CLIENT=https://your-domain.com # use http://localhost:3080 if not using a custom domain
DOMAIN_SERVER=https://your-domain.com # use http://localhost:3080 if not using a custom domain
# enable social login or else OpenID button will not appear on login page
ALLOW_SOCIAL_LOGIN=true
OPENID_CLIENT_ID=Your Application (client) ID
OPENID_CLIENT_SECRET=Your client secret
OPENID_ISSUER=https://login.microsoftonline.com/Your Directory (tenant ID)/v2.0/
OPENID_SESSION_SECRET=Any random string
OPENID_SCOPE=openid profile email #DO NOT CHANGE THIS
OPENID_CALLBACK_URL=/oauth/openid/callback # this should be the same for everyone
OPENID_REQUIRED_ROLE_TOKEN_KIND=id
# If you want to restrict access by groups
OPENID_REQUIRED_ROLE_PARAMETER_PATH="roles"
OPENID_REQUIRED_ROLE="Your Group Name" # Single role or comma-separated roles (e.g., Group1,Group2,Admin)
# Optional: redirects the user to the end session endpoint after logging out
OPENID_USE_END_SESSION_ENDPOINT=true
```
11. Save the .env file
> Note: If using docker, run `docker compose up -d` to apply the .env configuration changes
## Advanced: Token Reuse
LibreChat supports reusing Azure Entra ID tokens for session management, which can provide better integration with your Azure environment. This feature allows LibreChat to use Azure's refresh tokens instead of managing its own session tokens.
To learn more about this feature and how to configure it, see [Re-use OpenID Tokens for Login Session](/docs/configuration/authentication/OAuth2-OIDC/token-reuse).
## Advanced: Microsoft Graph API Integration
When using Azure Entra ID as your OpenID provider, you can enable Microsoft Graph API integration to enhance the permissions and sharing system with people and group search capabilities.
### Prerequisites
1. Your Azure app registration must have the appropriate Microsoft Graph API permissions
2. Admin consent may be required for certain Graph API scopes (like `GroupMember.Read.All`)
### Adding Graph API Permissions
1. In your Azure app registration, go to **API permissions**
2. Click **Add a permission** > **Microsoft Graph** > **Delegated permissions**
3. Add these permissions:
- `User.Read` - Sign in and read user profile
- `People.Read` - Read user contacts
- `GroupMember.Read.All` - Read all group memberships
- `User.ReadBasic.All` - Read all users' basic profiles
4. Click **Grant admin consent** if required (you'll need admin privileges)
### Configuration
**Important:** You MUST enable OpenID token reuse for this feature to work:
```bash filename=".env"
OPENID_REUSE_TOKENS=true
```
See [Token Reuse Configuration](#advanced-token-reuse) above for details.
Add the following environment variables to your `.env` file:
```bash filename=".env"
# Enable Entra ID people search in permissions/sharing
USE_ENTRA_ID_FOR_PEOPLE_SEARCH=true
# Include group owners as members when searching groups
ENTRA_ID_INCLUDE_OWNERS_AS_MEMBERS=true
# Microsoft Graph API scopes (these are automatically included with the OpenID scopes)
OPENID_GRAPH_SCOPES=User.Read,People.Read,GroupMember.Read.All,User.ReadBasic.All
```
When enabled, the people picker in the permissions and sharing dialogs will:
- Search both local LibreChat users and Azure Entra ID users
- Display user profiles with names and emails from your organization
- Allow searching and selecting Azure Entra ID groups
- Show group members based on your Graph API permissions
### Notes
- **Token reuse (`OPENID_REUSE_TOKENS=true`) is mandatory** for this feature to work
- The `OPENID_GRAPH_SCOPES` are automatically appended to your existing `OPENID_SCOPE` during authentication
- Group search requires the `GroupMember.Read.All` permission, which typically needs admin consent
- User search works with basic `User.Read`, `People.Read`, and `User.ReadBasic.All` permissions
## Advanced: SharePoint Integration
LibreChat can integrate with SharePoint Online and OneDrive for Business, allowing users to browse and attach files directly from their SharePoint libraries.
### Prerequisites
1. All requirements from [Token Reuse](#advanced-token-reuse) must be met
2. Your Azure app registration needs additional SharePoint permissions
### Adding SharePoint Permissions
1. In your Azure app registration, go to **API permissions**
2. Click **Add a permission**
#### For SharePoint Access:
3. Select **SharePoint** (not Microsoft Graph)
4. Choose **Delegated permissions**
5. Add: `AllSites.Read` - Read items in all site collections
#### For File Downloads:
6. Click **Add a permission** again
7. Select **Microsoft Graph**
8. Choose **Delegated permissions**
9. Add: `Files.Read.All` - Read all files that user can access
10. Click **Grant admin consent** for both permissions
### Configuration
```bash filename=".env"
# Enable SharePoint file picker
ENABLE_SHAREPOINT_FILEPICKER=true
# Your SharePoint tenant URL
SHAREPOINT_BASE_URL=https://yourtenant.sharepoint.com
# SharePoint scope for file picker (replace 'yourtenant' with your actual tenant)
SHAREPOINT_PICKER_SHAREPOINT_SCOPE=https://yourtenant.sharepoint.com/AllSites.Read
# Graph API scope for downloading files
SHAREPOINT_PICKER_GRAPH_SCOPE=Files.Read.All
```
### Usage
When properly configured:
1. Users will see "From SharePoint" option in the file attachment menu
2. Clicking it opens the native SharePoint file picker
3. Users can browse and select files from any SharePoint site or OneDrive they have access to
4. Selected files are downloaded and attached to the conversation
The SharePoint integration respects all existing SharePoint permissions. Users can only access files they already have permission to view in SharePoint/OneDrive.
For detailed troubleshooting and advanced configuration, see: [SharePoint Integration Guide](/docs/configuration/sharepoint)
# Discord (/docs/configuration/authentication/OAuth2-OIDC/discord)
## Create a new Discord Application
- Go to **[Discord Developer Portal](https://discord.com/developers)**
- Create a new Application and give it a name

## Discord Application Configuration
- In the OAuth2 general settings add a valid redirect URL:
- Example for localhost: `http://localhost:3080/oauth/discord/callback`
- Example for a domain: `https://example.com/oauth/discord/callback`

- In `Default Authorization Link`, select `In-app Authorization` and set the scopes to `applications.commands`

- Save changes and reset the Client Secret


## .env Configuration
- Paste your `Client ID` and `Client Secret` in the `.env` file:
```bash filename=".env"
DOMAIN_CLIENT=https://your-domain.com # use http://localhost:3080 if not using a custom domain
DOMAIN_SERVER=https://your-domain.com # use http://localhost:3080 if not using a custom domain
DISCORD_CLIENT_ID=your_client_id
DISCORD_CLIENT_SECRET=your_client_secret
DISCORD_CALLBACK_URL=/oauth/discord/callback
```
- Save the `.env` file
> Note: If using docker, run `docker compose up -d` to apply the .env configuration changes
# Facebook (/docs/configuration/authentication/OAuth2-OIDC/facebook)
> ⚠️ **Warning: Work in progress, not currently functional**
> ❗ Note: Facebook Authentication will not work from `localhost`
## Create a Facebook Application
- Go to the **[Facebook Developer Portal](https://developers.facebook.com/)**
- Click on "My Apps" in the header menu

- Create a new application

- Select "Authenticate and request data from users with Facebook Login"

- Choose "No, I'm not creating a game"

- Provide an `app name` and `App contact email` and click `Create app`

## Facebook Application Configuration
- In the side menu, select "Use cases" and click "Customize" under "Authentication and account creation."

- Add the `email permission`

- Now click `Go to settings`

- Ensure that `Client OAuth login`, `Web OAuth login` and `Enforce HTTPS` are **enabled**.

- Add a `Valid OAuth Redirect URIs` and "Save changes"
- Example for a domain: `https://example.com/oauth/facebook/callback`

- Click `Go back` and select `Basic` in the `App settings` tab

- Click "Show" next to the App secret.

## .env Configuration
- Copy the `App ID` and `App Secret` and paste them into the `.env` file as follows:
```bash filename=".env"
DOMAIN_CLIENT=https://your-domain.com # use http://localhost:3080 if not using a custom domain
DOMAIN_SERVER=https://your-domain.com # use http://localhost:3080 if not using a custom domain
FACEBOOK_CLIENT_ID=your_app_id
FACEBOOK_CLIENT_SECRET=your_app_secret
FACEBOOK_CALLBACK_URL=/oauth/facebook/callback
```
- Save the `.env` file.
> Note: If using docker, run `docker compose up -d` to apply the .env configuration changes
# GitHub (/docs/configuration/authentication/OAuth2-OIDC/github)
## Create a GitHub Application
- Go to your **[Github Developer settings](https://github.com/settings/apps)**
- Create a new GitHub app

## GitHub Application Configuration
- Give it a `GitHub App name` and set your `Homepage URL`
- Example for localhost: `http://localhost:3080`
- Example for a domain: `https://example.com`

- Add a valid `Callback URL`:
- Example for localhost: `http://localhost:3080/oauth/github/callback`
- Example for a domain: `https://example.com/oauth/github/callback`

- Uncheck the box labeled `Active` in the `Webhook` section

- Scroll down to `Account permissions` and set `Email addresses` to `Access: Read-only`


- Click on `Create GitHub App`

## .env Configuration
- Click `Generate a new client secret`

- Copy the `Client ID` and `Client Secret` in the `.env` file

```bash filename=".env"
DOMAIN_CLIENT=https://your-domain.com # use http://localhost:3080 if not using a custom domain
DOMAIN_SERVER=https://your-domain.com # use http://localhost:3080 if not using a custom domain
GITHUB_CLIENT_ID=your_client_id
GITHUB_CLIENT_SECRET=your_client_secret
GITHUB_CALLBACK_URL=/oauth/github/callback
# GitHub Enterprise (optional)
# Uncomment and configure the following if you are using GitHub Enterprise for authentication
# GITHUB_ENTERPRISE_BASE_URL=https://your-ghe-instance.com
# GITHUB_ENTERPRISE_USER_AGENT=YourEnterpriseAppName
```
- Save the `.env` file
> **Note:** If using Docker, run `docker compose up -d` to apply the .env configuration changes
# Google (/docs/configuration/authentication/OAuth2-OIDC/google)
## Create a Google Application
- Visit: **[Google Cloud Console](https://cloud.google.com)** and open the `Console`

- Create a New Project and give it a name


## Google Application Configuration
- Select the project you just created and go to `APIs and Services`


- Select `Credentials` and click `CONFIGURE CONSENT SCREEN`

- Select `External` then click `CREATE`

- Fill in your App information
> Note: You can get a logo from your LibreChat folder here: `docs\assets\favicon_package\android-chrome-192x192.png`

- Configure your `App domain` and add your `Developer contact information` then click `SAVE AND CONTINUE`

- Configure the `Sopes`
- Add `email`,`profile` and `openid`
- Click `UPDATE` and `SAVE AND CONTINUE`


- Click `SAVE AND CONTINUE`
- Review your app and go back to dashboard
- Go back to the `Credentials` tab, click on `+ CREATE CREDENTIALS` and select `OAuth client ID`

- Select `Web application` and give it a name

- Configure the `Authorized JavaScript origins`, you can add both your domain and localhost if you desire
- Example for localhost: `http://localhost:3080`
- Example for a domain: `https://example.com`

- Add a valid `Authorized redirect URIs`
- Example for localhost: `http://localhost:3080/oauth/google/callback`
- Example for a domain: `https://example.com/oauth/google/callback`

## .env Configuration
- Click `CREATE` and copy your `Client ID` and `Client secret`

- Add them to your `.env` file:
```bash filename=".env"
DOMAIN_CLIENT=https://your-domain.com # use http://localhost:3080 if not using a custom domain
DOMAIN_SERVER=https://your-domain.com # use http://localhost:3080 if not using a custom domain
GOOGLE_CLIENT_ID=your_client_id
GOOGLE_CLIENT_SECRET=your_client_secret
GOOGLE_CALLBACK_URL=/oauth/google/callback
```
- Save the `.env` file
> Note: If using docker, run `docker compose up -d` to apply the .env configuration changes
# Overview (/docs/configuration/authentication/OAuth2-OIDC)
This section will cover how to configure OAuth2 and OpenID Connect with LibreChat
## OAuth2
- [Apple](/docs/configuration/authentication/OAuth2-OIDC/apple)
- [Discord](/docs/configuration/authentication/OAuth2-OIDC/discord)
- [Facebook](/docs/configuration/authentication/OAuth2-OIDC/facebook)
- [GitHub](/docs/configuration/authentication/OAuth2-OIDC/github)
- [Google](/docs/configuration/authentication/OAuth2-OIDC/google)
## OpenID Connect
- [Auth0](/docs/configuration/authentication/OAuth2-OIDC/auth0)
- [AWS Cognito](/docs/configuration/authentication/OAuth2-OIDC/aws)
- [Azure Entra/AD](/docs/configuration/authentication/OAuth2-OIDC/azure)
- [Keycloak](/docs/configuration/authentication/OAuth2-OIDC/keycloak)
- [Re-use OpenID Tokens for Login Session](/docs/configuration/authentication/OAuth2-OIDC/token-reuse)
## Troubleshooting OpenID Connect
If you encounter issues with OpenID Connect authentication:
1. **Enable Header Debug Logging**: Set `DEBUG_OPENID_REQUESTS=true` in your environment variables to log request headers in addition to URLs (with sensitive data masked). Note: Request URLs are always logged at debug level
2. **Check Redirect URIs**: Ensure your callback URL matches exactly between your provider and LibreChat configuration
3. **Verify Scopes**: Make sure all required scopes are properly configured
4. **Review Provider Logs**: Check your identity provider's logs for authentication errors
5. **Validate Tokens**: Ensure your provider is issuing valid tokens with the expected claims
6. **Ensure _nonce_ is generated**: Some identity providers generate `nonce` url parameter if it's missing in the request. Set `OPENID_GENERATE_NONCE=true` to force the openid-client to generate it.
# Keycloak (/docs/configuration/authentication/OAuth2-OIDC/keycloak)
1. **Access Keycloak Admin Console:**
- Open the Keycloak Admin Console in your web browser. This is usually
found at a URL like `http://localhost:8080/auth/admin/`.
2. **Create a Realm (if necessary):**
- If you don't already have a realm for your application, create one. Click on 'Add Realm' and give it a name.
3. **Create a Client:**
- Within your realm, click on 'Clients' and then 'Create'.
- Enter a client ID and select 'openid-connect' as the Client Protocol.
- Set 'Client Authentication' to 'On'.
- In 'Valid Redirect URIs', enter `http://localhost:3080/oauth/openid/callback` or the appropriate URI for
your application.


4. **Configure Client:**
- After creating the client, you will be redirected to its settings page.
- Note the 'Client ID' and 'Secret' from the 'Credentials' tab – you'll need these for your application.

5. **Add Roles (Optional):**
If you want to restrict access to users with specific roles, you can define roles in Keycloak and assign them to users.
- Go to the 'Roles' tab in your client or realm (depending on where you want to define the roles).
- Create roles that match the value(s) you have in `OPENID_REQUIRED_ROLE`.

6. **Assign Roles to Users (Optional):**
- Go to 'Users', select a user, and go to the 'Role Mappings' tab.
- Assign at least one of the roles specified in `OPENID_REQUIRED_ROLE` to the user.

7. **Get path of roles list inside token (Optional):**
- Decode your jwtToken from OpenID provider and determine path for roles list inside access token. For example, if you are
using Keycloak, the path is `realm_access.roles`.
- Put this path in `OPENID_REQUIRED_ROLE_PARAMETER_PATH` variable in `.env` file.
- By parameter `OPENID_REQUIRED_ROLE_TOKEN_KIND` you can specify which token kind you want to use.
Possible values are `access` and `id`.
8. **Update Your Project's Configuration:**
- Open the `.env` file in your project folder and add the following variables:
```bash filename=".env"
OPENID_ISSUER=http://localhost:8080/realms/[YourRealmName]
OPENID_CLIENT_ID=[YourClientID]
OPENID_CLIENT_SECRET=[YourClientSecret]
OPENID_SESSION_SECRET=[JustGenerateARandomSessionSecret]
OPENID_CALLBACK_URL=/oauth/openid/callback
OPENID_SCOPE="openid profile email"
OPENID_REQUIRED_ROLE=[YourRequiredRole] # Single role or comma-separated roles (e.g., role1,role2,admin)
OPENID_REQUIRED_ROLE_TOKEN_KIND=(access|id) # that means, `access` or `id`
OPENID_REQUIRED_ROLE_PARAMETER_PATH="realm_access.roles"
# Optional: redirects the user to the end session endpoint after logging out
OPENID_USE_END_SESSION_ENDPOINT=true
```
# OpenID Connect Token Reuse (/docs/configuration/authentication/OAuth2-OIDC/token-reuse)
LibreChat supports reusing access and refresh tokens issued by your OpenID Connect provider (like Azure Entra ID or Auth0) to manage user authentication state. When this feature is active, the refresh token passed to the user as a cookie is issued by your OpenID provider instead of LibreChat, allowing LibreChat servers to refresh it and request access tokens from your provider.
## Prerequisites
- A configured OpenID Connect provider (like Azure Entra ID, Auth0, etc.)
- Basic OpenID Connect setup completed
## Configuration Steps
1. Set `OPENID_REUSE_TOKENS=true` in your environment variables.
## Provider-Specific Configuration
### Auth0 Configuration
When using Auth0 with token reuse, you **must** configure the `OPENID_AUDIENCE` environment variable. Without it, Auth0 will return opaque tokens that cannot be validated by LibreChat, causing infinite refresh loops.
For Auth0, you need to:
1. Create an API in Auth0 (required for JWT access tokens):
- Go to **Auth0 Dashboard** → **Applications** → **APIs**
- Click **"Create API"**
- Set an **Identifier** (e.g., `https://api.librechat.com`)
- Enable **"Allow Offline Access"** in the API settings
2. Set the required environment variables:
```bash filename=".env"
# Required for Auth0
OPENID_AUDIENCE=https://api.librechat.com # Your API identifier from Auth0
OPENID_SCOPE=openid profile email offline_access
```
For detailed Auth0 configuration, see: [Auth0 OpenID Connect Configuration](/docs/configuration/authentication/OAuth2-OIDC/auth0)
### Azure Entra ID Configuration
2. Configure your OpenID provider (using Azure Entra ID as an example):
- Go to the Azure Portal and navigate to your app registration
- Click on "Expose API" in the left menu
- Click "Add" next to "Application ID URI"
- Enter your API URI (e.g., "api://librechat") and save

3. Create an API scope:
- In the "Expose API" section, click "Add a scope"
- Configure the scope with appropriate permissions
- Save the scope configuration

4. Configure API permissions:
- Go to "API permissions" in the left menu
- Click "Add a permission"
- Under "APIs my organization uses", search for your app
- Select "Delegated permissions" and choose the appropriate scope (e.g., "access_user")


5. Set the required scope in your environment:
```bash filename=".env"
OPENID_SCOPE=api://librechat/.default openid profile email offline_access
```
Note: The `offline_access` scope is required to obtain a refresh token for reuse.
6. Grant admin consent:
- Go to Enterprise Applications in Azure Portal
- Find your LibreChat application
- Navigate to Security > Permissions
- Click "Grant admin consent"

7. Accept the requested permissions in the popup

8. Clear LibreChat cache and restart the service.
When using Azure Entra ID with token reuse, you can also enable Microsoft Graph API integration for enhanced people and group search capabilities. See [Microsoft Graph API Integration](/docs/configuration/authentication/OAuth2-OIDC/azure#advanced-microsoft-graph-api-integration) for more details.
## Environment Variables
```bash filename=".env"
# OpenID Token Reuse Configuration
OPENID_REUSE_TOKENS=true
OPENID_SCOPE=api://librechat/.default openid profile email offline_access
# Required for Auth0 (use your API identifier)
# OPENID_AUDIENCE=https://api.librechat.com
# Caching Configuration
OPENID_JWKS_URL_CACHE_ENABLED=true
OPENID_JWKS_URL_CACHE_TIME=600000 # 10 minutes in milliseconds
# Azure-specific Configuration
OPENID_ON_BEHALF_FLOW_FOR_USERINFO_REQUIRED=true
OPENID_ON_BEHALF_FLOW_USERINFO_SCOPE=user.read
# Logout Configuration
OPENID_USE_END_SESSION_ENDPOINT=true
```
## Additional Configuration Options
- `OPENID_AUDIENCE`: The audience parameter for authorization requests. **Required for Auth0** to receive JWT access tokens instead of opaque tokens
- `OPENID_JWKS_URL_CACHE_ENABLED`: Enables caching of signing key verification results to prevent excessive HTTP requests to the JWKS endpoint
- `OPENID_JWKS_URL_CACHE_TIME`: Cache duration in milliseconds (default: 600000 ms / 10 minutes)
- `OPENID_ON_BEHALF_FLOW_FOR_USERINFO_REQUIRED`: Enables on-behalf-of flow for user info (Azure-specific)
- `OPENID_ON_BEHALF_FLOW_USERINFO_SCOPE`: Scope for user info in on-behalf-of flow (Azure-specific)
- `OPENID_USE_END_SESSION_ENDPOINT`: Enables use of the end session endpoint for logout
## Security Considerations
- Ensure proper token storage and handling
- Implement appropriate token refresh mechanisms
- Monitor token usage and implement rate limiting if necessary
- Regularly rotate client secrets
- Use secure cookie settings for token storage
## Troubleshooting
If you encounter issues with token reuse:
1. Verify all required scopes are properly configured
2. Check that admin consent has been granted
3. Ensure the API permissions are correctly set up
4. Verify the token cache is working as expected
5. Check the application logs for any authentication errors
6. Enable detailed OpenID request header logging by setting `DEBUG_OPENID_REQUESTS=true` in your environment variables to see request headers in addition to URLs (with sensitive data masked)
# Auth0 (/docs/configuration/authentication/SAML/auth0)
## Step 1: Create a SAML Application in Auth0
1. Log in to your Auth0 Dashboard.
2. Navigate to `Applications > Applications`.
3. Click `Create Application`.
4. Enter an Application Name (e.g., `LibreChat`) and select `Regular Web Application`.
5. Click `Create`.
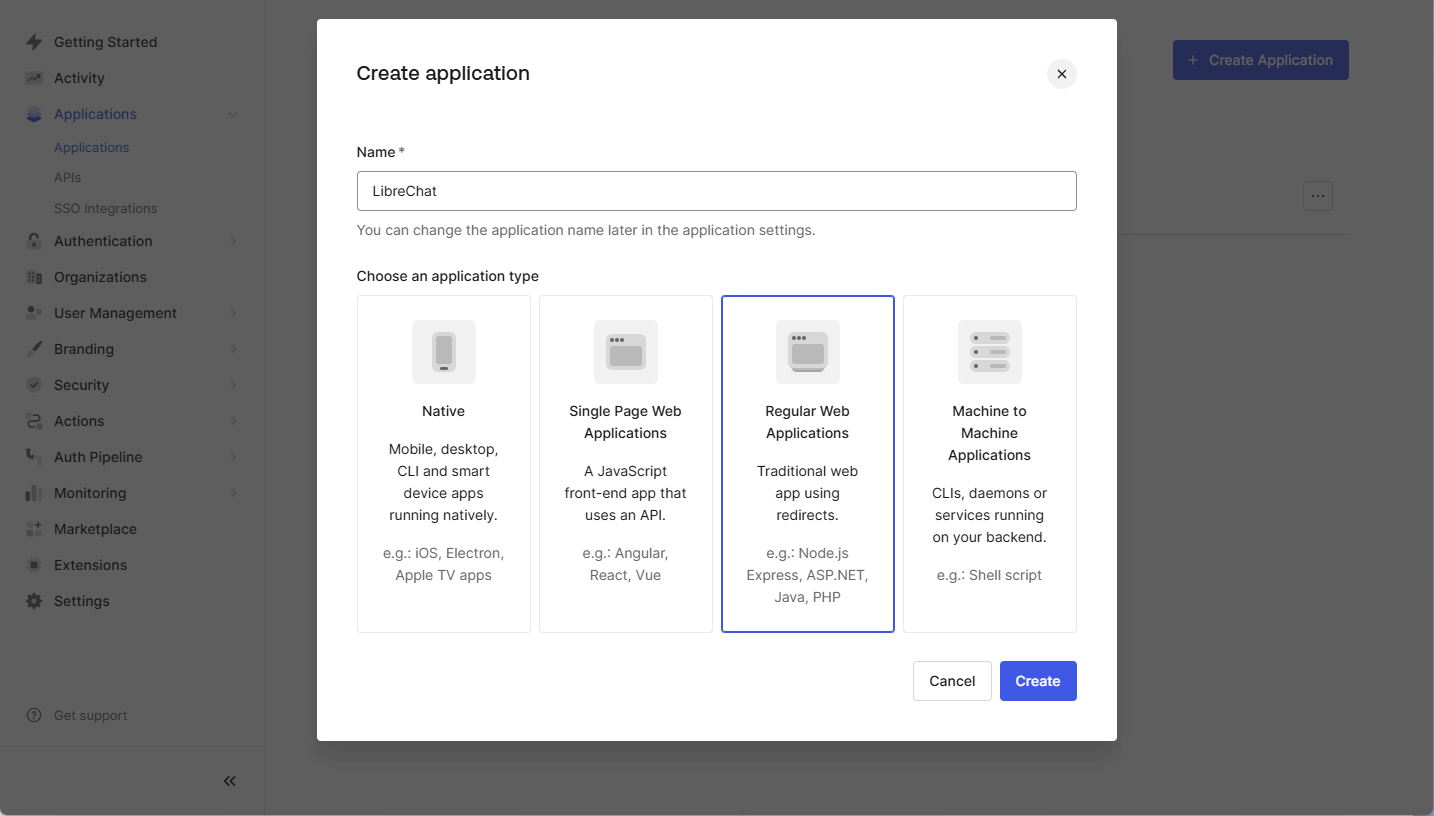
## Step 2: Configure the SAML Add-On
1. Open the newly created application in Auth0.
2. Go to the `Addons` tab.
3. Click the slider to enable the `SAML2 Web App`.
4. Click `SAML2 Web App` panel.
5. Configure the following settings:
- **Application Callback URL**: Set this to your LibreChat SAML callback URL:
`https://YOUR_DOMAIN/oauth/saml/callback`
- **Settings (JSON Format)**: Use the following configuration:
```json
{
"mappings": {
"email": "email",
"name": "username"
}
}
```
If your application requires additional attributes such as `given_name`,
`family_name`, `username` or `picture`, ensure these mappings are properly
configured in the Auth0 SAML settings.
6. Click `Save`.
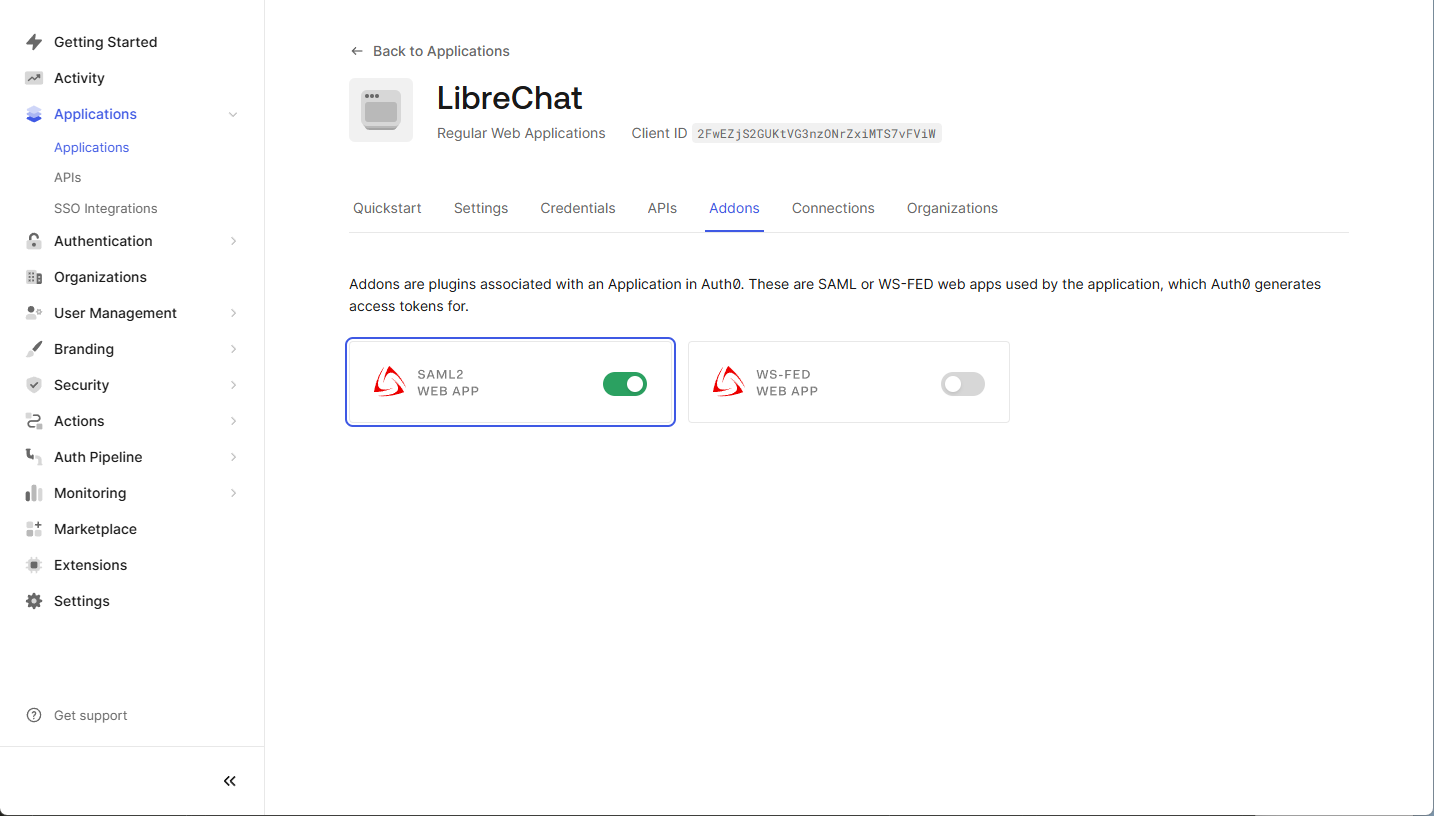

## Step 3: Obtain the Auth0 SAML Metadata
1. Once SAML is enabled, go back to the `SAML2 Web App` settings.
2. Go to the `Usage` tab.
3. Click on `Identity Provider Certificate: Download Atuh0 certificate`.
4. Use the `Issuer` to `SAML_ISSUER`
5. Use the `Identity Provider Login URL` to `SAML_ENTRY_POINT`.
6. Copy the donwloaded cert file to your project folder
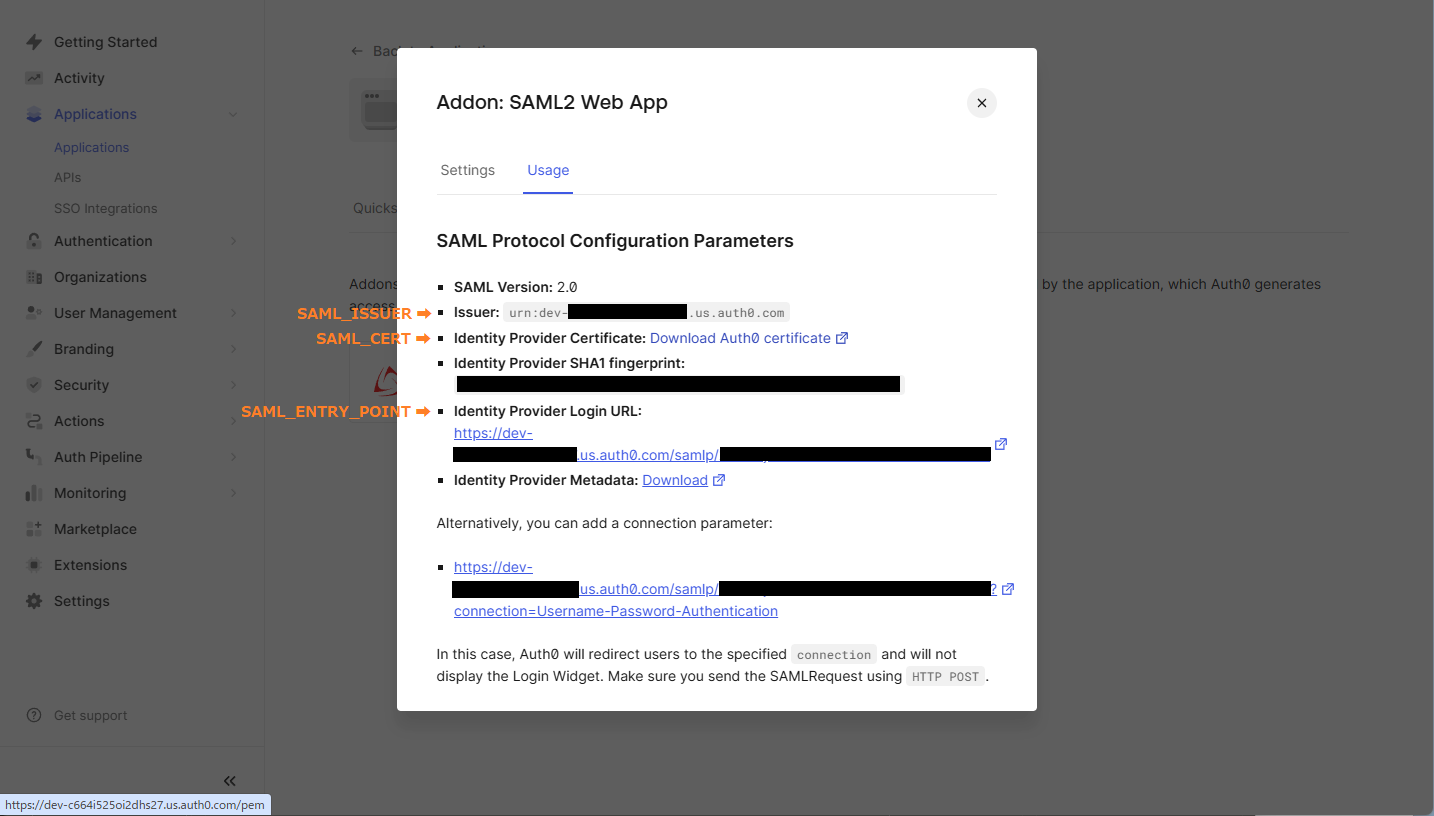
## Step 4: Configure LibreChat with SAML
Open the `.env` file in your project folder and add the following variables:
```bash filename=".env"
SAML_ENTRY_POINT=https://dev-xxxxx.us.auth0.com/samlp/aaaaaa
SAML_ISSUER=urn:dev-xxxxx.us.auth0.com
SAML_CERT=dev-xxxxx.pem
SAML_CALLBACK_URL=/oauth/saml/callback
SAML_SESSION_SECRET=[JustGenerateARandomSessionSecret]
# Attribute mappings (optional)
SAML_EMAIL_CLAIM=
SAML_USERNAME_CLAIM=
SAML_GIVEN_NAME_CLAIM=
SAML_FAMILY_NAME_CLAIM=
SAML_PICTURE_CLAIM=
SAML_NAME_CLAIM=
# Logint buttion settings (optional)
SAML_BUTTON_LABEL=
SAML_IMAGE_URL=
# Whether the SAML Response should be signed.
# - If "true", the entire `SAML Response` will be signed.
# - If "false" or unset, only the `SAML Assertion` will be signed (default behavior).
# SAML_USE_AUTHN_RESPONSE_SIGNED=
```
# Overview (/docs/configuration/authentication/SAML)
## Overview
SAML (Security Assertion Markup Language) is a widely used authentication
protocol that enables Single Sign-On (SSO). It allows users to authenticate once
with an Identity Provider (IdP) and gain access to multiple services without
needing to log in again.
Single Logout (SLO) is not supported in this implementation.
If OpenID authentication is enabled, SAML authentication will be automatically disabled.
Only one authentication method can be active at a time.
## Authentication Method Activation Based on Environment Variables
The following table indicates which authentication method is enabled depending
on the environment variable settings:
| OIDC | SAML | Active Authentication Method |
| -------- | -------- | ---------------------------- |
| ✅Enabled | ❌Disabled | OpenID Connect (OIDC) |
| ❌Disabled | ✅Enabled | SAML |
| ✅Enabled | ✅Enabled | OpenID Connect (OIDC) |
| ❌Disabled | ❌Disabled | No authentication enabled |
## SAML Certificate Format and Configuration
The `SAML_CERT` environment variable is used to specify the Identity Provider’s (IdP) signing certificate for validating SAML Responses. This certificate must be provided in **PEM format** and can be specified in one of the following ways:
### As a File Path (Relative or Absolute)
If `SAML_CERT` is set to a file path, the application will load the certificate from the specified file.
Both **relative paths** and **absolute paths** are supported.
```env
# Relative path (resolved based on the application root)
SAML_CERT=idp-cert.pem
# Absolute path
SAML_CERT=/path/to/idp-cert.pem
```
**Example File Content (`idp-cert.pem`):**
```
-----BEGIN CERTIFICATE-----
MIIDazCCAlOgAwIBAgIUKhXaFJGJJPx466rl...
-----END CERTIFICATE-----
```
### As a One-Line PEM String
The certificate can also be provided as a **one-line PEM string** (Base64-encoded, without line breaks).
```env
SAML_CERT="MIICizCCAfQCCQCY8tKaMc0BMjANBgkqh...W=="
```
This format is useful when storing the certificate directly in environment variables.
### As a Multi-Line PEM String (with \n escape sequences)
The certificate can also be provided as a **multi-line PEM string** where newlines are represented as \n.
```env
SAML_CERT="-----BEGIN CERTIFICATE-----\nMIIDazCCAlOgAwIBAgIUKhXaFJGJJPx466rl...\n-----END CERTIFICATE-----\n"
```
This format is useful when configuring certificates in .env files while preserving the full PEM structure.
### Certificate Format Requirements
- The certificate **must always be in PEM format** (Base64-encoded X.509 certificate).
- If provided as a file, it must be a valid **RFC7468 strict textual message PEM format**.
- When using a one-line certificate, ensure there are **no line breaks** in the value.
- When using a multi-line string, ensure newlines are represented as **\n** escape sequences.
For more details, refer to the [node-saml documentation](https://github.com/node-saml/node-saml/tree/master?tab=readme-ov-file#configuration-option-idpcert).
## Display Username Determination Flow Based on SAML Attributes
In SAML authentication, the display username is determined according to the following flow.
```mermaid
flowchart TD
A[Start] --> B{{Is SAML_NAME_CLAIM available?}}
B -- Yes --> C[Value of SAML_NAME_CLAIM]
B -- No --> D{{Are both SAML_GIVEN_NAME_CLAIM & SAML_FAMILY_NAME_CLAIM available?}}
D -- Yes --> E[Value of SAML_GIVEN_NAME_CLAIM / SAML_FAMILY_NAME_CLAIM]
D -- No --> F{{Is only SAML_GIVEN_NAME_CLAIM available?}}
F -- Yes --> G[Value of SAML_GIVEN_NAME_CLAIM]
F -- No --> H{{Is only SAML_FAMILY_NAME_CLAIM available?}}
H -- Yes --> I[Value of SAML_FAMILY_NAME_CLAIM]
H -- No --> J{{Is SAML_USERNAME_CLAIM available?}}
J -- Yes --> K[Value of SAML_USERNAME_CLAIM]
J -- No --> L[Value of SAML_EMAIL_CLAIM]
style C fill:#FFDEA5,stroke:#FFA500
style E fill:#FFDEA5,stroke:#FFA500
style G fill:#FFDEA5,stroke:#FFA500
style I fill:#FFDEA5,stroke:#FFA500
style K fill:#FFDEA5,stroke:#FFA500
style L fill:#FFDEA5,stroke:#FFA500
```
### Determination Rules
1. If `SAML_NAME_CLAIM` is provided, its value is used as the display username.
2. If both `SAML_GIVEN_NAME_CLAIM` and `SAML_FAMILY_NAME_CLAIM` are provided, their corresponding values are concatenated to form the username.
3. If only `SAML_GIVEN_NAME_CLAIM` is provided, its value is used.
4. If only `SAML_FAMILY_NAME_CLAIM` is provided, its value is used.
5. If `SAML_USERNAME_CLAIM` is provided, its value is used.
6. If none of the above attributes are provided, `SAML_EMAIL_CLAIM` is used as the display username.
By following this flow, an appropriate username is determined during SAML authentication.
## Configuration Examples
- [Auth0](/docs/configuration/authentication/SAML/auth0)
# Anyscale (/docs/configuration/librechat_yaml/ai_endpoints/anyscale)
> **Anyscale API key:** [anyscale.com/credentials](https://app.endpoints.anyscale.com/credentials)
**Notes:**
- **Known:** icon provided, fetching list of models is recommended.
```yaml filename="librechat.yaml"
- name: "Anyscale"
apiKey: "${ANYSCALE_API_KEY}"
baseURL: "https://api.endpoints.anyscale.com/v1"
models:
default: [
"meta-llama/Llama-2-7b-chat-hf",
]
fetch: true
titleConvo: true
titleModel: "meta-llama/Llama-2-7b-chat-hf"
summarize: false
summaryModel: "meta-llama/Llama-2-7b-chat-hf"
modelDisplayLabel: "Anyscale"
```
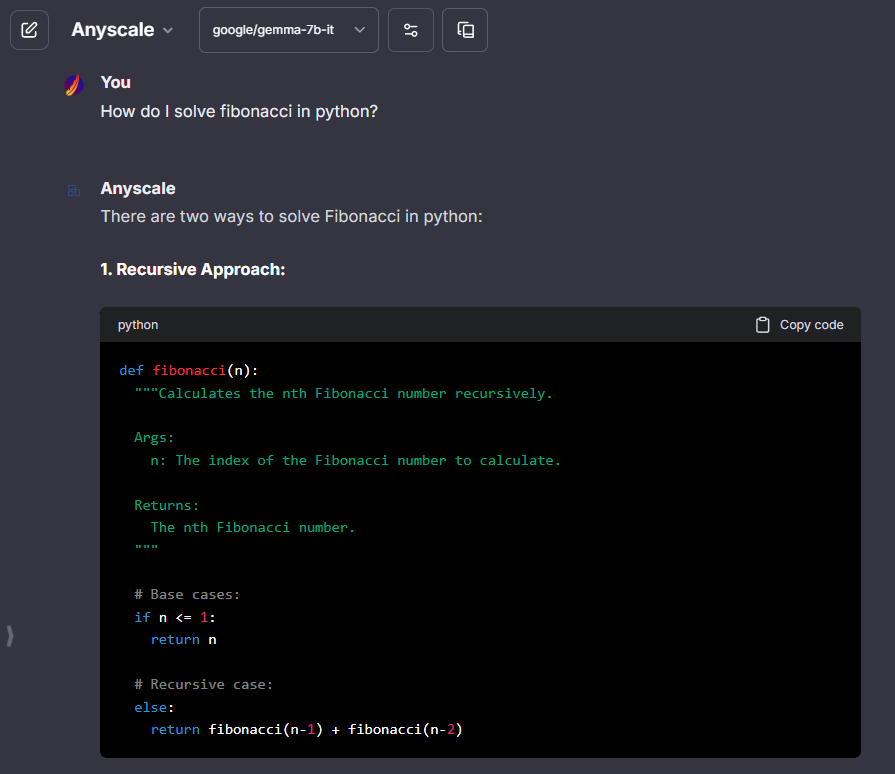
# APIpie (/docs/configuration/librechat_yaml/ai_endpoints/apipie)
> **APIpie API key:** [apipie.ai/dashboard/profile/api-keys](https://apipie.ai/dashboard/profile/api-keys)
**Notes:**
- **Known:** icon provided, fetching list of models is recommended as API token rates and pricing used for token credit balances when models are fetched.
- **Known issue:**
- Fetching list of models is not supported.
- Your success may vary with conversation titling
- Stream isn't currently supported (but is planned as of April 24, 2024)
This python script can fetch and order the llm models for you. The output will be saved in models.txt, formated in a way that should make it easier for you to include in the yaml config.
```py filename="fetch.py"
import json
import requests
def fetch_and_order_models():
# API endpoint
url = "https://apipie.ai/models"
# headers as per request example
headers = {"Accept": "application/json"}
# request parameters
params = {"type": "llm"}
# make request
response = requests.get(url, headers=headers, params=params)
# parse JSON response
data = response.json()
# extract an ordered list of unique model IDs
model_ids = sorted(set([model["id"] for model in data]))
# write result to a text file
with open("models.txt", "w") as file:
json.dump(model_ids, file, indent=2)
# execute the function
if __name__ == "__main__":
fetch_and_order_models()
```
```yaml filename="librechat.yaml"
# APIpie
- name: "APIpie"
apiKey: "${APIPIE_API_KEY}"
baseURL: "https://apipie.ai/v1/"
models:
default: [
"gpt-4",
"gpt-4-turbo",
"gpt-3.5-turbo",
"claude-3-opus",
"claude-3-sonnet",
"claude-3-haiku",
"llama-3-70b-instruct",
"llama-3-8b-instruct",
"gemini-pro-1.5",
"gemini-pro",
"mistral-large",
"mistral-medium",
"mistral-small",
"mistral-tiny",
"mixtral-8x22b",
]
fetch: false
titleConvo: true
titleModel: "claude-3-haiku"
summarize: false
summaryModel: "claude-3-haiku"
dropParams: ["stream"]
modelDisplayLabel: "APIpie"
```
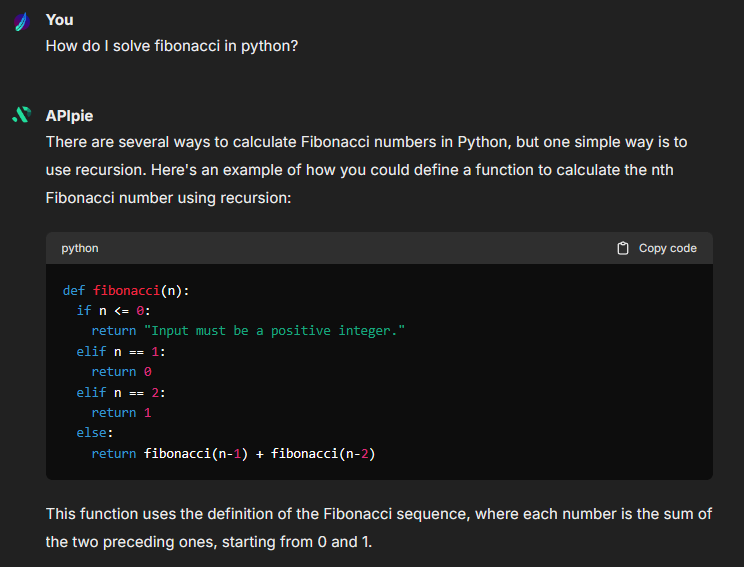
# Cloudflare Workers AI (/docs/configuration/librechat_yaml/ai_endpoints/cloudflare)
> Setup: [AI Gateway Setup](https://developers.cloudflare.com/ai-gateway/get-started/) | [Workers AI Models](https://developers.cloudflare.com/workers-ai/models/)
**Notes:**
- **OpenAI Compatible:** Uses the OpenAI compatible endpoint specification ([documentation](https://developers.cloudflare.com/ai-gateway/providers/workersai/#openai-compatible-endpoints))
- **Known Issue:** `@cf/openai/gpt-oss-*` models may not work due to spec incompatibility
- **Environment Variables Required:**
- `CF_API_TOKEN`: Your Cloudflare API token
- `CF_ACCOUNT_ID`: Your Cloudflare account ID
- `CF_GATEWAY_ID`: Your AI Gateway ID
- Note: these environment variables can be customized/renamed as needed.
```yaml filename="librechat.yaml"
- name: "Cloudflare Workers AI"
apiKey: "${CF_API_TOKEN}"
baseURL: "https://gateway.ai.cloudflare.com/v1/${CF_ACCOUNT_ID}/${CF_GATEWAY_ID}/workers-ai/v1"
models:
default: [
"@cf/google/gemma-3-12b-it",
"@cf/meta/llama-4-scout-17b-16e-instruct",
"@cf/qwen/qwq-32b",
"@cf/qwen/qwen2.5-coder-32b-instruct",
"@cf/deepseek-ai/deepseek-r1-distill-qwen-32b",
"@cf/openai/gpt-oss-120b"
]
fetch: false
titleConvo: true
titleModel: "@cf/google/gemma-3-12b-it"
modelDisplayLabel: "Cloudflare AI"
```

# Cohere (/docs/configuration/librechat_yaml/ai_endpoints/cohere)
> Cohere API key: [dashboard.cohere.com](https://dashboard.cohere.com/)
**Notes:**
- **Known:** icon provided.
- Experimental: does not follow OpenAI-spec, uses a new method for endpoint compatibility, shares some similarities and parameters.
- For a full list of Cohere-specific parameters, see the [Cohere API documentation](https://docs.cohere.com/reference/chat).
- Note: The following parameters are recognized between OpenAI and Cohere. Most are removed in the example config below to prefer Cohere's default settings:
- `stop`: mapped to `stopSequences`
- `top_p`: mapped to `p`, different min/max values
- `frequency_penalty`: mapped to `frequencyPenalty`, different min/max values
- `presence_penalty`: mapped to `presencePenalty`, different min/max values
- `model`: shared, included by default.
- `stream`: shared, included by default.
- `max_tokens`: shared, mapped to `maxTokens`, not included by default.
```yaml filename="librechat.yaml"
- name: "cohere"
apiKey: "${COHERE_API_KEY}"
baseURL: "https://api.cohere.ai/v1"
models:
default: ["command-r","command-r-plus","command-light","command-light-nightly","command","command-nightly"]
fetch: false
modelDisplayLabel: "cohere"
titleModel: "command"
dropParams: ["stop", "user", "frequency_penalty", "presence_penalty", "temperature", "top_p"]
```
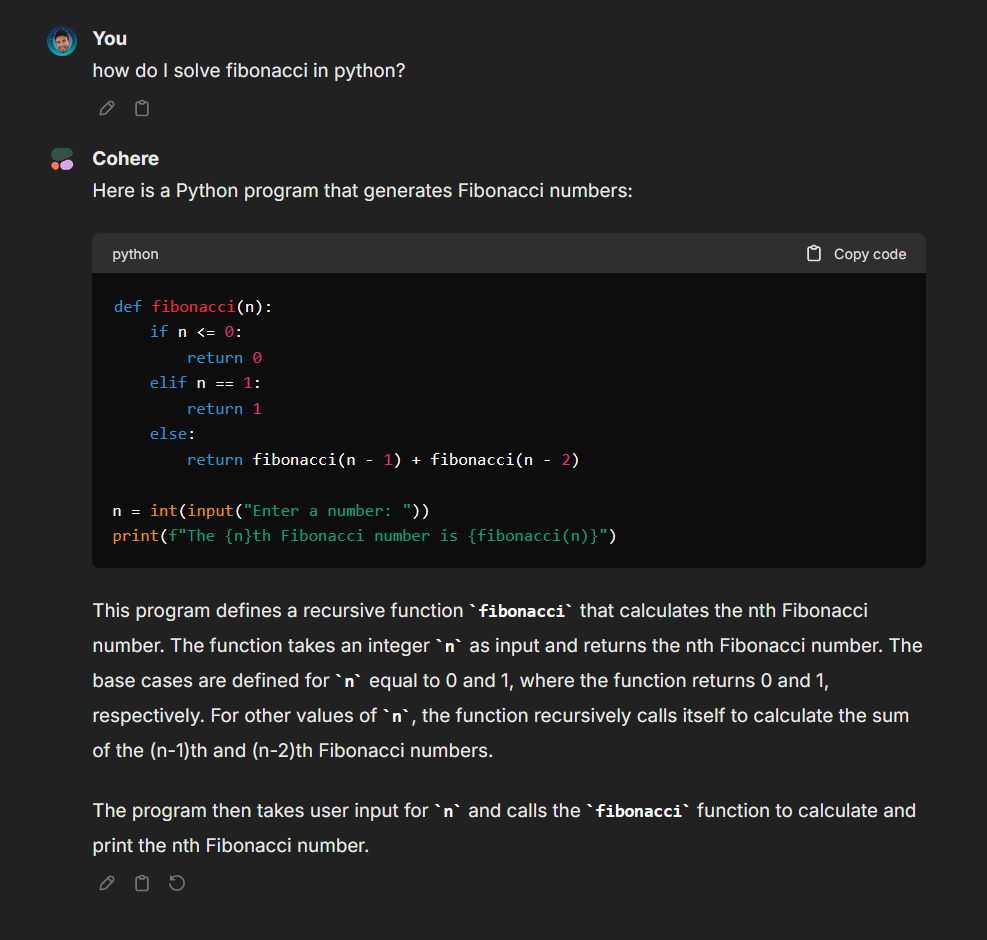
# Databricks (/docs/configuration/librechat_yaml/ai_endpoints/databricks)
> **[Sign up for Databricks]**(https://www.databricks.com/try-databricks#account)
**Notes:**
- Since Databricks provides a full completions endpoint, ending with "invocations" for "serving-endpoints", use of [directEndpoint](/docs/configuration/librechat_yaml/object_structure/custom_endpoint#directendpoint) setting is required.
- [titleMessageRole](/docs/configuration/librechat_yaml/object_structure/custom_endpoint#titlemessagerole) set to "user" is also required for title generation, as singular "system" messages are not supported.
```yaml filename="librechat.yaml"
- name: 'Databricks'
apiKey: '${DATABRICKS_API_KEY}'
baseURL: 'https://your_databricks_serving_endpoint_url_here_ending_with/invocations'
models:
default: [
"databricks-meta-llama-3-70b-instruct",
]
fetch: false
titleConvo: true
titleModel: 'current_model'
directEndpoint: true # required
titleMessageRole: 'user' # required
```
# Deepseek (/docs/configuration/librechat_yaml/ai_endpoints/deepseek)
import Image from 'next/image'
> Deepseek API key: [platform.deepseek.com](https://platform.deepseek.com/usage)
**Notes:**
- **Known:** icon provided.
- `deepseek-chat` and `deepseek-coder` are compatible with [Agents + tools](/docs/features/agents).
- `deepseek-reasoner`, codenamed "R1," is supported and will stream its "thought process"; however, certain OpenAI API parameters may not be supported by this specific model.
- "R1" may also be compatible with Agents when not using tools.
- `deepseek-chat` is preferred for title generation.
```yaml filename="librechat.yaml"
- name: "Deepseek"
apiKey: "${DEEPSEEK_API_KEY}"
baseURL: "https://api.deepseek.com/v1"
models:
default: ["deepseek-chat", "deepseek-coder", "deepseek-reasoner"]
fetch: false
titleConvo: true
titleModel: "deepseek-chat"
modelDisplayLabel: "Deepseek"
```
# Fireworks (/docs/configuration/librechat_yaml/ai_endpoints/fireworks)
> Fireworks API key: [fireworks.ai/api-keys](https://fireworks.ai/api-keys)
**Notes:**
- **Known:** icon provided, fetching list of models is recommended.
- - API may be strict for some models, and may not allow fields like `user`, in which case, you should use [`dropParams`.](/docs/configuration/librechat_yaml/object_structure/custom_endpoint#dropparams)
```yaml filename="librechat.yaml"
- name: "Fireworks"
apiKey: "${FIREWORKS_API_KEY}"
baseURL: "https://api.fireworks.ai/inference/v1"
models:
default: [
"accounts/fireworks/models/mixtral-8x7b-instruct",
]
fetch: true
titleConvo: true
titleModel: "accounts/fireworks/models/llama-v2-7b-chat"
summarize: false
summaryModel: "accounts/fireworks/models/llama-v2-7b-chat"
modelDisplayLabel: "Fireworks"
dropParams: ["user"]
```
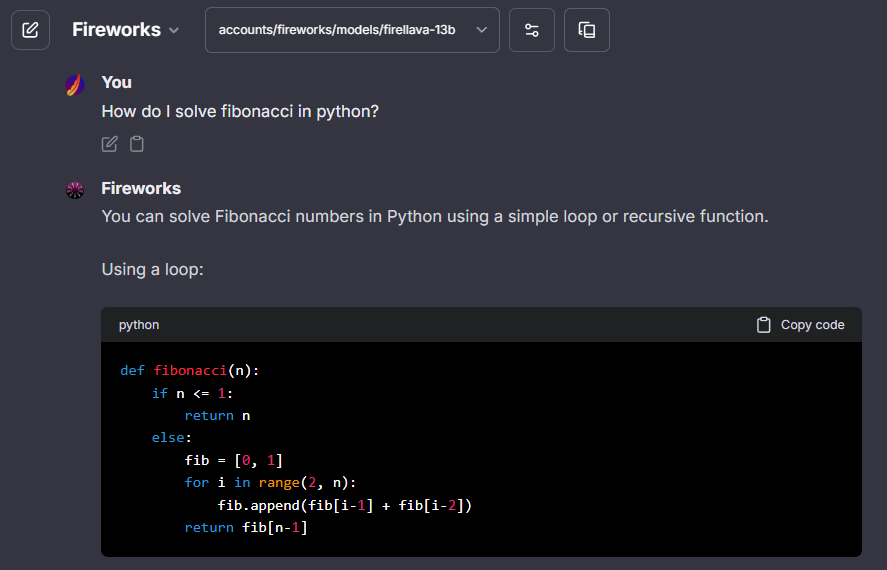
# Groq (/docs/configuration/librechat_yaml/ai_endpoints/groq)
> groq API key: [wow.groq.com](https://console.groq.com/keys)
**Notes:**
- **Known:** icon provided.
- **Temperature:** If you set a temperature value of 0, it will be converted to 1e-8. If you run into any issues, please try setting the value to a float32 greater than 0 and less than or equal to 2.
- Groq is currently free but rate limited: 10 queries/minute, 100/hour.
```yaml filename="librechat.yaml"
- name: "groq"
apiKey: "${GROQ_API_KEY}"
baseURL: "https://api.groq.com/openai/v1/"
models:
default: [
"llama3-70b-8192",
"llama3-8b-8192",
"llama2-70b-4096",
"mixtral-8x7b-32768",
"gemma-7b-it",
]
fetch: false
titleConvo: true
titleModel: "mixtral-8x7b-32768"
modelDisplayLabel: "groq"
```
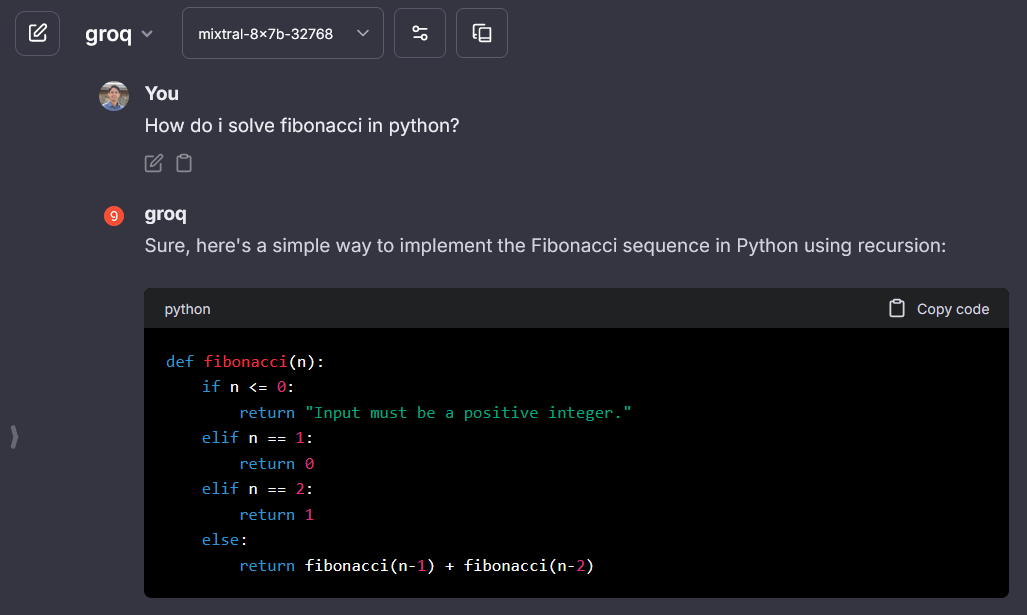
# Helicone (/docs/configuration/librechat_yaml/ai_endpoints/helicone)
> Helicone API key: [https://us.helicone.ai/settings/api-keys](https://us.helicone.ai/settings/api-keys)
**Notes:**
- **Known:** icon provided, fetching list of models is recommended as Helicone provides access to 100+ AI models from multiple providers.
- Helicone is an AI Gateway Provider that enables access to models from OpenAI, Anthropic, Google, Meta, Mistral, and other providers with built-in observability and monitoring.
- **Key Features:**
- 🚀 Access to 100+ AI models through a single gateway
- 📊 Built-in observability and monitoring
- 🔄 Multi-provider support
- ⚡ Request logging and analytics in Helicone dashboard
- **Important Considerations:**
- Make sure your Helicone account has credits so you can access the models.
- You can find all supported models in the [Helicone Model Library](https://helicone.ai/models).
- You can set your own rate limits and caching policies within the Helicone dashboard.
```yaml
- name: "Helicone"
# For `apiKey` and `baseURL`, you can use environment variables that you define.
# recommended environment variables:
apiKey: "${HELICONE_KEY}"
baseURL: "https://ai-gateway.helicone.ai"
headers:
x-librechat-body-parentmessageid: "{{LIBRECHAT_BODY_PARENTMESSAGEID}}"
models:
default: ["gpt-4o-mini", "claude-4.5-sonnet", "llama-3.1-8b-instruct", "gemini-2.5-flash-lite"]
fetch: true
titleConvo: true
titleModel: "gpt-4o-mini"
modelDisplayLabel: "Helicone"
iconURL: "https://marketing-assets-helicone.s3.us-west-2.amazonaws.com/helicone.png"
```
**Configuration Details:**
- **apiKey:** Use the `HELICONE_KEY` environment variable to store your Helicone API key.
- **baseURL:** The Helicone AI Gateway endpoint: `https://ai-gateway.helicone.ai`
- **headers:** The `x-librechat-body-parentmessageid` header is essential for message tracking and conversation continuity
- **models:** Sets default models, however by enabling `fetch`, you will automatically retrieve all available models from Helicone's API.
- **fetch:** Set to `true` to automatically retrieve available models from Helicone's API
**Setup Steps:**
1. Sign up for a Helicone account at [helicone.ai](https://helicone.ai/)
2. Generate your API key from the [Helicone dashboard](https://us.helicone.ai/settings/api-keys)
3. Set the `HELICONE_KEY` environment variable in your `.env` file
4. Copy the example configuration to your `librechat.yaml` file
5. Rebuild your Docker containers if using Docker deployment
6. Restart LibreChat to load the new configuration
7. Test by selecting Helicone from the provider dropdown
8. Head over to the [Helicone dashboard](https://us.helicone.ai/dashboard) to review your usage and settings.
**Potential Issues:**
- **Model Access:** Verify that you have credits within Helicone so you can access the models.
- **Rate Limiting:** You can set your own rate limits and caching policies within the Helicone dashboard.
- **Environment Variables:** Double-check that `HELICONE_KEY` is properly set and accessible to your LibreChat instance
**Testing:**
1. After configuration, select Helicone from the provider dropdown
2. Verify that models appear in the model selection
3. Send a test message and confirm it appears in your Helicone dashboard
4. Check that conversation threading works correctly with the parent message ID header
# Huggingface (/docs/configuration/librechat_yaml/ai_endpoints/huggingface)
> HuggingFace Token: [huggingface.co/settings/tokens](https://huggingface.co/settings/tokens)
**Notes:**
- **Known:** icon provided.
- The provided models are free but rate limited
- The use of [`dropParams`](/docs/configuration/librechat_yaml/object_structure/custom_endpoint#dropparams) to drop "top_p" params is required.
- Fetching models isn't supported
- Note: Some models currently work better than others, answers are very short (at least when using the free tier).
- The example includes a model list, which was last updated on May 09, 2024, for your convenience.
```yaml
- name: 'HuggingFace'
apiKey: '${HUGGINGFACE_TOKEN}'
baseURL: 'https://api-inference.huggingface.co/v1'
models:
default: [
"codellama/CodeLlama-34b-Instruct-hf",
"google/gemma-1.1-2b-it",
"google/gemma-1.1-7b-it",
"HuggingFaceH4/starchat2-15b-v0.1",
"HuggingFaceH4/zephyr-7b-beta",
"meta-llama/Meta-Llama-3-8B-Instruct",
"microsoft/Phi-3-mini-4k-instruct",
"mistralai/Mistral-7B-Instruct-v0.1",
"mistralai/Mistral-7B-Instruct-v0.2",
"mistralai/Mixtral-8x7B-Instruct-v0.1",
"NousResearch/Nous-Hermes-2-Mixtral-8x7B-DPO",
]
fetch: true
titleConvo: true
titleModel: "NousResearch/Nous-Hermes-2-Mixtral-8x7B-DPO"
dropParams: ["top_p"]
modelDisplayLabel: "HuggingFace"
```
Here’s a list of the other models that were tested along with their corresponding errors
```yaml
models:
default: [
"CohereForAI/c4ai-command-r-plus", # Model requires a Pro subscription
"HuggingFaceH4/zephyr-orpo-141b-A35b-v0.1", # Model requires a Pro subscription
"meta-llama/Llama-2-7b-hf", # Model requires a Pro subscription
"meta-llama/Meta-Llama-3-70B-Instruct", # Model requires a Pro subscription
"meta-llama/Llama-2-13b-chat-hf", # Model requires a Pro subscription
"meta-llama/Llama-2-13b-hf", # Model requires a Pro subscription
"meta-llama/Llama-2-70b-chat-hf", # Model requires a Pro subscription
"meta-llama/Llama-2-7b-chat-hf", # Model requires a Pro subscription
"------",
"bigcode/octocoder", # template not found
"bigcode/santacoder", # template not found
"bigcode/starcoder2-15b", # template not found
"bigcode/starcoder2-3b", # template not found
"codellama/CodeLlama-13b-hf", # template not found
"codellama/CodeLlama-7b-hf", # template not found
"google/gemma-2b", # template not found
"google/gemma-7b", # template not found
"HuggingFaceH4/starchat-beta", # template not found
"HuggingFaceM4/idefics-80b-instruct", # template not found
"HuggingFaceM4/idefics-9b-instruct", # template not found
"HuggingFaceM4/idefics2-8b", # template not found
"kashif/stack-llama-2", # template not found
"lvwerra/starcoderbase-gsm8k", # template not found
"tiiuae/falcon-7b", # template not found
"timdettmers/guanaco-33b-merged", # template not found
"------",
"bigscience/bloom", # 404 status code (no body)
"------",
"google/gemma-2b-it", # stream` is not supported for this model / unknown error
"------",
"google/gemma-7b-it", # AI Response error likely caused by Google censor/filter
"------",
"bigcode/starcoder", # Service Unavailable
"google/flan-t5-xxl", # Service Unavailable
"HuggingFaceH4/zephyr-7b-alpha", # Service Unavailable
"mistralai/Mistral-7B-v0.1", # Service Unavailable
"OpenAssistant/oasst-sft-1-pythia-12b", # Service Unavailable
"OpenAssistant/oasst-sft-4-pythia-12b-epoch-3.5", # Service Unavailable
]
```

# AI Endpoints (/docs/configuration/librechat_yaml/ai_endpoints)
## Intro
- This section lists known, compatible AI Endpoints, also known as "Custom Endpoints," with example setups for the `librechat.yaml` file, also known as the [Custom Config](/docs/configuration/librechat_yaml) file.
- In all of the examples, arbitrary environment variable names are defined but you can use any name you wish, as well as changing the value to `user_provided` to allow users to submit their own API key from the web UI.
When setting API keys to "user_provided", this allows users to enter their own API keys through the web interface. This is different from the pre-configured endpoints in the .env file where you would set `ENDPOINT_KEY=user_provided` (e.g., `OPENAI_API_KEY=user_provided`).
For custom endpoints in librechat.yaml, you would use:
```yaml
endpoints:
custom:
- name: "Your Endpoint"
apiKey: "user_provided" # No need for ${} syntax here
```
For environment variables in the .env file, you would use:
```bash
OPENAI_API_KEY=user_provided
```
- Some of the endpoints are marked as **Known,** which means they might have special handling and/or an icon already provided in the app for you.
### Notes
- It's recommended you follow the [Custom Endpoints Quick Start Guide](/docs/quick_start/custom_endpoints) before proceeding with the examples below.
- Important: make sure you setup the `librechat.yaml` file correctly: **[setup documentation](/docs/configuration/librechat_yaml)**.
# LiteLLM (/docs/configuration/librechat_yaml/ai_endpoints/litellm)
**Notes:**
- Reference [Using LibreChat with LiteLLM Proxy](/blog/2023-11-30_litellm) for configuration.
```yaml filename="librechat.yaml"
- name: "LiteLLM"
apiKey: "sk-from-config-file"
baseURL: "http://localhost:8000/v1"
# if using LiteLLM example in docker-compose.override.yml.example, use "http://litellm:8000/v1"
models:
default: ["gpt-3.5-turbo"]
fetch: true
titleConvo: true
titleModel: "gpt-3.5-turbo"
summarize: false
summaryModel: "gpt-3.5-turbo"
modelDisplayLabel: "LiteLLM"
```
# Mistral (/docs/configuration/librechat_yaml/ai_endpoints/mistral)
> Mistral API key: [console.mistral.ai](https://console.mistral.ai/)
**Notes:**
- **Known:** icon provided, special handling of message roles: system message is only allowed at the top of the messages payload.
- API is strict with unrecognized parameters and errors are not descriptive (usually "no body")
- The use of [`dropParams`](/docs/configuration/librechat_yaml/object_structure/custom_endpoint#dropparams) to drop "user", "frequency_penalty", "presence_penalty" params is required.
- `stop` is no longer included as a default parameter, so there is no longer a need to include it in [`dropParams`](/docs/configuration/librechat_yaml/object_structure/custom_endpoint#dropparams), unless you would like to completely prevent users from configuring this field.
- Allows fetching the models list, but be careful not to use embedding models for chat.
```yaml filename="librechat.yaml"
- name: "Mistral"
apiKey: "${MISTRAL_API_KEY}"
baseURL: "https://api.mistral.ai/v1"
models:
default: ["mistral-tiny", "mistral-small", "mistral-medium", "mistral -large-latest"]
fetch: true
titleConvo: true
titleModel: "mistral-tiny"
modelDisplayLabel: "Mistral"
dropParams: ["stop", "user", "frequency_penalty", "presence_penalty"]
```
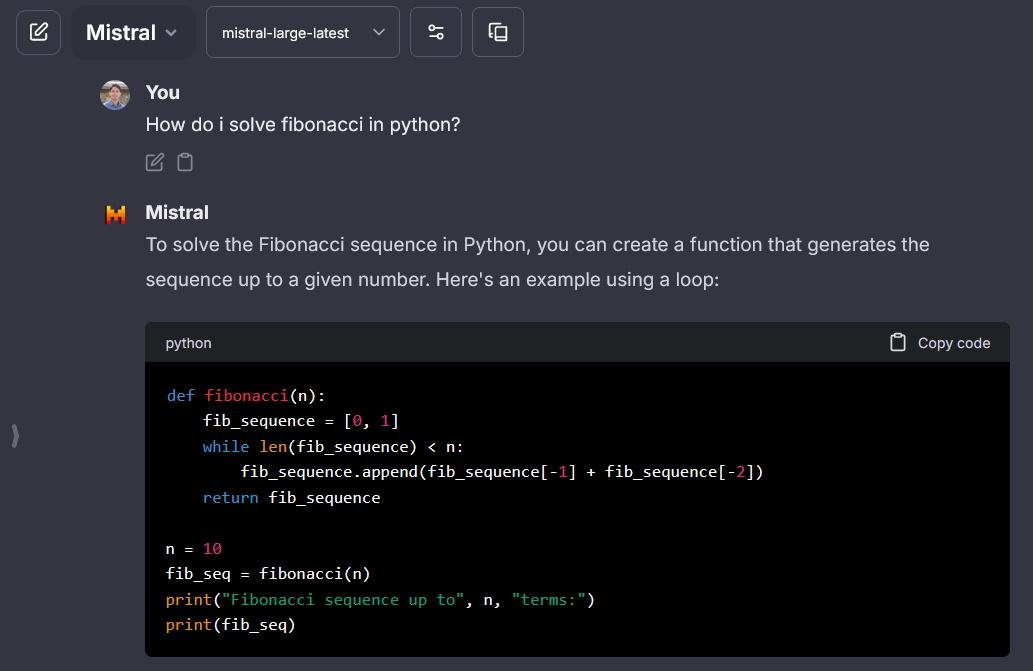
# Apple MLX (/docs/configuration/librechat_yaml/ai_endpoints/mlx)
> [MLX OpenAI Compatibility](https://github.com/ml-explore/mlx-lm/blob/main/mlx_lm/SERVER.md)
**Notes:**
- **Known:** icon provided.
- API is mostly strict with unrecognized parameters.
- Support only one model at a time, otherwise you'll need to run a different endpoint with a different `baseURL`.
```yaml filename="librechat.yaml"
- name: "MLX"
apiKey: "mlx"
baseURL: "http://localhost:8080/v1/"
models:
default: [
"Meta-Llama-3-8B-Instruct-4bit"
]
fetch: false # fetching list of models is not supported
titleConvo: true
titleModel: "current_model"
summarize: false
summaryModel: "current_model"
modelDisplayLabel: "Apple MLX"
addParams:
max_tokens: 2000
"stop": [
"<|eot_id|>"
]
```

# Moonshot (/docs/configuration/librechat_yaml/ai_endpoints/moonshot)
> Moonshot API key: [platform.moonshot.cn](https://platform.moonshot.ai)
**Notes:**
- **Known:** icon provided.
- **Important:** For models with reasoning/thinking capabilities (e.g., `kimi-k2.5`, `kimi-k2-thinking`), the endpoint `name` **must** be set to `"Moonshot"` (case-insensitive) for interleaved reasoning to work correctly with tool calls. Using a different name will result in errors like `thinking is enabled but reasoning_content is missing in assistant tool call message`. See [Moonshot's documentation](https://platform.moonshot.ai/docs/guide/use-kimi-k2-thinking-model#frequently-asked-questions) for more details.
```yaml filename="librechat.yaml"
- name: "Moonshot"
apiKey: "${MOONSHOT_API_KEY}"
baseURL: "https://api.moonshot.ai/v1"
models:
default: ["kimi-k2.5"]
fetch: true
titleConvo: true
titleModel: "current_model"
modelDisplayLabel: "Moonshot"
```
# NeurochainAI (/docs/configuration/librechat_yaml/ai_endpoints/neurochain)
> NeurochainAI API key: Required - [NeurochainAI REST API Documentation](https://app.neurochain.ai/network-integrations/rest-api)
**Notes:**
- Api is based on the OpenAI API.
- Model list is constantly growing and may not be up-to-date in this example. Keep an eye on the [NeurochainAI](https://neurochain.ai) for the latest models.
- The example includes the NeurochainAI model: "Mistral-7B-OpenOrca-GPTQ".
```yaml filename="neurochainai.yaml"
- name: "NeurochainAI"
apiKey: "<=generated api key=>"
baseURL: "https://ncmb.neurochain.io/v1/"
models:
default: [
"Mistral-7B-OpenOrca-GPTQ"
]
fetch: true
titleConvo: true
titleModel: "current_model"
summarize: false
summaryModel: "current_model"
modelDisplayLabel: "NeurochainAI"
iconURL: "https://raw.githubusercontent.com/LibreChat-AI/librechat-config-yaml/refs/heads/main/icons/NeurochainAI.png"
```
# Ollama (/docs/configuration/librechat_yaml/ai_endpoints/ollama)
> Ollama API key: Required but ignored - [Ollama OpenAI Compatibility](https://github.com/ollama/ollama/blob/main/docs/openai.md)
**Notes:**
- **Known:** icon provided.
- Download models with ollama run command. See [Ollama Library](https://ollama.com/library)
- It's recommend to use the value "current_model" for the `titleModel` to avoid loading more than 1 model per conversation.
- Doing so will dynamically use the current conversation model for the title generation.
- The example includes a top 5 popular model list from the Ollama Library, which was last updated on March 1, 2024, for your convenience.
```yaml filename="librechat.yaml"
custom:
- name: "Ollama"
apiKey: "ollama"
# use 'host.docker.internal' instead of localhost if running LibreChat in a docker container
baseURL: "http://localhost:11434/v1/"
models:
default: [
"llama2",
"mistral",
"codellama",
"dolphin-mixtral",
"mistral-openorca"
]
# fetching list of models is supported but the `name` field must start
# with `ollama` (case-insensitive), as it does in this example.
fetch: true
titleConvo: true
titleModel: "current_model"
summarize: false
summaryModel: "current_model"
modelDisplayLabel: "Ollama"
```
Note: Once `stop` was removed from the [default parameters](/docs/configuration/librechat_yaml/object_structure/default_params), the issue highlighted below should no longer exist.
However, in case you experience the behavior where `llama3` does not stop generating, add this `addParams` block to the config:
```yaml filename="librechat.yaml"
custom:
- name: "Ollama"
apiKey: "ollama"
baseURL: "http://host.docker.internal:11434/v1/"
models:
default: [
"llama3"
]
fetch: false # fetching list of models is not supported
titleConvo: true
titleModel: "current_model"
summarize: false
summaryModel: "current_model"
modelDisplayLabel: "Ollama"
addParams:
"stop": [
"<|start_header_id|>",
"<|end_header_id|>",
"<|eot_id|>",
"<|reserved_special_token"
]
```
If you are only using `llama3` with **Ollama**, it's fine to set the `stop` parameter at the config level via `addParams`.
However, if you are using multiple models, it's now recommended to add stop sequences from the frontend via conversation parameters and presets.
For example, we can omit `addParams`:
```yaml filename="librechat.yaml"
- name: "Ollama"
apiKey: "ollama"
baseURL: "http://host.docker.internal:11434/v1/"
models:
default: [
"llama3:latest",
"mistral"
]
fetch: false # fetching list of models is not supported
titleConvo: true
titleModel: "current_model"
modelDisplayLabel: "Ollama"
```
And use these settings (best to also save it):

# OpenRouter (/docs/configuration/librechat_yaml/ai_endpoints/openrouter)
[OpenRouter](https://openrouter.ai/) provides access to hundreds of AI models through a single API. This guide walks you through setting up OpenRouter as a custom endpoint in LibreChat from scratch.
Before starting, make sure you have:
- LibreChat installed and running (see [Docker setup](/docs/local/docker))
- A `librechat.yaml` file created and mounted (see [librechat.yaml guide](/docs/configuration/librechat_yaml))
## Setup
### Get an API Key
Create an account at [openrouter.ai](https://openrouter.ai/) and generate an API key from the [Keys page](https://openrouter.ai/keys).
Copy the key -- it starts with `sk-or-v1-`.
### Add the Key to Your .env File
Open your `.env` file in the project root and add your OpenRouter API key:
```bash filename=".env"
OPENROUTER_KEY=sk-or-v1-your-key-here
```
You must use `OPENROUTER_KEY` as the variable name. Using `OPENROUTER_API_KEY` will override the built-in OpenAI endpoint to use OpenRouter as well, which is almost certainly not what you want.
### Add the Endpoint to librechat.yaml
Add the following to your `librechat.yaml` file. If the file already has content, merge the `endpoints` section with your existing configuration:
```yaml filename="librechat.yaml"
version: 1.3.5
cache: true
endpoints:
custom:
- name: "OpenRouter"
apiKey: "${OPENROUTER_KEY}"
baseURL: "https://openrouter.ai/api/v1"
models:
default: ["meta-llama/llama-3-70b-instruct"]
fetch: true
titleConvo: true
titleModel: "meta-llama/llama-3-70b-instruct"
dropParams: ["stop"]
modelDisplayLabel: "OpenRouter"
```
Key fields explained:
| Field | Purpose |
|-------|---------|
| `apiKey: "${OPENROUTER_KEY}"` | References the env var from Step 2. The `${}` syntax tells LibreChat to read the value from `.env`. |
| `models.fetch: true` | Fetches the full model list from OpenRouter's API, so new models appear automatically. |
| `dropParams: ["stop"]` | Removes the `stop` parameter from requests. OpenRouter models use varied stop tokens, so dropping this avoids compatibility issues. |
| `modelDisplayLabel: "OpenRouter"` | The name shown in LibreChat's endpoint selector. |
### Restart LibreChat
```bash
docker compose down && docker compose up -d
```
Stop the running process (Ctrl+C) and restart:
```bash
npm run backend
```
### Verify It Works
Open LibreChat in your browser. You should see **OpenRouter** in the endpoint selector dropdown. Select it to see the available models.
If OpenRouter does not appear, check the server logs for configuration errors:
```bash
docker compose logs api | grep -i "error\|openrouter"
```
## Customization
### Using user_provided API Key
Instead of storing the key in `.env`, you can let each user provide their own key through the LibreChat UI:
```yaml
apiKey: "user_provided"
```
Users will see a key input field when selecting the OpenRouter endpoint.
### Limiting Available Models
Instead of fetching all models, you can specify a fixed list:
```yaml
models:
default: ["anthropic/claude-3.5-sonnet", "openai/gpt-4o", "meta-llama/llama-3-70b-instruct"]
fetch: false
```
## Reference
All available fields for custom endpoint configuration
Complete annotated librechat.yaml with multiple endpoints
# Perplexity (/docs/configuration/librechat_yaml/ai_endpoints/perplexity)
> Perplexity API key: [perplexity.ai/settings/api](https://www.perplexity.ai/settings/api)
**Notes:**
- **Known:** icon provided.
- **Known issue:** fetching list of models is not supported.
- API may be strict for some models, and may not allow fields like `stop` and `frequency_penalty` may cause an error when set to 0, in which case, you should use [`dropParams`.](/docs/configuration/librechat_yaml/object_structure/custom_endpoint#dropparams)
- The example includes a model list, which was last updated on 3 July 2024, for your convenience.
```yaml
- name: "Perplexity"
apiKey: "${PERPLEXITY_API_KEY}"
baseURL: "https://api.perplexity.ai/"
models:
default: [
"sonar-deep-research",
"sonar-reasoning-pro",
"sonar-reasoning",
"sonar-pro",
"sonar",
"r1-1776"
]
fetch: false # fetching list of models is not supported
titleConvo: true
titleModel: "llama-3-sonar-small-32k-chat"
summarize: false
summaryModel: "llama-3-sonar-small-32k-chat"
dropParams: ["stop", "frequency_penalty"]
modelDisplayLabel: "Perplexity"
```
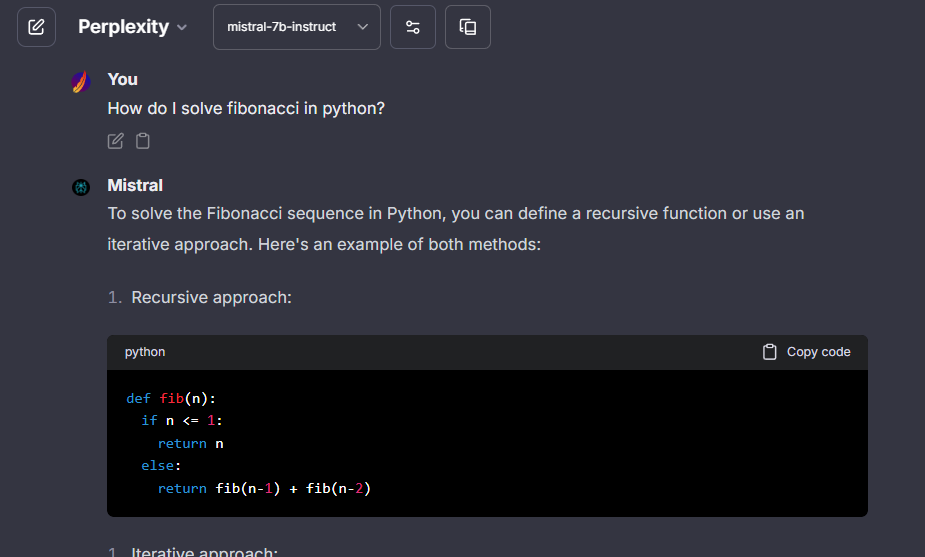
# Portkey AI (/docs/configuration/librechat_yaml/ai_endpoints/portkey)
> Portkey API key: [app.portkey.ai](https://app.portkey.ai/)
**Notes:**
- LibreChat requires that the `API key` field is present. We don’t need it for the Portkey integration, we can pass a `dummy` string for it.
- Portkey integrates with LibreChat, offering observability, 50+ guardrails, caching, and conditional routing with fallbacks and retries for reliable, production-grade deployments.
- Portkey Supports 250+ Models, you can find the list of providers on [Portkey Docs](https://docs.portkey.ai/docs/integrations/llms)
- You can use Portkey in two ways—through [Virtual Keys](https://docs.portkey.ai/docs/product/ai-gateway/virtual-keys ) or [Configs](https://docs.portkey.ai/docs/product/ai-gateway/configs).
- You can use Model specific parameters like `top_p`, `max Tokens`, etc. in using Portke Config. [Learn more](https://docs.portkey.ai/docs/product/ai-gateway/configs#configs)
## Using Portkey AI with Virtual Keys
```yaml filename="librechat.yaml"
- name: "Portkey"
apiKey: "dummy"
baseURL: ${PORTKEY_GATEWAY_URL}
headers:
x-portkey-api-key: "${PORTKEY_API_KEY}"
x-portkey-virtual-key: "PORTKEY_OPENAI_VIRTUAL_KEY"
models:
default: ["gpt-4o-mini"]
fetch: true
titleConvo: true
titleModel: "current_model"
summarize: false
summaryModel: "current_model"
modelDisplayLabel: "Portkey:OpenAI"
iconURL: https://images.crunchbase.com/image/upload/c_pad,f_auto,q_auto:eco,dpr_1/rjqy7ghvjoiu4cd1xjbf
```
## Using Portkey AI with Configs
```yaml filename="librechat.yaml"
- name: "Portkey"
apikey: "dummy"
baseURL: ${PORTKEY_GATEWAY_URL}
headers:
x-portkey-api-key: "${PORTKEY_API_KEY}"
x-portkey-config: "pc-libre-xxx"
models:
default: ["llama-3.2"]
fetch: true
titleConvo: true
titleModel: "current_model"
summarize: false
summaryModel: "current_model"
modelDisplayLabel: "Portkey:Llama"
iconURL: https://images.crunchbase.com/image/upload/c_pad,f_auto,q_auto:eco,dpr_1/rjqy7ghvjoiu4cd1xjbf
```
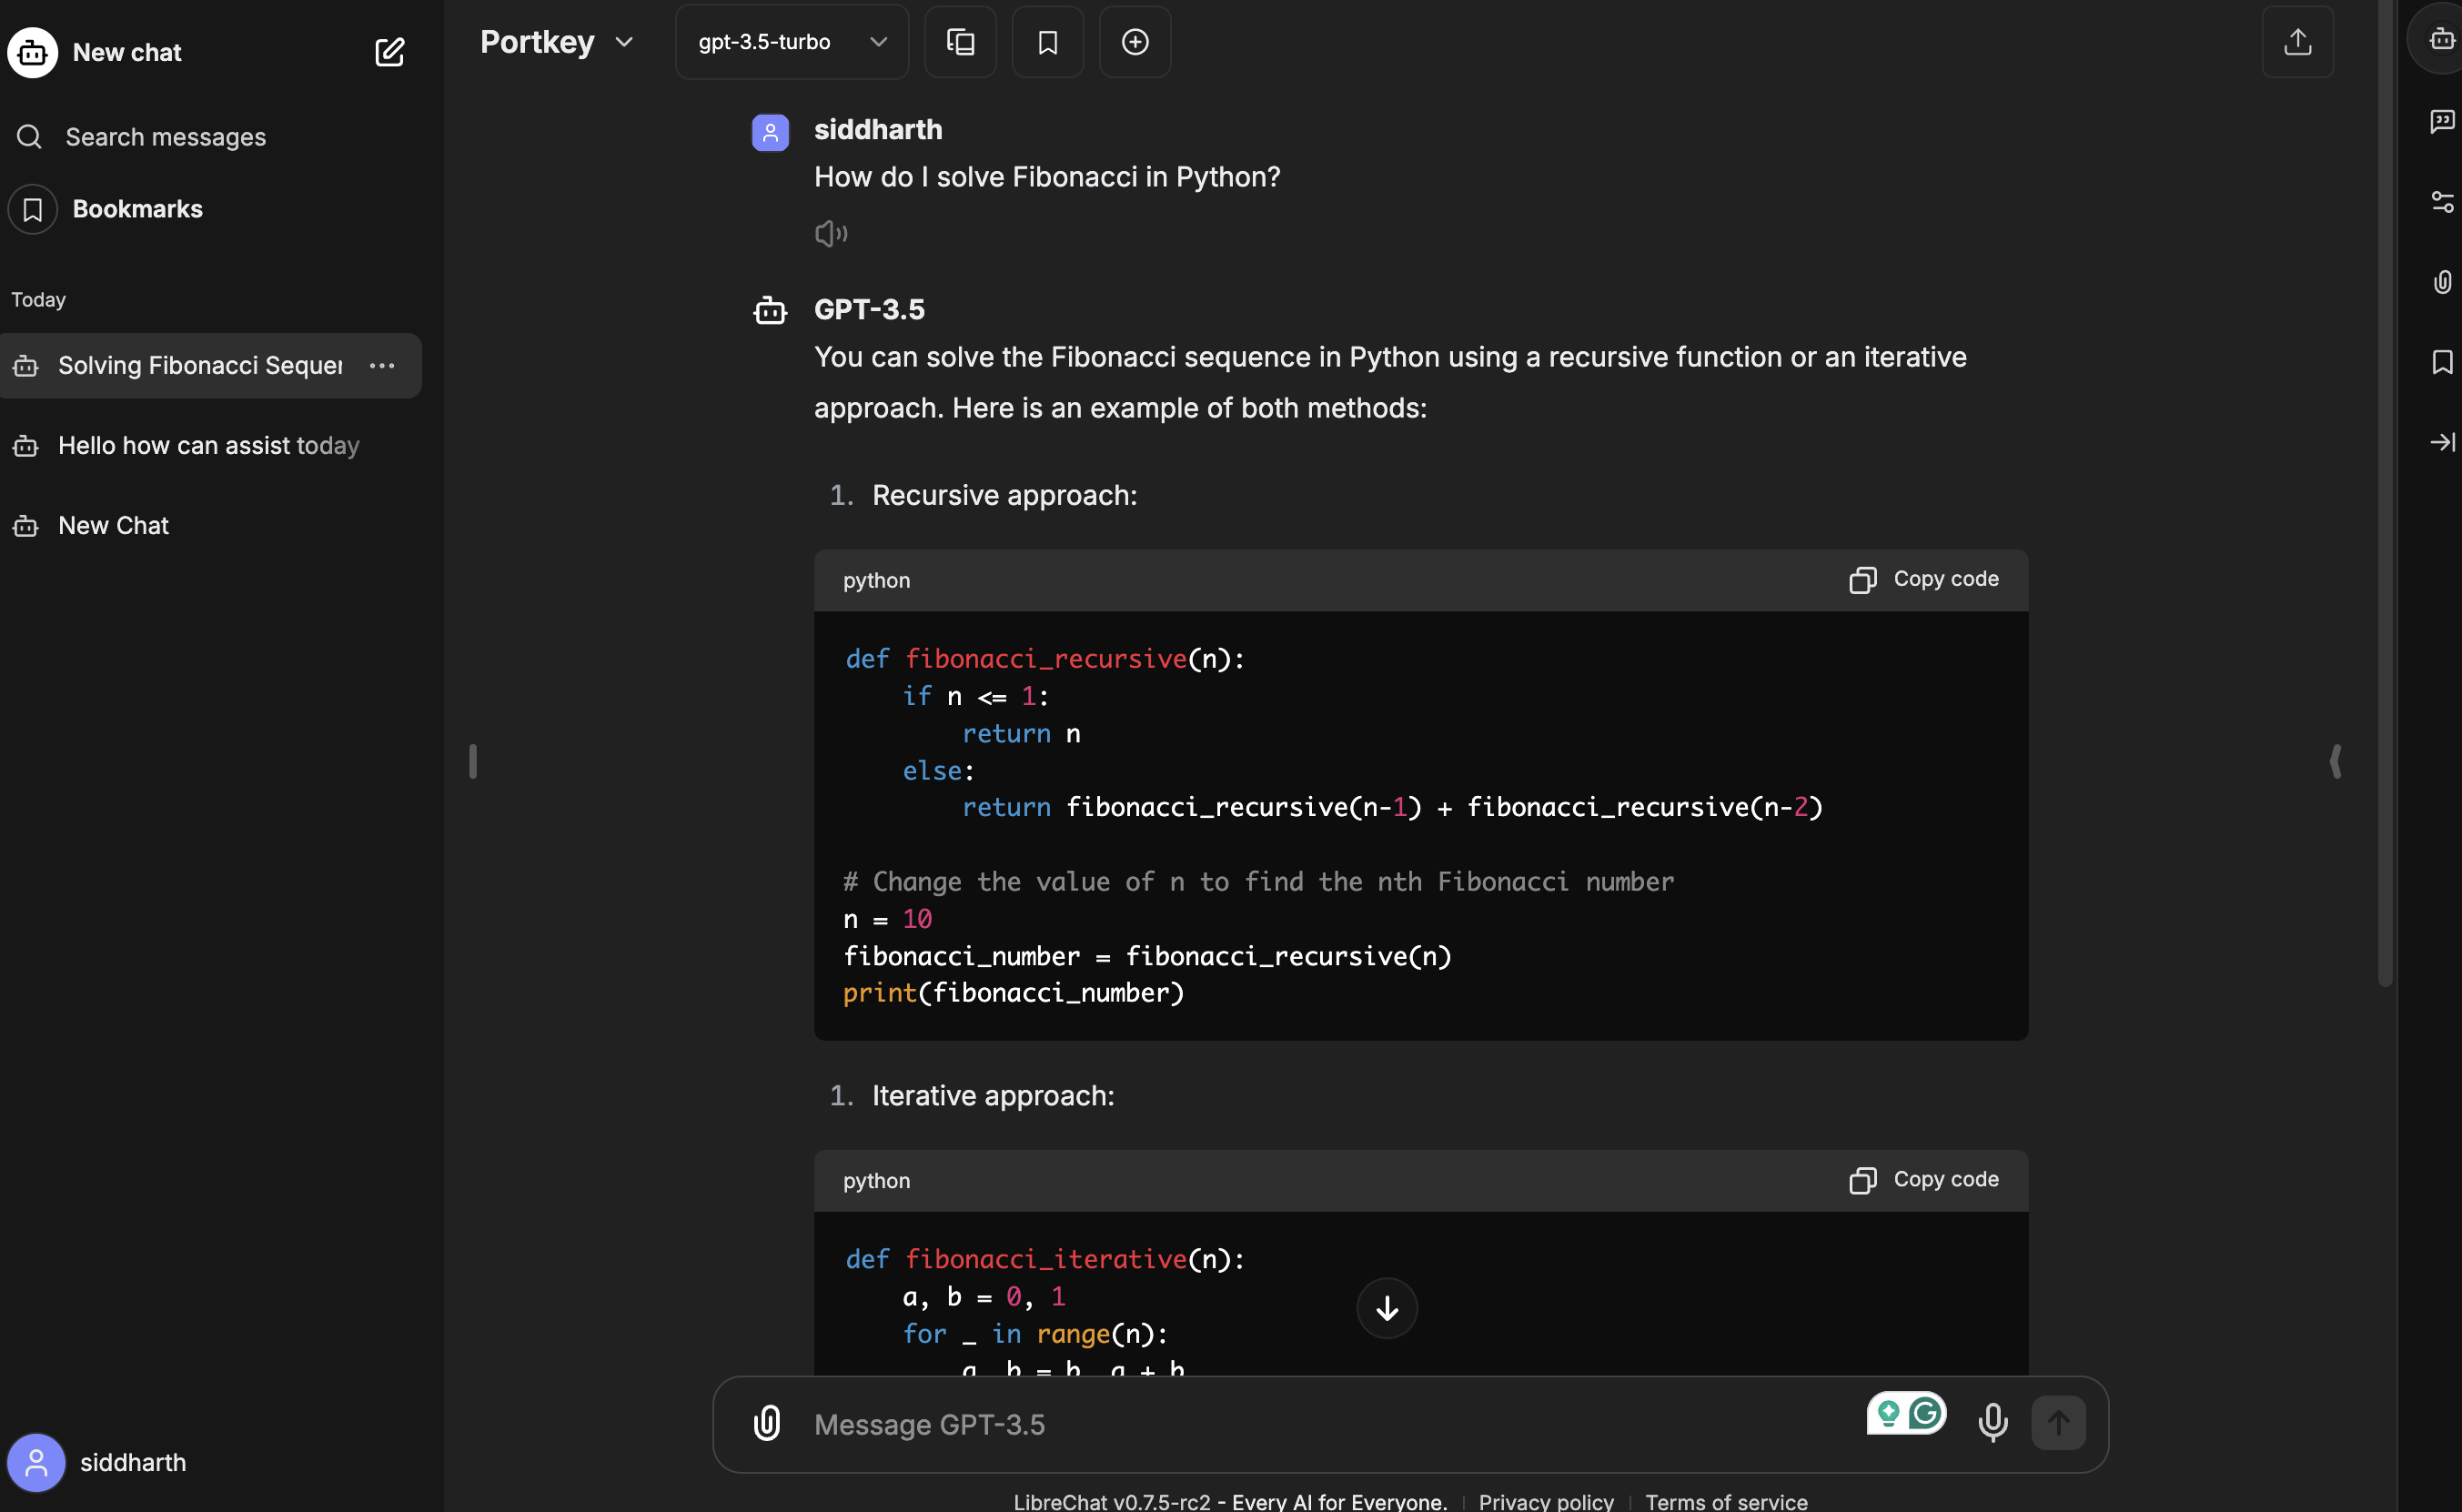
# ShuttleAI (/docs/configuration/librechat_yaml/ai_endpoints/shuttleai)
> ShuttleAI API key: [shuttleai.com/keys](https://shuttleai.com/keys)
**Notes:**
- **Known:** icon provided, fetching list of models is recommended.
```yaml
- name: "ShuttleAI"
apiKey: "${SHUTTLEAI_API_KEY}"
baseURL: "https://api.shuttleai.com/v1"
models:
default: [
"shuttle-2.5", "shuttle-2.5-mini"
]
fetch: true
titleConvo: true
titleModel: "shuttle-2.5-mini"
summarize: false
summaryModel: "shuttle-2.5-mini"
modelDisplayLabel: "ShuttleAI"
dropParams: ["user", "stop"]
```
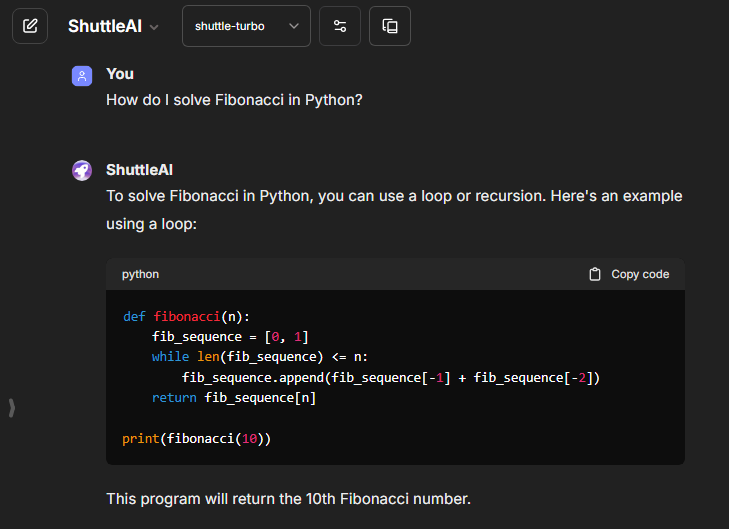
# together.ai (/docs/configuration/librechat_yaml/ai_endpoints/togetherai)
> together.ai API key: [api.together.xyz/settings/api-keys](https://api.together.xyz/settings/api-keys)
**Notes:**
- **Known:** icon provided.
- **Known issue:** fetching list of models is not supported.
- The example includes a model list, which was last updated on August 1, 2024, for your convenience.
This python script can fetch and order the llm models for you. The output will be saved in models.txt, formated in a way that should make it easier for you to include in the yaml config.
```py filename="fetch_togetherai.py"
import json
import requests
# API key
api_key = ""
# API endpoint
url = "https://api.together.xyz/v1/models"
# headers
headers = {
"accept": "application/json",
"Authorization": f"Bearer {api_key}"
}
# make request
response = requests.get(url, headers=headers)
# parse JSON response
data = response.json()
# extract an ordered list of unique model IDs
model_ids = sorted(
[
model['id']
for model in data
if model['type'] == 'chat'
]
)
# write result to a text file
with open("models_togetherai.json", "w") as file:
json.dump(model_ids, file, indent=2)
```
```yaml
- name: "together.ai"
apiKey: "${TOGETHERAI_API_KEY}"
baseURL: "https://api.together.xyz"
models:
default: [
"Austism/chronos-hermes-13b",
"Gryphe/MythoMax-L2-13b",
"HuggingFaceH4/zephyr-7b-beta",
"NousResearch/Hermes-2-Theta-Llama-3-70B",
"NousResearch/Nous-Capybara-7B-V1p9",
"NousResearch/Nous-Hermes-2-Mistral-7B-DPO",
"NousResearch/Nous-Hermes-2-Mixtral-8x7B-DPO",
"NousResearch/Nous-Hermes-2-Mixtral-8x7B-SFT",
"NousResearch/Nous-Hermes-2-Yi-34B",
"NousResearch/Nous-Hermes-Llama2-13b",
"NousResearch/Nous-Hermes-Llama2-70b",
"NousResearch/Nous-Hermes-llama-2-7b",
"Open-Orca/Mistral-7B-OpenOrca",
"Qwen/Qwen1.5-0.5B-Chat",
"Qwen/Qwen1.5-1.8B-Chat",
"Qwen/Qwen1.5-110B-Chat",
"Qwen/Qwen1.5-14B-Chat",
"Qwen/Qwen1.5-32B-Chat",
"Qwen/Qwen1.5-4B-Chat",
"Qwen/Qwen1.5-72B-Chat",
"Qwen/Qwen1.5-7B-Chat",
"Qwen/Qwen2-1.5B",
"Qwen/Qwen2-1.5B-Instruct",
"Qwen/Qwen2-72B",
"Qwen/Qwen2-72B-Instruct",
"Qwen/Qwen2-7B",
"Qwen/Qwen2-7B-Instruct",
"Snowflake/snowflake-arctic-instruct",
"Undi95/ReMM-SLERP-L2-13B",
"Undi95/Toppy-M-7B",
"WizardLM/WizardLM-13B-V1.2",
"allenai/OLMo-7B-Instruct",
"carson/ml31405bit",
"carson/ml3170bit",
"carson/ml318bit",
"carson/ml318br",
"codellama/CodeLlama-13b-Instruct-hf",
"codellama/CodeLlama-34b-Instruct-hf",
"codellama/CodeLlama-70b-Instruct-hf",
"codellama/CodeLlama-7b-Instruct-hf",
"cognitivecomputations/dolphin-2.5-mixtral-8x7b",
"databricks/dbrx-instruct",
"deepseek-ai/deepseek-coder-33b-instruct",
"deepseek-ai/deepseek-llm-67b-chat",
"garage-bAInd/Platypus2-70B-instruct",
"google/gemma-2-27b-it",
"google/gemma-2-9b-it",
"google/gemma-2b-it",
"google/gemma-7b-it",
"gradientai/Llama-3-70B-Instruct-Gradient-1048k",
"lmsys/vicuna-13b-v1.3",
"lmsys/vicuna-13b-v1.5",
"lmsys/vicuna-13b-v1.5-16k",
"lmsys/vicuna-7b-v1.3",
"lmsys/vicuna-7b-v1.5",
"meta-llama/Llama-2-13b-chat-hf",
"meta-llama/Llama-2-70b-chat-hf",
"meta-llama/Llama-2-7b-chat-hf",
"meta-llama/Llama-3-70b-chat-hf",
"meta-llama/Llama-3-8b-chat-hf",
"meta-llama/Meta-Llama-3-70B-Instruct",
"meta-llama/Meta-Llama-3-70B-Instruct-Lite",
"meta-llama/Meta-Llama-3-70B-Instruct-Turbo",
"meta-llama/Meta-Llama-3-8B-Instruct",
"meta-llama/Meta-Llama-3-8B-Instruct-Lite",
"meta-llama/Meta-Llama-3-8B-Instruct-Turbo",
"meta-llama/Meta-Llama-3.1-405B-Instruct-Turbo",
"meta-llama/Meta-Llama-3.1-70B-Instruct-Reference",
"meta-llama/Meta-Llama-3.1-70B-Instruct-Turbo",
"meta-llama/Meta-Llama-3.1-70B-Reference",
"meta-llama/Meta-Llama-3.1-8B-Instruct-Reference",
"meta-llama/Meta-Llama-3.1-8B-Instruct-Turbo",
"microsoft/WizardLM-2-8x22B",
"mistralai/Mistral-7B-Instruct-v0.1",
"mistralai/Mistral-7B-Instruct-v0.2",
"mistralai/Mistral-7B-Instruct-v0.3",
"mistralai/Mixtral-8x22B-Instruct-v0.1",
"mistralai/Mixtral-8x7B-Instruct-v0.1",
"openchat/openchat-3.5-1210",
"snorkelai/Snorkel-Mistral-PairRM-DPO",
"teknium/OpenHermes-2-Mistral-7B",
"teknium/OpenHermes-2p5-Mistral-7B",
"togethercomputer/CodeLlama-13b-Instruct",
"togethercomputer/CodeLlama-34b-Instruct",
"togethercomputer/CodeLlama-7b-Instruct",
"togethercomputer/Koala-13B",
"togethercomputer/Koala-7B",
"togethercomputer/Llama-2-7B-32K-Instruct",
"togethercomputer/Llama-3-8b-chat-hf-int4",
"togethercomputer/Llama-3-8b-chat-hf-int8",
"togethercomputer/SOLAR-10.7B-Instruct-v1.0-int4",
"togethercomputer/StripedHyena-Nous-7B",
"togethercomputer/alpaca-7b",
"togethercomputer/guanaco-13b",
"togethercomputer/guanaco-33b",
"togethercomputer/guanaco-65b",
"togethercomputer/guanaco-7b",
"togethercomputer/llama-2-13b-chat",
"togethercomputer/llama-2-70b-chat",
"togethercomputer/llama-2-7b-chat",
"upstage/SOLAR-10.7B-Instruct-v1.0",
"zero-one-ai/Yi-34B-Chat"
]
fetch: false # fetching list of models is not supported
titleConvo: true
titleModel: "togethercomputer/llama-2-7b-chat"
summarize: false
summaryModel: "togethercomputer/llama-2-7b-chat"
modelDisplayLabel: "together.ai"
```
# TrueFoundry AI Gateway (/docs/configuration/librechat_yaml/ai_endpoints/truefoundry)
TrueFoundry AI Gateway is the proxy layer that sits between your applications and the LLM providers and MCP Servers. It is an enterprise-grade platform that enables users to access 1000+ LLMs using a unified interface while taking care of observability and governance.
## Configuration Details
To use [TrueFoundry's AI Gateway](https://www.truefoundry.com/ai-gateway) follow the quick start guide [here](https://docs.truefoundry.com/gateway/quick-start).
### Getting Base URL and Model Names
- **Base URL and Model Names**: Get your TrueFoundry AI Gateway endpoint URL and model name from the unified code snippet (ensure you have added the same model name)
- **PAT**: Generate from your TrueFoundry Personal Access Token [PAT](https://docs.truefoundry.com/gateway/authentication#personal-access-token-pat)
## Using TrueFoundry AI Gateway with any LLM model
```yaml filename="librechat.yaml"
- name: "TrueFoundry"
apiKey: "${TRUEFOUNDRY_API_KEY}"
baseURL: "${TRUEFOUNDRY_GATEWAY_URL}"
models:
default: ["openai-main/gpt-4o-mini", "openai-main/gpt-4o"]
fetch: true
titleConvo: true
titleModel: "current_model"
summarize: false
summaryModel: "current_model"
modelDisplayLabel: "TrueFoundry:OpenAI"
```
For more details you can check: [TrueFoundry Docs](https://docs.truefoundry.com/docs/introduction)
# vLLM (/docs/configuration/librechat_yaml/ai_endpoints/vllm)
> vLLM is a high-throughput and memory-efficient inference and serving engine for LLMs.
**Notes:**
- **Not Known:** icon not provided, but fetching list of models is recommended to get available models from your local vLLM server.
- The `titleMessageRole` is important as some local LLMs will not accept system message roles for title messages (which is the default).
- This configuration assumes you have a vLLM server running locally at the specified baseURL.
```yaml
- name: "vLLM"
apiKey: "vllm"
baseURL: "http://127.0.0.1:8023/v1"
models:
default: ['google/gemma-3-27b-it']
fetch: true
titleConvo: true
titleModel: "current_model"
titleMessageRole: "user"
summarize: false
summaryModel: "current_model"
```
The configuration above connects LibreChat to a local vLLM server running on port 8023. It uses the Gemma 3 27B model as the default model, but will fetch all available models from your vLLM server.
## Key Configuration Options
- `apiKey`: A simple placeholder value for vLLM (local deployments typically don't require authentication)
- `baseURL`: The URL where your vLLM server is running
- `titleMessageRole`: Set to "user" instead of the default "system" as some local LLMs don't support system messages
# Vultr Cloud Inference (/docs/configuration/librechat_yaml/ai_endpoints/vultrcloudinference)
> Vultr Cloud Inference API key: Required - [Vultr Cloud Inference](https://docs.vultr.com/vultr-cloud-inference)
**Notes:**
- The example includes the 4 models optimized for chat, which was last updated on June 28, 2024, for your convenience.
- The only model currently supporting title generation is llama2-7b-chat-Q5_K_M.gguf.
```yaml filename="librechat.yaml"
custom:
- name: 'Vultr Cloud Inference'
apiKey: '${VULTRINFERENCE_TOKEN}'
baseURL: 'https://api.vultrinference.com/v1/chat/completions'
models:
default: [
"llama2-7b-chat-Q5_K_M.gguf",
"llama2-13b-chat-Q5_K_M.gguf",
"mistral-7b-Q5_K_M.gguf",
"zephyr-7b-beta-Q5_K_M.gguf",
]
fetch: true
titleConvo: true
titleModel: "llama2-7b-chat-Q5_K_M.gguf"
modelDisplayLabel: "Vultr Cloud Inference"
```
# xAI (/docs/configuration/librechat_yaml/ai_endpoints/xai)
> xAI API key: [x.ai](https://console.x.ai/)
**Notes:**
- **Known:** icon provided.
```yaml filename="librechat.yaml"
- name: "xai"
apiKey: "${XAI_API_KEY}"
baseURL: "https://api.x.ai/v1"
models:
default: ["grok-beta"]
fetch: false
titleConvo: true
titleMethod: "completion"
titleModel: "grok-beta"
summarize: false
summaryModel: "grok-beta"
modelDisplayLabel: "Grok"
```

# Actions Object Structure (/docs/configuration/librechat_yaml/object_structure/actions)
Actions can be used to dynamically create tools from OpenAPI specs. The `actions` object structure allows you to specify allowed domains for agent/assistant actions.
More info: [Agents - Actions](/docs/features/agents#actions)
## Example
```yaml filename="Actions Object Structure"
# Example Actions Object Structure
actions:
allowedDomains:
- "swapi.dev"
- "librechat.ai"
- "google.com"
- "https://api.example.com:8443" # With protocol and port
```
## allowedDomains
**Key:**
**Optional**
### Security Context (SSRF Protection)
LibreChat includes SSRF (Server-Side Request Forgery) protection with the following behavior:
**When `allowedDomains` is NOT configured:**
- SSRF-prone targets are **blocked by default**
- All other external domains are **allowed**
**When `allowedDomains` IS configured:**
- **Only** domains on the list are allowed
- Internal/SSRF targets can be allowed by explicitly adding them to the list
**Blocked SSRF targets include:**
- **Localhost** addresses (`localhost`, `127.0.0.1`, `::1`)
- **Private IP ranges** (`10.0.0.0/8`, `172.16.0.0/12`, `192.168.0.0/16`)
- **Link-local addresses** (`169.254.0.0/16`, includes cloud metadata IPs)
- **Internal TLDs** (`.internal`, `.local`, `.localhost`)
- **Common internal service names** (`redis`, `mongodb`, `postgres`, `api`, etc.)
If your actions need to access internal services, you **must explicitly add them** to `allowedDomains`.
### Pattern Formats
The `allowedDomains` array supports several formats:
1. **Domain only** - Allows all protocols and ports:
```yaml
allowedDomains:
- "api.example.com"
```
2. **With protocol** - Restricts to specific protocol:
```yaml
allowedDomains:
- "https://api.example.com"
```
3. **With protocol and port** - Restricts to specific protocol and port:
```yaml
allowedDomains:
- "https://api.example.com:8443"
```
4. **Internal addresses** (must be explicitly allowed):
```yaml
allowedDomains:
- "192.168.1.100"
- "internal-api.local"
```
**Example:**
```yaml filename="actions / allowedDomains"
allowedDomains:
- "swapi.dev"
- "librechat.ai"
- "google.com"
- "https://secure-api.example.com:443"
- "192.168.1.50" # Internal service (explicitly allowed)
```
# Agents Endpoint Object Structure (/docs/configuration/librechat_yaml/object_structure/agents)
This page applies to the [`agents`](/docs/features/agents) endpoint.
## Example
```yaml filename="Agents Endpoint"
endpoints:
agents:
recursionLimit: 50
maxRecursionLimit: 100
disableBuilder: false
# (optional) Agent Capabilities available to all users. Omit the ones you wish to exclude. Defaults to list below.
# capabilities: ["execute_code", "file_search", "actions", "tools", "artifacts", "context", "ocr", "chain", "web_search"]
# (optional) File citation configuration for file_search capability
maxCitations: 30 # Maximum total citations in responses (1-50)
maxCitationsPerFile: 7 # Maximum citations from each file (1-10)
minRelevanceScore: 0.45 # Minimum relevance score threshold (0.0-1.0)
```
> This configuration enables the builder interface for agents.
## recursionLimit
**Default:** `25`
**Example:**
```yaml filename="endpoints / agents / recursionLimit"
recursionLimit: 50
```
For more information about agent steps, see [Max Agent Steps](/docs/features/agents#max-agent-steps).
## maxRecursionLimit
**Default:** If omitted, defaults to the value of recursionLimit or 50 if recursionLimit is also omitted.
**Example:**
```yaml filename="endpoints / agents / maxRecursionLimit"
maxRecursionLimit: 100
```
For more information about agent steps, see [Max Agent Steps](/docs/features/agents#max-agent-steps).
## disableBuilder
**Default:** `false`
**Example:**
```yaml filename="endpoints / agents / disableBuilder"
disableBuilder: false
```
## allowedProviders
**Default:** `[]` (empty list, all providers allowed)
**Note:** Must be one of the following, or a custom endpoint name as defined in your [configuration](/docs/configuration/librechat_yaml/object_structure/custom_endpoint#name):
- `openAI, azureOpenAI, google, anthropic, assistants, azureAssistants, bedrock`
**Example:**
```yaml filename="endpoints / agents / allowedProviders"
allowedProviders:
- openAI
- google
```
## capabilities
**Default:** `["execute_code", "file_search", "actions", "tools", "artifacts", "context", "ocr", "chain", "web_search"]`
**Example:**
```yaml filename="endpoints / agents / capabilities"
capabilities:
- "execute_code"
- "file_search"
- "actions"
- "tools"
- "artifacts"
- "context"
- "ocr"
- "chain"
- "web_search"
```
**Note:** This field is optional. If omitted, the default behavior is to include all the capabilities listed in the default.
## maxCitations
**Default:** `30`
**Range:** `1-50`
**Example:**
```yaml filename="endpoints / agents / maxCitations"
maxCitations: 30
```
## maxCitationsPerFile
**Default:** `7`
**Range:** `1-10`
**Example:**
```yaml filename="endpoints / agents / maxCitationsPerFile"
maxCitationsPerFile: 7
```
## minRelevanceScore
**Default:** `0.45` (45% relevance threshold)
**Range:** `0.0-1.0`
**Example:**
```yaml filename="endpoints / agents / minRelevanceScore"
minRelevanceScore: 0.45
```
### File Citation Configuration Examples
**Default Configuration (Balanced)**
```yaml
endpoints:
agents:
maxCitations: 30
maxCitationsPerFile: 7
minRelevanceScore: 0.45
```
Provides comprehensive citations while preventing overwhelming responses and filtering out low-quality matches.
**Strict Configuration (High Quality)**
```yaml
endpoints:
agents:
maxCitations: 10
maxCitationsPerFile: 3
minRelevanceScore: 0.7
```
Only includes highly relevant citations with strict limits for focused responses.
**Comprehensive Configuration (Research)**
```yaml
endpoints:
agents:
maxCitations: 50
maxCitationsPerFile: 10
minRelevanceScore: 0.0
```
Maximum information extraction for exhaustive research tasks, including all sources regardless of relevance.
## Agent Capabilities
The `capabilities` field allows you to enable or disable specific functionalities for agents. The available capabilities are:
- **execute_code**: Allows the agent to execute code.
- **file_search**: Enables the agent to search and interact with files. When enabled, citation behavior is controlled by `maxCitations`, `maxCitationsPerFile`, and `minRelevanceScore` settings.
- **actions**: Permits the agent to perform predefined actions.
- **tools**: Grants the agent access to various tools.
- **artifacts**: Enables the agent to generate interactive artifacts (React components, HTML, Mermaid diagrams).
- **context**: Enables "Upload as Text" functionality in chat, and "File Context" for agents, allowing users to upload files and have their content extracted and included directly in the conversation.
- **ocr**: Optionally enhances "Upload as Text" in chat, and "File Context" for agents, allowing files to be uploaded and processed with OCR. **Requires an OCR service to be configured.**
- **chain**: Enables Beta feature for agent chaining, also known as Mixture-of-Agents (MoA) workflows.
- **web_search**: Enables web search functionality for agents, allowing them to search and retrieve information from the internet.
By specifying the capabilities, you can control the features available to users when interacting with agents.
## Example Configuration
Here is an example of configuring the `agents` endpoint with custom capabilities and file citation settings:
```yaml filename="Agents Endpoint"
endpoints:
agents:
disableBuilder: false
# File citation configuration
maxCitations: 20
maxCitationsPerFile: 5
minRelevanceScore: 0.6
# Custom capabilities
capabilities:
- "execute_code"
- "file_search"
- "actions"
- "artifacts"
- "context"
- "ocr"
- "web_search"
```
In this example:
- The builder interface is enabled
- File citations are limited to 20 total, with maximum 5 per file
- Only sources with 60%+ relevance are included
- LibreChat Agents have access to code execution, file search (with citations), actions, artifacts, file context, ocr services if configured, and web search capabilities
## Notes
- It's not recommended to disable the builder interface unless you are using [modelSpecs](/docs/configuration/librechat_yaml/object_structure/model_specs) to define a list of agents to choose from.
- File citation configuration (`maxCitations`, `maxCitationsPerFile`, `minRelevanceScore`) only applies when the `file_search` capability is enabled.
- The relevance score is calculated using vector similarity, where 1.0 represents a perfect match and 0.0 represents no similarity.
- Citation limits help balance comprehensive information retrieval with response quality and performance.
- The `context` capability works without OCR configuration using text parsing methods. OCR enhances extraction quality when configured.
- The `ocr` capability requires an OCR service to be configured (see [OCR Configuration](/docs/configuration/librechat_yaml/object_structure/ocr)).
# Anthropic Vertex AI Object Structure (/docs/configuration/librechat_yaml/object_structure/anthropic_vertex)
LibreChat supports running Anthropic Claude models through **Google Cloud Vertex AI**. This allows you to use Claude models with your existing Google Cloud infrastructure, billing, and credentials.
**[For quick setup using environment variables, see the Anthropic configuration guide](/docs/configuration/pre_configured_ai/anthropic#vertex-ai)**
## Benefits
- **Unified Billing:** Use your existing Google Cloud billing account
- **Enterprise Features:** Access Google Cloud's enterprise security and compliance features
- **Regional Compliance:** Deploy in specific regions to meet data residency requirements
- **Existing Infrastructure:** Leverage your current GCP service accounts and IAM policies
## Prerequisites
Before configuring Anthropic Vertex AI, ensure you have:
1. **Google Cloud Project** with the Vertex AI API enabled
2. **Service Account** with the `Vertex AI User` role (`roles/aiplatform.user`)
3. **Claude models** enabled in your [Vertex AI Model Garden](https://console.cloud.google.com/vertex-ai/model-garden)
4. **Service Account Key** (JSON file) downloaded and accessible to LibreChat
## Example Configuration
```yaml filename="Example Anthropic Vertex AI Configuration"
endpoints:
anthropic:
streamRate: 20
titleModel: "claude-3.5-haiku" # Use the visible model name (key from models config)
vertex:
region: "us-east5"
# serviceKeyFile: "/path/to/service-account.json" # Optional, defaults to api/data/auth.json
# projectId: "${VERTEX_PROJECT_ID}" # Optional, auto-detected from service key
# Model mapping: visible name -> Vertex AI deployment name
models:
claude-opus-4.5:
deploymentName: claude-opus-4-5@20251101
claude-sonnet-4:
deploymentName: claude-sonnet-4-20250514
claude-3.7-sonnet:
deploymentName: claude-3-7-sonnet-20250219
claude-3.5-sonnet:
deploymentName: claude-3-5-sonnet-v2@20241022
claude-3.5-haiku:
deploymentName: claude-3-5-haiku@20241022
```
> **Note:** Anthropic endpoint supports all [Shared Endpoint Settings](/docs/configuration/librechat_yaml/object_structure/shared_endpoint_settings), including `streamRate`, `titleModel`, `titleMethod`, `titlePrompt`, `titlePromptTemplate`, and `titleEndpoint`.
---
## vertex
The `vertex` object contains all Vertex AI-specific configuration options.
### region
**Key:**
**Default:** `us-east5`
**Available Regions:**
- `global` (recommended for most use cases)
- `us-east5`
- `us-central1`
- `europe-west1`
- `europe-west4`
- `asia-southeast1`
> **Tip:** The `global` region is recommended as it provides automatic routing to the nearest available region. Use specific regions only if you have data residency requirements.
**Example:**
```yaml filename="endpoints / anthropic / vertex / region"
region: "global"
```
### projectId
**Key:**
**Default:** Auto-detected from service key file
**Example:**
```yaml filename="endpoints / anthropic / vertex / projectId"
projectId: "${GOOGLE_PROJECT_ID}"
```
### serviceKeyFile
**Key:**
**Default:** `api/data/auth.json` (or `GOOGLE_SERVICE_KEY_FILE` environment variable)
**Example:**
```yaml filename="endpoints / anthropic / vertex / serviceKeyFile"
serviceKeyFile: "/etc/secrets/gcp-service-account.json"
```
---
## models
The `models` field defines the available Claude models and maps user-friendly names to Vertex AI deployment IDs. This works similarly to [Azure OpenAI model mapping](/docs/configuration/librechat_yaml/object_structure/azure_openai#group-object-structure).
### Format Options
You can configure models in three ways:
#### Option 1: Simple Array
Use the actual Vertex AI model IDs directly. These will be shown as-is in the UI:
```yaml filename="Simple array format"
models:
- "claude-sonnet-4-20250514"
- "claude-3-7-sonnet-20250219"
- "claude-3-5-haiku@20241022"
```
#### Option 2: Object with Custom Names (Recommended)
Map user-friendly names to Vertex AI deployment names:
```yaml filename="Object format with custom names"
models:
claude-opus-4.5: # Visible in UI
deploymentName: claude-opus-4-5@20251101 # Actual Vertex AI model ID
claude-sonnet-4:
deploymentName: claude-sonnet-4-20250514
claude-3.5-haiku:
deploymentName: claude-3-5-haiku@20241022
```
#### Option 3: Mixed Format with Default
Set a default deployment name and use boolean values for models that inherit it:
```yaml filename="Mixed format"
deploymentName: claude-sonnet-4-20250514 # Default deployment
models:
claude-sonnet-4: true # Uses default deploymentName
claude-3.5-haiku:
deploymentName: claude-3-5-haiku@20241022 # Override for this model
```
### Model Object Properties
**Example:**
```yaml filename="Model with deploymentName"
models:
claude-sonnet-4:
deploymentName: claude-sonnet-4-20250514
```
---
## Environment Variable Alternative
For simpler setups, you can configure Vertex AI using environment variables instead of YAML:
```bash filename=".env"
# Enable Vertex AI mode
ANTHROPIC_USE_VERTEX=true
# Vertex AI region (optional, defaults to us-east5)
ANTHROPIC_VERTEX_REGION=global
# Path to service account key (optional, defaults to api/data/auth.json)
GOOGLE_SERVICE_KEY_FILE=/path/to/service-account.json
```
> **Note:** When using environment variables, model mapping is not available. All known Claude models will be included automatically.
---
## Complete Examples
### Basic Setup
Minimal configuration using defaults (Vertex AI is enabled by the presence of the `vertex` section):
```yaml filename="Basic Vertex AI Setup"
endpoints:
anthropic:
vertex:
region: us-east5
```
This uses:
- Region: `us-east5`
- Service key: `api/data/auth.json` (or `GOOGLE_SERVICE_KEY_FILE` env var)
- Project ID: Auto-detected from service key
- Models: All known Claude models
### Production Setup with Model Mapping
Full configuration with custom model names and titles:
```yaml filename="Production Vertex AI Setup"
endpoints:
anthropic:
streamRate: 20
titleModel: "haiku"
titleMethod: "completion"
vertex:
region: "global"
serviceKeyFile: "${GOOGLE_SERVICE_KEY_FILE}"
models:
opus:
deploymentName: claude-opus-4-5@20251101
sonnet:
deploymentName: claude-sonnet-4-20250514
haiku:
deploymentName: claude-3-5-haiku@20241022
```
### Multi-Region Setup
You can only configure one region per deployment. For multi-region needs, consider using separate LibreChat instances or custom endpoints.
---
## Troubleshooting
### Common Errors
**"Could not load the default credentials"**
- Ensure the service account key file exists at the specified path
- Check file permissions (must be readable by the LibreChat process)
- Verify the JSON file is valid and not corrupted
**"Permission denied" or "403 Forbidden"**
- Verify the service account has the `Vertex AI User` role
- Ensure Claude models are enabled in your Vertex AI Model Garden
- Check that the service account belongs to the correct project
**"Model not found"**
- Check that the model ID in `deploymentName` is correct
- Verify the model is available in your selected region
- Ensure the model is enabled in your Vertex AI Model Garden
### Region Issues
**"Invalid region" or "Region not supported"**
- Use one of the supported regions listed above
- Try using `global` region which provides automatic routing
- Check [Google Cloud's documentation](https://cloud.google.com/vertex-ai/generative-ai/docs/partner-models/use-claude#regions) for the latest list of regions where Claude is available
**"Model not available in region"**
- Not all Claude models are available in all regions
- Try switching to `global` region for automatic routing to an available region
- Check the [Vertex AI Model Garden](https://console.cloud.google.com/vertex-ai/model-garden) to see which models are available in your region
- Consider using a different region that has broader model availability (e.g., `us-east5`)
**Latency issues**
- If you're experiencing high latency, try using a region geographically closer to your users
- The `global` region automatically routes to the nearest available region
- For production workloads with strict latency requirements, test different regions and choose the one with best performance for your use case
### Verifying Setup
1. Ensure your service account key is valid:
```bash
gcloud auth activate-service-account --key-file=/path/to/key.json
gcloud auth list
```
2. Test Vertex AI access:
```bash
gcloud ai models list --region=us-east5
```
3. Verify Claude model access:
```bash
curl -X POST \
-H "Authorization: Bearer $(gcloud auth print-access-token)" \
-H "Content-Type: application/json" \
"https://us-east5-aiplatform.googleapis.com/v1/projects/YOUR_PROJECT/locations/us-east5/publishers/anthropic/models/claude-3-5-haiku@20241022:rawPredict" \
-d '{"anthropic_version": "vertex-2023-10-16", "max_tokens": 100, "messages": [{"role": "user", "content": "Hello"}]}'
```
---
## Notes
- Vertex AI and direct Anthropic API are mutually exclusive. When a `vertex` configuration section is present, the `ANTHROPIC_API_KEY` environment variable is ignored.
- Web search functionality is fully supported with Vertex AI.
- Prompt caching is supported via automatic header filtering for Vertex AI compatibility.
- Function calling and tool use work the same as with the direct Anthropic API.
# Assistants Endpoint Object Structure (/docs/configuration/librechat_yaml/object_structure/assistants_endpoint)
This page applies to both the `assistants` and `azureAssistants` endpoints.
**Note:** To enable `azureAssistants`, see the [Azure OpenAI Configuration](/docs/configuration/azure#using-assistants-with-azure) for more information.
## Example
```yaml filename="Assistants Endpoint"
endpoints:
# azureAssistants: # <-- Azure-specific configuration has the same structure as `assistants`
# pollIntervalMs: 500
# timeoutMs: 10000
assistants:
disableBuilder: false
# Use either `supportedIds` or `excludedIds` but not both
supportedIds: ["asst_supportedAssistantId1", "asst_supportedAssistantId2"]
# excludedIds: ["asst_excludedAssistantId"]
# `privateAssistants` do not work with `supportedIds` or `excludedIds`
# privateAssistants: false
# (optional) Models that support retrieval, will default to latest known OpenAI models that support the feature
# retrievalModels: ["gpt-4-turbo-preview"]
# (optional) Assistant Capabilities available to all users. Omit the ones you wish to exclude. Defaults to list below.
# capabilities: ["code_interpreter", "retrieval", "actions", "tools", "image_vision"]
```
> This configuration enables the builder interface for assistants, sets a polling interval of 500ms to check for run updates, and establishes a timeout of 10 seconds for assistant run operations.
## disableBuilder
**Key:**
**Default:** `false`
**Example:**
```yaml filename="endpoints / assistants / disableBuilder"
disableBuilder: false
```
## pollIntervalMs
**Key:**
**Default:** `2000`
**Example:**
```yaml filename="endpoints / assistants / pollIntervalMs"
pollIntervalMs: 2500
```
**Note:** Currently, this is only used by Azure Assistants. Higher values are recommended for Azure Assistants to avoid rate limiting errors.
## timeoutMs
**Key:**
**Default:** `180000`
**Example:**
```yaml filename="endpoints / assistants / timeoutMs"
timeoutMs: 10000
```
**Note:** Defaults to 3 minutes (180,000 ms). Run operation times can range between 50 seconds to 2 minutes but also exceed this. If the `timeoutMs` value is exceeded, the run will be cancelled.
## supportedIds
**Key:**
**Example:**
```yaml filename="endpoints / assistants / supportedIds"
supportedIds:
- "asst_supportedAssistantId1"
- "asst_supportedAssistantId2"
```
## excludedIds
**Key:**
**Example:**
```yaml filename="endpoints / assistants / excludedIds"
excludedIds:
- "asst_excludedAssistantId1"
- "asst_excludedAssistantId2"
```
## privateAssistants
**Key:**
**Default:** `false`
**Example:**
```yaml filename="endpoints / assistants / privateAssistants"
privateAssistants: false
```
## retrievalModels
**Key:**
**Default:** `[]` (uses the latest known OpenAI models that support retrieval)
**Example:**
```yaml filename="endpoints / assistants / retrievalModels"
retrievalModels:
- "gpt-4-turbo-preview"
```
## capabilities
**Key:**
**Default:** `["code_interpreter", "image_vision", "retrieval", "actions", "tools"]`
**Example:**
```yaml filename="endpoints / assistants / capabilities"
capabilities:
- "code_interpreter"
- "retrieval"
- "actions"
- "tools"
- "image_vision"
```
**Note:** This field is optional. If omitted, the default behavior is to include all the capabilities listed in the example.
# AWS Bedrock Object Structure (/docs/configuration/librechat_yaml/object_structure/aws_bedrock)
Integrating AWS Bedrock with your application allows you to seamlessly utilize multiple AI models hosted on AWS. This section details how to configure the AWS Bedrock endpoint for your needs.
## Example Configuration
```yaml filename="Example AWS Bedrock Object Structure"
endpoints:
bedrock:
titleModel: "anthropic.claude-3-haiku-20240307-v1:0"
streamRate: 35
availableRegions:
- "us-east-1"
- "us-west-2"
guardrailConfig:
guardrailIdentifier: "your-guardrail-id"
guardrailVersion: "1"
trace: "enabled"
```
> **Note:** AWS Bedrock endpoint supports all [Shared Endpoint Settings](/docs/configuration/librechat_yaml/object_structure/shared_endpoint_settings), including `streamRate`, `titleModel`, `titleMethod`, `titlePrompt`, `titlePromptTemplate`, and `titleEndpoint`. The settings shown below are specific to Bedrock or have Bedrock-specific defaults.
## titleModel
**Key:**
**Default:** Not specified
**Example:**
```yaml filename="titleModel"
titleModel: "anthropic.claude-3-haiku-20240307-v1:0"
```
## streamRate
**Key:**
**Default:** Not specified
**Example:**
```yaml filename="streamRate"
streamRate: 35
```
## availableRegions
**Key:**
**Default:** Not specified
**Example:**
```yaml filename="availableRegions"
availableRegions:
- "us-east-1"
- "us-west-2"
```
## models
**Key:**
**Default:** Not specified (uses default Bedrock model list)
**Example:**
```yaml filename="models"
endpoints:
bedrock:
models:
- "anthropic.claude-sonnet-4-20250514-v1:0"
- "anthropic.claude-haiku-4-20250514-v1:0"
- "us.anthropic.claude-sonnet-4-20250514-v1:0"
```
## inferenceProfiles
**Key:**
**Default:** Not specified
**Example:**
```yaml filename="inferenceProfiles"
endpoints:
bedrock:
inferenceProfiles:
"us.anthropic.claude-sonnet-4-20250514-v1:0": "${BEDROCK_INFERENCE_PROFILE_CLAUDE_SONNET}"
"anthropic.claude-3-7-sonnet-20250219-v1:0": "arn:aws:bedrock:us-west-2:123456789012:application-inference-profile/abc123"
```
**Notes:**
- Inference profiles enable cross-region inference, allowing you to route requests to models in different AWS regions
- Values support environment variable interpolation with `${ENV_VAR}` syntax
- The model ID in the key must match the model selected by the user in the UI
- Use with the `models` field to make cross-region model IDs available in the model selector
- For a complete guide on creating and managing inference profiles, see [AWS Bedrock Inference Profiles](/docs/configuration/pre_configured_ai/bedrock_inference_profiles)
**Combined Example:**
```yaml filename="Bedrock with inference profiles"
endpoints:
bedrock:
models:
- "us.anthropic.claude-sonnet-4-20250514-v1:0"
- "us.anthropic.claude-haiku-4-20250514-v1:0"
inferenceProfiles:
"us.anthropic.claude-sonnet-4-20250514-v1:0": "${BEDROCK_CLAUDE_SONNET_PROFILE}"
"us.anthropic.claude-haiku-4-20250514-v1:0": "${BEDROCK_CLAUDE_HAIKU_PROFILE}"
```
## guardrailConfig
**Key:**
**Sub-keys:**
**Example:**
```yaml filename="guardrailConfig"
endpoints:
bedrock:
guardrailConfig:
guardrailIdentifier: "abc123xyz"
guardrailVersion: "1"
trace: "enabled"
```
**Notes:**
- Guardrails help ensure responsible AI usage by filtering harmful content, PII, and other sensitive information
- The `guardrailIdentifier` can be found in the AWS Bedrock console under Guardrails
- Set `trace` to `"enabled"` or `"enabled_full"` during development to see which guardrail policies are triggered
- For production, set `trace` to `"disabled"` to reduce response payload size
## Notes
- The main configuration for AWS Bedrock is done through environment variables, additional forms of authentication are in development.
# Azure OpenAI Object Structure (/docs/configuration/librechat_yaml/object_structure/azure_openai)
Integrating Azure OpenAI Service with your application allows you to seamlessly utilize multiple deployments and region models hosted by Azure OpenAI. This section details how to configure the Azure OpenAI endpoint for your needs.
**[For a detailed guide on setting up Azure OpenAI configurations, click here](/docs/configuration/azure)**
## Example Configuration
```yaml filename="Example Azure OpenAI Object Structure"
endpoints:
azureOpenAI:
titleModel: "gpt-4-turbo"
groups:
- group: "my-westus" # arbitrary name
apiKey: "${WESTUS_API_KEY}"
instanceName: "actual-instance-name" # name of the resource group or instance
version: "2023-12-01-preview"
# baseURL: https://prod.example.com
# additionalHeaders:
# X-Custom-Header: value
models:
gpt-4-vision-preview:
deploymentName: gpt-4-vision-preview
version: "2024-02-15-preview"
gpt-3.5-turbo:
deploymentName: gpt-35-turbo
gpt-3.5-turbo-1106:
deploymentName: gpt-35-turbo-1106
gpt-4:
deploymentName: gpt-4
gpt-4-1106-preview:
deploymentName: gpt-4-1106-preview
- group: "my-eastus"
apiKey: "${EASTUS_API_KEY}"
instanceName: "actual-eastus-instance-name"
deploymentName: gpt-4-turbo
version: "2024-02-15-preview"
baseURL: "https://gateway.ai.cloudflare.com/v1/cloudflareId/azure/azure-openai/${INSTANCE_NAME}/${DEPLOYMENT_NAME}" # uses env variables
additionalHeaders:
X-Custom-Header: value
models:
gpt-4-turbo: true
```
> **Note:** Azure OpenAI endpoint supports all [Shared Endpoint Settings](/docs/configuration/librechat_yaml/object_structure/shared_endpoint_settings), including `streamRate`, `titleModel`, `titleMethod`, `titlePrompt`, `titlePromptTemplate`, and `titleEndpoint`.
## assistants
**Key:**
**Default:** Not specified
**Example:**
```yaml filename="endpoints / azureOpenAI / assistants"
assistants: true
```
## groups
**Key:**
**Default:** Not specified
**Note:** [See example above.](#example-configuration)
## Group Object Structure
Each item under `groups` is part of a list of records, each with the following fields:
### group
**Key:**
**Required:** yes
**Example:**
```yaml filename="endpoints / azureOpenAI / groups / {group_item} / group"
"group": "my-westus"
```
### apiKey
**Key:**
**Required:** yes
**Example:**
```yaml filename="endpoints / azureOpenAI / groups / {group_item} / apiKey"
apiKey: "${WESTUS_API_KEY}"
```
### instanceName
**Key:**
**Required:** yes
**Example:**
```yaml filename="endpoints / azureOpenAI / groups / {group_item} / instanceName"
# Using just the instance name (legacy format applied)
instanceName: "my-westus"
# OR using the full domain (new format)
instanceName: "my-westus.cognitiveservices.azure.com"
```
### version
**Key:**
**Default:** Not specified
**Example:**
```yaml filename="endpoints / azureOpenAI / groups / {group_item} / version"
version: "2023-12-01-preview"
```
### baseURL
**Key:**
**Default:** Not specified
**Example:**
```yaml filename="endpoints / azureOpenAI / groups / {group_item} / baseURL"
baseURL: "https://prod.example.com"
```
### additionalHeaders
**Key:**
**Default:** Not specified
**Example:**
```yaml filename="endpoints / azureOpenAI / groups / {group_item} / additionalHeaders"
additionalHeaders:
X-Custom-Header: ${YOUR_SECRET_CUSTOM_VARIABLE}
```
### serverless
**Key:**
**Default:** Not specified
**Example:**
```yaml filename="endpoints / azureOpenAI / groups / {group_item} / serverless"
serverless: true
```
### addParams
**Key:**
**Default:** Not specified
**Example:**
```yaml filename="endpoints / azureOpenAI / groups / {group_item} / addParams"
addParams:
safe_prompt: true
```
### dropParams
**Key:**
**Default:** Not specified
**Example:**
```yaml filename="endpoints / azureOpenAI / groups / {group_item} / dropParams"
dropParams: ["stop", "user", "frequency_penalty", "presence_penalty"]
```
### models
**Key:**
**Default:** Not specified
**Example:**
```yaml filename="endpoints / azureOpenAI / groups / {group_item} / models"
models:
gpt-4-vision-preview:
deploymentName: "arbitrary-deployment-name"
version: "2024-02-15-preview"
```
# Balance (/docs/configuration/librechat_yaml/object_structure/balance)
## Overview
The `balance` object allows administrators to configure how token credit balances are managed for users within LibreChat. Settings include enabling balance tracking, initializing user balances, and configuring automatic token refill behavior.
**Fields under `balance`:**
- `enabled`
- `startBalance`
- `autoRefillEnabled`
- `refillIntervalValue`
- `refillIntervalUnit`
- `refillAmount`
**Notes:**
- `balance` configurations apply globally across the application.
- Defaults are provided but can be customized based on requirements.
- Conditional logic can dynamically modify these settings based on other configurations.
## Example
```yaml filename="balance"
balance:
enabled: false
startBalance: 20000
autoRefillEnabled: false
refillIntervalValue: 30
refillIntervalUnit: "days"
refillAmount: 10000
```
## enabled
**Key:**
**Default:** `false`
**Example:**
```yaml filename="balance / enabled"
balance:
enabled: true
```
## startBalance
**Key:**
**Default:** `20000`
**Example:**
```yaml filename="balance / startBalance"
balance:
startBalance: 20000
```
## autoRefillEnabled
**Key:**
**Default:** `false`
**Example:**
```yaml filename="balance / autoRefillEnabled"
balance:
autoRefillEnabled: true
```
## refillIntervalValue
**Key:**
**Default:** `30`
**Example:**
```yaml filename="balance / refillIntervalValue"
balance:
refillIntervalValue: 30
```
## refillIntervalUnit
**Key:**
**Default:** `"days"`
**Example:**
```yaml filename="balance / refillIntervalUnit"
balance:
refillIntervalUnit: "days"
```
## refillAmount
**Key:**
**Default:** `10000`
**Example:**
```yaml filename="balance / refillAmount"
balance:
refillAmount: 10000
```
# Config Structure (/docs/configuration/librechat_yaml/object_structure/config)
**Note:** Fields not specifically mentioned as required are optional.
## version
- **required**
## cache
## fileStrategy
- **Options**: "local" | "firebase" | "s3" | "azure_blob"
- **Notes**:
- `"firebase"` is currently the only option that serves files through a true CDN (Content Delivery Network), which means images and avatars are delivered from edge locations globally. S3 and Azure Blob Storage are object storage backends — files are accessible but not CDN-served by default.
- S3 serves files via **presigned URLs** (temporary signed tokens) that expire. Once expired, any image or avatar referencing that URL will appear broken in the UI. This makes S3 unsuitable as a primary strategy for visual assets. See the [related discussion](https://github.com/danny-avila/LibreChat/discussions/10280#discussioncomment-14803903) for details.
- CloudFront (CDN for S3) is planned and in active development.
- For best performance of images and avatars, use `"firebase"` or configure `fileStrategies` to route `avatar` and `image` to a CDN-backed strategy.
- Please refer to the [File Storage & CDN documentation](/docs/configuration/cdn) for setup details
## fileStrategies
Allows granular control over file storage strategies for different file types.
- **Available Strategies**: "local" | "firebase" | "s3" | "azure_blob"
**Sub-keys:**
- **Notes**:
- This setting takes precedence over the single `fileStrategy` option
- If a specific file type is not configured, it falls back to `default`, then to `fileStrategy`, and finally to `"local"`
- Images and avatars need persistent, stable URLs to render correctly across the UI. S3 presigned URLs expire (AWS cap: 7 days for IAM users, hours for STS/role-based credentials), causing broken images in the model selector and chat UI. See the [related discussion](https://github.com/danny-avila/LibreChat/discussions/10280#discussioncomment-14803903) for full context. Use `"firebase"` (the only current CDN-backed strategy) for `avatar` and `image` to avoid this.
- CloudFront support for S3 is in active development and will eliminate presigned URL limitations.
- S3 and Azure Blob Storage are well-suited for `document` storage, where short-lived presigned download URLs are appropriate.
- Please refer to the [File Storage & CDN documentation](/docs/configuration/cdn) for setup details for each storage provider
**Examples:**
```yaml filename="fileStrategies - All in one place"
# Use a single strategy for all file types
fileStrategies:
default: "s3"
```
```yaml filename="fileStrategies - Mixed strategies"
# Route images and avatars to CDN, keep documents in object storage
fileStrategies:
avatar: "firebase" # CDN delivery for avatars
image: "firebase" # CDN delivery for generated/uploaded images
document: "s3" # Object storage for documents
```
```yaml filename="fileStrategies - Partial configuration"
# Only configure specific types, others use default
fileStrategies:
default: "local"
avatar: "firebase" # Only avatars use Firebase CDN, everything else is local
```
## filteredTools
- **Notes**:
- If `includedTools` and `filteredTools` are both specified, only `includedTools` will be recognized.
- Affects both `gptPlugins` and `assistants` endpoints
- You can find the names of the tools to filter in [`api/app/clients/tools/manifest.json`](https://github.com/danny-avila/LibreChat/blob/main/api/app/clients/tools/manifest.json)
- Use the `pluginKey` value
- Also, any listed under the ".well-known" directory [`api/app/clients/tools/.well-known`](https://github.com/danny-avila/LibreChat/blob/main/api/app/clients/tools/.well-known)
- Use the `name_for_model` value
## includedTools
- **Notes**:
- If `includedTools` and `filteredTools` are both specified, only `includedTools` will be recognized.
- Affects both `gptPlugins` and `assistants` endpoints
- You can find the names of the tools to filter in [`api/app/clients/tools/manifest.json`](https://github.com/danny-avila/LibreChat/blob/main/api/app/clients/tools/manifest.json)
- Use the `pluginKey` value
- Also, any listed under the ".well-known" directory [`api/app/clients/tools/.well-known`](https://github.com/danny-avila/LibreChat/blob/main/api/app/clients/tools/.well-known)
- Use the `name_for_model` value
## secureImageLinks
## imageOutputType
- **Note**: Case-sensitive. Google endpoint only supports "jpeg" and "png" output types.
- **Options**: "png" | "webp" | "jpeg"
## ocr
**Key:**
**Subkeys:**
see: [OCR Config Object Structure](/docs/configuration/librechat_yaml/object_structure/ocr)
## webSearch
**Key:**
**Subkeys:**
see: [Web Search Object Structure](/docs/configuration/librechat_yaml/object_structure/web_search)
## fileConfig
**Key:**
**Subkeys:**
## clientImageResize
**Key:**
**Subkeys:**
**Description:**
The `clientImageResize` configuration enables automatic client-side image resizing before upload. This feature helps:
- **Prevent upload failures** due to large image files exceeding server limits
- **Reduce bandwidth usage** by compressing images before transmission
- **Improve upload performance** with smaller file sizes
- **Maintain image quality** while optimizing file size
When enabled, images that exceed the specified `maxWidth` or `maxHeight` dimensions are automatically resized on the client side before being uploaded to the server. The resizing maintains the original aspect ratio while ensuring the image fits within the specified bounds.
**Example:**
```yaml filename="clientImageResize"
fileConfig:
clientImageResize:
enabled: true
maxWidth: 1920
maxHeight: 1080
quality: 0.8
compressFormat: "jpeg"
```
**Notes:**
- Only applies to image files (JPEG, PNG, WebP, etc.)
- Resizing occurs automatically when images exceed the specified dimensions
- Original aspect ratio is preserved during resizing
- The feature works with all supported image upload endpoints
- Quality setting only applies to JPEG and WebP formats
- Setting quality too low (< 0.5) may result in noticeable image degradation
see: [File Config Object Structure](/docs/configuration/librechat_yaml/object_structure/file_config)
## rateLimits
**Key:**
**Subkeys:**
**fileUploads Subkeys:**
**conversationsImport Subkeys:**
**tts Subkeys:**
**stt Subkeys:**
- **Example**:
```yaml filename="rateLimits"
rateLimits:
fileUploads:
ipMax: 100
ipWindowInMinutes: 60
userMax: 50
userWindowInMinutes: 60
conversationsImport:
ipMax: 100
ipWindowInMinutes: 60
userMax: 50
userWindowInMinutes: 60
stt:
ipMax: 100
ipWindowInMinutes: 1
userMax: 50
userWindowInMinutes: 1
tts:
ipMax: 100
ipWindowInMinutes: 1
userMax: 50
userWindowInMinutes: 1
```
## registration
**Key:**
**Subkeys:**
see also:
- [socialLogins](/docs/configuration/librechat_yaml/object_structure/registration#sociallogins),
- [alloweddomains](/docs/configuration/librechat_yaml/object_structure/registration#alloweddomains),
- [Registration Object Structure](/docs/configuration/librechat_yaml/object_structure/registration)
## memory
**Key:**
**Subkeys:**
see: [Memory Object Structure](/docs/configuration/librechat_yaml/object_structure/memory)
## summarization
**Key:**
**Subkeys:**
see: [Summarization Object Structure](/docs/configuration/librechat_yaml/object_structure/summarization)
## actions
**Key:**
**Subkeys:**
see also:
- [alloweddomains](/docs/configuration/librechat_yaml/object_structure/actions#alloweddomains),
- [Actions Object Structure](/docs/configuration/librechat_yaml/object_structure/actions)
## interface
**Key:**
**Subkeys:**
see: [Interface Object Structure](/docs/configuration/librechat_yaml/object_structure/interface)
## modelSpecs
**Key:**
**Subkeys:**
see: [Model Specs Object Structure](/docs/configuration/librechat_yaml/object_structure/model_specs)
## endpoints
**Key:**
**Subkeys:**
> **Note:** All endpoints support [Shared Endpoint Settings](/docs/configuration/librechat_yaml/object_structure/shared_endpoint_settings) which include `streamRate`, `titleModel`, `titleMethod`, `titlePrompt`, `titlePromptTemplate`, `titleEndpoint`, and `maxToolResultChars`. These can be configured individually per endpoint or globally using the `all` key. The `all` key does not accept `baseURL`.
## mcpSettings
**Key:**
**Subkeys:**
- **Notes**:
- This is a security feature to protect against abuse / misuse of internal addresses via MCP servers
- By default, LibreChat restricts MCP servers from connecting to internal, local, or private network addresses
- MCP servers using local IP addresses or domains must be **explicitly** allowed
- As with all yaml configuration changes, a LibreChat restart is required to take effect
- Supports domains, wildcard subdomains (`*.example.com`), docker domains, and IP addresses
**Example:**
```yaml filename="mcpSettings"
mcpSettings:
allowedDomains:
- "example.com" # Specific domain
- "*.example.com" # All subdomains
- "mcp-server" # Local Docker domain
- "172.24.1.165" # Internal network IP
```
see: [MCP Settings Object Structure](/docs/configuration/librechat_yaml/object_structure/mcp_settings)
## mcpServers
**Key:**
**Subkeys:**
', 'Object', 'Each key under `mcpServers` represents an individual MCP server configuration, identified by a unique name.', ''],
]}
/>
- **Notes**:
- Initialization happens at startup, and the app must be restarted for changes to take effect.
- The `` is a unique identifier for each MCP server configuration.
- Each MCP server can be configured using one of four connection types:
- `stdio`
- `websocket`
- `sse`
- `streamable-http`
- The `type` field specifies the connection type to the MCP server.
- If `type` is omitted, it defaults based on the presence and format of `url` or `command`:
- If `url` is specified and starts with `http` or `https`, `type` defaults to `sse`.
- If `url` is specified and starts with `ws` or `wss`, `type` defaults to `websocket`.
- If `command` is specified, `type` defaults to `stdio`.
- Additional configuration options include:
- `timeout`: Timeout in milliseconds for MCP server requests. Determines how long to wait for a response for tool requests.
- `initTimeout`: Timeout in milliseconds for MCP server initialization. Determines how long to wait for the server to initialize.
- `serverInstructions`: Controls whether server instructions are included in agent context. Can be `true` (use server-provided), `false` (disabled), or a custom string (overrides server-provided).
- `customUserVars`: (Optional) Defines custom variables (e.g., API keys, URLs) that individual users can set for an MCP server. These per-user values, provided through the UI, can then be referenced in the server's `headers` or `env` configurations using `{{VARIABLE_NAME}}` syntax. This allows for per-user authentication or customization for MCP tools.
- see: [MCP Servers Object Structure](/docs/configuration/librechat_yaml/object_structure/mcp_servers)
**Example:**
```yaml filename="mcpServers"
mcpServers:
everything:
# type: sse # type can optionally be omitted
url: http://localhost:3001/sse
timeout: 30000
initTimeout: 10000
serverInstructions: true # Use server-provided instructions
puppeteer:
type: stdio
command: npx
args:
- -y
- "@modelcontextprotocol/server-puppeteer"
timeout: 30000
initTimeout: 10000
serverInstructions: "Do not access any local files or local/internal IP addresses"
filesystem:
# type: stdio
command: npx
args:
- -y
- "@modelcontextprotocol/server-filesystem"
- /home/user/LibreChat/
iconPath: /home/user/LibreChat/client/public/assets/logo.svg
mcp-obsidian:
command: npx
args:
- -y
- "mcp-obsidian"
- /path/to/obsidian/vault
streamable-http-example:
type: streamable-http
url: https://example.com/mcp
headers:
Authorization: "Bearer ${API_TOKEN}"
timeout: 30000
per-user-crendentials-example:
type: sse
url: "https//some.mcp/sse"
headers:
X-Custom-Auth-Token: "{{USER_API_KEY}}" # Placeholder for the user-provided API key, defined in `customUserVars` below.
customUserVars:
USER_API_KEY:
title: "Service API Key"
description: "Your personal API key for this service. You can get it here."
serverInstructions: true
```
see: [MCP Servers Object Structure](/docs/configuration/librechat_yaml/object_structure/mcp_servers)
## speech
**Key:**
**Subkeys:**
see: [Speech Object Structure](/docs/configuration/librechat_yaml/object_structure/speech)
## turnstile
**Key:**
**Subkeys:**
see: [Turnstile Object Structure](/docs/configuration/librechat_yaml/object_structure/turnstile)
## transactions
**Key:**
**Subkeys:**
see: [Transactions Object Structure](/docs/configuration/librechat_yaml/object_structure/transactions)
## Additional links
- [Summarization Object Structure](/docs/configuration/librechat_yaml/object_structure/summarization)
- [AWS Bedrock Object Structure](/docs/configuration/librechat_yaml/object_structure/aws_bedrock)
- [Custom Endpoint Object Structure](/docs/configuration/librechat_yaml/object_structure/custom_endpoint)
- [Azure OpenAI Endpoint Object Structure](/docs/configuration/librechat_yaml/object_structure/azure_openai)
- [Assistants Endpoint Object Structure](/docs/configuration/librechat_yaml/object_structure/assistants_endpoint)
- [Agents](/docs/configuration/librechat_yaml/object_structure/agents)
- [OCR Config Object Structure](/docs/configuration/librechat_yaml/object_structure/ocr)
- [Speech Object Structure](/docs/configuration/librechat_yaml/object_structure/speech)
- [Turnstile Object Structure](/docs/configuration/librechat_yaml/object_structure/turnstile)
- [Transactions Object Structure](/docs/configuration/librechat_yaml/object_structure/transactions)
- [Balance Object Structure](/docs/configuration/librechat_yaml/object_structure/balance)
- [Web Search Object Structure](/docs/configuration/librechat_yaml/object_structure/web_search)
- [Memory Object Structure](/docs/configuration/librechat_yaml/object_structure/memory)
# Custom Endpoint Object Structure (/docs/configuration/librechat_yaml/object_structure/custom_endpoint)
Each endpoint in the `custom` array should have the following structure:
## Example
```yaml filename="Endpoint Object Structure"
endpoints:
custom:
# Example using Mistral AI API
- name: "Mistral"
apiKey: "${YOUR_ENV_VAR_KEY}"
baseURL: "https://api.mistral.ai/v1"
models:
default: ["mistral-tiny", "mistral-small", "mistral-medium", "mistral-large-latest"]
titleConvo: true
titleModel: "mistral-tiny"
modelDisplayLabel: "Mistral"
# addParams:
# safe_prompt: true # Mistral specific value for moderating messages
# NOTE: For Mistral, it is necessary to drop the following parameters or you will encounter a 422 Error:
dropParams: ["stop", "user", "frequency_penalty", "presence_penalty"]
```
## name
**Key:**
**Required**
**Example:**
```yaml filename="endpoints / custom / name"
name: "Mistral"
```
## apiKey
**Key:**
**Required**
**Example:**
```yaml filename="endpoints / custom / apiKey"
apiKey: "${MISTRAL_API_KEY}"
```
or
```yaml filename="endpoints / custom / apiKey"
apiKey: "your_api_key"
```
or
```yaml filename="endpoints / custom / apiKey"
apiKey: "user_provided"
```
## baseURL
**Key:**
**Required**
**Example:**
```yaml filename="endpoints / custom / baseURL"
baseURL: "https://api.mistral.ai/v1"
```
or
```yaml filename="endpoints / custom / baseURL"
baseURL: "${MISTRAL_BASE_URL}"
```
or
```yaml filename="endpoints / custom / baseURL"
baseURL: "user_provided"
```
**Notes:**
* If the `baseURL` you set is the full completions endpoint, you can set the [directEndpoint](#directendpoint) field to `true` to use it directly.
- This is necessary because the app appends "/chat/completions" or "/completion" to the `baseURL` by default.
## iconURL
**Key:**
**Default:** `""`
**Example:**
```yaml filename="endpoints / custom / iconURL"
iconURL: https://github.com/danny-avila/LibreChat/raw/main/docs/assets/LibreChat.svg
```
**Notes:**
* If you want to use existing project icons, define the endpoint `name` as one of the main endpoints (case-sensitive):
- "openAI" | "azureOpenAI" | "google" | "anthropic" | "assistants" | "gptPlugins"
* There are also "known endpoints" (case-insensitive), which have icons provided. If your endpoint `name` matches the following names, you should omit this field:
- "Anyscale"
- "APIpie"
- "Cohere"
- "Deepseek"
- "Fireworks"
- "groq"
- "Helicone"
- "Huggingface"
- "Mistral"
- "MLX"
- "Moonshot"
- "ollama"
- "OpenRouter"
- "Perplexity"
- "Qwen"
- "ShuttleAI"
- "together.ai"
- "Unify"
- "xai"
## models
**Key:**
**Required**
**Properties:**
### default
**Key:**
**Required**
**Example:**
```yaml filename="endpoints / custom / models / default"
default:
- "mistral-tiny"
- "mistral-small"
- "mistral-medium"
```
### fetch
**Key:**
**Default:** `false`
**Example:**
```yaml filename="endpoints / custom / models / fetch"
fetch: true
```
### userIdQuery
**Key:**
**Default:** `false`
**Example:**
```yaml filename="endpoints / custom / models / userIdQuery"
userIdQuery: true
```
## titleConvo
**Key:**
**Default:** `false`
**Example:**
```yaml filename="endpoints / custom / titleConvo"
titleConvo: true
```
## titleMethod
**Key:**
**Default:** `"completion"`
**Available Methods:**
- **`"completion"`** - Uses standard completion API without tools/functions. Compatible with most LLMs.
- **`"structured"`** - Uses structured output for title generation. Requires provider/model support.
- **`"functions"`** - Legacy alias for "structured". Functionally identical.
**Example:**
```yaml filename="endpoints / custom / titleMethod"
titleMethod: "completion"
```
## titleModel
**Key:**
**Default:** `"gpt-3.5-turbo"`
**Example:**
```yaml filename="endpoints / custom / titleModel"
titleModel: "mistral-tiny"
```
```yaml filename="endpoints / custom / titleModel"
titleModel: "current_model"
```
## titlePrompt
**Key:**
**Default:**
```
Analyze this conversation and provide:
1. The detected language of the conversation
2. A concise title in the detected language (5 words or less, no punctuation or quotation)
{convo}
```
**Notes:**
- Must always include the `{convo}` placeholder
- The `{convo}` placeholder will be replaced with the formatted conversation
**Example:**
```yaml filename="endpoints / custom / titlePrompt"
titlePrompt: "Create a brief, descriptive title for the following conversation:\n\n{convo}\n\nTitle:"
```
## titlePromptTemplate
**Key:**
**Default:** `"User: {input}\nAI: {output}"`
**Notes:**
- Must include both `{input}` and `{output}` placeholders
- Controls how the conversation is formatted when inserted into `titlePrompt`
**Example:**
```yaml filename="endpoints / custom / titlePromptTemplate"
titlePromptTemplate: "Human: {input}\n\nAssistant: {output}"
```
## titleEndpoint
**Key:**
**Default:** Uses the current custom endpoint
**Accepted Values:**
- `openAI`
- `azureOpenAI`
- `google`
- `anthropic`
- `bedrock`
- Another custom endpoint name
**Example:**
```yaml filename="endpoints / custom / titleEndpoint"
# Use a different custom endpoint for titles
endpoints:
custom:
- name: "my-chat-endpoint"
apiKey: "${CHAT_API_KEY}"
baseURL: "https://api.example.com/v1/chat"
models:
default: ["gpt-4"]
titleEndpoint: "my-title-endpoint"
- name: "my-title-endpoint"
apiKey: "${TITLE_API_KEY}"
baseURL: "https://api.example.com/v1/title"
models:
default: ["gpt-3.5-turbo"]
```
## modelDisplayLabel
**Key:**
**Default:** `"AI"`
**Example:**
```yaml filename="endpoints / custom / modelDisplayLabel"
modelDisplayLabel: "Mistral"
```
## addParams
**Key:**
**Example:**
```yaml filename="endpoints / custom / addParams"
addParams:
safe_prompt: true
max_tokens: 2048
```
**Notes:**
- The `addParams` field allows you to include additional parameters that are not part of the default payload(see the ["Default Parameters"](/docs/configuration/librechat_yaml/object_structure/default_params) section). This is particularly useful for API-specific options.
## dropParams
**Key:**
**Example:**
```yaml filename="endpoints / custom / dropParams"
dropParams:
- "stop"
- "user"
- "frequency_penalty"
- "presence_penalty"
```
**Note:**
- The `dropParams` field allows you to remove ["Default Parameters"](/docs/configuration/librechat_yaml/object_structure/default_params) that are sent with every request. This is helpful when working with APIs that do not accept or recognize certain parameters.
## headers
**Key:**
**Example:**
```yaml filename="endpoints / custom / headers"
headers:
x-api-key: "${ENVIRONMENT_VARIABLE}"
Content-Type: "application/json"
X-User-ID: "{{LIBRECHAT_USER_ID}}"
X-User-Email: "{{LIBRECHAT_USER_EMAIL}}"
```
**Note:** Supports dynamic environment variable values, which use the format: `"${VARIABLE_NAME}"`.
**Available User Field Placeholders:**
| Placeholder | User Field | Type | Description |
|------------|------------|------|-------------|
| `{{LIBRECHAT_USER_ID}}` | `id` | String | User's unique identifier |
| `{{LIBRECHAT_USER_NAME}}` | `name` | String | User's display name |
| `{{LIBRECHAT_USER_USERNAME}}` | `username` | String | User's username |
| `{{LIBRECHAT_USER_EMAIL}}` | `email` | String | User's email address |
| `{{LIBRECHAT_USER_PROVIDER}}` | `provider` | String | Authentication provider (e.g., "email", "google", "github") |
| `{{LIBRECHAT_USER_ROLE}}` | `role` | String | User's role (e.g., "user", "admin") |
| `{{LIBRECHAT_USER_GOOGLEID}}` | `googleId` | String | Google account ID |
| `{{LIBRECHAT_USER_FACEBOOKID}}` | `facebookId` | String | Facebook account ID |
| `{{LIBRECHAT_USER_OPENIDID}}` | `openidId` | String | OpenID account ID |
| `{{LIBRECHAT_USER_SAMLID}}` | `samlId` | String | SAML account ID |
| `{{LIBRECHAT_USER_LDAPID}}` | `ldapId` | String | LDAP account ID |
| `{{LIBRECHAT_USER_GITHUBID}}` | `githubId` | String | GitHub account ID |
| `{{LIBRECHAT_USER_DISCORDID}}` | `discordId` | String | Discord account ID |
| `{{LIBRECHAT_USER_APPLEID}}` | `appleId` | String | Apple account ID |
| `{{LIBRECHAT_USER_EMAILVERIFIED}}` | `emailVerified` | Boolean → String | Email verification status ("true" or "false") |
| `{{LIBRECHAT_USER_TWOFACTORENABLED}}` | `twoFactorEnabled` | Boolean → String | 2FA status ("true" or "false") |
| `{{LIBRECHAT_USER_TERMSACCEPTED}}` | `termsAccepted` | Boolean → String | Terms acceptance status ("true" or "false") |
**Available Request Body Placeholders:**
| Placeholder | Body Field | Type | Description |
|------------|------------|------|-------------|
| `{{LIBRECHAT_BODY_CONVERSATIONID}}` | `conversationId` | String | Current conversation identifier |
| `{{LIBRECHAT_BODY_PARENTMESSAGEID}}` | `parentMessageId` | String | Parent message identifier |
| `{{LIBRECHAT_BODY_MESSAGEID}}` | `messageId` | String | Current message identifier |
**Example using request body placeholders:**
```yaml filename="endpoints / custom / headers with body placeholders"
headers:
X-Conversation-ID: "{{LIBRECHAT_BODY_CONVERSATIONID}}"
X-Parent-Message-ID: "{{LIBRECHAT_BODY_PARENTMESSAGEID}}"
X-Message-ID: "{{LIBRECHAT_BODY_MESSAGEID}}"
```
## directEndpoint
**Key:**
**Default:** `false`
**Example:**
```yaml filename="endpoints / custom / directEndpoint"
directEndpoint: true
```
## titleMessageRole
- **Options**: `"system"` | `"user"` | `"assistant"`
**Key:**
**Default:** `"system"`
**Example:**
```yaml filename="endpoints / custom / titleMessageRole"
titleMessageRole: "user"
```
# Custom Parameters (/docs/configuration/librechat_yaml/object_structure/custom_params)
### Picking A Default Parameters Set
By default, when you specify a custom endpoint in `librechat.yaml` config file, it will use the default parameters of the OpenAI API. However, you can override these defaults by specifying the `customParams.defaultParamsEndpoint` field within the definition of your custom endpoint. For example, to use Google parameters for your custom endpoint:
```yaml filename="excerpt of librechat.yaml"
endpoints:
custom:
- name: 'Google Gemini'
apiKey: ...
baseURL: ...
customParams:
defaultParamsEndpoint: 'google'
```
Your "Google Gemini" endpoint will now display parameters for Google API when you create a new agent or preset.
### Overriding Parameter Definitions
On top of that, you can also fine tune the parameters provided for your custom endpoint. For example, the `temperature` parameter for google endpoint is a slide with range from 0.0 to 1.0, and default of 1.0, you can update the `librechat.yaml` file to override these values:
```yaml filename="excerpt of librechat.yaml"
endpoints:
custom:
- name: 'Google Gemini'
apiKey: ...
baseURL: ...
customParams:
defaultParamsEndpoint: 'google'
paramDefinitions:
- key: temperature
range:
min: 0
max: 0.7
step: 0.1
default: 0.5
```
As a result, the `Temperature` slider will be limited to the range of `0.0` and `0.7` with step of `0.1`, and a default of `0.5`. The rest of the parameters will be set to their default values.
### Setting Default Parameter Values
You can specify default values for parameters that will be automatically applied when making API requests. This is useful for setting baseline parameter values for your custom endpoint without requiring users to manually configure them each time.
The `default` field in `paramDefinitions` allows you to set default values that are applied when parameters are undefined. These defaults follow a priority order to ensure proper override behavior:
**Priority Order (lowest to highest):**
1. **Default values from `paramDefinitions`** - Applied first when parameter is undefined
2. **`addParams`** - Can override default values
3. **User-configured `modelOptions`** - Highest priority, overrides everything
```yaml filename="excerpt of librechat.yaml"
endpoints:
custom:
- name: 'My Custom LLM'
apiKey: ...
baseURL: ...
customParams:
defaultParamsEndpoint: 'openAI'
paramDefinitions:
- key: temperature
default: 0.7
- key: topP
default: 0.9
- key: maxTokens
default: 2000
```
In this example:
- If a user doesn't specify `temperature`, it defaults to `0.7`
- If a user explicitly sets `temperature` to `0.5`, their value (`0.5`) takes precedence
- The `addParams` field (if configured) can override these defaults
- User selections in the UI always have the highest priority
### Anthropic
When using `defaultParamsEndpoint: 'anthropic'`, the system provides special handling that goes beyond just displaying and using Anthropic parameter sets:
**Anthropic API Compatibility**
Setting `defaultParamsEndpoint: 'anthropic'` enables full Anthropic API compatibility for parameters, headers, and payload formatting:
- Parameters are sent to your custom endpoint exactly as the Anthropic API expects
- This is essential for proxy services like LiteLLM that pass non-OpenAI-spec parameters directly to the underlying provider
- Anthropic-specific parameters like `thinking` are properly formatted
- The `messages` payload is formatted according to Anthropic's requirements (thinking blocks and prompt caching)
- Appropriate beta headers are automatically added based on the model as when using Anthropic directly
This is mainly necessary to properly format the `thinking` parameter, which is not OpenAI-compatible:
```json
{
"thinking": {
"type": "enabled",
"budget_tokens": 10000
}
}
```
Additionally, the system automatically adds model-specific Anthropic beta headers such as:
- `anthropic-beta: prompt-caching-2024-07-31` for prompt caching support
- `anthropic-beta: context-1m-2025-08-07` for extended context models
- Model-specific feature flags based on the Claude model being used
This ensures full compatibility when routing through proxy services or directly to Anthropic-compatible endpoints.
**Implementation Status**
Currently, this automatic parameter and header handling is fully implemented for Anthropic endpoints. Similar behavior for other `defaultParamsEndpoint` values (e.g., `google`, `bedrock`) is planned for future updates.
# Default Parameters (/docs/configuration/librechat_yaml/object_structure/default_params)
**Note**
- The purpose of this part of the documentation is to help understand what `addParams` and `dropParams` do. You **CANNOT** globally configure the parameters and their values that LibeChat sends by default, it can only be configured within a single endpoint.
Custom endpoints share logic with the OpenAI endpoint, and thus have default parameters tailored to the OpenAI API.
```yaml filename="Default Parameters"
{
"model": "your-selected-model",
"user": "LibreChat_User_ID",
"stream": true,
"messages": [
{
"role": "user",
"content": "hi how are you",
},
],
}
```
### Breakdown
- `model`: The selected model from list of models.
- `user`: A unique identifier representing your end-user, which can help OpenAI to [monitor and detect abuse](https://platform.openai.com/docs/api-reference/chat/create#chat-create-user).
- `stream`: If set, partial message deltas will be sent, like in ChatGPT. Otherwise, generation will only be available when completed.
- `messages`: [OpenAI format for messages](https://platform.openai.com/docs/api-reference/chat/create#chat-create-messages); the `name` field is added to messages with `system` and `assistant` roles when a custom name is specified via preset.
**Note:** The `max_tokens` field is not sent to use the maximum amount of tokens available, which is default OpenAI API behavior. Some alternate APIs require this field, or it may default to a very low value and your responses may appear cut off; in this case, you should add it to `addParams` field as shown in the [Custom Endpoint Object Structure](/docs/configuration/librechat_yaml/object_structure/custom_endpoint).
# File Config Object Structure (/docs/configuration/librechat_yaml/object_structure/file_config)
## Overview
The `fileConfig` object allows you to configure file handling settings for the application, including size limits and MIME type restrictions. This section provides a detailed breakdown of the `fileConfig` object structure.
There are 8 main fields under `fileConfig`:
- `endpoints`
- `serverFileSizeLimit`
- `avatarSizeLimit`
- `imageGeneration`
- `fileTokenLimit`
- `ocr`
- `text`
- `stt`
**Notes:**
- At the time of writing, the Assistants endpoint [supports filetypes from this list](https://platform.openai.com/docs/assistants/tools/file-search#supported-files).
- OpenAI, Azure OpenAI, Google, and Custom endpoints support files through the [RAG API.](../../rag_api.mdx)
- OpenAI, Azure OpenAI, Anthropic, Google, and AWS Bedrock endpoints support direct file uploads via [Upload to Provider](/docs/features/ocr#5-upload-files-to-provider-direct).
- The `ocr`, `text`, and `stt` sections control file processing for features like [Upload as Text](/docs/features/upload_as_text) and [OCR](/docs/features/ocr)
- Any other endpoints not mentioned, like Plugins, do not support file uploads (yet).
- The Assistants endpoint has a defined endpoint value of `assistants`. All other endpoints use the defined value `default`
- For non-assistants endpoints, you can adjust file settings for all of them under `default`
- If you'd like to adjust settings for a specific endpoint, you can list their corresponding endpoint names:
- `assistants`
- does not use "default" as it has defined defaults separate from the others.
- `openAI`
- `azureOpenAI`
- `google`
- `bedrock`
- `YourCustomEndpointName`
- You can omit values, in which case, the app will use the default values as defined per endpoint type listed below.
- LibreChat counts 1 megabyte as follows: `1 x 1024 x 1024`
## Example
```yaml filename="fileConfig"
fileConfig:
endpoints:
assistants:
fileLimit: 5
fileSizeLimit: 10
totalSizeLimit: 50
supportedMimeTypes:
- "image/.*"
- "application/pdf"
openAI:
disabled: true
default:
totalSizeLimit: 20
YourCustomEndpointName:
fileLimit: 5
fileSizeLimit: 1000
supportedMimeTypes:
- "image/.*"
serverFileSizeLimit: 1000
avatarSizeLimit: 2
fileTokenLimit: 100000
imageGeneration:
percentage: 100
px: 1024
ocr:
supportedMimeTypes:
- "^image/(jpeg|gif|png|webp|heic|heif)$"
- "^application/pdf$"
- "^application/vnd\\.openxmlformats-officedocument\\.(wordprocessingml\\.document|presentationml\\.presentation|spreadsheetml\\.sheet)$"
- "^application/vnd\\.ms-(word|powerpoint|excel)$"
- "^application/epub\\+zip$"
text:
supportedMimeTypes:
- "^text/(plain|markdown|csv|json|xml|html|css|javascript|typescript|x-python|x-java|x-csharp|x-php|x-ruby|x-go|x-rust|x-kotlin|x-swift|x-scala|x-perl|x-lua|x-shell|x-sql|x-yaml|x-toml)$"
stt:
supportedMimeTypes:
- "^audio/(mp3|mpeg|mpeg3|wav|wave|x-wav|ogg|vorbis|mp4|x-m4a|flac|x-flac|webm)$"
```
## serverFileSizeLimit
```yaml filename="fileConfig / serverFileSizeLimit"
fileConfig:
serverFileSizeLimit: 1000
```
## avatarSizeLimit
```yaml filename="fileConfig / avatarSizeLimit"
fileConfig:
avatarSizeLimit: 2
```
## imageGeneration
`imageGeneration` supports the following parameters:
- `percentage` (Integer)
- The output size of the generated image expressed as a percentage (e.g., `100` means 100% of base size).
- Use this to scale the output image relative to a default or original size.
- `px` (Integer)
- Specifies the output image dimension in pixels (e.g., `1024`).
- Use this to explicitly set the output size of the generated image regardless of base size.
You may set only one of these parameters (`percentage` or `px`), not both, depending on your use case
Example configuration:
```yaml filename="fileConfig / imageGeneration"
fileConfig:
imageGeneration:
percentage: 100
px: 1024
```
## fileTokenLimit
**Description:** When attaching text content, LibreChat truncates the text at runtime to the configured token limit just before prompt construction.
**Default:** `100000`
```yaml filename="fileConfig / fileTokenLimit"
fileConfig:
fileTokenLimit: 100000
```
## ocr
**Description:** The `ocr` section configures which file types should be processed using OCR functionality for extracting text from visual documents.
**Note:** This section controls file type matching for OCR processing. To enable agent capabilities and configure OCR services, see:
- [Agents Configuration](/docs/configuration/librechat_yaml/object_structure/agents#capabilities) for the `ocr` and `context` capabilities
- [OCR Configuration](/docs/configuration/librechat_yaml/object_structure/ocr) for OCR service setup
### supportedMimeTypes
**Default:** Images, PDFs, and Office documents
```yaml filename="fileConfig / ocr / supportedMimeTypes"
fileConfig:
ocr:
supportedMimeTypes:
- "^image/(jpeg|gif|png|webp|heic|heif)$"
- "^application/pdf$"
- "^application/vnd\\.openxmlformats-officedocument\\.(wordprocessingml\\.document|presentationml\\.presentation|spreadsheetml\\.sheet)$"
- "^application/vnd\\.ms-(word|powerpoint|excel)$"
- "^application/epub\\+zip$"
```
## text
**Description:** The `text` section configures which file types should be processed using direct text extraction.
**Note:** Text parsing is the default method used by the "Upload as Text" feature (controlled by the `context` capability). It first attempts to use the text parsing library from the RAG API, and if the RAG API is not connected, it falls back to a simpler text extraction method without requiring any external services. See [Upload as Text](/docs/features/upload_as_text) for more information.
### supportedMimeTypes
**Default:** All text files and common programming languages
```yaml filename="fileConfig / text / supportedMimeTypes"
fileConfig:
text:
supportedMimeTypes:
- "^text/(plain|markdown|csv|json|xml|html|css|javascript|typescript|x-python|x-java|x-csharp|x-php|x-ruby|x-go|x-rust|x-kotlin|x-swift|x-scala|x-perl|x-lua|x-shell|x-sql|x-yaml|x-toml)$"
```
## stt
**Description:** The `stt` section configures which audio file types should be processed using Speech-to-Text functionality for converting audio to text.
### supportedMimeTypes
**Default:** Common audio formats
```yaml filename="fileConfig / stt / supportedMimeTypes"
fileConfig:
stt:
supportedMimeTypes:
- "^audio/(mp3|mpeg|mpeg3|wav|wave|x-wav|ogg|vorbis|mp4|x-m4a|flac|x-flac|webm)$"
```
**Notes:**
- Files matching `text` patterns are processed with simple text extraction
- Files matching `ocr` patterns are processed with the provided OCR service
- Files matching `stt` patterns are processed with Speech-to-Text transcription
- **Processing precedence: OCR > STT > text parsing > fallback**
- Files not matching any pattern will fall back to text parsing
## File Processing Priority
LibreChat processes uploaded files based on MIME type matching with the following **priority order**:
1. **OCR** - If file matches `ocr.supportedMimeTypes` AND OCR is configured
2. **STT** - If file matches `stt.supportedMimeTypes` AND STT is configured
3. **Text Parsing** - If file matches `text.supportedMimeTypes`
4. **Fallback** - Text parsing as last resort
This processing order ensures optimal extraction quality while maintaining functionality even when specialized services (OCR/STT) are not configured.
### Processing Examples
**PDF file with OCR configured:**
- File matches `ocr.supportedMimeTypes`
- **Uses OCR** to extract text
- Better quality for scanned PDFs and images
**PDF file without OCR configured:**
- File matches `text.supportedMimeTypes` (or uses fallback)
- **Uses text parsing** library
- Works well for digital PDFs with selectable text
**Python file:**
- File matches `text.supportedMimeTypes`
- **Uses text parsing** (no OCR needed)
- Direct text extraction
**Audio file with STT configured:**
- File matches `stt.supportedMimeTypes`
- **Uses STT** to transcribe audio to text
**Image file without OCR configured:**
- File matches `ocr.supportedMimeTypes` but OCR not available
- **Falls back to text parsing**
- Limited extraction capability without OCR
This priority system allows features like "Upload as Text" to work without requiring OCR configuration, while still leveraging OCR when available for improved extraction quality.
## endpoints
**Description:** Each object under endpoints is a record that can have the following settings:
### Overview
- `disabled`
- Whether file handling is disabled for the endpoint.
- `fileLimit`
- The maximum number of files allowed per upload request.
- `fileSizeLimit`
- The maximum size for a single file. In units of MB (e.g. use `20` for 20 megabytes)
- `totalSizeLimit`
- The total maximum size for all files in a single request. In units of MB (e.g. use `20` for 20 megabytes)
- `supportedMimeTypes`
- A list of [Regular Expressions](https://en.wikipedia.org/wiki/Regular_expression) specifying what MIME types are allowed for upload. This can be customized to restrict file types.
## disabled
**Default:** `false`
```yaml filename="fileConfig / endpoints / {endpoint_record} / disabled"
openAI:
disabled: true
```
## fileLimit
**Key:**
**Default:** Varies by endpoint
```yaml filename="fileConfig / endpoints / {endpoint_record} / fileLimit"
assistants:
fileLimit: 5
```
## fileSizeLimit
**Key:**
**Default:** Varies by endpoint
```yaml filename="fileConfig / endpoints / {endpoint_record} / fileSizeLimit"
YourCustomEndpointName:
fileSizeLimit: 1000
```
## totalSizeLimit
**Key:**
**Default:** Varies by endpoint
```yaml filename="fileConfig / endpoints / {endpoint_record} / totalSizeLimit"
assistants:
totalSizeLimit: 50
```
## supportedMimeTypes
**Key:**
**Default:** Varies by endpoint
```yaml filename="fileConfig / endpoints / {endpoint_record} / supportedMimeTypes"
assistants:
supportedMimeTypes:
- "image/.*"
- "application/pdf"
```
# Interface Object Structure (/docs/configuration/librechat_yaml/object_structure/interface)
## Overview
The `interface` object allows for customization of various user interface elements within the application, including visibility and behavior settings for components such as menus, panels, and links. This section provides a detailed breakdown of the `interface` object structure.
These are fields under `interface`:
- `mcpServers`
- `privacyPolicy`
- `termsOfService`
- `modelSelect`
- `parameters`
- `presets`
- `prompts`
- `bookmarks`
- `memories`
- `multiConvo`
- `agents`
- `temporaryChat`
- `temporaryChatRetention`
- `customWelcome`
- `runCode`
- `webSearch`
- `fileSearch`
- `fileCitations`
- `peoplePicker`
- `marketplace`
**Notes:**
- The `interface` configurations are applied globally within the application.
- Default values are provided for most settings but can be overridden based on specific requirements or conditions.
- Conditional logic in the application can further modify these settings based on other configurations like model specifications.
## Example
```yaml filename="interface"
interface:
mcpServers:
placeholder: "MCP Servers"
use: true
create: true
share: false
public: false
trustCheckbox:
label: "I trust this server"
subLabel: "Only enable servers you trust"
privacyPolicy:
externalUrl: "https://example.com/privacy"
openNewTab: true
termsOfService:
externalUrl: "https://example.com/terms"
openNewTab: true
modalAcceptance: true
modalTitle: "Terms of Service"
modalContent: |
# Terms of Service
## Introduction
Welcome to LibreChat!
modelSelect: false
parameters: true
presets: false
prompts:
use: true
create: true
share: true
public: false
bookmarks: true
multiConvo: true
agents:
use: true
create: true
share: true
public: false
customWelcome: "Hey {{user.name}}! Welcome to LibreChat"
runCode: true
webSearch: true
fileSearch: true
fileCitations: true
```
## mcpServers
**Key:**
**Sub-keys:**
**trustCheckbox Sub-keys:**
**Example:**
```yaml filename="interface / mcpServers"
interface:
mcpServers:
placeholder: "Select MCP Server"
use: true
create: true
share: false
trustCheckbox:
label:
en: "I trust this server"
es: "Confío en este servidor"
subLabel:
en: "Only enable servers you trust"
es: "Solo habilite servidores en los que confíe"
```
## privacyPolicy
**Key:**
**Sub-keys:**
## termsOfService
**Key:**
**Sub-keys:**
## modelSelect
**Key:**
**Default:** `true`
**Notes:**
- This is required to be `true` if using [`modelSpecs.addedEndpoints`](/docs/configuration/librechat_yaml/object_structure/model_specs#addedendpoints).
- If `modelSpecs.addedEndpoints` is used and `interface.modelSelect` is not explicitly set, it defaults to `true`.
**Example:**
```yaml filename="interface / modelSelect"
interface:
modelSelect: true
```
## parameters
**Key:**
**Default:** `true`
**Example:**
```yaml filename="interface / parameters"
interface:
parameters: false
```
## presets
**Key:**
**Default:** `true`
**Example:**
```yaml filename="interface / presets"
interface:
presets: true
```
## prompts
**Key:**
**Default:** `true`
**Important: Boolean vs Object Configuration**
- **Boolean (`prompts: true`)**: Only updates the `use` permission. Existing `create`, `share`, and `public` permission values are **preserved** from the database. Use this as a simple feature toggle without affecting other settings configured through the admin panel.
- **Object**: Updates only the sub-permissions that are explicitly specified. Any permissions not included in the config are preserved from the database.
When using the object structure:
**Sub-keys:**
**Example (boolean - simple feature toggle):**
```yaml filename="interface / prompts (boolean)"
interface:
prompts: true # Only updates USE; create/share/public remain unchanged
```
**Example (object - granular control):**
```yaml filename="interface / prompts (object)"
interface:
prompts:
use: true
create: false # Disable creation while allowing use
# share and public not specified - preserves existing values
```
**Example (object - full control):**
```yaml filename="interface / prompts (object)"
interface:
prompts:
use: true
create: true
share: true
public: false
```
## bookmarks
**Key:**
**Default:** `true`
**Example:**
```yaml filename="interface / bookmarks"
interface:
bookmarks: true
```
## memories
**Key:**
**Default:** `true`
**Note:** This controls the UI visibility of the memories feature. For detailed memory behavior configuration (token limits, personalization, agent settings), see the [Memory Configuration](/docs/configuration/librechat_yaml/object_structure/memory).
**Example:**
```yaml filename="interface / memories"
interface:
memories: true
```
## multiConvo
**Key:**
**Default:** `true`
**Example:**
```yaml filename="interface / multiConvo"
interface:
multiConvo: true
```
## agents
More info on [Agents](/docs/features/agents)
**Key:**
**Default:** `true`
**Important: Boolean vs Object Configuration**
- **Boolean (`agents: true`)**: Only updates the `use` permission. Existing `create`, `share`, and `public` permission values are **preserved** from the database. Use this as a simple feature toggle without affecting other settings configured through the admin panel.
- **Object**: Updates only the sub-permissions that are explicitly specified. Any permissions not included in the config are preserved from the database.
When using the object structure:
**Sub-keys:**
**Example (boolean - simple feature toggle):**
```yaml filename="interface / agents (boolean)"
interface:
agents: true # Only updates USE; create/share/public remain unchanged
```
**Example (object - granular control):**
```yaml filename="interface / agents (object)"
interface:
agents:
use: true
create: false # Disable creation while allowing use
# share and public not specified - preserves existing values
```
**Example (object - full control):**
```yaml filename="interface / agents (object)"
interface:
agents:
use: true
create: true
share: true
public: false
```
## remoteAgents
Controls access to the Agents API (OpenAI-compatible and Open Responses API endpoints), which allows external applications to interact with LibreChat agents programmatically via API keys.
**Key:**
**Sub-keys:**
**Default:** All fields default to `false` (disabled).
**Example:**
```yaml filename="interface / remoteAgents"
interface:
remoteAgents:
use: true
create: true
share: false
public: false
```
**Note:** Admin users have all remote agent permissions enabled by default regardless of this configuration.
## temporaryChat
Controls whether the temporary chat feature is available to users. Temporary chats are not saved to conversation history and are automatically deleted after a configurable retention period.
**Key:**
**Default:** `true`
**Note:** The retention period for temporary chats can be configured using `temporaryChatRetention`.
**Example:**
```yaml filename="interface / temporaryChat"
interface:
temporaryChat: true
```
## temporaryChatRetention
The `temporaryChatRetention` configuration allows you to customize how long temporary chats are retained before being automatically deleted.
**Key:**
**Validation Rules:**
- **Minimum**: 1 hour (prevents immediate deletion)
- **Maximum**: 8760 hours (1 year maximum retention)
- **Default**: 720 hours (30 days)
**Configuration Methods:**
1. **LibreChat.yaml** (recommended): `interface.temporaryChatRetention: 168`
2. **Environment Variable** (deprecated): `TEMP_CHAT_RETENTION_HOURS=168`
> **Note:** The environment variable `TEMP_CHAT_RETENTION_HOURS` is deprecated. Please use the `interface.temporaryChatRetention` config option in `librechat.yaml` instead. The config file value takes precedence over the environment variable.
**Example:**
```yaml filename="interface / temporaryChatRetention"
interface:
temporaryChatRetention: 168 # Retain temporary chats for 7 days
```
**Common Retention Periods:**
- **1 hour**: `temporaryChatRetention: 1` (minimal retention)
- **24 hours**: `temporaryChatRetention: 24` (1 day)
- **168 hours**: `temporaryChatRetention: 168` (1 week)
- **720 hours**: `temporaryChatRetention: 720` (30 days - default)
- **8760 hours**: `temporaryChatRetention: 8760` (1 year - maximum)
## customWelcome
**Key:**
**Default:** _None (if not specified, a default greeting is used)_
**Example:**
```yaml filename="interface / customWelcome"
interface:
customWelcome: "Hey {{user.name}}! Welcome to LibreChat"
```
**Note:** You can use `{{user.name}}` within the `customWelcome` message to dynamically insert the user's name for a personalized greeting experience.
## runCode
Enables/disables the "Run Code" button for Markdown Code Blocks. More info on the [LibreChat Code Interpreter API](/docs/features/code_interpreter)
**Note:** This setting does not disable the [Agents Code Interpreter Capability](/docs/features/agents#code-interpreter). To disable the Agents Capability, see the [Agents Endpoint configuration](/docs/configuration/librechat_yaml/object_structure/agents) instead.
**Key:**
**Default:** `true`
**Example:**
```yaml filename="interface / runCode"
interface:
runCode: true
```
## webSearch
Enables/disables the web search button in the chat interface. More info on [Web Search Configuration](/docs/configuration/librechat_yaml/object_structure/web_search)
**Note:** This setting does not disable the [Agents Web Search Capability](/docs/features/agents#web-search). To disable the Agents Capability, see the [Agents Endpoint configuration](/docs/configuration/librechat_yaml/object_structure/agents) instead.
**Key:**
**Default:** `true`
**Example:**
```yaml filename="interface / webSearch"
interface:
webSearch: true
```
## fileSearch
Enables/disables the file search (for RAG API usage via tool) button in the chat interface
**Note:** This setting does not disable the [Agents File Search Capability](/docs/features/agents#file-search). To disable the Agents Capability, see the [Agents Endpoint configuration](/docs/configuration/librechat_yaml/object_structure/agents) instead.
**Key:**
**Default:** `true`
**Example:**
```yaml filename="interface / fileSearch"
interface:
fileSearch: true
```
## fileCitations
Controls the global availability of file citations functionality. When disabled, it effectively removes the `FILE_CITATIONS` permission for all users, preventing any file citations from being displayed when using file search, regardless of individual user permissions.
**Note:**
- This setting acts as a global toggle for the `FILE_CITATIONS` permission system-wide.
- When set to `false`, no users will see file citations, even if they have been granted the permission through roles.
- File citations require the `fileSearch` feature to be enabled.
- When using agents with file search capability, citation behavior (quantity and quality) can be configured through the [Agents endpoint configuration](/docs/configuration/librechat_yaml/object_structure/agents#file-citation-configuration-examples).
**Key:**
**Default:** `true`
**Example:**
```yaml filename="interface / fileCitations"
interface:
fileCitations: true
```
## peoplePicker
Controls which principal types (users, groups, roles) are available for selection in the people picker interface, typically used when sharing agents or managing access controls.
**Key:**
**Sub-keys:**
**Default:**
```yaml
peoplePicker:
users: true
groups: true
roles: true
```
**Example:**
```yaml filename="interface / peoplePicker"
interface:
peoplePicker:
users: true
groups: true
roles: false # Disable role selection in people picker
```
## marketplace
Enables/disables access to the Agent Marketplace.
**Key:**
**Sub-keys:**
**Default:**
```yaml
marketplace:
use: false
```
**Example:**
```yaml filename="interface / marketplace"
interface:
marketplace:
use: true # Enable marketplace access
```
# MCP Servers Object Structure (/docs/configuration/librechat_yaml/object_structure/mcp_servers)
## Example
```yaml filename="MCP Servers Object Structure"
# Example MCP Servers Object Structure
mcpServers:
everything:
# type: sse # type can optionally be omitted
url: http://localhost:3001/sse
googlesheets:
type: sse
url: https://mcp.composio.dev/googlesheets/some-endpoint
requiresOAuth: true
headers:
X-User-ID: "{{LIBRECHAT_USER_ID}}"
X-API-Key: "${SOME_API_KEY}"
serverInstructions: true # Use server-provided instructions
puppeteer:
type: stdio
command: npx
args:
- -y
- "@modelcontextprotocol/server-puppeteer"
serverInstructions: "Do not access any local files or local/internal IP addresses"
filesystem:
# type: stdio
command: npx
args:
- -y
- "@modelcontextprotocol/server-filesystem"
- /home/user/LibreChat/
iconPath: /home/user/LibreChat/client/public/assets/logo.svg
# The “wrench” icon shows up if no icon is provided as it is the default rendering.
mcp-obsidian:
command: npx
args:
- -y
- "mcp-obsidian"
- /path/to/obsidian/vault
streamable-http-server:
type: streamable-http
url: https://example.com/api/
per-user-credentials-example:
type: streamable-http
url: "https://example.com/api/"
headers:
X-Auth-Token: "{{MY_SERVICE_API_KEY}}"
customUserVars:
MY_SERVICE_API_KEY:
title: "My Service API Key"
description: "Enter your personal API key for the service. You can generate one at Service Developer Portal."
oauth-example:
type: streamable-http
url: https://api.example.com/mcp/
oauth:
authorization_url: https://example.com/oauth/authorize
token_url: https://example.com/oauth/token
client_id: your_client_id
client_secret: your_client_secret
redirect_uri: http://localhost:3080/api/mcp/oauth-example/oauth/callback
scope: "read execute"
```
## ``
**Key:**
', 'Object', 'Each key under `mcpServers` represents an individual MCP server configuration, identified by a unique name. This name is used to reference the server configuration within the application.', ''],
]}
/>
### Subkeys
#### `title`
- **Type:** String (Optional)
- **Description:** Custom display name for the MCP server in the UI. If not specified, the server key name is used.
- **Example:**
```yaml
my-server:
title: "File System Access"
command: npx
args: ["-y", "@modelcontextprotocol/server-filesystem"]
```
#### `description`
- **Type:** String (Optional)
- **Description:** Description of the MCP server, displayed in the UI to help users understand its purpose and capabilities.
- **Example:**
```yaml
my-server:
title: "File System Access"
description: "Provides read/write access to local files and directories"
command: npx
args: ["-y", "@modelcontextprotocol/server-filesystem"]
```
#### `type`
- **Type:** String
- **Description:** Specifies the connection type to the MCP server. Valid options are `"stdio"`, `"websocket"`, `"streamable-http"`, or `"sse"`.
- **Default Value:** Determined based on the presence and format of `url` or `command`.
#### `command`
- **Type:** String
- **Description:** (For `stdio` type) The command or executable to run to start the MCP server.
#### `args`
- **Type:** Array of Strings
- **Description:** (For `stdio` type) Command line arguments to pass to the `command`.
#### `url`
- **Type:** String
- **Description:** (For `websocket`, `streamable-http`, or `sse` type) The URL to connect to the MCP server. Supports dynamic user field placeholders (`{{LIBRECHAT_USER_*}}`) and environment variable substitution (`${ENV_VAR}`).
- **Notes:**
- For `sse` type, the URL must start with `http://` or `https://`.
- For `streamable-http` type, the URL must start with `http://` or `https://`.
- For `websocket` type, the URL must start with `ws://` or `wss://`.
#### `headers`
- **Type:** Object (Optional, for `sse` and `streamable-http` types)
- **Description:** Custom headers to send with the request. Supports various placeholder types for dynamic value substitution.
- **Placeholder Support:**
- `{{LIBRECHAT_USER_ID}}`: Will be replaced with the current user's ID, enabling multi-user support.
- `{{LIBRECHAT_USER_*}}`: Dynamic user field placeholders. Replace `*` with the UPPERCASE version of any allowed field.
- `{{CUSTOM_VARIABLE_NAME}}`: Replaced with the value provided by the user for a variable defined in `customUserVars` (e.g., `{{MY_API_KEY}}`).
- `${ENV_VAR}`: Will be replaced with the value of the environment variable `{{ENV_VAR}}`.
**Available User Field Placeholders:**
| Placeholder | User Field | Type | Description |
|------------|------------|------|-------------|
| `{{LIBRECHAT_USER_NAME}}` | `name` | String | User's display name |
| `{{LIBRECHAT_USER_USERNAME}}` | `username` | String | User's username |
| `{{LIBRECHAT_USER_EMAIL}}` | `email` | String | User's email address |
| `{{LIBRECHAT_USER_PROVIDER}}` | `provider` | String | Authentication provider (e.g., "email", "google", "github") |
| `{{LIBRECHAT_USER_ROLE}}` | `role` | String | User's role (e.g., "user", "admin") |
| `{{LIBRECHAT_USER_GOOGLEID}}` | `googleId` | String | Google account ID |
| `{{LIBRECHAT_USER_FACEBOOKID}}` | `facebookId` | String | Facebook account ID |
| `{{LIBRECHAT_USER_OPENIDID}}` | `openidId` | String | OpenID account ID |
| `{{LIBRECHAT_USER_SAMLID}}` | `samlId` | String | SAML account ID |
| `{{LIBRECHAT_USER_LDAPID}}` | `ldapId` | String | LDAP account ID |
| `{{LIBRECHAT_USER_GITHUBID}}` | `githubId` | String | GitHub account ID |
| `{{LIBRECHAT_USER_DISCORDID}}` | `discordId` | String | Discord account ID |
| `{{LIBRECHAT_USER_APPLEID}}` | `appleId` | String | Apple account ID |
| `{{LIBRECHAT_USER_EMAILVERIFIED}}` | `emailVerified` | Boolean → String | Email verification status ("true" or "false") |
| `{{LIBRECHAT_USER_TWOFACTORENABLED}}` | `twoFactorEnabled` | Boolean → String | 2FA status ("true" or "false") |
| `{{LIBRECHAT_USER_TERMSACCEPTED}}` | `termsAccepted` | Boolean → String | Terms acceptance status ("true" or "false") |
**Note:** Missing fields will be replaced with empty strings.
- **Example:**
```yaml
headers:
X-User-ID: "{{LIBRECHAT_USER_ID}}"
X-User-Email: "{{LIBRECHAT_USER_EMAIL}}"
X-User-Role: "{{LIBRECHAT_USER_ROLE}}"
X-API-Key: "${SOME_API_KEY}"
Authorization: "Bearer ${SOME_AUTH_TOKEN}"
```
#### `apiKey`
- **Type:** Object (Optional, for `sse` and `streamable-http` types)
- **Description:** API key authentication configuration for the MCP server. Provides a structured way to configure API key-based authentication.
- **Sub-keys:**
- `source`: String - Where the API key comes from. Options:
- `"admin"`: API key is configured by the administrator (in environment variables or config)
- `"user"`: API key is provided by the user through the UI
- `authorization_type`: String - How the API key is sent in requests. Options:
- `"bearer"`: Sent as `Authorization: Bearer `
- `"basic"`: Sent as `Authorization: Basic `
- `"custom"`: Sent in a custom header (requires `custom_header`)
- `custom_header`: String - (Required when `authorization_type` is `"custom"`) The header name to use for the API key
- **Example:**
```yaml
# Admin-provided API key with Bearer auth
my-server:
type: streamable-http
url: https://api.example.com/mcp
apiKey:
source: "admin"
authorization_type: "bearer"
# User-provided API key with custom header
another-server:
type: sse
url: https://api.example.com/sse
apiKey:
source: "user"
authorization_type: "custom"
custom_header: "X-API-Key"
```
#### `iconPath`
- **Type:** String (Optional)
- **Description:** Defines the tool's display icon shown in the tool selection dialog.
#### `chatMenu`
- **Type:** Boolean (Optional)
- **Description:** When set to `false`, excludes the MCP server from the chatarea dropdown (MCPSelect) for quick and easy access.
- **Default Value:** `true` (The MCP server will be included in the chatarea dropdown)
#### `serverInstructions`
- **Type:** Boolean or String (Optional)
- **Description:** Controls how MCP server instructions are injected into agent context. Server instructions provide high-level usage guidance for the entire MCP server, complementing individual tool descriptions.
- **Options:**
- **`undefined`** (default): No instructions are included
- **`true`**: Use server-provided instructions (if available) - ideal for well-documented servers with comprehensive guidance
- **`false`**: Explicitly disable instructions - useful for saving context tokens or when tools are self-explanatory
- **`string`**: Use custom instructions (overrides server-provided) - best for application-specific workflows or when server instructions are insufficient
- **Default Value:** `undefined` (no instructions included)
- **Notes:**
- Instructions are automatically injected when `serverInstructions` is configured and the server's tools are available to the agent
- Multiple servers can each contribute instructions to the agent context
- **Example:**
```yaml
# Use server-provided instructions
serverInstructions: true
# Use custom instructions
serverInstructions: |
When using this filesystem server:
1. Always use absolute paths for file operations
2. Check file permissions before attempting write operations
# Explicitly disable instructions
serverInstructions: false
```
#### `env`
- **Type:** Object (Optional, `stdio` type only)
- **Description:** Environment variables to use when spawning the process.
- **Placeholder Support:**
- `{{LIBRECHAT_USER_ID}}`: Replaced with the current user's ID.
- `{{LIBRECHAT_USER_*}}`: Dynamic user field placeholders (e.g., `{{LIBRECHAT_USER_EMAIL}}`).
- `{{CUSTOM_VARIABLE_NAME}}`: Replaced with the value provided by the user for a variable defined in `customUserVars` (e.g., `{{MY_API_KEY}}`).
- `${ENV_VAR}`: Replaced with the value of the server-side environment variable `{{ENV_VAR}}`.
#### `timeout`
- **Type:** Integer (Optional)
- **Description:** Timeout in milliseconds for MCP server requests. Must be a non-negative integer.
- **Default Value:** `30000` (30 seconds)
#### `initTimeout`
- **Type:** Integer (Optional)
- **Description:** Timeout in milliseconds for MCP server initialization. Must be a non-negative integer.
- **Default Value:** `10000` (10 seconds)
#### `requiresOAuth`
- **Type:** Boolean (Optional, `sse` type only)
- **Description:** Whether this server requires OAuth authentication. If not specified, will be auto-detected during server startup. Although optional, it's best to set this value explicitly if you know whether the server requires OAuth or not.
- **Default Value:** Auto-detected if not specified
- **Notes:**
- Only applicable to `sse` type MCP servers
- Auto-detection occurs during server startup, which may add initialization time
- Explicit configuration improves startup performance by skipping detection
- Works with MCP OAuth environment variables (`MCP_OAUTH_ON_AUTH_ERROR`, `MCP_OAUTH_DETECTION_TIMEOUT`) for enhanced connection management
#### `stderr`
- **Type:** String or Integer (Optional, `stdio` type only)
- **Description:** How to handle `stderr` of the child process. This matches the semantics of Node's [`child_process.spawn`](https://nodejs.org/api/child_process.html#child_processspawncommand-args-options). Valid string values: `"pipe"`, `"ignore"`, `"inherit"`. Alternatively, a non-negative integer can be used as a file descriptor.
- **Default Value:** `"inherit"` (messages to `stderr` will be printed to the parent process's `stderr`).
#### `customUserVars`
- **Type:** Object (Optional)
- **Description:** Defines custom variables that users can set for this MCP server. This allows administrators to specify variables (e.g., API keys, URLs) that each user must configure individually. These user-provided values can then be used in `headers` or `env` configuration. Servers with `customUserVars` are automatically excluded from app-level connections, ensuring per-user credentials are always resolved at runtime.
- **Structure:**
- The `customUserVars` object contains keys, where each key represents a variable name (e.g., `MY_API_KEY`). This name will be used in placeholders like `{{MY_API_KEY}}`.
- Each variable name is an object with the following subkeys:
- `title`: String (Required) - A user-friendly title for the variable, displayed in the configuration UI.
- `description`: String (Optional) - A description or instructions for the variable, also displayed in the UI to guide the user. HTML can be used in this field (e.g., to create a link: `More info`).
- **Usage in `headers` and `env`:**
- Once defined under `customUserVars`, these variables can be referenced in the `headers` (for `sse` and `streamable-http` types) or `env` (for `stdio` type) sections using the `{{VARIABLE_NAME}}` syntax.
- Users provide these values through the UI. These settings can be accessed in two ways:
- **From Assistant Chat Input**: When selecting MCP tools for an assistant, a settings icon will appear next to configurable MCP servers in the tool selection dropdown. Clicking this icon opens a dialog to manage credentials for that server.
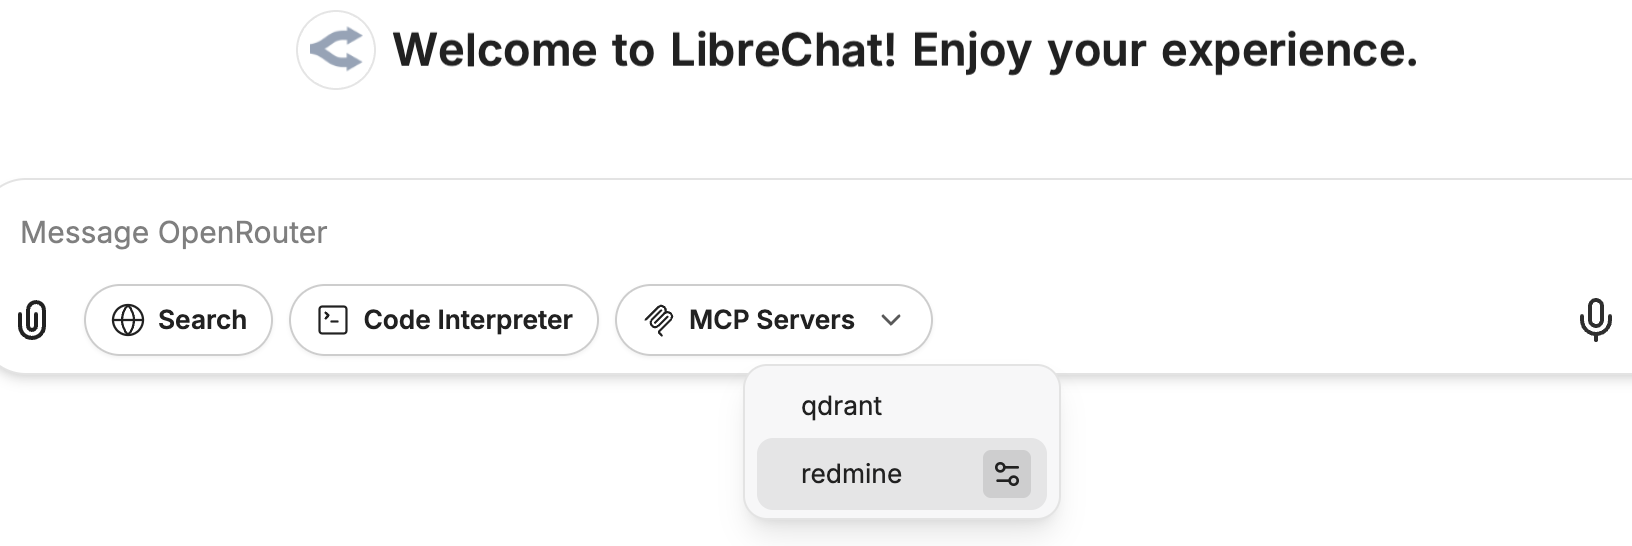
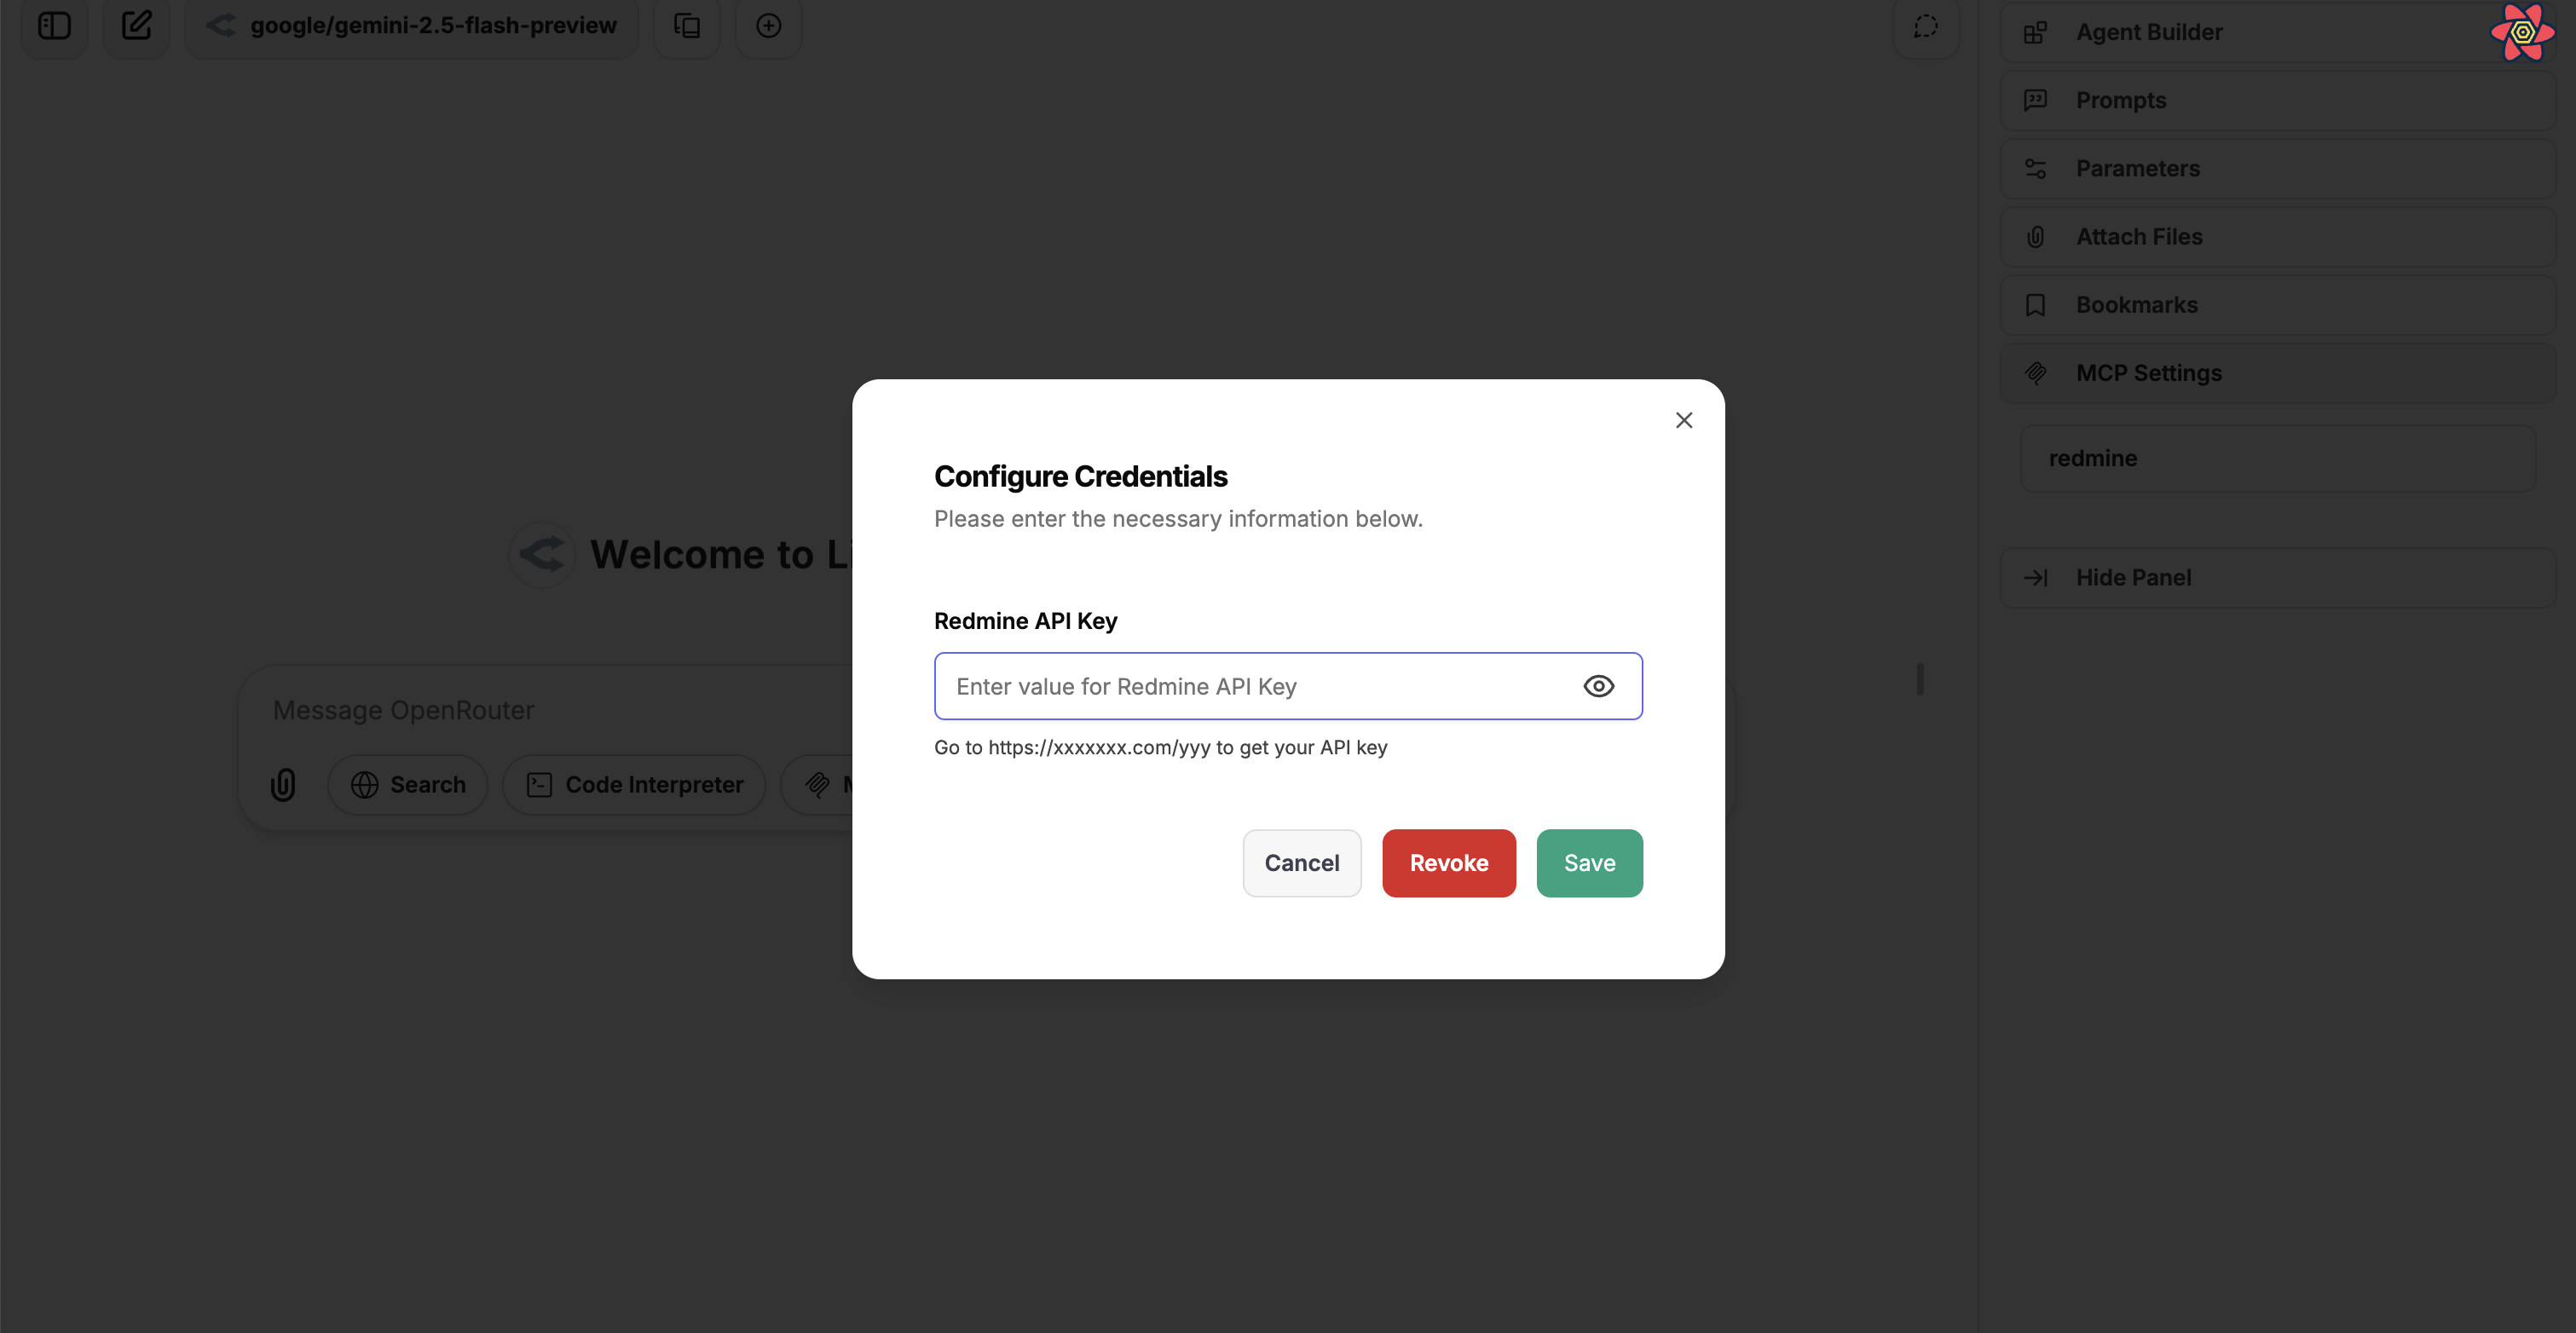 - **From Settings Panel**: A dedicated "MCP Settings" section in the right panel lists all MCP servers with definable custom variables. Users can click on a server to open the configuration dialog to set or update their credentials for that specific MCP server.
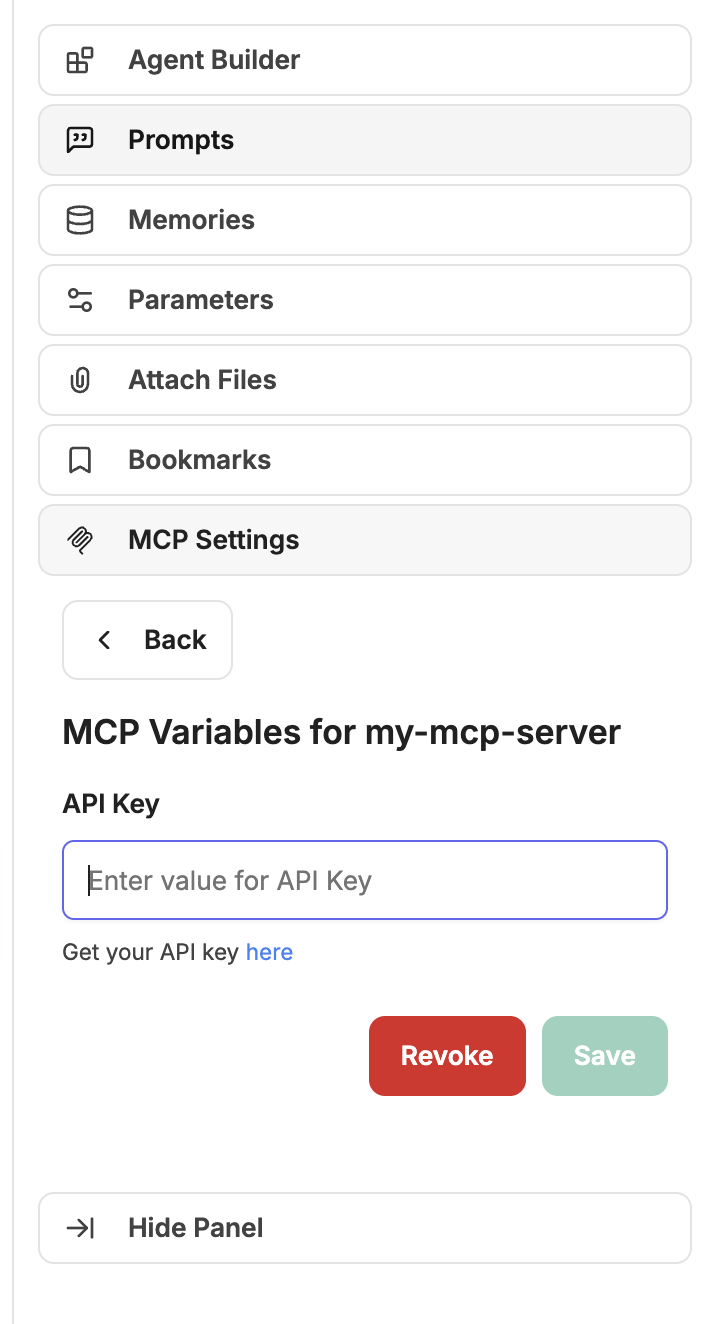 - These user-provided values are stored securely, associated with the individual user and the specific MCP server, and substituted at runtime.
- **Example:**
```yaml
customUserVars:
MY_SERVICE_API_KEY:
title: "My Service API Key"
description: "Your personal API access key for My Service. Find it at My Service API Settings."
SOME_OTHER_VAR:
title: "Some Other Variable"
description: "The specific value for some other configuration (e.g., a specific path or identifier)."
```
Usage in `headers`:
```yaml
headers:
X-Auth-Token: "{{MY_SERVICE_API_KEY}}"
X-Some-Other-Config: "{{SOME_OTHER_VAR}}"
```
Usage in `env` (for `stdio` type):
```yaml
env:
API_KEY: "{{MY_SERVICE_API_KEY}}"
```
#### `oauth`
- **Type:** Object (Optional)
- **Description:** OAuth2 configuration for authenticating with the MCP server. When configured, users will be prompted to authenticate via OAuth flow before the MCP server can be used. If no client id & client secret is provided, Dynamic Client Registration (DCR) will be used.
- **Required Subkeys:**
- `authorization_url`: String - The OAuth authorization endpoint URL
- `token_url`: String - The OAuth token endpoint URL
- `client_id`: String - OAuth client identifier
- `client_secret`: String - OAuth client secret
- `redirect_uri`: String - [OAuth redirect URI](/docs/features/mcp#oauth-callback-url) (eg. `http://localhost:3080/api/mcp/${serverName}/oauth/callback`)
- `scope`: String - OAuth scopes (space-separated)
- **Optional Subkeys:**
- `grant_types_supported`: Array of Strings - Supported grant types (defaults to `["authorization_code", "refresh_token"]`)
- `token_endpoint_auth_methods_supported`: Array of Strings - Supported token endpoint authentication methods (defaults to `["client_secret_basic", "client_secret_post"]`)
- `response_types_supported`: Array of Strings - Supported response types (defaults to `["code"]`)
- `code_challenge_methods_supported`: Array of Strings - Supported PKCE code challenge methods (defaults to `["S256", "plain"]`)
- `skip_code_challenge_check`: Boolean - Skip checking whether the OAuth provider advertises PKCE support. Useful for providers like AWS Cognito that support S256 but don't advertise it in their metadata. (defaults to `false`)
- **Example:**
```yaml
oauth-api-server:
authorization_url: https://api.example.com/oauth/authorize
token_url: https://api.example.com/oauth/token
client_id: your_client_id
client_secret: your_client_secret
redirect_uri: http://localhost:3080/api/mcp/oauth-api-server/oauth/callback
scope: "read execute"
grant_types_supported: ["authorization_code", "refresh_token"]
token_endpoint_auth_methods_supported: ["client_secret_post"]
response_types_supported: ["code"]
code_challenge_methods_supported: ["S256", "plain"]
```
#### `startup`
- **Type:** Boolean (Optional)
- **Description:** When set to `false`, this MCP server will not be connected at application startup. This is useful for servers that require user input or configuration before connecting, or for cases where you want to control when the server is initialized.
- **Default Value:** `true`
- **Example:**
```yaml
mcpServers:
my-mcp-server:
type: streamable-http
url: "https://api.example.com/mcp/"
startup: false
```
### Notes
- **Type Inference:**
- If `type` is omitted:
- If `url` is specified and starts with `http://` or `https://`, `type` defaults to `sse`.
- If `url` is specified and starts with `ws://` or `wss://`, `type` defaults to `websocket`.
- If `command` is specified, `type` defaults to `stdio`.
- **Connection Types:**
- **`stdio`**: Starts an MCP server as a child process and communicates via standard input/output.
- **`websocket`**: Connects to an external MCP server via WebSocket.
- **`sse`**: Connects to an external MCP server via Server-Sent Events (SSE).
- **`streamable-http`**: Connects to an external MCP server via HTTP with support for streaming responses.
- **Internal/Local Addresses:**
- **Important**: MCP servers using internal IP addresses (e.g., `172.24.1.165`, `192.168.1.100`), or local domains (e.g., `mcp-server`, `host.docker.internal`) **must** be explicitly allowed in [`mcpSettings.allowedDomains`](/docs/configuration/librechat_yaml/object_structure/mcp_settings).
- See [MCP Settings](/docs/configuration/librechat_yaml/object_structure/mcp_settings) for configuration details.
## Examples
### Configuration with Internal Addresses
When using internal/local MCP servers, you must configure `mcpSettings.allowedDomains`:
```yaml filename="Complete MCP Configuration with Internal Servers"
# MCP Settings - Required for internal/local addresses
mcpSettings:
allowedDomains:
- "172.24.1.165" # Internal IP
- "mcp-prod" # Docker container
- "host.docker.internal" # Docker host
# MCP Servers - Individual configurations
mcpServers:
prod-mcp:
type: streamable-http
url: http://172.24.1.165:8000/mcp
timeout: 120000
test-mcp:
type: streamable-http
url: http://mcp-prod:8001/mcp
timeout: 120000
```
### `stdio` MCP Server
```yaml filename="stdio MCP Server"
puppeteer:
type: stdio
command: npx
args:
- -y
- "@modelcontextprotocol/server-puppeteer"
timeout: 30000
initTimeout: 10000
env:
NODE_ENV: "production"
USER_EMAIL: "{{LIBRECHAT_USER_EMAIL}}"
USER_ROLE: "{{LIBRECHAT_USER_ROLE}}"
stderr: inherit
```
### `sse` MCP Server
```yaml filename="sse MCP Server"
everything:
url: http://localhost:3001/sse
headers:
X-User-ID: "{{LIBRECHAT_USER_ID}}"
X-API-Key: "${SOME_API_KEY}"
```
### `websocket` MCP Server
```yaml filename="websocket MCP Server"
myWebSocketServer:
url: ws://localhost:8080
```
### `streamable-http` MCP Server
```yaml filename="streamable-http MCP Server"
streamable-http-server:
type: streamable-http
url: https://example.com/api/
headers:
X-User-ID: "{{LIBRECHAT_USER_ID}}"
X-API-Key: "${SOME_API_KEY}"
```
### MCP Server with Dynamic User Fields
```yaml filename="MCP Server with User Fields"
user-aware-server:
type: sse
url: https://api.example.com/users/{{LIBRECHAT_USER_USERNAME}}/stream
headers:
X-User-ID: "{{LIBRECHAT_USER_ID}}"
X-User-Email: "{{LIBRECHAT_USER_EMAIL}}"
X-User-Role: "{{LIBRECHAT_USER_ROLE}}"
X-Email-Verified: "{{LIBRECHAT_USER_EMAILVERIFIED}}"
Authorization: "Bearer ${API_TOKEN}"
```
### MCP Server with Per-User Credentials via `customUserVars`
```yaml filename="MCP Server with customUserVars"
my-mcp-server:
type: streamable-http
url: "https://api.example-service.com/api/" # Example URL
headers:
X-Auth-Token: "{{API_KEY}}" # Uses the API_KEY defined below
customUserVars:
API_KEY: # This key will be used as {{API_KEY}} in headers/url
title: "API Key" # This is the label shown above the input field
description: "Get your API key here." # This description appears below the input
```
**NOTE** See [MCP Server Initialization](/docs/features/mcp#server-initialization) for more information about UI based server initialization.
### MCP Server with Custom Icon
```yaml filename="MCP Server with Icon"
filesystem:
command: npx
args:
- -y
- "@modelcontextprotocol/server-filesystem"
- /home/user/LibreChat/
iconPath: /home/user/LibreChat/client/public/assets/logo.svg
chatMenu: false # Exclude from chatarea dropdown
```
### MCP Server with OAuth Authentication
```yaml filename="MCP Server with OAuth"
oauth-api-server:
type: streamable-http
url: https://api.example.com/mcp/
oauth:
authorization_url: https://api.example.com/oauth/authorize
token_url: https://api.example.com/oauth/token
client_id: your_client_id
client_secret: your_client_secret
redirect_uri: http://localhost:3080/api/mcp/oauth-api-server/oauth/callback
scope: "read execute"
```
### MCP Server with Server Instructions
```yaml filename="MCP Server with Instructions"
# Server that uses its own provided instructions
web-search:
type: streamable-http
url: https://example.com/mcp/search
serverInstructions: true
# Server with instructions explicitly disabled
filesystem:
command: npx
args:
- -y
- "@modelcontextprotocol/server-filesystem"
- /home/user/documents/
serverInstructions: false
# Server with custom instructions
puppeteer:
type: stdio
command: npx
args:
- -y
- "@modelcontextprotocol/server-puppeteer"
serverInstructions: |
Browser automation security and best practices:
1. Be cautious with local file access and internal IP addresses
2. Take screenshots to verify successful page interactions
3. Wait for page elements to load before interacting with them
4. Use specific CSS selectors for reliable element targeting
5. Check console logs for JavaScript errors when troubleshooting
```
### OAuth-Enabled MCP Server (Legacy requiresOAuth)
```yaml filename="OAuth-Enabled MCP Server"
composio-googlesheets:
type: sse
url: https://mcp.composio.dev/googlesheets/sse-endpoint
requiresOAuth: true
headers:
X-User-ID: "{{LIBRECHAT_USER_ID}}"
X-API-Key: "${COMPOSIO_API_KEY}"
timeout: 45000
initTimeout: 15000
```
**Related Environment Variables (Optional):**
```bash
# OAuth configuration for MCP servers
MCP_OAUTH_ON_AUTH_ERROR=true
MCP_OAUTH_DETECTION_TIMEOUT=10000
# API key for the service
COMPOSIO_API_KEY=your_composio_api_key_here
```
---
**Importing MCP Server Configurations**
The `mcpServers` configurations allow LibreChat to dynamically interact with various MCP servers, which can perform specialized tasks or provide specific functionalities within the application. This modular approach facilitates extending the application's capabilities by simply adding or modifying server configurations.
---
## Additional Information
- **Default Behavior:**
- Initialization happens at startup, and the app must be restarted for changes to take effect.
- If both `url` and `command` are specified, the `type` must be explicitly defined to avoid ambiguity.
- **Multi-User Support:**
- The MCPManager now supports distinct user-level and app-level connections, enabling proper connection management per user.
- User connections are tracked and managed separately, with proper establishment and cleanup.
- Use dynamic user field placeholders in headers, URLs, and environment variables:
- `{{LIBRECHAT_USER_ID}}` - User's unique identifier
- `{{LIBRECHAT_USER_EMAIL}}` - User's email address
- `{{LIBRECHAT_USER_USERNAME}}` - User's username
- `{{LIBRECHAT_USER_ROLE}}` - User's role (e.g., "user", "admin")
- And many more fields (see headers section for complete list)
- **User Idle Management:**
- User connections are monitored for activity and will be disconnected after 15 minutes of inactivity.
- **Environment Variables:**
- **In `env` (for `stdio` type):** Useful for setting up specific runtime environments or configurations required by the MCP server process.
- **In `headers` (for `sse` and `streamable-http` types):** Use `${ENV_VAR}` syntax to reference environment variables in header values.
- **Dynamic User Fields:**
- User field placeholders are replaced at runtime with the authenticated user's information
- Only non-sensitive fields are available (passwords and other sensitive data are excluded)
- Missing fields default to empty strings
- Boolean fields are converted to string representations ("true" or "false")
- **Error Handling (`stderr`):**
- Configuring `stderr` allows you to manage how error messages from the MCP server process are handled. The default `"inherit"` means that the errors will be printed to the parent process's `stderr`.
- **Server Instructions:**
- Instructions are automatically injected into the agent's system message when MCP server tools are used
- Custom instructions (string values) take precedence over server-provided instructions
- Multiple MCP servers can each contribute their own instructions to the agent context
- Instructions are only included when the corresponding MCP server's tools are actually available to the agent
- **OAuth Authentication:**
- OAuth2 flow is supported for secure authentication with MCP servers
- Users will be prompted to authenticate via OAuth before the MCP server can be used
## References
- [Model Context Protocol (MCP) Documentation](https://github.com/modelcontextprotocol)
- [MCP Transports Specification](https://modelcontextprotocol.io/specification/draft/basic/transports)
- [Node.js child_process.spawn](https://nodejs.org/api/child_process.html#child_processspawncommand-args-options)
---
By properly configuring the `mcpServers` in your `librechat.yaml`, you can enhance LibreChat's functionality and integrate custom tools and services seamlessly.
# MCP Settings Object Structure (/docs/configuration/librechat_yaml/object_structure/mcp_settings)
## Overview
The `mcpSettings` configuration provides global settings for MCP (Model Context Protocol) server security and behavior. This configuration is separate from `mcpServers` and controls how MCP servers can connect to certain domains and IP addresses.
## Example
```yaml filename="MCP Settings Object Structure"
# Example MCP Settings Configuration
mcpSettings:
allowedDomains:
- "example.com" # Specific domain
- "*.example.com" # All subdomains using wildcard
- "mcp-server" # Local Docker domain
- "172.24.1.165" # Internal network IP
- "https://api.example.com:8443" # With protocol and port
```
## Configuration
### Subkeys
### Security Context (SSRF Protection)
LibreChat includes SSRF (Server-Side Request Forgery) protection with the following behavior:
**When `allowedDomains` is NOT configured:**
- SSRF-prone targets are **blocked by default**
- All other external domains are **allowed**
**When `allowedDomains` IS configured:**
- **Only** domains on the list are allowed
- Internal/SSRF targets can be allowed by explicitly adding them to the list
**Blocked SSRF targets include:**
- **Localhost** addresses (`localhost`, `127.0.0.1`, `::1`)
- **Private IP ranges** (`10.0.0.0/8`, `172.16.0.0/12`, `192.168.0.0/16`)
- **Link-local addresses** (`169.254.0.0/16`, includes cloud metadata IPs)
- **Internal TLDs** (`.internal`, `.local`, `.localhost`)
- **Common internal service names** (`redis`, `mongodb`, `postgres`, `api`, `rag_api`, etc.)
If your MCP servers need to connect to internal services or Docker containers, you **must explicitly add them** to `allowedDomains`.
### Pattern Formats
The `allowedDomains` array supports several pattern formats:
1. **Exact Domain Match**
```yaml
allowedDomains:
- "example.com"
```
Only allows connections to exactly `example.com` (any protocol/port)
2. **Wildcard Subdomain Match**
```yaml
allowedDomains:
- "*.example.com"
```
Allows connections to all subdomains of `example.com` (e.g., `api.example.com`, `mcp.example.com`)
3. **Specific IP Address**
```yaml
allowedDomains:
- "192.168.1.100"
- "172.24.1.165"
```
Allows connections to specific IP addresses
4. **Local Docker Domains**
```yaml
allowedDomains:
- "mcp-server"
- "host.docker.internal"
```
Allows connections to Docker container names or special Docker domains
5. **With Protocol and Port**
```yaml
allowedDomains:
- "https://api.example.com:8443"
- "http://internal-mcp:3000"
```
Restricts connections to specific protocol and port combinations
### Error Messages
If you see errors like:
```bash
error: [MCPServersRegistry] Failed to inspect server "my-mcp": Domain "http://172.24.1.165:8000" is not allowed
error: [MCP][my-mcp] Failed to initialize: Domain "http://172.24.1.165:8000" is not allowed
```
This likely indicates that the MCP server's domain needs to be added to `allowedDomains`:
```yaml
mcpSettings:
allowedDomains:
- "172.24.1.165" # Add the IP address or domain
```
## References
- [MCP Servers Configuration](/docs/configuration/librechat_yaml/object_structure/mcp_servers)
- [MCP Features](/docs/features/mcp)
- [Actions allowedDomains](/docs/configuration/librechat_yaml/object_structure/actions#alloweddomains) (similar concept for Actions)
# Memory Configuration (/docs/configuration/librechat_yaml/object_structure/memory)
## Overview
The `memory` object allows you to configure conversation memory and personalization features for the application. This configuration controls how the system remembers and personalizes conversations, including token limits, message context windows, and agent-based memory processing.
## Example
```yaml filename="memory"
memory:
disabled: false
validKeys: ["user_preferences", "conversation_context", "personal_info"]
tokenLimit: 2000
charLimit: 10000
personalize: true
messageWindowSize: 5
agent:
provider: "openAI"
model: "gpt-4"
instructions: "You are a helpful assistant that remembers user preferences and context."
model_parameters:
temperature: 0.7
max_tokens: 1000
```
## disabled
**Default:** `false`
```yaml filename="memory / disabled"
memory:
disabled: true
```
## validKeys
**Default:** No restriction (all keys are valid)
```yaml filename="memory / validKeys"
memory:
validKeys:
- "user_preferences"
- "conversation_context"
- "personal_information"
- "learned_facts"
```
## tokenLimit
**Default:** No limit
```yaml filename="memory / tokenLimit"
memory:
tokenLimit: 2000
```
## charLimit
**Default:** `10000`
```yaml filename="memory / charLimit"
memory:
charLimit: 10000
```
## personalize
**Default:** `true`
```yaml filename="memory / personalize"
memory:
personalize: false
```
## messageWindowSize
**Default:** `5`
```yaml filename="memory / messageWindowSize"
memory:
messageWindowSize: 10
```
## agent
The `agent` field supports two different configuration formats:
### Agent by ID
When you have a pre-configured agent, you can reference it by its ID:
```yaml filename="memory / agent (by ID)"
memory:
agent:
id: "memory-agent-001"
```
### Custom Agent Configuration
For more control, you can define a complete agent configuration:
```yaml filename="memory / agent (custom)"
memory:
agent:
provider: "openAI"
model: "gpt-4"
instructions: "You are a memory assistant that helps maintain conversation context and user preferences."
model_parameters:
temperature: 0.3
max_tokens: 1500
top_p: 0.9
```
#### Agent Configuration Fields
When using custom agent configuration, the following fields are available:
**provider** (required)
**model** (required)
**instructions** (optional)
**model_parameters** (optional)
## Complete Configuration Example
Here's a comprehensive example showing all memory configuration options:
```yaml filename="librechat.yaml"
version: 1.3.8
cache: true
memory:
disabled: false
validKeys:
- "user_preferences"
- "conversation_context"
- "learned_facts"
- "personal_information"
tokenLimit: 3000
charLimit: 10000
personalize: true
messageWindowSize: 8
agent:
provider: "openAI"
model: "gpt-4"
instructions: |
Store memory using only the specified validKeys. For user_preferences: save
explicitly stated preferences about communication style, topics of interest,
or workflow preferences. For conversation_context: save important facts or
ongoing projects mentioned. For learned_facts: save objective information
about the user. For personal_information: save only what the user explicitly
shares about themselves. Delete outdated or incorrect information promptly.
model_parameters:
temperature: 0.2
max_tokens: 2000
top_p: 0.8
frequency_penalty: 0.1
```
## Using Custom Endpoints
The memory feature supports custom endpoints. When using a custom endpoint, the `provider` field should match the custom endpoint's `name` exactly. Custom headers with environment variables and user placeholders are properly resolved.
```yaml filename="librechat.yaml with custom endpoint for memory"
endpoints:
custom:
- name: 'Custom Memory Endpoint'
apiKey: 'dummy'
baseURL: 'https://api.gateway.ai/v1'
headers:
x-gateway-api-key: '${GATEWAY_API_KEY}'
x-gateway-virtual-key: '${GATEWAY_OPENAI_VIRTUAL_KEY}'
X-User-Identifier: '{{LIBRECHAT_USER_EMAIL}}'
X-Application-Identifier: 'LibreChat - Test'
api-key: '${TEST_CUSTOM_API_KEY}'
models:
default:
- 'gpt-4o-mini'
- 'gpt-4o'
fetch: false
memory:
disabled: false
tokenLimit: 3000
personalize: true
messageWindowSize: 10
agent:
provider: 'Custom Memory Endpoint'
model: 'gpt-4o-mini'
```
- See [Custom Endpoint Headers](/docs/configuration/librechat_yaml/object_structure/custom_endpoint#headers) for all available placeholders
## Notes
- Memory functionality enhances conversation continuity and personalization
- When `personalize` is true, users get a toggle in their chat interface to control memory usage
- Token limits help control memory usage and processing costs
- Valid keys provide granular control over what information can be stored
- Custom `instructions` replace default memory handling instructions and should be used with `validKeys`
- Agent configuration allows customization of memory processing behavior
- When disabled, all memory features are turned off regardless of other settings
- The message window size affects how much recent context is considered for memory updates
# Model Config Structure (/docs/configuration/librechat_yaml/object_structure/model_config)
Each item under `models` is part of a list of records, either a boolean value or Object:
**When specifying a model as an object:**
An object allows for detailed configuration of the model, including its `deploymentName` and/or `version`. This mode is used for more granular control over the models, especially when working with multiple versions or deployments under one instance or resource group.
**Example**:
```yaml filename="endpoints / azureOpenAI / groups / {group_item} / models / {model_item=Object}"
models:
gpt-4-vision-preview:
deploymentName: "gpt-4-vision-preview"
version: "2024-02-15-preview"
```
**Notes:**
- **Deployment Names** and **Versions** are critical for ensuring that the correct model is used.
- Double-check these values for accuracy to prevent unexpected behavior.
### deploymentName
**Key:**
**Required:** yes
**Example:**
```yaml filename="endpoints / azureOpenAI / groups / {group_item} / models / {model_item=Object} / deploymentName"
deploymentName: "gpt-4-vision-preview"
```
## version
**Key:**
**Required:** yes
**Example:**
```yaml filename="endpoints / azureOpenAI / groups / {group_item} / models / {model_item=Object} / version"
version: "2024-02-15-preview"
```
**Enabling a Model with Default Group Configuration**
**Key:**
**Example:**
```yaml filename="endpoints / azureOpenAI / groups / {group_item} / models"
models:
gpt-4-turbo: true
```
# Model Specs Object Structure (/docs/configuration/librechat_yaml/object_structure/model_specs)
## **Overview**
The `modelSpecs` object helps you provide a simpler UI experience for AI models within your application.
There are 3 main fields under `modelSpecs`:
- `enforce` (optional; default: false)
- `prioritize` (optional; default: true)
- `list` (required)
- `addedEndpoints` (optional)
**Notes:**
- If `enforce` is set to true, model specifications can potentially conflict with other interface settings such as `modelSelect`, `presets`, and `parameters`.
- The `list` array contains detailed configurations for each model, including presets that dictate specific behaviors, appearances, and capabilities.
- If [interface](interface.mdx) fields are not specified in the configuration, having a list of model specs will disable the following interface elements:
- `modelSelect`
- `parameters`
- `presets`
- If you would like to enable these interface elements along with model specs, you can set them to `true` in the `interface` object.
## Example
```yaml filename="modelSpecs"
modelSpecs:
enforce: true
prioritize: true
list:
- name: "meeting-notes-gpt4"
label: "Meeting Notes Assistant (GPT4)"
default: true
description: "Generate meeting notes by simply pasting in the transcript from a Teams recording."
iconURL: "https://example.com/icon.png"
preset:
endpoint: "azureOpenAI"
model: "gpt-4-turbo-1106-preview"
maxContextTokens: 128000 # Maximum context tokens
max_tokens: 4096 # Maximum output tokens
temperature: 0.2
modelLabel: "Meeting Summarizer"
greeting: |
This assistant creates meeting notes based on transcripts of Teams recordings.
To start, simply paste the transcript into the chat box.
promptPrefix: |
Based on the transcript, create coherent meeting minutes for a business meeting. Include the following sections:
- Date and Attendees
- Agenda
- Minutes
- Action Items
Focus on what items were discussed and/or resolved. List any open action items.
The format should be a bulleted list of high level topics in chronological order, and then one or more concise sentences explaining the details.
Each high level topic should have at least two sub topics listed, but add as many as necessary to support the high level topic.
- Do not start items with the same opening words.
Take a deep breath and be sure to think step by step.
```
---
## **Top-level Fields**
### enforce
**Default:** `false`
**Example:**
```yaml filename="modelSpecs / enforce"
modelSpecs:
enforce: true
```
---
### prioritize
**Default:** `true`
**Example:**
```yaml filename="modelSpecs / prioritize"
modelSpecs:
prioritize: false
```
---
### addedEndpoints
**Default:** `[]` (empty list)
**Note:** Must be one of the following:
- `openAI, azureOpenAI, google, anthropic, assistants, azureAssistants, bedrock`
**Example:**
```yaml filename="modelSpecs / addedEndpoints"
modelSpecs:
# ... other modelSpecs fields
addedEndpoints:
- openAI
- google
```
---
### list
**Required**
## **Model Spec (List Item)**
Within each **Model Spec**, or each **list** item, you can configure the following fields:
---
### name
**Description:**
Unique identifier for the model.
---
### label
**Description:**
A user-friendly name or label for the model, shown in the header dropdown.
---
### default
**Description:**
Specifies if this model spec is the default selection, to be auto-selected on every new chat.
---
### iconURL
**Description:**
URL or a predefined endpoint name for the model's icon.
---
### description
**Description:**
A brief description of the model and its intended use or role, shown in the header dropdown menu.
---
### group
**Description:**
Optional group name for organizing model specs in the UI selector. The `group` field provides flexible control over how model specs are organized:
- **If `group` matches an endpoint name** (e.g., `"openAI"`, `"groq"`): The model spec appears nested under that endpoint in the selector menu
- **If `group` is a custom name** (doesn't match any endpoint): Creates a separate collapsible section with that name. You can optionally use `groupIcon` to set a custom icon for this section (URL or built-in key like `"openAI"`)
- **If `group` is omitted**: The model spec appears as a standalone item at the top level
This feature is particularly useful when you want to add descriptions to models without losing the organizational structure of the selector menu.
**Example:**
```yaml filename="modelSpecs with group field examples"
modelSpecs:
list:
# Example 1: Nested under an endpoint
# When group matches an endpoint name, the spec appears under that endpoint
- name: "gpt-4o-optimized"
label: "GPT-4 Optimized"
description: "Most capable GPT-4 model with multimodal support"
group: "openAI" # Appears nested under the OpenAI endpoint
preset:
endpoint: "openAI"
model: "gpt-4o"
# Example 2: Custom group section with icon
# When group is a custom name, it creates a separate collapsible section
- name: "coding-assistant"
label: "Coding Assistant"
description: "Specialized for coding tasks"
group: "My Assistants"
groupIcon: "https://example.com/icons/assistants.png" # Custom icon for the group
preset:
endpoint: "openAI"
model: "gpt-4o"
# Multiple specs with the same group name are grouped together
- name: "writing-assistant"
label: "Writing Assistant"
description: "Specialized for creative writing"
group: "My Assistants" # Grouped with coding-assistant, uses its icon
preset:
endpoint: "anthropic"
model: "claude-sonnet-4"
# Example 3: Custom group using built-in icon
- name: "fast-model"
label: "Fast Model"
group: "Fast Models"
groupIcon: "groq" # Uses built-in Groq icon
preset:
endpoint: "groq"
model: "llama3-8b-8192"
# Example 4: Standalone (no group)
# When group is omitted, the spec appears at the top level
- name: "general-assistant"
label: "General Assistant"
description: "General purpose assistant"
# No group field - appears as standalone item at top level
preset:
endpoint: "openAI"
model: "gpt-4o-mini"
```
---
### showIconInMenu
**Description:**
Controls whether the model's icon appears in the header dropdown menu. Defaults to `true`.
---
### showIconInHeader
**Description:**
Controls whether the model's icon appears in the header dropdown button, left of its name. Defaults to `true`.
---
### authType
**Description:**
Authentication type required for the model spec. Determines whether authentication is overridden, provided by the user, or defined by the system.
---
### webSearch
**Description:**
Enables web search capability for this model spec. When set to `true`, the model can perform web searches to retrieve current information.
**Example:**
```yaml filename="modelSpecs / webSearch"
modelSpecs:
list:
- name: "research-assistant"
label: "Research Assistant"
webSearch: true
preset:
endpoint: "openAI"
model: "gpt-4o"
```
---
### fileSearch
**Description:**
Enables file search capability for this model spec. When set to `true`, the model can search through and reference uploaded files.
**Example:**
```yaml filename="modelSpecs / fileSearch"
modelSpecs:
list:
- name: "document-analyst"
label: "Document Analyst"
fileSearch: true
preset:
endpoint: "openAI"
model: "gpt-4o"
```
---
### executeCode
**Description:**
Enables code execution capability for this model spec. When set to `true`, the model can execute code in a sandboxed environment.
**Example:**
```yaml filename="modelSpecs / executeCode"
modelSpecs:
list:
- name: "code-assistant"
label: "Code Assistant"
executeCode: true
preset:
endpoint: "openAI"
model: "gpt-4o"
```
---
### mcpServers
**Description:**
List of Model Context Protocol (MCP) server names to enable for this model spec. MCP servers extend the model's capabilities with custom tools and resources.
**Example:**
```yaml filename="modelSpecs / mcpServers"
modelSpecs:
list:
- name: "enhanced-assistant"
label: "Enhanced Assistant"
mcpServers:
- "filesystem"
- "sequential-thinking"
- "fetch"
preset:
endpoint: "openAI"
model: "gpt-4o"
```
---
### artifacts
**Description:**
Enables the Artifacts capability for this model spec, allowing the model to generate and display interactive artifacts such as React components, HTML, and Mermaid diagrams. When set to `true`, the default artifact mode is used. You can also specify a mode string directly.
**Example:**
```yaml filename="modelSpecs / artifacts"
modelSpecs:
list:
- name: "artifact-assistant"
label: "Artifact Assistant"
artifacts: true
preset:
endpoint: "openAI"
model: "gpt-4o"
```
---
### preset
**Description:**
Detailed preset configurations that define the behavior and capabilities of the model (see Preset Object Structure below).
---
## Preset Fields
The `preset` field for a `modelSpecs.list` item is made up of a comprehensive configuration blueprint for AI models within the system. It is designed to specify the operational settings of AI models, tailoring their behavior, outputs, and interactions with other system components and endpoints.
### System Options
#### endpoint
**Required**
**Accepted Values:**
- `openAI`
- `azureOpenAI`
- `google`
- `anthropic`
- `assistants`
- `azureAssistants`
- `bedrock`
- `agents`
**Note:** If you are using a custom endpoint, the `endpoint` value must match the defined [custom endpoint name](/docs/configuration/librechat_yaml/object_structure/custom_endpoint#name) exactly.
**Example:**
```yaml filename="modelSpecs / list / {spec_item} / preset / endpoint"
preset:
endpoint: "openAI"
```
---
#### modelLabel
**Default:** `None`
**Example:**
```yaml filename="modelSpecs / list / {spec_item} / preset / modelLabel"
preset:
modelLabel: "Customer Support Bot"
```
---
#### greeting
**Default:** `None`
**Example:**
```yaml filename="modelSpecs / list / {spec_item} / preset / greeting"
preset:
greeting: "This assistant creates meeting notes based on transcripts of Teams recordings. To start, simply paste the transcript into the chat box."
```
---
#### promptPrefix
**Default:** `None`
**Example 1:**
```yaml filename="modelSpecs / list / {spec_item} / preset / promptPrefix"
preset:
promptPrefix: "As a financial advisor, ..."
```
**Example 2:**
```yaml filename="modelSpecs / list / {spec_item} / preset / promptPrefix"
preset:
promptPrefix: |
Based on the transcript, create coherent meeting minutes for a business meeting. Include the following sections:
- Date and Attendees
- Agenda
- Minutes
- Action Items
Focus on what items were discussed and/or resolved. List any open action items.
The format should be a bulleted list of high level topics in chronological order, and then one or more concise sentences explaining the details.
Each high level topic should have at least two sub topics listed, but add as many as necessary to support the high level topic.
- Do not start items with the same opening words.
Take a deep breath and be sure to think step by step.
```
---
#### resendFiles
**Default:** `true`
**Example:**
```yaml filename="modelSpecs / list / {spec_item} / preset / resendFiles"
preset:
resendFiles: true
```
---
#### imageDetail
**Accepted Values:**
- low
- auto
- high
**Default:** `"auto"`
**Example:**
```yaml filename="modelSpecs / list / {spec_item} / preset / imageDetail"
preset:
imageDetail: "high"
```
---
#### maxContextTokens
**Example:**
```yaml filename="modelSpecs / list / {spec_item} / preset / maxContextTokens"
preset:
maxContextTokens: 4096
```
---
### Agent Options
Note that these options are only applicable when using the `agents` endpoint.
You should exclude any model options and defer to the agent's configuration as defined in the UI.
As of v0.8.0, LibreChat uses an ACL (Access Control List) based permissions system for agents. When model specs are configured to use agents, any agents that the user doesn't have access to will be automatically filtered out, even if they are configured in the model spec. This ensures users only see and can use agents they have proper permissions for.
For more information about the ACL permissions system, see the [Agents documentation](/docs/features/agents#migration-required-v080-rc3).
---
#### agent_id
**Example:**
```yaml filename="modelSpecs / list / {spec_item} / preset / agent_id"
preset:
agent_id: "agent_someUniqueId"
```
---
### Assistant Options
Note that these options are only applicable when using the `assistants` or `azureAssistants` endpoint.
Similar to [Agents](#agent-options), you should exclude any model options and defer to the assistant's configuration.
---
#### assistant_id
**Example:**
```yaml filename="modelSpecs / list / {spec_item} / preset / assistant_id"
preset:
assistant_id: "asst_someUniqueId"
```
---
#### instructions
**Note:** this is distinct from [`promptPrefix`](#promptPrefix), as this overrides existing assistant instructions for current runs.
Only use this if you want to override the assistant's core instructions.
Use [`promptPrefix`](#promptPrefix) for `additional_instructions`.
More information:
- https://platform.openai.com/docs/api-reference/models#runs-createrun-instructions
- https://platform.openai.com/docs/api-reference/runs/createRun#runs-createrun-additional_instructions
**Example:**
```yaml filename="modelSpecs / list / {spec_item} / preset / instructions"
preset:
instructions: "Please handle customer queries regarding order status."
```
---
#### append_current_datetime
Adds the current date and time to `additional_instructions` for each run. Does not overwrite `promptPrefix`, but adds to it.
**Example:**
```yaml filename="modelSpecs / list / {spec_item} / preset / append_current_datetime"
preset:
append_current_datetime: true
```
---
### Model Options
> **Note:** Each parameter below includes a note on which endpoints support it.
> **OpenAI / AzureOpenAI / Custom** typically support `temperature`, `presence_penalty`, `frequency_penalty`, `stop`, `top_p`, `max_tokens`.
> **Google / Anthropic** typically support `topP`, `topK`, `maxOutputTokens`.
> **Anthropic / Bedrock (Anthropic and Nova models)** support `promptCache`.
> **Bedrock** supports `region`, `maxTokens`, and a few others.
#### model
> **Supported by:** All endpoints (except `agents`)
**Default:** `None`
**Example:**
```yaml
preset:
model: "gpt-4-turbo"
```
---
#### temperature
> **Supported by:** `openAI`, `azureOpenAI`, `google` (as `temperature`), `anthropic` (as `temperature`), and custom (OpenAI-like)
**Example:**
```yaml
preset:
temperature: 0.7
```
---
#### presence_penalty
> **Supported by:** `openAI`, `azureOpenAI`, custom (OpenAI-like)
> *Not typically used by Google/Anthropic/Bedrock*
**Example:**
```yaml
preset:
presence_penalty: 0.3
```
---
#### frequency_penalty
> **Supported by:** `openAI`, `azureOpenAI`, custom (OpenAI-like)
> *Not typically used by Google/Anthropic/Bedrock*
**Example:**
```yaml
preset:
frequency_penalty: 0.5
```
---
#### stop
> **Supported by:** `openAI`, `azureOpenAI`, custom (OpenAI-like)
> *Not typically used by Google/Anthropic/Bedrock*
**Example:**
```yaml
preset:
stop:
- "END"
- "STOP"
```
---
#### top_p
> **Supported by:** `openAI`, `azureOpenAI`, custom (OpenAI-like)
> **Google/Anthropic** often use `topP` (capital “P”) instead of `top_p`.
**Example:**
```yaml
preset:
top_p: 0.9
```
---
#### topP
> **Supported by:** `google` & `anthropic`
> (similar purpose to `top_p`, but named differently in those APIs)
**Example:**
```yaml
preset:
topP: 0.8
```
---
#### topK
> **Supported by:** `google` & `anthropic`
> (k-sampling limit on the next token distribution)
**Example:**
```yaml
preset:
topK: 40
```
---
#### max_tokens
> **Supported by:** `openAI`, `azureOpenAI`, custom (OpenAI-like)
> *For Google/Anthropic, use `maxOutputTokens` or `maxTokens` (depending on the endpoint).*
**Example:**
```yaml
preset:
max_tokens: 4096
```
---
#### maxOutputTokens
> **Supported by:** `google`, `anthropic`
> *Equivalent to `max_tokens` for these providers.*
**Example:**
```yaml
preset:
maxOutputTokens: 2048
```
---
#### promptCache
> **Supported by:** `anthropic`, `bedrock` (Anthropic and Nova models)
> (Toggle Anthropic’s “prompt-caching” feature)
**Default:** `true`
**Example:**
```yaml
preset:
promptCache: true
```
**Note:** For Bedrock endpoints, prompt caching is automatically enabled for Claude and Nova models. Set `promptCache: false` to explicitly disable it.
---
#### reasoning_effort
**Accepted Values:**
- `""` (empty string — unset, uses API default)
- `"none"`
- `"minimal"`
- `"low"`
- `"medium"`
- `"high"`
- `"xhigh"` (extra high)
> **Supported by:** `openAI`, `azureOpenAI`, custom (OpenAI-like), `bedrock` (ZAI, MoonshotAI models)
**Default:** `""` (unset)
**Example:**
```yaml
preset:
reasoning_effort: "low"
```
---
#### reasoning_summary
**Accepted Values:**
- `""` (empty string — disables reasoning summaries)
- `"auto"`
- `"concise"`
- `"detailed"`
> **Supported by:** `openAI`, `azureOpenAI`, custom (OpenAI-like)
**Default:** `""` (disabled)
**Example:**
```yaml
preset:
reasoning_summary: "detailed"
```
---
#### useResponsesApi
> **Supported by:** `openAI`, `azureOpenAI`, custom (OpenAI-like)
**Default:** `false`
**Example:**
```yaml
preset:
useResponsesApi: true
```
---
#### verbosity
**Accepted Values:**
- `""` (empty string — unset, uses API default)
- `"low"`
- `"medium"`
- `"high"`
> **Supported by:** `openAI`, `azureOpenAI`, custom (OpenAI-like)
**Default:** `""` (unset)
**Example:**
```yaml
preset:
verbosity: "low"
```
---
#### web_search
> **Supported by:** `openAI`, `azureOpenAI`, custom (OpenAI-like), `google`, `anthropic`
**Default:** `false`
**Note:** For Google endpoints, this parameter appears as `Grounding with Google Search` in the actual panel but controls `web_search` in the implementation.
**Example:**
```yaml
preset:
web_search: true
```
---
#### disableStreaming
> **Supported by:** `openAI`, `azureOpenAI`, custom (OpenAI-like)
**Default:** `false`
**Example:**
```yaml
preset:
disableStreaming: true
```
---
#### thinkingBudget
> **Supported by:** `google`, `anthropic`, `bedrock` (Anthropic models)
**Default:** `"Auto (-1)"` (Google), `2000` (Anthropic, Bedrock (Anthropic models))
**Example:**
```yaml
preset:
thinkingBudget: "2000"
```
---
#### thinkingLevel
> **Supported by:** `google` (Gemini 3+ models)
**Accepted Values:**
- `""` (unset/auto)
- `"minimal"`
- `"low"`
- `"medium"`
- `"high"`
**Default:** `""` (unset — model decides)
**Example:**
```yaml
preset:
thinkingLevel: "medium"
```
---
#### effort
> **Supported by:** `anthropic`, `bedrock` (Anthropic models)
**Options:** `""` (unset/auto), `"low"`, `"medium"`, `"high"`, `"max"`
**Default:** `""` (unset — model decides)
**Example:**
```yaml
preset:
effort: "high"
```
---
#### thinking
> **Supported by:** `google`, `anthropic`, `bedrock` (Anthropic models)
**Default:** `true`
**Example:**
```yaml
preset:
thinking: true
```
---
#### region
> **Supported by:** `bedrock`
> (Used to specify an AWS region for Amazon Bedrock)
**Example:**
```yaml
preset:
region: "us-east-1"
```
---
#### maxTokens
> **Supported by:** `bedrock`
> (Used in place of `max_tokens`)
**Example:**
```yaml
preset:
maxTokens: 1024
```
# OCR Config Object Structure (/docs/configuration/librechat_yaml/object_structure/ocr)
## Overview
The `ocr` object allows you to configure Optical Character Recognition (OCR) settings for the application, enabling the extraction of text from images. This section provides a detailed breakdown of the `ocr` object structure.
There are 4 main fields under `ocr`:
- `mistralModel`
- `apiKey`
- `baseURL`
- `strategy`
**Notes:**
- If using the Mistral OCR API, you don't need to edit your `librechat.yaml` file.
- You only need the following environment variables to get started: `OCR_API_KEY` and `OCR_BASEURL`.
- OCR functionality allows the application to extract text from images, which can then be processed by AI models.
- The default strategy is `mistral_ocr`, which uses Mistral's OCR capabilities.
- You can also configure a custom OCR service by setting the strategy to `custom_ocr`.
- Azure-deployed Mistral OCR models can be used by setting the strategy to `azure_mistral_ocr`.
- Google Vertex AI-deployed Mistral OCR models can be used by setting the strategy to `vertexai_mistral_ocr`.
- Requires the `GOOGLE_SERVICE_KEY_FILE` environment variable to be set with service account credentials
- The service key can be provided as: file path, URL, base64 encoded JSON, or raw JSON string
- Project ID and location are automatically extracted from the service account credentials
- Local text extraction is available via `document_parser`, which extracts text from PDF, DOCX, XLS/XLSX, and OpenDocument files without any external API.
- Uses `pdfjs-dist`, `mammoth`, and `SheetJS` locally — no API key or base URL needed
- Only the `strategy` field is required; `apiKey`, `baseURL`, and `mistralModel` are ignored
- If using the default Mistral OCR, you may optionally specify a specific Mistral model to use.
- Environment variable parsing is supported for `apiKey`, `baseURL`, and `mistralModel` parameters.
- A `user_provided` strategy option is planned for future releases but is not yet implemented.
## Automatic Document Parsing (No Configuration Required)
The built-in `document_parser` runs automatically for agent file uploads **even when no `ocr` block is configured** in your `librechat.yaml`. This means PDF, DOCX, XLS/XLSX, and ODS files are parsed out of the box without any setup.
The resolution logic works as follows:
1. **No `ocr` config exists** — When an agent context file is uploaded and its MIME type matches a supported document type (PDF, DOCX, Excel, ODS), the `document_parser` is used directly. No OCR capability check is required for the agent.
2. **`ocr` config exists** — The configured strategy (e.g., `mistral_ocr`) is tried first. If the configured strategy **fails at runtime**, the `document_parser` is used as a fallback so text extraction still succeeds for supported document types.
3. **Neither succeeds** — If both the configured strategy and the document parser fail (e.g., the file is an image-only PDF with no embedded text), an error is returned suggesting that an OCR service is needed.
The `document_parser` handles text-based documents only. For image-based PDFs or scanned documents, you still need a configured OCR strategy (such as `mistral_ocr`) to extract text from the images within those files.
## Example
```yaml filename="ocr"
ocr:
mistralModel: "mistral-ocr-latest"
apiKey: "your-mistral-api-key"
strategy: "mistral_ocr"
```
Example with custom OCR:
```yaml filename="ocr with custom OCR"
ocr:
apiKey: "your-custom-ocr-api-key"
baseURL: "https://your-custom-ocr-service.com/api"
strategy: "custom_ocr"
```
Example with Azure Mistral OCR:
```yaml filename="ocr with Azure Mistral OCR"
ocr:
mistralModel: "deployed-mistral-ocr-2503" # should match deployment name on Azure
apiKey: "${AZURE_MISTRAL_OCR_API_KEY}" # arbitrary .env var reference
baseURL: "https://your-deployed-endpoint.models.ai.azure.com/v1" # hardcoded, can also be .env var reference
strategy: "azure_mistral_ocr"
```
Example with Google Vertex AI Mistral OCR:
```yaml filename="ocr with Google Vertex AI Mistral OCR"
ocr:
mistralModel: "mistral-ocr-2505" # model name as deployed in Vertex AI
strategy: "vertexai_mistral_ocr"
```
Example with local document parser (no external API needed):
```yaml filename="ocr with document parser"
ocr:
strategy: "document_parser"
```
## mistralModel
```yaml filename="ocr / mistralModel"
ocr:
mistralModel: "mistral-ocr-latest"
```
For Azure deployments:
```yaml filename="ocr / mistralModel (Azure)"
ocr:
mistralModel: "deployed-mistral-ocr-2503" # Your Azure deployment name
```
For Google Vertex AI deployments:
```yaml filename="ocr / mistralModel (Google Vertex AI)"
ocr:
mistralModel: "mistral-ocr-2505" # Your Vertex AI model name
```
## apiKey
```yaml filename="ocr / apiKey"
ocr:
apiKey: "your-ocr-api-key"
```
## baseURL
```yaml filename="ocr / baseURL"
ocr:
baseURL: "https://your-ocr-service.com/api"
```
## strategy
```yaml filename="ocr / strategy"
ocr:
strategy: "custom_ocr"
```
**Available Strategies:**
- `mistral_ocr`: Uses Mistral's OCR capabilities via the standard [Mistral API](/docs/features/ocr#1-mistral-ocr-default).
- `azure_mistral_ocr`: Uses Mistral OCR models deployed on [Azure AI Foundry](/docs/features/ocr#2-azure-mistral-ocr).
- `vertexai_mistral_ocr`: Uses Mistral OCR models deployed on [Google Cloud Vertex AI](/docs/features/ocr#3-google-vertex-ai-mistral-ocr).
- `document_parser`: Uses local text extraction for PDF, DOCX, XLS/XLSX, and OpenDocument files. No external API needed. Also runs automatically for agent file uploads when no `ocr` config is present, and as a fallback when a configured OCR strategy fails.
- `custom_ocr`: Uses a custom OCR service specified by the `baseURL` [(not yet implemented)](/docs/features/ocr#future-enhancements).
# Registration Object Structure (/docs/configuration/librechat_yaml/object_structure/registration)
## Example
```yaml filename="Registration Object Structure"
# Example Registration Object Structure
registration:
socialLogins: ["google", "facebook", "github", "discord", "openid"]
allowedDomains:
- "gmail.com"
- "protonmail.com"
```
## socialLogins
**Key:**
**Example:**
```yaml filename="registration / socialLogins"
socialLogins: ["google", "facebook", "github", "discord", "openid"]
```
## allowedDomains
**Key:**
**Required**
**Example:**
```yaml filename="registration / allowedDomains"
allowedDomains:
- "gmail.com"
- "protonmail.com"
```
# Shared Endpoint Settings (/docs/configuration/librechat_yaml/object_structure/shared_endpoint_settings)
This page describes the shared configuration settings for all endpoints. The settings highlighted here are available to all configurations under the ["Endpoints"](/docs/configuration/librechat_yaml/object_structure/config#endpoints) field unless noted otherwise.
## Example Configuration
```yaml filename="Shared Endpoint Settings"
endpoints:
# Individual endpoint configurations
openAI:
streamRate: 25
titleModel: "gpt-4o-mini"
titleMethod: "completion"
titlePrompt: "Create a concise title for this conversation:\n\n{convo}"
azureOpenAI:
streamRate: 35
titleModel: "grok-3"
titleMethod: "structured"
titlePrompt: |
Analyze this conversation and provide:
1. A concise title in the detected language (5 words or less, no punctuation or quotation)
2. Always provide a relevant emoji at the start of the title
{convo}
titleConvo: true
anthropic:
streamRate: 25
titleModel: "claude-3-5-haiku-20241022"
titleMethod: "completion"
bedrock:
streamRate: 25
titleModel: "us.amazon.nova-lite-v1:0"
titleEndpoint: "anthropic"
google:
streamRate: 1
titleModel: "gemini-2.0-flash-lite"
titlePromptTemplate: "Human: {input}\nAssistant: {output}"
assistants:
streamRate: 30
azureAssistants:
streamRate: 30
# Global configuration using 'all' - this will override ALL individual endpoint settings that are "shared",
# i.e. streamRate, titleModel, titleMethod, titlePrompt, titlePromptTemplate, titleEndpoint.
all:
titleConvo: true
titleModel: "gpt-4.1-nano"
titlePrompt: |
Analyze this conversation and provide:
1. The detected language of the conversation
2. A concise title in the detected language (5 words or less, no punctuation or quotation)
3. Always provide a relevant emoji at the start of the title
{convo}
```
> **Important:** When using the `all` configuration, it will override ALL individual endpoint settings for the properties you define. In the example above, the `all` configuration would override the `titleConvo`, `titleModel`, and `titlePrompt` settings for all endpoints, while individual `streamRate` settings would be preserved since it's not defined in `all`.
## streamRate
**Key:**
**Default:** 1
> Allows for streaming data at the fastest rate possible while allowing the system to wait for the next tick
## titleConvo
**Key:**
**Default:** `false`
**Notes:**
- When enabled, titles will be generated automatically using the configured title settings
- Must be used in conjunction with `titleModel` or the endpoint must have a default model available
**Example:**
```yaml filename="titleConvo"
titleConvo: true
```
## titleModel
**Key:**
**Default:** System default for the current endpoint
## titleMethod
**Key:**
**Default:** `"completion"`
**Available Methods:**
- **`"completion"`** - Uses standard completion API without tools/functions. Compatible with most LLMs.
- **`"structured"`** - Uses structured output for title generation. Requires provider/model support.
- **`"functions"`** - Legacy alias for "structured". Functionally identical.
**Example:**
```yaml filename="titleMethod"
titleMethod: "completion"
```
## titlePrompt
**Key:**
**Default:**
```
Analyze this conversation and provide:
1. The detected language of the conversation
2. A concise title in the detected language (5 words or less, no punctuation or quotation)
{convo}
```
**Notes:**
- Must always include the `{convo}` placeholder
- The `{convo}` placeholder will be replaced with the formatted conversation
- Can be placed anywhere in the prompt
**Example:**
```yaml filename="titlePrompt"
titlePrompt: "Create a brief, descriptive title for the following conversation:\n\n{convo}\n\nTitle:"
```
## titlePromptTemplate
**Key:**
**Default:** `"User: {input}\nAI: {output}"`
**Notes:**
- Must include both `{input}` and `{output}` placeholders
- `{input}` is replaced with the user's initial message
- `{output}` is replaced with the AI's response
- The formatted result replaces `{convo}` in the titlePrompt
**Example:**
```yaml filename="titlePromptTemplate"
titlePromptTemplate: "Human: {input}\n\nAssistant: {output}"
```
## titleEndpoint
**Key:**
**Default:** Uses the current conversation's endpoint
**Accepted Values:**
- `openAI`
- `azureOpenAI`
- `google`
- `anthropic`
- `bedrock`
- For custom endpoints: use the exact [custom endpoint name](/docs/configuration/librechat_yaml/object_structure/custom_endpoint#name)
**Example:**
```yaml filename="titleEndpoint"
# Use Anthropic for titles even when chatting with OpenAI
endpoints:
openAI:
titleEndpoint: "anthropic"
# Will use anthropic's configuration for title generation
```
## maxToolResultChars
**Key:**
**Default:** No limit
**Notes:**
- Helps prevent excessively large tool outputs from consuming too many tokens
- Applies to all tool call results for the endpoint
**Example:**
```yaml filename="maxToolResultChars"
endpoints:
all:
maxToolResultChars: 50000
```
---
**Notes:**
- All settings shown on this page can be configured individually per endpoint or globally using the `all` key
- When using the `all` configuration, it will override the corresponding settings in ALL individual endpoints
- The `all` key does not accept `baseURL`
- Settings not defined in `all` will preserve their individual endpoint values
- For `streamRate`: Recommended values are between 25-40 for a smooth streaming experience
- Using a higher stream rate is a must when serving the app to many users at scale
**Example of Override Behavior:**
```yaml
endpoints:
openAI:
streamRate: 25 # This will be preserved
titleModel: "gpt-4" # This will be overridden
titleConvo: false # This will be overridden
all:
titleConvo: true
titleModel: "gpt-3.5-turbo"
# streamRate not defined here, so individual values are kept
```
---
# Endpoint Settings
- [Custom Endpoints](/docs/configuration/librechat_yaml/object_structure/custom_endpoint)
- [OpenAI](/docs/configuration/pre_configured_ai/openai)
- [Anthropic](/docs/configuration/pre_configured_ai/anthropic)
- [Bedrock](/docs/configuration/pre_configured_ai/bedrock)
- [Google](/docs/configuration/pre_configured_ai/google)
- [Azure OpenAI](/docs/configuration/librechat_yaml/object_structure/azure_openai)
- [Assistants](/docs/configuration/librechat_yaml/object_structure/assistants_endpoint)
# Speech Configuration (/docs/configuration/librechat_yaml/object_structure/speech)
## Overview
The `speech` object allows you to configure Text-to-Speech (TTS) and Speech-to-Text (STT) providers directly in your `librechat.yaml` configuration file. This enables server-side speech services without requiring users to configure their own API keys.
**Fields under `speech`:**
- `tts` - Text-to-Speech provider configurations
- `stt` - Speech-to-Text provider configurations
- `speechTab` - Default UI settings for speech features
**Notes:**
- Multiple providers can be configured simultaneously
- Users can select their preferred provider from the available options
- API keys in the config file should use environment variable references for security
## Example
```yaml filename="speech"
speech:
tts:
openai:
apiKey: "${TTS_API_KEY}"
model: "tts-1"
voices: ["alloy", "echo", "fable", "onyx", "nova", "shimmer"]
elevenlabs:
apiKey: "${ELEVENLABS_API_KEY}"
model: "eleven_multilingual_v2"
voices: ["voice-id-1", "voice-id-2"]
stt:
openai:
apiKey: "${STT_API_KEY}"
model: "whisper-1"
speechTab:
conversationMode: true
advancedMode: false
speechToText: true
textToSpeech: true
```
---
## tts
The `tts` object configures Text-to-Speech providers. Multiple providers can be configured, and users can choose which one to use.
### openai
OpenAI TTS configuration using models like `tts-1` or `tts-1-hd`.
**Example:**
```yaml filename="speech / tts / openai"
tts:
openai:
apiKey: "${TTS_API_KEY}"
model: "tts-1"
voices: ["alloy", "echo", "fable", "onyx", "nova", "shimmer"]
```
### azureOpenAI
Azure OpenAI TTS configuration.
**Example:**
```yaml filename="speech / tts / azureOpenAI"
tts:
azureOpenAI:
instanceName: "my-azure-instance"
apiKey: "${AZURE_TTS_API_KEY}"
deploymentName: "tts-deployment"
apiVersion: "2024-02-15-preview"
model: "tts-1"
voices: ["alloy", "echo", "nova"]
```
### elevenlabs
ElevenLabs TTS configuration for high-quality voice synthesis.
**voice_settings Sub-keys:**
**Example:**
```yaml filename="speech / tts / elevenlabs"
tts:
elevenlabs:
apiKey: "${ELEVENLABS_API_KEY}"
model: "eleven_multilingual_v2"
voices: ["21m00Tcm4TlvDq8ikWAM", "AZnzlk1XvdvUeBnXmlld"]
voice_settings:
stability: 0.5
similarity_boost: 0.75
use_speaker_boost: true
```
### localai
LocalAI TTS configuration for self-hosted speech synthesis.
**Example:**
```yaml filename="speech / tts / localai"
tts:
localai:
url: "http://localhost:8080"
voices: ["en-us-amy-low", "en-us-danny-low"]
backend: "piper"
```
---
## stt
The `stt` object configures Speech-to-Text providers.
### openai
OpenAI Whisper STT configuration.
**Example:**
```yaml filename="speech / stt / openai"
stt:
openai:
apiKey: "${STT_API_KEY}"
model: "whisper-1"
```
### azureOpenAI
Azure OpenAI Whisper STT configuration.
**Example:**
```yaml filename="speech / stt / azureOpenAI"
stt:
azureOpenAI:
instanceName: "my-azure-instance"
apiKey: "${AZURE_STT_API_KEY}"
deploymentName: "whisper-deployment"
apiVersion: "2024-02-15-preview"
```
---
## speechTab
The `speechTab` object configures default UI settings for speech features. These settings control what users see by default in the speech settings panel.
### speechToText (Object format)
When using an object instead of a boolean:
### textToSpeech (Object format)
When using an object instead of a boolean:
**Example:**
```yaml filename="speech / speechTab"
speechTab:
conversationMode: false
advancedMode: false
speechToText:
engineSTT: "openai"
autoTranscribeAudio: true
decibelValue: -45
textToSpeech:
engineTTS: "openai"
voice: "nova"
automaticPlayback: false
playbackRate: 1.0
cacheTTS: true
```
---
## Complete Example
```yaml filename="librechat.yaml"
version: 1.3.8
cache: true
speech:
tts:
openai:
apiKey: "${TTS_API_KEY}"
model: "tts-1-hd"
voices: ["alloy", "echo", "fable", "onyx", "nova", "shimmer"]
elevenlabs:
apiKey: "${ELEVENLABS_API_KEY}"
model: "eleven_multilingual_v2"
voices: ["21m00Tcm4TlvDq8ikWAM", "AZnzlk1XvdvUeBnXmlld"]
voice_settings:
stability: 0.5
similarity_boost: 0.75
stt:
openai:
apiKey: "${STT_API_KEY}"
model: "whisper-1"
speechTab:
conversationMode: false
advancedMode: false
speechToText: true
textToSpeech:
engineTTS: "openai"
voice: "nova"
automaticPlayback: false
```
---
## Notes
- Always use environment variable references (e.g., `${API_KEY}`) for API keys in configuration files
- Multiple TTS providers can be configured; users select their preferred option in the UI
- The `speechTab` settings define defaults that users can override in their personal settings
- For detailed feature documentation, see [Speech to Text & Text to Speech](/docs/configuration/stt_tts)
# Summarization Configuration (/docs/configuration/librechat_yaml/object_structure/summarization)
## Overview
The `summarization` configuration provides centralized control over conversation summarization and context pruning. This replaces the per-endpoint `summarize` and `summaryModel` fields that were previously available on custom and Azure OpenAI endpoints.
When a conversation exceeds the model's context window, the summarization system automatically compresses older messages into a concise checkpoint summary. This allows conversations to continue indefinitely without losing important context. The system also includes **context pruning**, which progressively degrades large tool results in older messages to reclaim token space before summarization is needed.
## Example
```yaml filename="summarization"
summarization:
provider: "openAI"
model: "gpt-4o-mini"
maxSummaryTokens: 4096
reserveRatio: 0.05
trigger:
type: "token_ratio"
value: 0.8
contextPruning:
enabled: true
keepLastAssistants: 3
softTrimRatio: 0.3
hardClearRatio: 0.5
minPrunableToolChars: 50000
softTrim:
maxChars: 4000
headChars: 1500
tailChars: 1500
hardClear:
enabled: true
placeholder: "[Old tool result content cleared]"
```
## provider
**Default:** Agent's own provider
## model
**Default:** Agent's own model
## parameters
## prompt
**Default:** A structured checkpoint prompt that produces sections for Goal, Constraints & Preferences, Progress, Key Decisions, Next Steps, and Critical Context.
## updatePrompt
**Default:** A built-in prompt that merges new messages into the existing checkpoint, compresses older details, and gives recent actions more detail.
## maxSummaryTokens
## reserveRatio
**Default:** `0.05` (5% headroom)
## trigger
### trigger Sub-keys
### Trigger Types
| Type | Value | Fires When |
|---|---|---|
| `token_ratio` | `0.0–1.0` | The fraction of context tokens used reaches or exceeds the value |
| `remaining_tokens` | Number | The remaining context tokens drops to or below the value |
| `messages_to_refine` | Number | The count of messages eligible for summarization reaches or exceeds the value |
| _(not set)_ | — | Whenever pruning drops any messages (default behavior) |
**Example:**
```yaml filename="summarization / trigger"
summarization:
trigger:
type: "remaining_tokens"
value: 8000
```
## contextPruning
Context pruning is an opt-in feature that operates independently of summarization. It targets large tool call results in older messages, applying two progressive stages:
1. **Soft trim** — Truncates tool results to keep only the head and tail portions, with an ellipsis in between
2. **Hard clear** — Replaces the entire tool result with a short placeholder
Both stages are position-based: messages closer to the beginning of the conversation (older) are pruned first.
### contextPruning Sub-keys
**Defaults:**
| Field | Default |
|---|---|
| `enabled` | `false` |
| `keepLastAssistants` | `3` |
| `softTrimRatio` | `0.3` |
| `hardClearRatio` | `0.5` |
| `minPrunableToolChars` | `50000` |
### softTrim Sub-keys
**Defaults:** `maxChars: 4000`, `headChars: 1500`, `tailChars: 1500`
### hardClear Sub-keys
**Defaults:** `enabled: true`, `placeholder: "[Old tool result content cleared]"`
**Example:**
```yaml filename="summarization / contextPruning"
summarization:
contextPruning:
enabled: true
keepLastAssistants: 5
softTrimRatio: 0.25
hardClearRatio: 0.6
minPrunableToolChars: 30000
softTrim:
maxChars: 6000
headChars: 2500
tailChars: 2500
hardClear:
enabled: true
placeholder: "[Content removed for context management]"
```
## Complete Configuration Example
```yaml filename="librechat.yaml"
version: 1.3.8
cache: true
summarization:
provider: "openAI"
model: "gpt-4o-mini"
maxSummaryTokens: 4096
reserveRatio: 0.05
trigger:
type: "token_ratio"
value: 0.8
contextPruning:
enabled: true
keepLastAssistants: 3
softTrimRatio: 0.3
hardClearRatio: 0.5
minPrunableToolChars: 50000
softTrim:
maxChars: 4000
headChars: 1500
tailChars: 1500
hardClear:
enabled: true
placeholder: "[Old tool result content cleared]"
```
## Migration from Per-Endpoint Settings
If you previously used `summarize` and `summaryModel` on custom or Azure OpenAI endpoints:
```yaml filename="Before (removed)"
endpoints:
custom:
- name: "My Endpoint"
summarize: true
summaryModel: "gpt-3.5-turbo"
```
These fields have been removed. Use the top-level `summarization` configuration instead:
```yaml filename="After"
summarization:
model: "gpt-4o-mini"
```
## Notes
- Summarization is configured globally rather than per-endpoint
- The `summarize` and `summaryModel` fields on custom endpoints and Azure OpenAI endpoints are no longer supported
- When `provider` and `model` are omitted, the agent's own provider and model are used for summarization
- Context pruning is disabled by default and must be explicitly enabled with `contextPruning.enabled: true`
- Context pruning only affects tool call results that exceed `minPrunableToolChars` — smaller results are never pruned
- The `keepLastAssistants` setting protects recent turns from pruning regardless of the trim/clear ratios
- Custom `prompt` and `updatePrompt` values fully replace the built-in prompts — use with care
- Set `AGENT_DEBUG_LOGGING=true` in your `.env` file to enable verbose logging of token counts and context pruning diagnostics
# Transactions (/docs/configuration/librechat_yaml/object_structure/transactions)
## Overview
The `transactions` object controls whether token usage records are saved to the database in LibreChat. This allows administrators to enable or disable transaction tracking independently from the balance system.
**Fields under `transactions`:**
- `enabled`
**Notes:**
- Transaction recording is essential for tracking historical token usage
- When `balance.enabled` is set to `true`, transactions are automatically enabled regardless of this setting
- Default value is `true` to ensure token usage is tracked by default
- Disabling transactions can reduce database storage requirements but will prevent historical usage analysis
## Example
```yaml filename="transactions"
transactions:
enabled: false
```
## enabled
**Key:**
**Description:**
The `enabled` field determines whether LibreChat saves detailed transaction records for each token usage event. These records include:
- Token counts for prompts and completions
- Associated costs and rates
- User and conversation identifiers
- Timestamps for each transaction
**Important Behavior:**
When the balance system is enabled (`balance.enabled: true`), transaction recording is automatically enabled regardless of the `transactions.enabled` setting. This ensures that:
1. Balance tracking functions correctly with a complete audit trail
2. Token usage can be accurately calculated and deducted from user balances
3. Historical data is available for balance reconciliation
**Use Cases:**
- **Enable transactions** (`true`): When you need to track usage patterns, generate reports, or maintain an audit trail
- **Disable transactions** (`false`): When you want to reduce database storage and don't need historical usage data (only works when balance tracking is also disabled)
## Relationship with Balance System
The transactions and balance systems work together:
```yaml filename="Example: Transactions with Balance"
# When balance is enabled, transactions are always enabled
balance:
enabled: true
startBalance: 20000
transactions:
enabled: false # This will be overridden to true because balance.enabled is true
```
```yaml filename="Example: Standalone Transaction Tracking"
# Track transactions without balance management
balance:
enabled: false
transactions:
enabled: true # Records all token usage without enforcing balance limits
```
## Database Impact
When transactions are enabled, each API call that consumes tokens creates a record in the "Transactions" collection with the following information:
- User ID and email
- Conversation ID
- Model used
- Token counts (prompt and completion)
- Token values and rates
- Timestamp
- Transaction type (credit or debit)
Consider the storage implications when enabling transactions for high-volume deployments.
# Cloudflare Turnstile Configuration (/docs/configuration/librechat_yaml/object_structure/turnstile)
## Example
```yaml filename="turnstile"
turnstile:
siteKey: "your-site-key-here"
options:
language: "auto" # "auto" or an ISO 639-1 language code (e.g., en)
size: "normal" # Options: "normal", "compact", "flexible", or "invisible"
```
## turnstile
**Key:**
### Fields
#### siteKey
- **Type:** `String`
- **Description:** Your unique Cloudflare Turnstile site key. Make sure you have registered your domain with Cloudflare and obtained this key from the [Cloudflare Turnstile Get Started](https://developers.cloudflare.com/turnstile/get-started/) guide.
- **Example:**
```yaml
turnstile:
siteKey: "your-site-key-here"
```
#### options
- **Type:** `Object`
- **Description:** An object to configure additional settings for the Turnstile widget.
**Subkeys:**
```yaml
turnstile:
options:
language: "auto"
size: "normal"
```
### Notes
- **Optional Integration:** The `turnstile` configuration block is optional. If you choose not to use Cloudflare Turnstile, you may omit this block entirely.
- **Dashboard Consistency:** Ensure that the values you configure here match your settings in the Cloudflare dashboard.
- **User Experience:** Customize the `options` subkeys as needed to tailor the widget's behavior and appearance to your application’s requirements.
---
# Web Search Configuration (/docs/configuration/librechat_yaml/object_structure/web_search)
The `webSearch` configuration allows you to customize the web search functionality within LibreChat, including search providers, content scrapers, and result rerankers.
## Overview
The web search feature consists of three main components:
1. **Search Providers**: Services that perform the initial web search
2. **Scrapers**: Services that extract content from web pages
3. **Rerankers**: Services that reorder search results for better relevance
## Example
```yaml filename="webSearch"
webSearch:
# Search Provider Configuration
serperApiKey: "${SERPER_API_KEY}"
searxngInstanceUrl: "${SEARXNG_INSTANCE_URL}"
searxngApiKey: "${SEARXNG_API_KEY}"
searchProvider: "serper" # Options: "serper", "searxng"
# Scraper Configuration
firecrawlApiKey: "${FIRECRAWL_API_KEY}"
firecrawlApiUrl: "${FIRECRAWL_API_URL}"
firecrawlVersion: "${FIRECRAWL_VERSION}"
scraperProvider: "firecrawl" # Options: "firecrawl", "serper"
# Reranker Configuration
jinaApiKey: "${JINA_API_KEY}"
jinaApiUrl: "${JINA_API_URL}"
cohereApiKey: "${COHERE_API_KEY}"
rerankerType: "jina" # Options: "jina", "cohere"
# General Settings
scraperTimeout: 7500 # Timeout in milliseconds for scraper requests (default: 7500)
safeSearch: 1 # Options: 0 (OFF), 1 (MODERATE - default), 2 (STRICT)
```
## Search Providers
### searchProvider
### serperApiKey
**Note:** Get your API key from [Serper.dev](https://serper.dev/api-keys)
### searxngInstanceUrl
### searxngApiKey
**Note:** This is optional and only needed if your SearXNG instance requires authentication.
## Scrapers
### firecrawlApiKey
**Note:** Get your API key from [Firecrawl.dev](https://docs.firecrawl.dev/introduction#api-key)
### firecrawlApiUrl
**Note:** This is optional and only needed if you're using a custom Firecrawl instance.
### firecrawlVersion
### scraperProviderider
### firecrawlOptions
**Subkeys:**
#### formats
#### includeTags
#### excludeTags
#### headers
#### waitFor
#### timeout
#### maxAge
**Note:** If you do not need extremely fresh data, enabling this can speed up your scrapes by 500%.
#### mobile
#### skipTlsVerification
#### blockAds
#### removeBase64Images
#### parsePDF
#### storeInCache
#### zeroDataRetention
#### location
#### onlyMainContent
#### changeTrackingOptions
**Example:**
```yaml filename="webSearch"
webSearch:
firecrawlApiKey: "${FIRECRAWL_API_KEY}"
firecrawlOptions:
formats: ["markdown", "rawHtml"]
includeTags: ["main", "article", ".content"]
excludeTags: ["nav", "footer", ".ads"]
waitFor: 2000
timeout: 10000
mobile: false
blockAds: true
onlyMainContent: true
location:
country: "US"
languages: ["en"]
```
**Note:** For detailed information about Firecrawl scraper options and defaults, see the [Firecrawl API Documentation](https://docs.firecrawl.dev/api-reference/endpoint/scrape).
## Rerankers
### jinaApiKey
**Note:** Get your API key from [Jina.ai](https://jina.ai/api-dashboard/)
### jinaApiUrl
**Note:** This is optional and only needed if you're using a custom Jina instance.
### cohereApiKey
**Note:** Get your API key from [Cohere Dashboard](https://dashboard.cohere.com/welcome/login)
### rerankerType
## General Settings
### scraperTimeout
### safeSearch
**Note:** Safe search levels align with standard search API conventions. MODERATE filtering is enabled by default to provide reasonable content filtering while maintaining search effectiveness.
## Notes
- API keys can be configured in two ways:
1. Set the environment variables specified in the YAML configuration
2. If environment variables are not set, users will be prompted to provide the API keys via the UI
- The configuration supports multiple services for each component (providers, scrapers, rerankers)
- If a specific service type is not specified, the system will try all available services in that category
- Safe search provides three levels of content filtering: OFF (0), MODERATE (1), and STRICT (2)
- Never put actual API keys in the YAML configuration - only use environment variable names
## Setting Up SearXNG
SearXNG is a privacy-focused meta search engine that you can self-host.
For more information, see the [official SearXNG documentation](https://docs.searxng.org/).
Here are the steps to set up your own SearXNG instance for use with LibreChat:
### Using Docker Desktop
1. **Search for the official SearXNG image**
- Open Docker Desktop
- Search for `searxng/searxng` in the **Images** tab
- Click **Run** on the official image to automatically pull down and run a container of the image
2. **Running the container**
- Expand the **Optional Settings** dropdown in the proceeding panel that appears once the download completes
- Set your desired configuration details (port number, container name, etc.)
- Click **Run** to start the container
3. **Configure SearXNG for LibreChat**
- Navigate to the `Files` tab in Docker Desktop
- Go to `/etc/searxng/settings.yaml`
- Open the file editor
- Navigate to the `formats` section
- Add `json` as an acceptable format so that LibreChat can communicate with your instance
- Save the file
4. **Restart the container**
- Restart the container for the changes to take effect
#### Video Guide:
Here's a video to guide you through the process from start to finish in about a minute:
**Note:** In this example, the instance URL is http://localhost:55011 (port number found under the container name in the top left at the end of the video)
### Configuring LibreChat to use SearXNG
You can configure SearXNG in LibreChat within the UI or through `librechat.yaml`.
#### UI Configuration
1. **Open the tools dropdown in the chat input bar**
2. **Click on the gear icon next to Web Search**
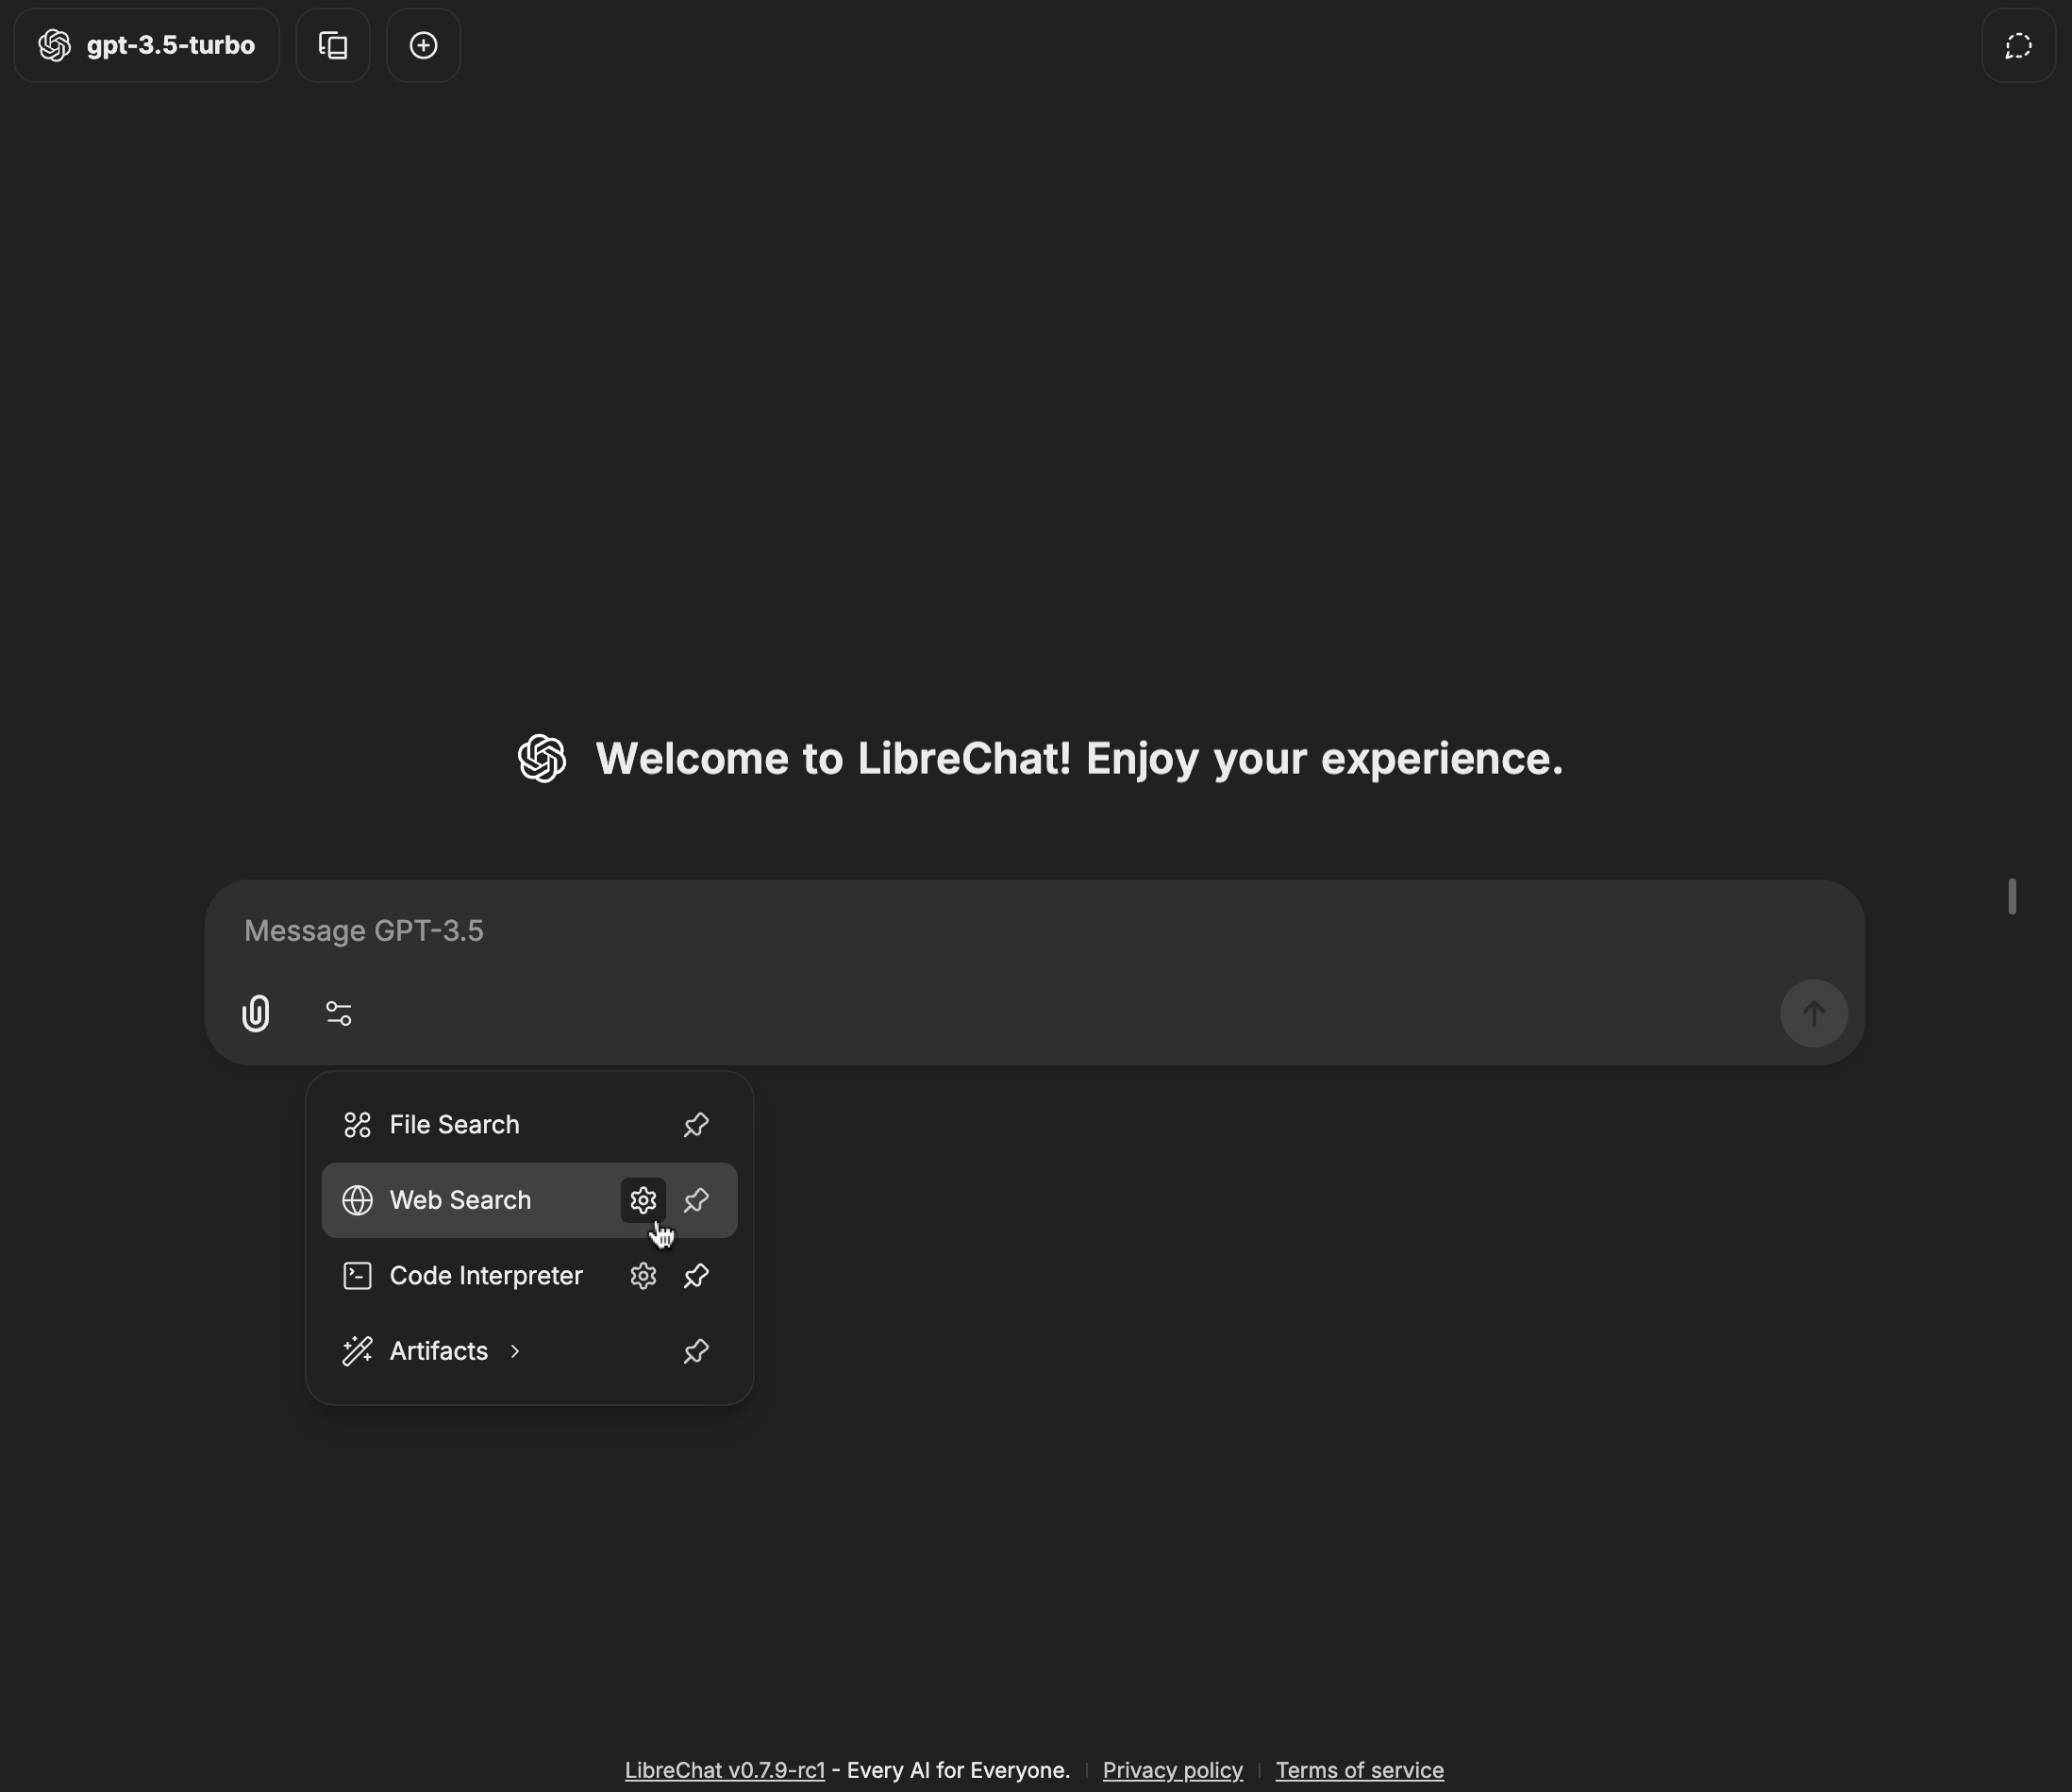
3. **Select SearXNG from the Search Provider dropdown**
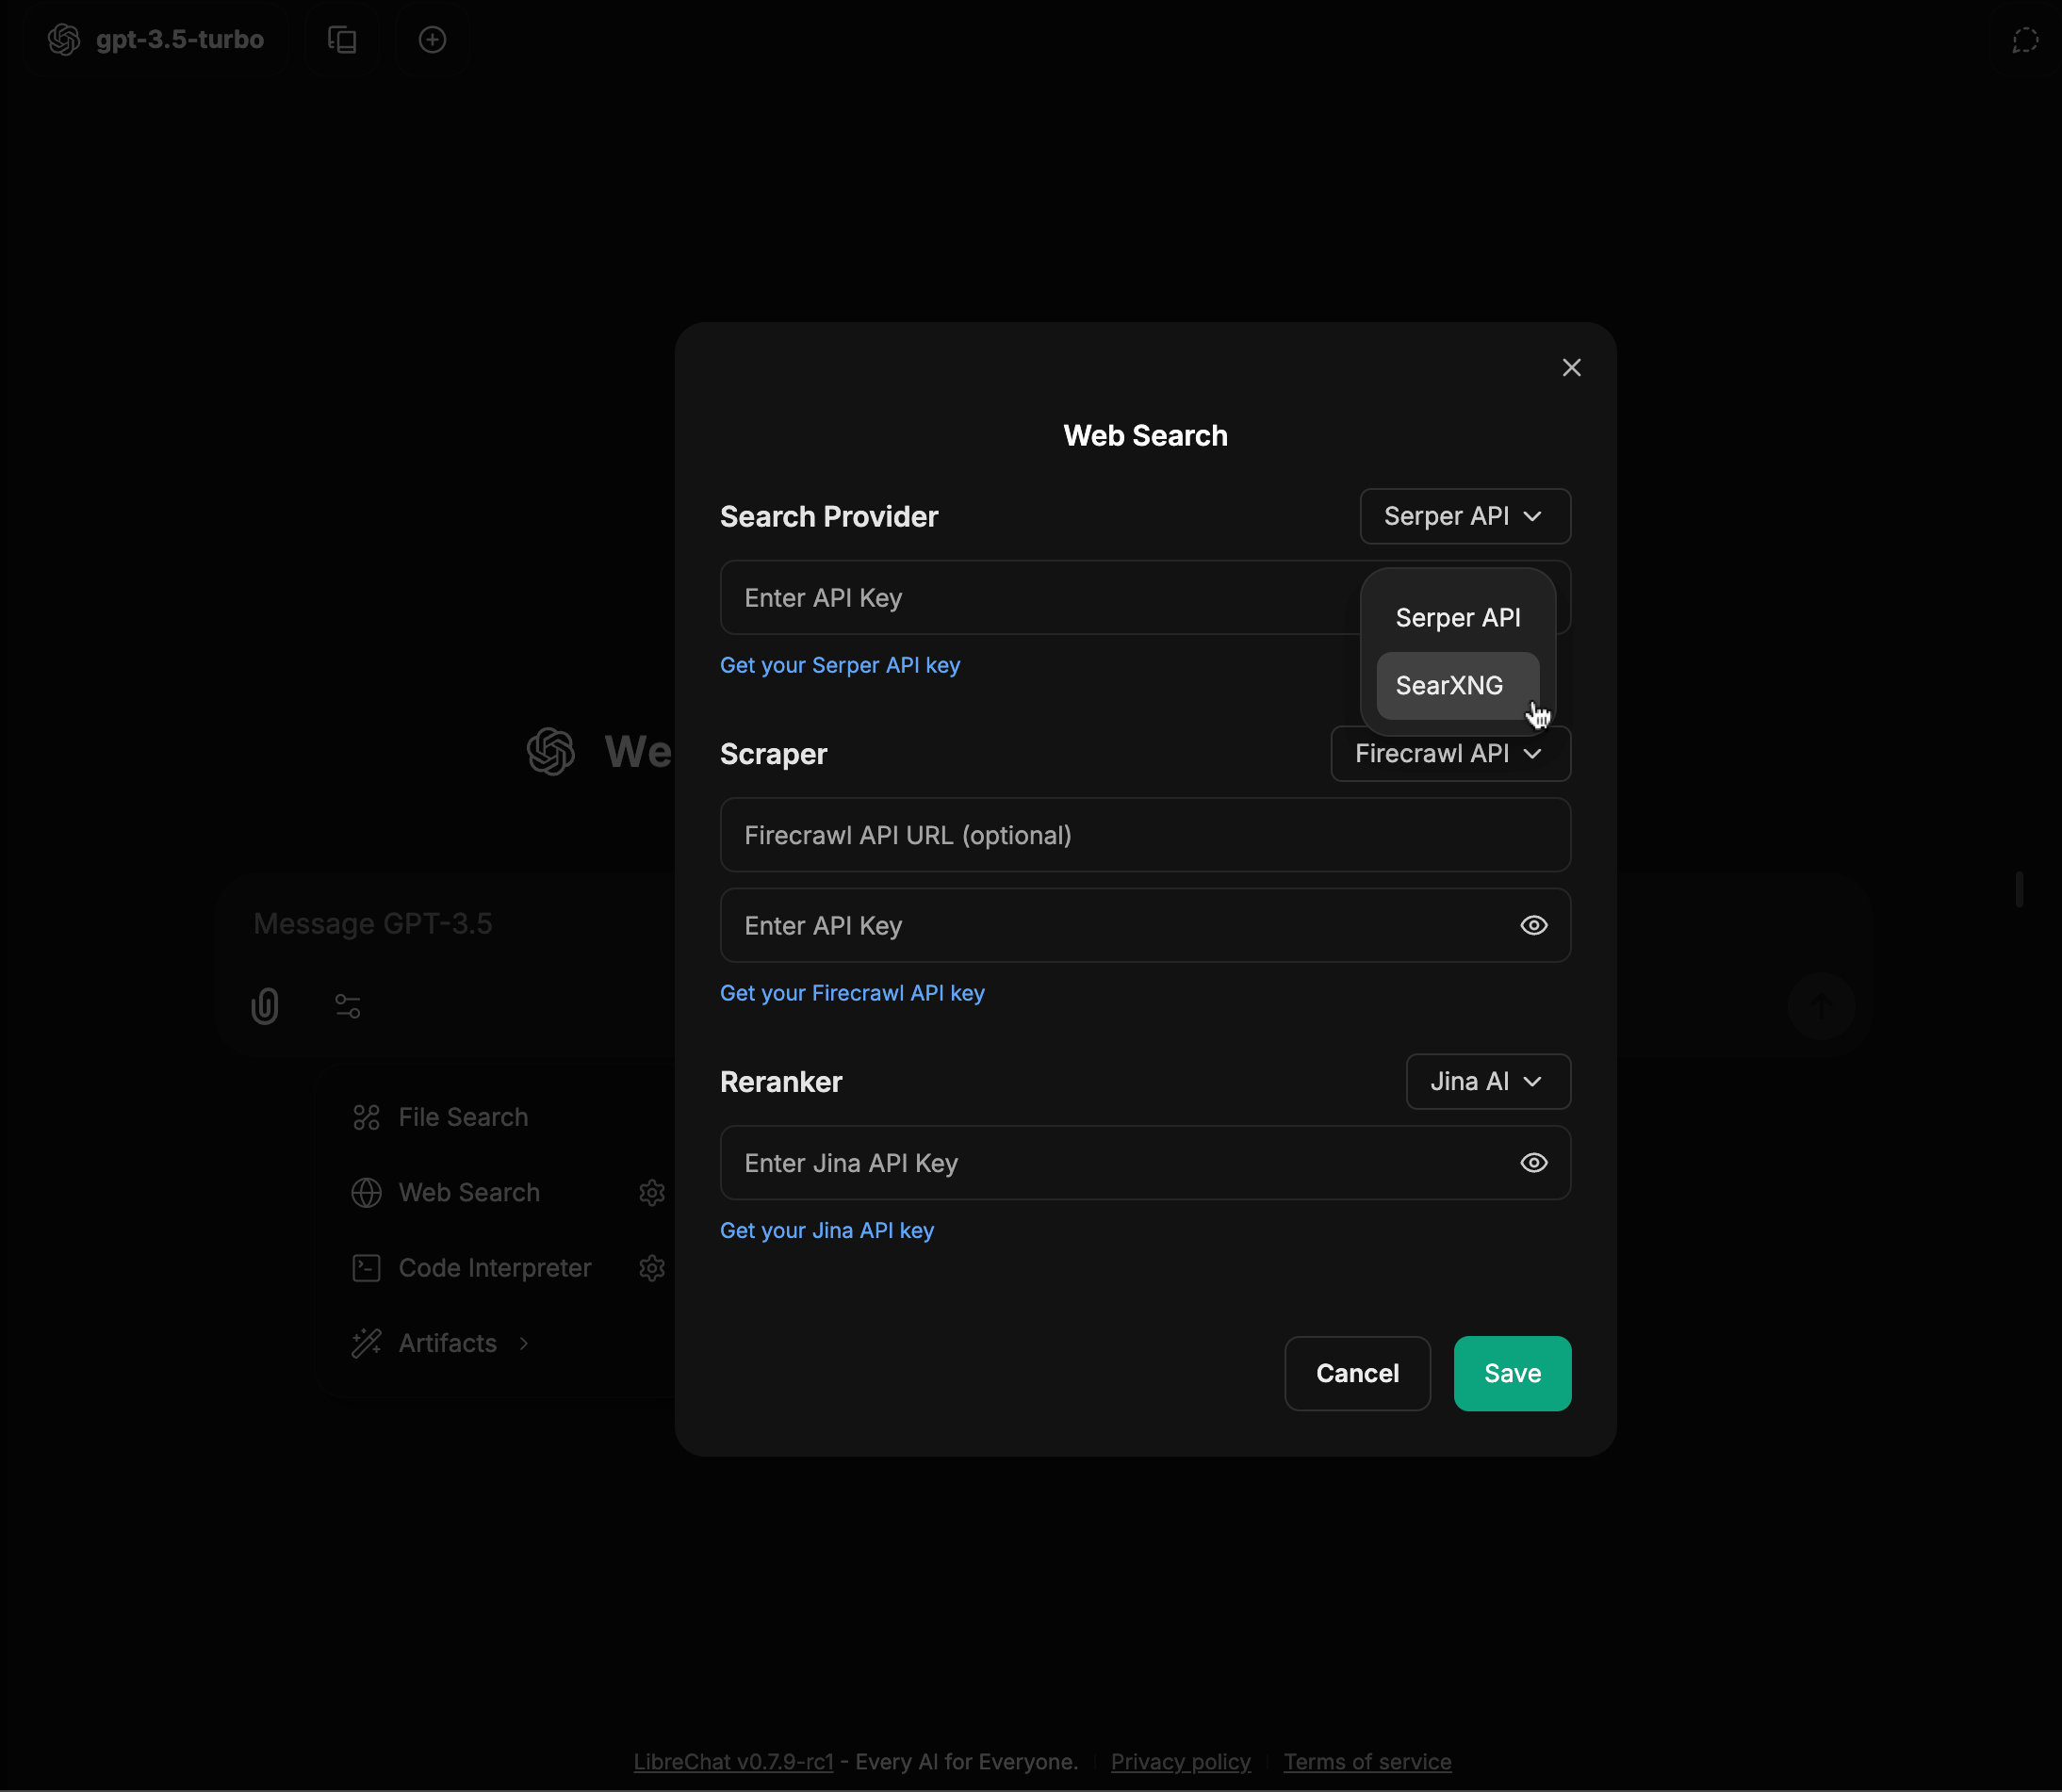
4. **Enter your configuration details (e.g. instance URL, scraper type, etc.) and click save**
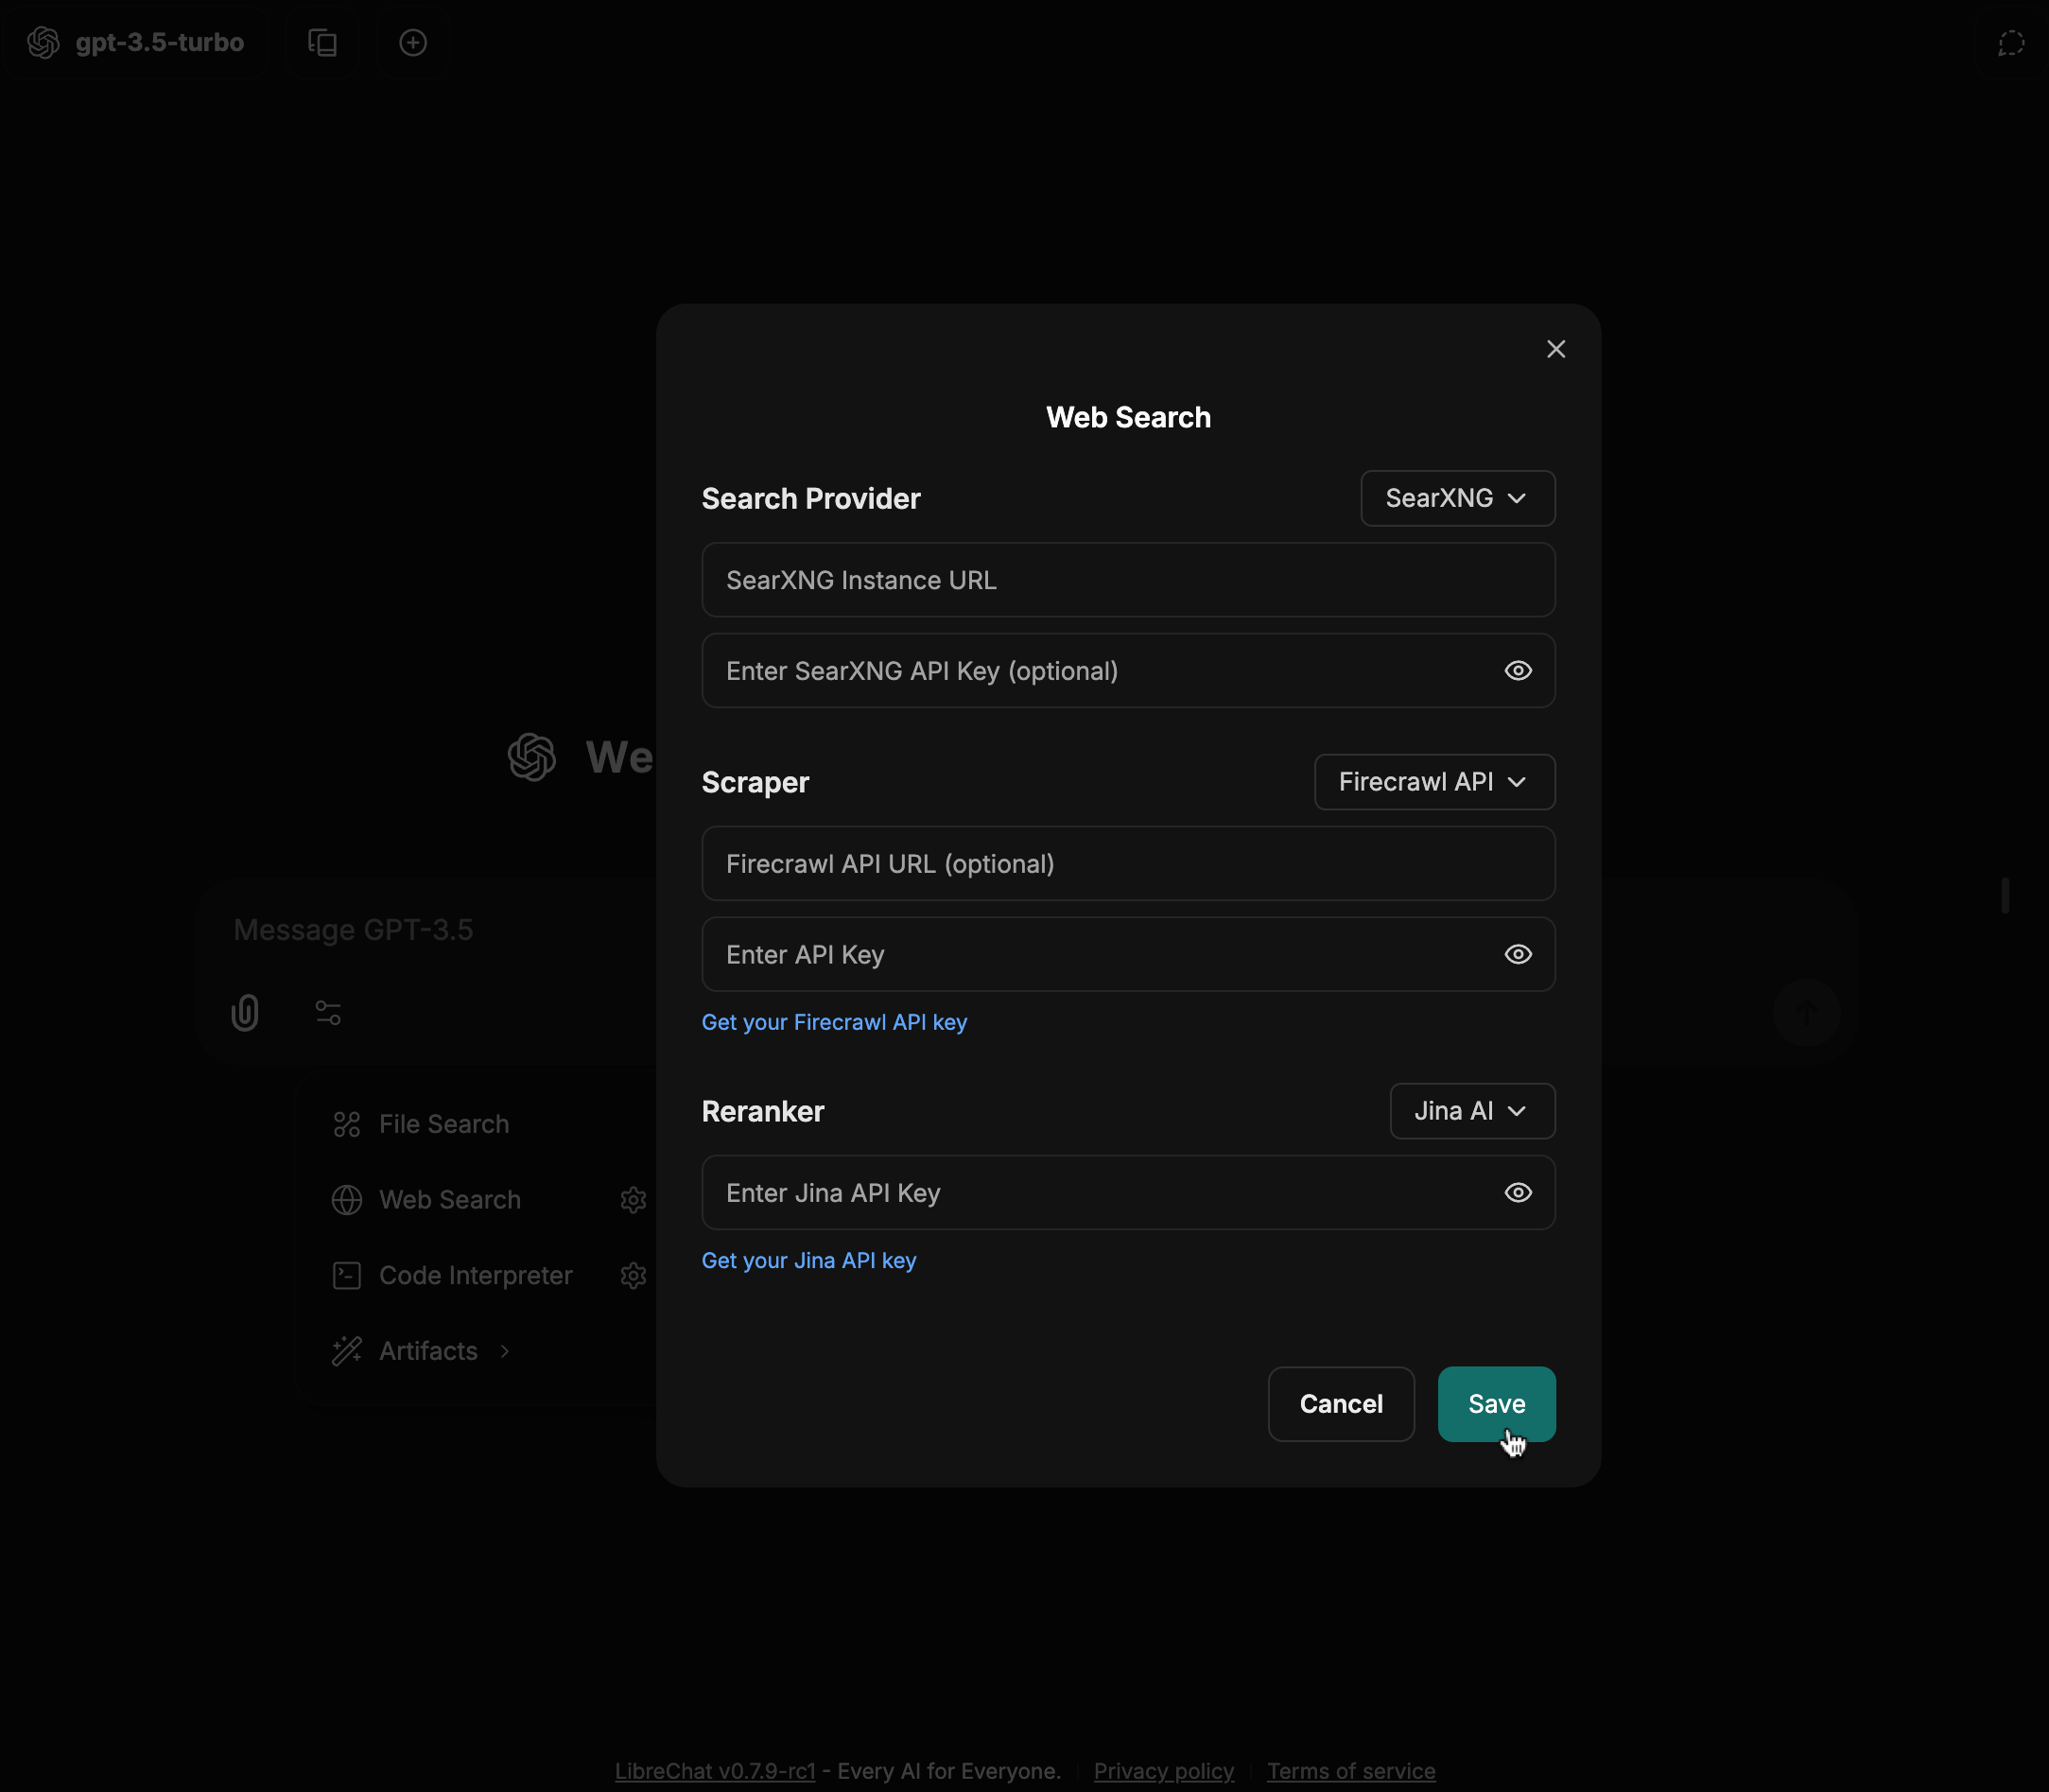
5. **Click on the Web Search option in the tools dropdown**

6. **The Web Search badge should now be enabled, meaning your queries can now utilize the web search functionality**
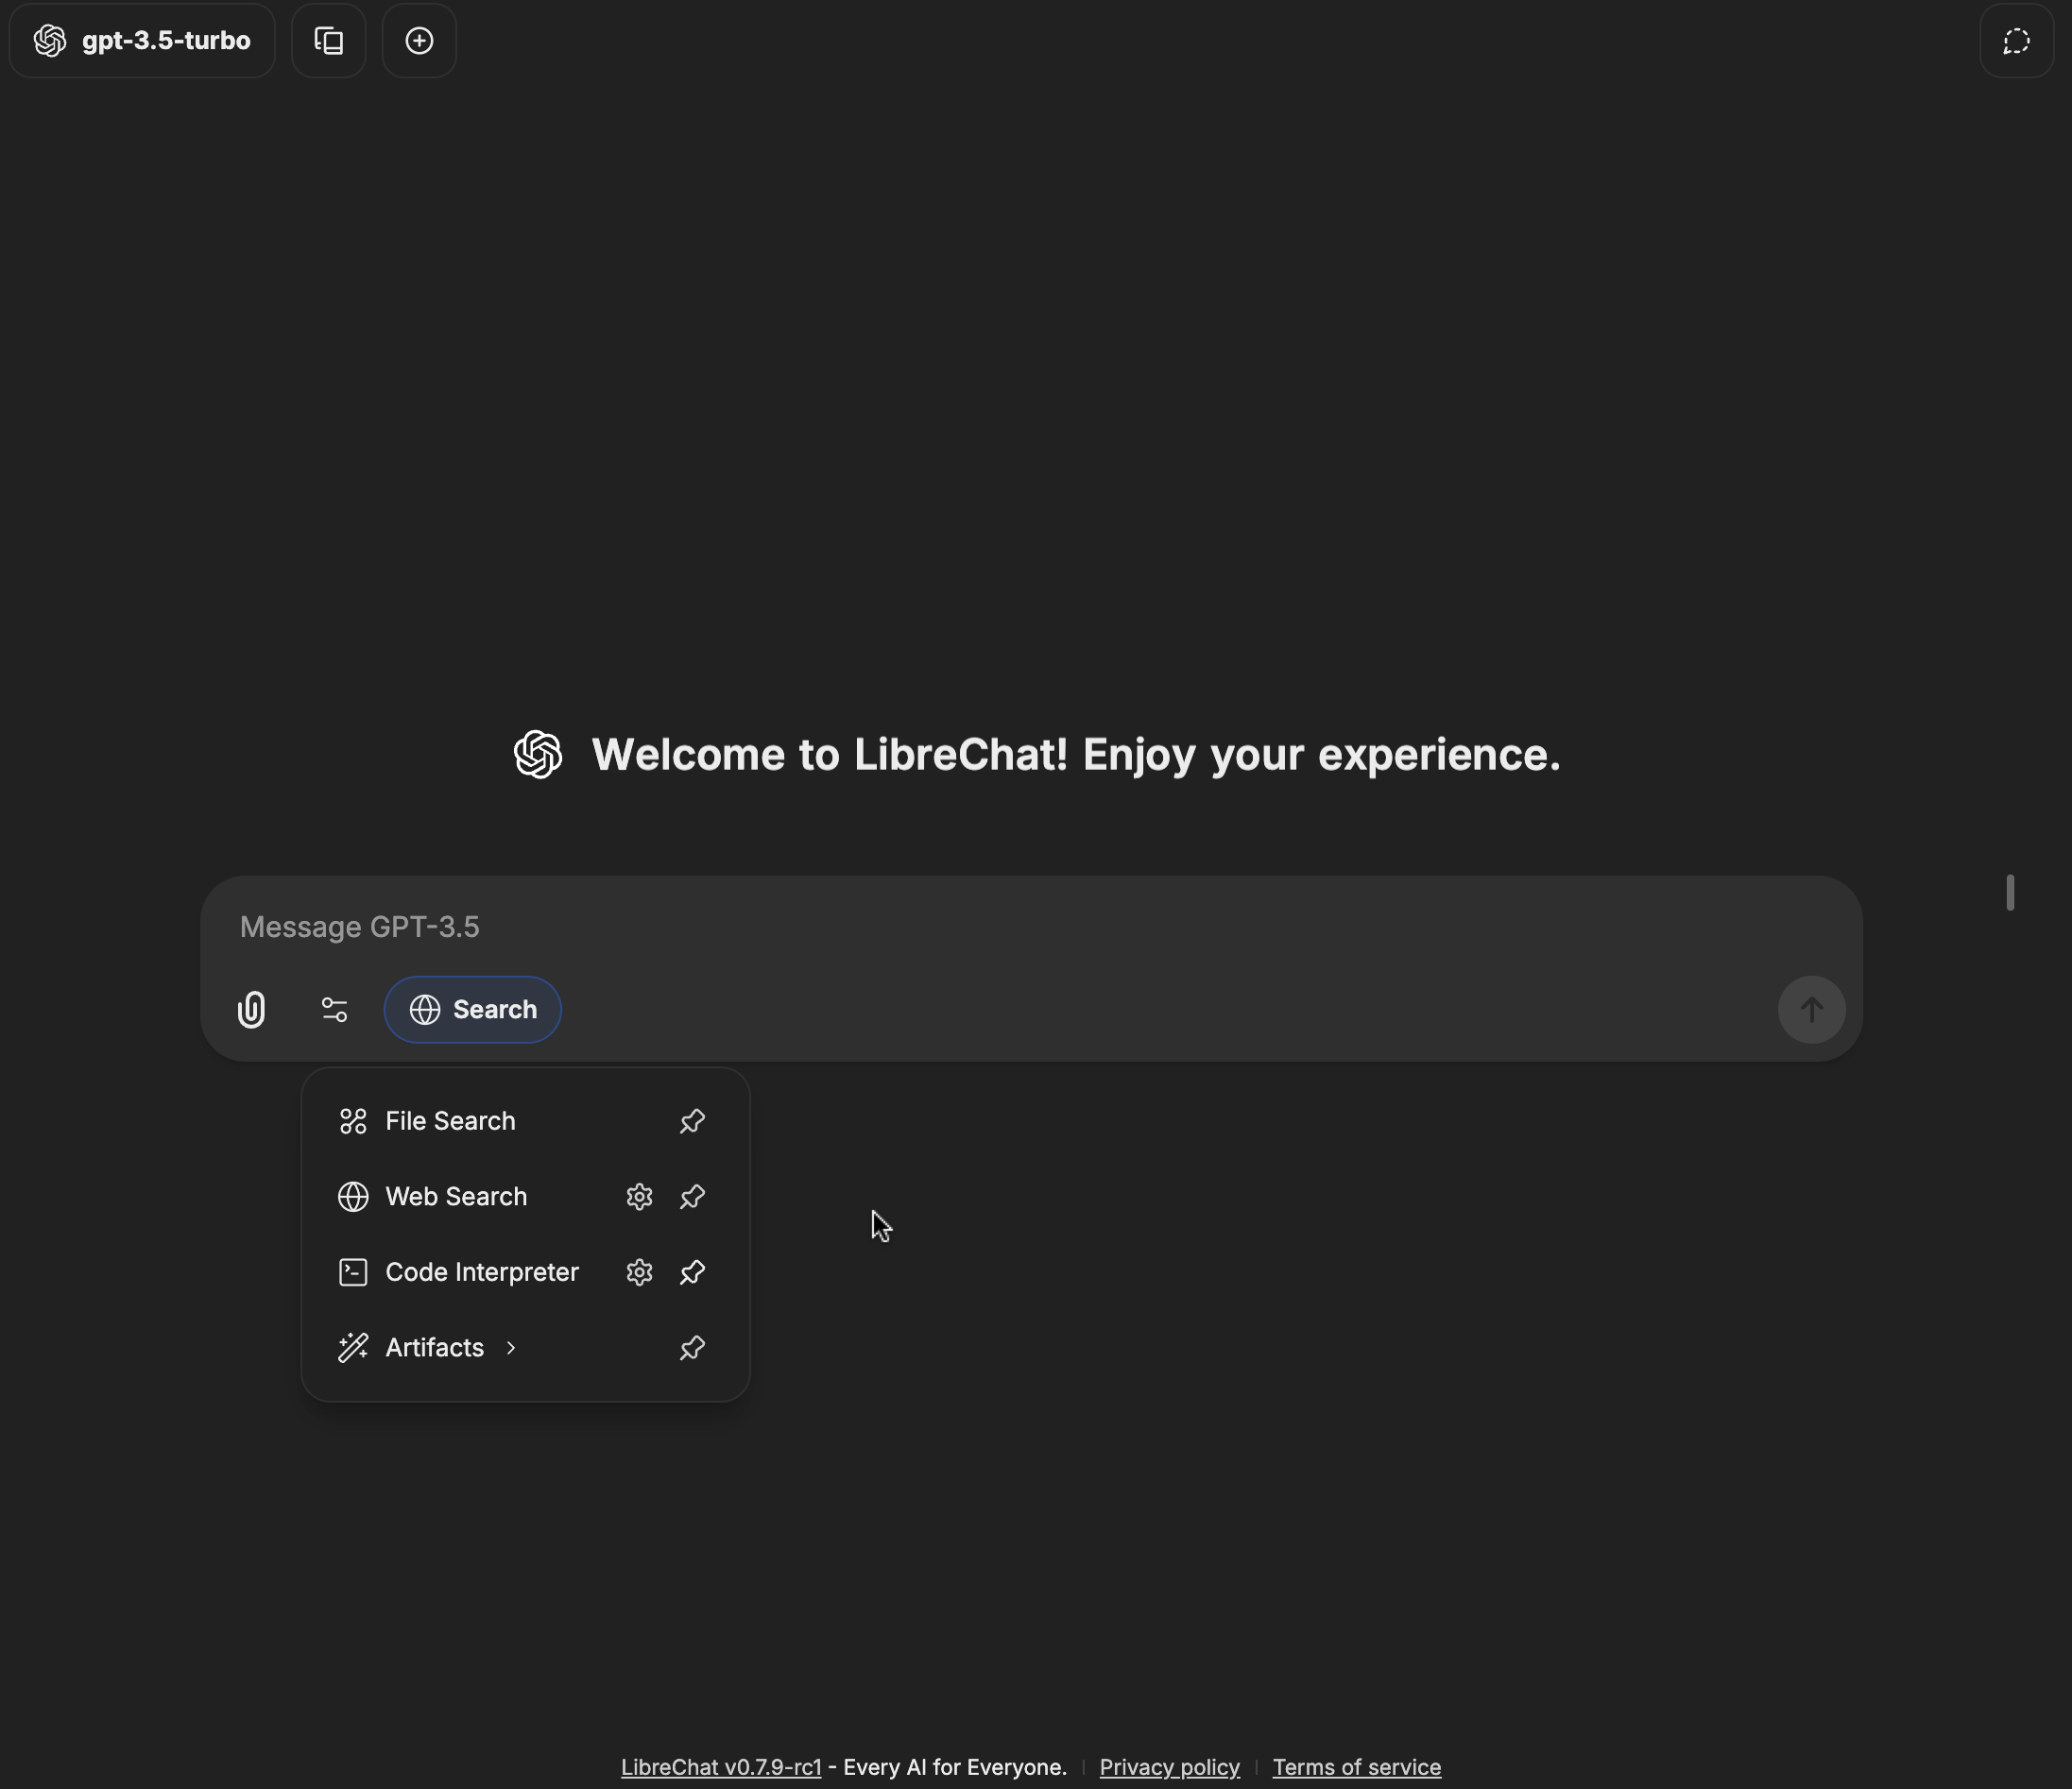
- These user-provided values are stored securely, associated with the individual user and the specific MCP server, and substituted at runtime.
- **Example:**
```yaml
customUserVars:
MY_SERVICE_API_KEY:
title: "My Service API Key"
description: "Your personal API access key for My Service. Find it at My Service API Settings."
SOME_OTHER_VAR:
title: "Some Other Variable"
description: "The specific value for some other configuration (e.g., a specific path or identifier)."
```
Usage in `headers`:
```yaml
headers:
X-Auth-Token: "{{MY_SERVICE_API_KEY}}"
X-Some-Other-Config: "{{SOME_OTHER_VAR}}"
```
Usage in `env` (for `stdio` type):
```yaml
env:
API_KEY: "{{MY_SERVICE_API_KEY}}"
```
#### `oauth`
- **Type:** Object (Optional)
- **Description:** OAuth2 configuration for authenticating with the MCP server. When configured, users will be prompted to authenticate via OAuth flow before the MCP server can be used. If no client id & client secret is provided, Dynamic Client Registration (DCR) will be used.
- **Required Subkeys:**
- `authorization_url`: String - The OAuth authorization endpoint URL
- `token_url`: String - The OAuth token endpoint URL
- `client_id`: String - OAuth client identifier
- `client_secret`: String - OAuth client secret
- `redirect_uri`: String - [OAuth redirect URI](/docs/features/mcp#oauth-callback-url) (eg. `http://localhost:3080/api/mcp/${serverName}/oauth/callback`)
- `scope`: String - OAuth scopes (space-separated)
- **Optional Subkeys:**
- `grant_types_supported`: Array of Strings - Supported grant types (defaults to `["authorization_code", "refresh_token"]`)
- `token_endpoint_auth_methods_supported`: Array of Strings - Supported token endpoint authentication methods (defaults to `["client_secret_basic", "client_secret_post"]`)
- `response_types_supported`: Array of Strings - Supported response types (defaults to `["code"]`)
- `code_challenge_methods_supported`: Array of Strings - Supported PKCE code challenge methods (defaults to `["S256", "plain"]`)
- `skip_code_challenge_check`: Boolean - Skip checking whether the OAuth provider advertises PKCE support. Useful for providers like AWS Cognito that support S256 but don't advertise it in their metadata. (defaults to `false`)
- **Example:**
```yaml
oauth-api-server:
authorization_url: https://api.example.com/oauth/authorize
token_url: https://api.example.com/oauth/token
client_id: your_client_id
client_secret: your_client_secret
redirect_uri: http://localhost:3080/api/mcp/oauth-api-server/oauth/callback
scope: "read execute"
grant_types_supported: ["authorization_code", "refresh_token"]
token_endpoint_auth_methods_supported: ["client_secret_post"]
response_types_supported: ["code"]
code_challenge_methods_supported: ["S256", "plain"]
```
#### `startup`
- **Type:** Boolean (Optional)
- **Description:** When set to `false`, this MCP server will not be connected at application startup. This is useful for servers that require user input or configuration before connecting, or for cases where you want to control when the server is initialized.
- **Default Value:** `true`
- **Example:**
```yaml
mcpServers:
my-mcp-server:
type: streamable-http
url: "https://api.example.com/mcp/"
startup: false
```
### Notes
- **Type Inference:**
- If `type` is omitted:
- If `url` is specified and starts with `http://` or `https://`, `type` defaults to `sse`.
- If `url` is specified and starts with `ws://` or `wss://`, `type` defaults to `websocket`.
- If `command` is specified, `type` defaults to `stdio`.
- **Connection Types:**
- **`stdio`**: Starts an MCP server as a child process and communicates via standard input/output.
- **`websocket`**: Connects to an external MCP server via WebSocket.
- **`sse`**: Connects to an external MCP server via Server-Sent Events (SSE).
- **`streamable-http`**: Connects to an external MCP server via HTTP with support for streaming responses.
- **Internal/Local Addresses:**
- **Important**: MCP servers using internal IP addresses (e.g., `172.24.1.165`, `192.168.1.100`), or local domains (e.g., `mcp-server`, `host.docker.internal`) **must** be explicitly allowed in [`mcpSettings.allowedDomains`](/docs/configuration/librechat_yaml/object_structure/mcp_settings).
- See [MCP Settings](/docs/configuration/librechat_yaml/object_structure/mcp_settings) for configuration details.
## Examples
### Configuration with Internal Addresses
When using internal/local MCP servers, you must configure `mcpSettings.allowedDomains`:
```yaml filename="Complete MCP Configuration with Internal Servers"
# MCP Settings - Required for internal/local addresses
mcpSettings:
allowedDomains:
- "172.24.1.165" # Internal IP
- "mcp-prod" # Docker container
- "host.docker.internal" # Docker host
# MCP Servers - Individual configurations
mcpServers:
prod-mcp:
type: streamable-http
url: http://172.24.1.165:8000/mcp
timeout: 120000
test-mcp:
type: streamable-http
url: http://mcp-prod:8001/mcp
timeout: 120000
```
### `stdio` MCP Server
```yaml filename="stdio MCP Server"
puppeteer:
type: stdio
command: npx
args:
- -y
- "@modelcontextprotocol/server-puppeteer"
timeout: 30000
initTimeout: 10000
env:
NODE_ENV: "production"
USER_EMAIL: "{{LIBRECHAT_USER_EMAIL}}"
USER_ROLE: "{{LIBRECHAT_USER_ROLE}}"
stderr: inherit
```
### `sse` MCP Server
```yaml filename="sse MCP Server"
everything:
url: http://localhost:3001/sse
headers:
X-User-ID: "{{LIBRECHAT_USER_ID}}"
X-API-Key: "${SOME_API_KEY}"
```
### `websocket` MCP Server
```yaml filename="websocket MCP Server"
myWebSocketServer:
url: ws://localhost:8080
```
### `streamable-http` MCP Server
```yaml filename="streamable-http MCP Server"
streamable-http-server:
type: streamable-http
url: https://example.com/api/
headers:
X-User-ID: "{{LIBRECHAT_USER_ID}}"
X-API-Key: "${SOME_API_KEY}"
```
### MCP Server with Dynamic User Fields
```yaml filename="MCP Server with User Fields"
user-aware-server:
type: sse
url: https://api.example.com/users/{{LIBRECHAT_USER_USERNAME}}/stream
headers:
X-User-ID: "{{LIBRECHAT_USER_ID}}"
X-User-Email: "{{LIBRECHAT_USER_EMAIL}}"
X-User-Role: "{{LIBRECHAT_USER_ROLE}}"
X-Email-Verified: "{{LIBRECHAT_USER_EMAILVERIFIED}}"
Authorization: "Bearer ${API_TOKEN}"
```
### MCP Server with Per-User Credentials via `customUserVars`
```yaml filename="MCP Server with customUserVars"
my-mcp-server:
type: streamable-http
url: "https://api.example-service.com/api/" # Example URL
headers:
X-Auth-Token: "{{API_KEY}}" # Uses the API_KEY defined below
customUserVars:
API_KEY: # This key will be used as {{API_KEY}} in headers/url
title: "API Key" # This is the label shown above the input field
description: "Get your API key here." # This description appears below the input
```
**NOTE** See [MCP Server Initialization](/docs/features/mcp#server-initialization) for more information about UI based server initialization.
### MCP Server with Custom Icon
```yaml filename="MCP Server with Icon"
filesystem:
command: npx
args:
- -y
- "@modelcontextprotocol/server-filesystem"
- /home/user/LibreChat/
iconPath: /home/user/LibreChat/client/public/assets/logo.svg
chatMenu: false # Exclude from chatarea dropdown
```
### MCP Server with OAuth Authentication
```yaml filename="MCP Server with OAuth"
oauth-api-server:
type: streamable-http
url: https://api.example.com/mcp/
oauth:
authorization_url: https://api.example.com/oauth/authorize
token_url: https://api.example.com/oauth/token
client_id: your_client_id
client_secret: your_client_secret
redirect_uri: http://localhost:3080/api/mcp/oauth-api-server/oauth/callback
scope: "read execute"
```
### MCP Server with Server Instructions
```yaml filename="MCP Server with Instructions"
# Server that uses its own provided instructions
web-search:
type: streamable-http
url: https://example.com/mcp/search
serverInstructions: true
# Server with instructions explicitly disabled
filesystem:
command: npx
args:
- -y
- "@modelcontextprotocol/server-filesystem"
- /home/user/documents/
serverInstructions: false
# Server with custom instructions
puppeteer:
type: stdio
command: npx
args:
- -y
- "@modelcontextprotocol/server-puppeteer"
serverInstructions: |
Browser automation security and best practices:
1. Be cautious with local file access and internal IP addresses
2. Take screenshots to verify successful page interactions
3. Wait for page elements to load before interacting with them
4. Use specific CSS selectors for reliable element targeting
5. Check console logs for JavaScript errors when troubleshooting
```
### OAuth-Enabled MCP Server (Legacy requiresOAuth)
```yaml filename="OAuth-Enabled MCP Server"
composio-googlesheets:
type: sse
url: https://mcp.composio.dev/googlesheets/sse-endpoint
requiresOAuth: true
headers:
X-User-ID: "{{LIBRECHAT_USER_ID}}"
X-API-Key: "${COMPOSIO_API_KEY}"
timeout: 45000
initTimeout: 15000
```
**Related Environment Variables (Optional):**
```bash
# OAuth configuration for MCP servers
MCP_OAUTH_ON_AUTH_ERROR=true
MCP_OAUTH_DETECTION_TIMEOUT=10000
# API key for the service
COMPOSIO_API_KEY=your_composio_api_key_here
```
---
**Importing MCP Server Configurations**
The `mcpServers` configurations allow LibreChat to dynamically interact with various MCP servers, which can perform specialized tasks or provide specific functionalities within the application. This modular approach facilitates extending the application's capabilities by simply adding or modifying server configurations.
---
## Additional Information
- **Default Behavior:**
- Initialization happens at startup, and the app must be restarted for changes to take effect.
- If both `url` and `command` are specified, the `type` must be explicitly defined to avoid ambiguity.
- **Multi-User Support:**
- The MCPManager now supports distinct user-level and app-level connections, enabling proper connection management per user.
- User connections are tracked and managed separately, with proper establishment and cleanup.
- Use dynamic user field placeholders in headers, URLs, and environment variables:
- `{{LIBRECHAT_USER_ID}}` - User's unique identifier
- `{{LIBRECHAT_USER_EMAIL}}` - User's email address
- `{{LIBRECHAT_USER_USERNAME}}` - User's username
- `{{LIBRECHAT_USER_ROLE}}` - User's role (e.g., "user", "admin")
- And many more fields (see headers section for complete list)
- **User Idle Management:**
- User connections are monitored for activity and will be disconnected after 15 minutes of inactivity.
- **Environment Variables:**
- **In `env` (for `stdio` type):** Useful for setting up specific runtime environments or configurations required by the MCP server process.
- **In `headers` (for `sse` and `streamable-http` types):** Use `${ENV_VAR}` syntax to reference environment variables in header values.
- **Dynamic User Fields:**
- User field placeholders are replaced at runtime with the authenticated user's information
- Only non-sensitive fields are available (passwords and other sensitive data are excluded)
- Missing fields default to empty strings
- Boolean fields are converted to string representations ("true" or "false")
- **Error Handling (`stderr`):**
- Configuring `stderr` allows you to manage how error messages from the MCP server process are handled. The default `"inherit"` means that the errors will be printed to the parent process's `stderr`.
- **Server Instructions:**
- Instructions are automatically injected into the agent's system message when MCP server tools are used
- Custom instructions (string values) take precedence over server-provided instructions
- Multiple MCP servers can each contribute their own instructions to the agent context
- Instructions are only included when the corresponding MCP server's tools are actually available to the agent
- **OAuth Authentication:**
- OAuth2 flow is supported for secure authentication with MCP servers
- Users will be prompted to authenticate via OAuth before the MCP server can be used
## References
- [Model Context Protocol (MCP) Documentation](https://github.com/modelcontextprotocol)
- [MCP Transports Specification](https://modelcontextprotocol.io/specification/draft/basic/transports)
- [Node.js child_process.spawn](https://nodejs.org/api/child_process.html#child_processspawncommand-args-options)
---
By properly configuring the `mcpServers` in your `librechat.yaml`, you can enhance LibreChat's functionality and integrate custom tools and services seamlessly.
# MCP Settings Object Structure (/docs/configuration/librechat_yaml/object_structure/mcp_settings)
## Overview
The `mcpSettings` configuration provides global settings for MCP (Model Context Protocol) server security and behavior. This configuration is separate from `mcpServers` and controls how MCP servers can connect to certain domains and IP addresses.
## Example
```yaml filename="MCP Settings Object Structure"
# Example MCP Settings Configuration
mcpSettings:
allowedDomains:
- "example.com" # Specific domain
- "*.example.com" # All subdomains using wildcard
- "mcp-server" # Local Docker domain
- "172.24.1.165" # Internal network IP
- "https://api.example.com:8443" # With protocol and port
```
## Configuration
### Subkeys
### Security Context (SSRF Protection)
LibreChat includes SSRF (Server-Side Request Forgery) protection with the following behavior:
**When `allowedDomains` is NOT configured:**
- SSRF-prone targets are **blocked by default**
- All other external domains are **allowed**
**When `allowedDomains` IS configured:**
- **Only** domains on the list are allowed
- Internal/SSRF targets can be allowed by explicitly adding them to the list
**Blocked SSRF targets include:**
- **Localhost** addresses (`localhost`, `127.0.0.1`, `::1`)
- **Private IP ranges** (`10.0.0.0/8`, `172.16.0.0/12`, `192.168.0.0/16`)
- **Link-local addresses** (`169.254.0.0/16`, includes cloud metadata IPs)
- **Internal TLDs** (`.internal`, `.local`, `.localhost`)
- **Common internal service names** (`redis`, `mongodb`, `postgres`, `api`, `rag_api`, etc.)
If your MCP servers need to connect to internal services or Docker containers, you **must explicitly add them** to `allowedDomains`.
### Pattern Formats
The `allowedDomains` array supports several pattern formats:
1. **Exact Domain Match**
```yaml
allowedDomains:
- "example.com"
```
Only allows connections to exactly `example.com` (any protocol/port)
2. **Wildcard Subdomain Match**
```yaml
allowedDomains:
- "*.example.com"
```
Allows connections to all subdomains of `example.com` (e.g., `api.example.com`, `mcp.example.com`)
3. **Specific IP Address**
```yaml
allowedDomains:
- "192.168.1.100"
- "172.24.1.165"
```
Allows connections to specific IP addresses
4. **Local Docker Domains**
```yaml
allowedDomains:
- "mcp-server"
- "host.docker.internal"
```
Allows connections to Docker container names or special Docker domains
5. **With Protocol and Port**
```yaml
allowedDomains:
- "https://api.example.com:8443"
- "http://internal-mcp:3000"
```
Restricts connections to specific protocol and port combinations
### Error Messages
If you see errors like:
```bash
error: [MCPServersRegistry] Failed to inspect server "my-mcp": Domain "http://172.24.1.165:8000" is not allowed
error: [MCP][my-mcp] Failed to initialize: Domain "http://172.24.1.165:8000" is not allowed
```
This likely indicates that the MCP server's domain needs to be added to `allowedDomains`:
```yaml
mcpSettings:
allowedDomains:
- "172.24.1.165" # Add the IP address or domain
```
## References
- [MCP Servers Configuration](/docs/configuration/librechat_yaml/object_structure/mcp_servers)
- [MCP Features](/docs/features/mcp)
- [Actions allowedDomains](/docs/configuration/librechat_yaml/object_structure/actions#alloweddomains) (similar concept for Actions)
# Memory Configuration (/docs/configuration/librechat_yaml/object_structure/memory)
## Overview
The `memory` object allows you to configure conversation memory and personalization features for the application. This configuration controls how the system remembers and personalizes conversations, including token limits, message context windows, and agent-based memory processing.
## Example
```yaml filename="memory"
memory:
disabled: false
validKeys: ["user_preferences", "conversation_context", "personal_info"]
tokenLimit: 2000
charLimit: 10000
personalize: true
messageWindowSize: 5
agent:
provider: "openAI"
model: "gpt-4"
instructions: "You are a helpful assistant that remembers user preferences and context."
model_parameters:
temperature: 0.7
max_tokens: 1000
```
## disabled
**Default:** `false`
```yaml filename="memory / disabled"
memory:
disabled: true
```
## validKeys
**Default:** No restriction (all keys are valid)
```yaml filename="memory / validKeys"
memory:
validKeys:
- "user_preferences"
- "conversation_context"
- "personal_information"
- "learned_facts"
```
## tokenLimit
**Default:** No limit
```yaml filename="memory / tokenLimit"
memory:
tokenLimit: 2000
```
## charLimit
**Default:** `10000`
```yaml filename="memory / charLimit"
memory:
charLimit: 10000
```
## personalize
**Default:** `true`
```yaml filename="memory / personalize"
memory:
personalize: false
```
## messageWindowSize
**Default:** `5`
```yaml filename="memory / messageWindowSize"
memory:
messageWindowSize: 10
```
## agent
The `agent` field supports two different configuration formats:
### Agent by ID
When you have a pre-configured agent, you can reference it by its ID:
```yaml filename="memory / agent (by ID)"
memory:
agent:
id: "memory-agent-001"
```
### Custom Agent Configuration
For more control, you can define a complete agent configuration:
```yaml filename="memory / agent (custom)"
memory:
agent:
provider: "openAI"
model: "gpt-4"
instructions: "You are a memory assistant that helps maintain conversation context and user preferences."
model_parameters:
temperature: 0.3
max_tokens: 1500
top_p: 0.9
```
#### Agent Configuration Fields
When using custom agent configuration, the following fields are available:
**provider** (required)
**model** (required)
**instructions** (optional)
**model_parameters** (optional)
## Complete Configuration Example
Here's a comprehensive example showing all memory configuration options:
```yaml filename="librechat.yaml"
version: 1.3.8
cache: true
memory:
disabled: false
validKeys:
- "user_preferences"
- "conversation_context"
- "learned_facts"
- "personal_information"
tokenLimit: 3000
charLimit: 10000
personalize: true
messageWindowSize: 8
agent:
provider: "openAI"
model: "gpt-4"
instructions: |
Store memory using only the specified validKeys. For user_preferences: save
explicitly stated preferences about communication style, topics of interest,
or workflow preferences. For conversation_context: save important facts or
ongoing projects mentioned. For learned_facts: save objective information
about the user. For personal_information: save only what the user explicitly
shares about themselves. Delete outdated or incorrect information promptly.
model_parameters:
temperature: 0.2
max_tokens: 2000
top_p: 0.8
frequency_penalty: 0.1
```
## Using Custom Endpoints
The memory feature supports custom endpoints. When using a custom endpoint, the `provider` field should match the custom endpoint's `name` exactly. Custom headers with environment variables and user placeholders are properly resolved.
```yaml filename="librechat.yaml with custom endpoint for memory"
endpoints:
custom:
- name: 'Custom Memory Endpoint'
apiKey: 'dummy'
baseURL: 'https://api.gateway.ai/v1'
headers:
x-gateway-api-key: '${GATEWAY_API_KEY}'
x-gateway-virtual-key: '${GATEWAY_OPENAI_VIRTUAL_KEY}'
X-User-Identifier: '{{LIBRECHAT_USER_EMAIL}}'
X-Application-Identifier: 'LibreChat - Test'
api-key: '${TEST_CUSTOM_API_KEY}'
models:
default:
- 'gpt-4o-mini'
- 'gpt-4o'
fetch: false
memory:
disabled: false
tokenLimit: 3000
personalize: true
messageWindowSize: 10
agent:
provider: 'Custom Memory Endpoint'
model: 'gpt-4o-mini'
```
- See [Custom Endpoint Headers](/docs/configuration/librechat_yaml/object_structure/custom_endpoint#headers) for all available placeholders
## Notes
- Memory functionality enhances conversation continuity and personalization
- When `personalize` is true, users get a toggle in their chat interface to control memory usage
- Token limits help control memory usage and processing costs
- Valid keys provide granular control over what information can be stored
- Custom `instructions` replace default memory handling instructions and should be used with `validKeys`
- Agent configuration allows customization of memory processing behavior
- When disabled, all memory features are turned off regardless of other settings
- The message window size affects how much recent context is considered for memory updates
# Model Config Structure (/docs/configuration/librechat_yaml/object_structure/model_config)
Each item under `models` is part of a list of records, either a boolean value or Object:
**When specifying a model as an object:**
An object allows for detailed configuration of the model, including its `deploymentName` and/or `version`. This mode is used for more granular control over the models, especially when working with multiple versions or deployments under one instance or resource group.
**Example**:
```yaml filename="endpoints / azureOpenAI / groups / {group_item} / models / {model_item=Object}"
models:
gpt-4-vision-preview:
deploymentName: "gpt-4-vision-preview"
version: "2024-02-15-preview"
```
**Notes:**
- **Deployment Names** and **Versions** are critical for ensuring that the correct model is used.
- Double-check these values for accuracy to prevent unexpected behavior.
### deploymentName
**Key:**
**Required:** yes
**Example:**
```yaml filename="endpoints / azureOpenAI / groups / {group_item} / models / {model_item=Object} / deploymentName"
deploymentName: "gpt-4-vision-preview"
```
## version
**Key:**
**Required:** yes
**Example:**
```yaml filename="endpoints / azureOpenAI / groups / {group_item} / models / {model_item=Object} / version"
version: "2024-02-15-preview"
```
**Enabling a Model with Default Group Configuration**
**Key:**
**Example:**
```yaml filename="endpoints / azureOpenAI / groups / {group_item} / models"
models:
gpt-4-turbo: true
```
# Model Specs Object Structure (/docs/configuration/librechat_yaml/object_structure/model_specs)
## **Overview**
The `modelSpecs` object helps you provide a simpler UI experience for AI models within your application.
There are 3 main fields under `modelSpecs`:
- `enforce` (optional; default: false)
- `prioritize` (optional; default: true)
- `list` (required)
- `addedEndpoints` (optional)
**Notes:**
- If `enforce` is set to true, model specifications can potentially conflict with other interface settings such as `modelSelect`, `presets`, and `parameters`.
- The `list` array contains detailed configurations for each model, including presets that dictate specific behaviors, appearances, and capabilities.
- If [interface](interface.mdx) fields are not specified in the configuration, having a list of model specs will disable the following interface elements:
- `modelSelect`
- `parameters`
- `presets`
- If you would like to enable these interface elements along with model specs, you can set them to `true` in the `interface` object.
## Example
```yaml filename="modelSpecs"
modelSpecs:
enforce: true
prioritize: true
list:
- name: "meeting-notes-gpt4"
label: "Meeting Notes Assistant (GPT4)"
default: true
description: "Generate meeting notes by simply pasting in the transcript from a Teams recording."
iconURL: "https://example.com/icon.png"
preset:
endpoint: "azureOpenAI"
model: "gpt-4-turbo-1106-preview"
maxContextTokens: 128000 # Maximum context tokens
max_tokens: 4096 # Maximum output tokens
temperature: 0.2
modelLabel: "Meeting Summarizer"
greeting: |
This assistant creates meeting notes based on transcripts of Teams recordings.
To start, simply paste the transcript into the chat box.
promptPrefix: |
Based on the transcript, create coherent meeting minutes for a business meeting. Include the following sections:
- Date and Attendees
- Agenda
- Minutes
- Action Items
Focus on what items were discussed and/or resolved. List any open action items.
The format should be a bulleted list of high level topics in chronological order, and then one or more concise sentences explaining the details.
Each high level topic should have at least two sub topics listed, but add as many as necessary to support the high level topic.
- Do not start items with the same opening words.
Take a deep breath and be sure to think step by step.
```
---
## **Top-level Fields**
### enforce
**Default:** `false`
**Example:**
```yaml filename="modelSpecs / enforce"
modelSpecs:
enforce: true
```
---
### prioritize
**Default:** `true`
**Example:**
```yaml filename="modelSpecs / prioritize"
modelSpecs:
prioritize: false
```
---
### addedEndpoints
**Default:** `[]` (empty list)
**Note:** Must be one of the following:
- `openAI, azureOpenAI, google, anthropic, assistants, azureAssistants, bedrock`
**Example:**
```yaml filename="modelSpecs / addedEndpoints"
modelSpecs:
# ... other modelSpecs fields
addedEndpoints:
- openAI
- google
```
---
### list
**Required**
## **Model Spec (List Item)**
Within each **Model Spec**, or each **list** item, you can configure the following fields:
---
### name
**Description:**
Unique identifier for the model.
---
### label
**Description:**
A user-friendly name or label for the model, shown in the header dropdown.
---
### default
**Description:**
Specifies if this model spec is the default selection, to be auto-selected on every new chat.
---
### iconURL
**Description:**
URL or a predefined endpoint name for the model's icon.
---
### description
**Description:**
A brief description of the model and its intended use or role, shown in the header dropdown menu.
---
### group
**Description:**
Optional group name for organizing model specs in the UI selector. The `group` field provides flexible control over how model specs are organized:
- **If `group` matches an endpoint name** (e.g., `"openAI"`, `"groq"`): The model spec appears nested under that endpoint in the selector menu
- **If `group` is a custom name** (doesn't match any endpoint): Creates a separate collapsible section with that name. You can optionally use `groupIcon` to set a custom icon for this section (URL or built-in key like `"openAI"`)
- **If `group` is omitted**: The model spec appears as a standalone item at the top level
This feature is particularly useful when you want to add descriptions to models without losing the organizational structure of the selector menu.
**Example:**
```yaml filename="modelSpecs with group field examples"
modelSpecs:
list:
# Example 1: Nested under an endpoint
# When group matches an endpoint name, the spec appears under that endpoint
- name: "gpt-4o-optimized"
label: "GPT-4 Optimized"
description: "Most capable GPT-4 model with multimodal support"
group: "openAI" # Appears nested under the OpenAI endpoint
preset:
endpoint: "openAI"
model: "gpt-4o"
# Example 2: Custom group section with icon
# When group is a custom name, it creates a separate collapsible section
- name: "coding-assistant"
label: "Coding Assistant"
description: "Specialized for coding tasks"
group: "My Assistants"
groupIcon: "https://example.com/icons/assistants.png" # Custom icon for the group
preset:
endpoint: "openAI"
model: "gpt-4o"
# Multiple specs with the same group name are grouped together
- name: "writing-assistant"
label: "Writing Assistant"
description: "Specialized for creative writing"
group: "My Assistants" # Grouped with coding-assistant, uses its icon
preset:
endpoint: "anthropic"
model: "claude-sonnet-4"
# Example 3: Custom group using built-in icon
- name: "fast-model"
label: "Fast Model"
group: "Fast Models"
groupIcon: "groq" # Uses built-in Groq icon
preset:
endpoint: "groq"
model: "llama3-8b-8192"
# Example 4: Standalone (no group)
# When group is omitted, the spec appears at the top level
- name: "general-assistant"
label: "General Assistant"
description: "General purpose assistant"
# No group field - appears as standalone item at top level
preset:
endpoint: "openAI"
model: "gpt-4o-mini"
```
---
### showIconInMenu
**Description:**
Controls whether the model's icon appears in the header dropdown menu. Defaults to `true`.
---
### showIconInHeader
**Description:**
Controls whether the model's icon appears in the header dropdown button, left of its name. Defaults to `true`.
---
### authType
**Description:**
Authentication type required for the model spec. Determines whether authentication is overridden, provided by the user, or defined by the system.
---
### webSearch
**Description:**
Enables web search capability for this model spec. When set to `true`, the model can perform web searches to retrieve current information.
**Example:**
```yaml filename="modelSpecs / webSearch"
modelSpecs:
list:
- name: "research-assistant"
label: "Research Assistant"
webSearch: true
preset:
endpoint: "openAI"
model: "gpt-4o"
```
---
### fileSearch
**Description:**
Enables file search capability for this model spec. When set to `true`, the model can search through and reference uploaded files.
**Example:**
```yaml filename="modelSpecs / fileSearch"
modelSpecs:
list:
- name: "document-analyst"
label: "Document Analyst"
fileSearch: true
preset:
endpoint: "openAI"
model: "gpt-4o"
```
---
### executeCode
**Description:**
Enables code execution capability for this model spec. When set to `true`, the model can execute code in a sandboxed environment.
**Example:**
```yaml filename="modelSpecs / executeCode"
modelSpecs:
list:
- name: "code-assistant"
label: "Code Assistant"
executeCode: true
preset:
endpoint: "openAI"
model: "gpt-4o"
```
---
### mcpServers
**Description:**
List of Model Context Protocol (MCP) server names to enable for this model spec. MCP servers extend the model's capabilities with custom tools and resources.
**Example:**
```yaml filename="modelSpecs / mcpServers"
modelSpecs:
list:
- name: "enhanced-assistant"
label: "Enhanced Assistant"
mcpServers:
- "filesystem"
- "sequential-thinking"
- "fetch"
preset:
endpoint: "openAI"
model: "gpt-4o"
```
---
### artifacts
**Description:**
Enables the Artifacts capability for this model spec, allowing the model to generate and display interactive artifacts such as React components, HTML, and Mermaid diagrams. When set to `true`, the default artifact mode is used. You can also specify a mode string directly.
**Example:**
```yaml filename="modelSpecs / artifacts"
modelSpecs:
list:
- name: "artifact-assistant"
label: "Artifact Assistant"
artifacts: true
preset:
endpoint: "openAI"
model: "gpt-4o"
```
---
### preset
**Description:**
Detailed preset configurations that define the behavior and capabilities of the model (see Preset Object Structure below).
---
## Preset Fields
The `preset` field for a `modelSpecs.list` item is made up of a comprehensive configuration blueprint for AI models within the system. It is designed to specify the operational settings of AI models, tailoring their behavior, outputs, and interactions with other system components and endpoints.
### System Options
#### endpoint
**Required**
**Accepted Values:**
- `openAI`
- `azureOpenAI`
- `google`
- `anthropic`
- `assistants`
- `azureAssistants`
- `bedrock`
- `agents`
**Note:** If you are using a custom endpoint, the `endpoint` value must match the defined [custom endpoint name](/docs/configuration/librechat_yaml/object_structure/custom_endpoint#name) exactly.
**Example:**
```yaml filename="modelSpecs / list / {spec_item} / preset / endpoint"
preset:
endpoint: "openAI"
```
---
#### modelLabel
**Default:** `None`
**Example:**
```yaml filename="modelSpecs / list / {spec_item} / preset / modelLabel"
preset:
modelLabel: "Customer Support Bot"
```
---
#### greeting
**Default:** `None`
**Example:**
```yaml filename="modelSpecs / list / {spec_item} / preset / greeting"
preset:
greeting: "This assistant creates meeting notes based on transcripts of Teams recordings. To start, simply paste the transcript into the chat box."
```
---
#### promptPrefix
**Default:** `None`
**Example 1:**
```yaml filename="modelSpecs / list / {spec_item} / preset / promptPrefix"
preset:
promptPrefix: "As a financial advisor, ..."
```
**Example 2:**
```yaml filename="modelSpecs / list / {spec_item} / preset / promptPrefix"
preset:
promptPrefix: |
Based on the transcript, create coherent meeting minutes for a business meeting. Include the following sections:
- Date and Attendees
- Agenda
- Minutes
- Action Items
Focus on what items were discussed and/or resolved. List any open action items.
The format should be a bulleted list of high level topics in chronological order, and then one or more concise sentences explaining the details.
Each high level topic should have at least two sub topics listed, but add as many as necessary to support the high level topic.
- Do not start items with the same opening words.
Take a deep breath and be sure to think step by step.
```
---
#### resendFiles
**Default:** `true`
**Example:**
```yaml filename="modelSpecs / list / {spec_item} / preset / resendFiles"
preset:
resendFiles: true
```
---
#### imageDetail
**Accepted Values:**
- low
- auto
- high
**Default:** `"auto"`
**Example:**
```yaml filename="modelSpecs / list / {spec_item} / preset / imageDetail"
preset:
imageDetail: "high"
```
---
#### maxContextTokens
**Example:**
```yaml filename="modelSpecs / list / {spec_item} / preset / maxContextTokens"
preset:
maxContextTokens: 4096
```
---
### Agent Options
Note that these options are only applicable when using the `agents` endpoint.
You should exclude any model options and defer to the agent's configuration as defined in the UI.
As of v0.8.0, LibreChat uses an ACL (Access Control List) based permissions system for agents. When model specs are configured to use agents, any agents that the user doesn't have access to will be automatically filtered out, even if they are configured in the model spec. This ensures users only see and can use agents they have proper permissions for.
For more information about the ACL permissions system, see the [Agents documentation](/docs/features/agents#migration-required-v080-rc3).
---
#### agent_id
**Example:**
```yaml filename="modelSpecs / list / {spec_item} / preset / agent_id"
preset:
agent_id: "agent_someUniqueId"
```
---
### Assistant Options
Note that these options are only applicable when using the `assistants` or `azureAssistants` endpoint.
Similar to [Agents](#agent-options), you should exclude any model options and defer to the assistant's configuration.
---
#### assistant_id
**Example:**
```yaml filename="modelSpecs / list / {spec_item} / preset / assistant_id"
preset:
assistant_id: "asst_someUniqueId"
```
---
#### instructions
**Note:** this is distinct from [`promptPrefix`](#promptPrefix), as this overrides existing assistant instructions for current runs.
Only use this if you want to override the assistant's core instructions.
Use [`promptPrefix`](#promptPrefix) for `additional_instructions`.
More information:
- https://platform.openai.com/docs/api-reference/models#runs-createrun-instructions
- https://platform.openai.com/docs/api-reference/runs/createRun#runs-createrun-additional_instructions
**Example:**
```yaml filename="modelSpecs / list / {spec_item} / preset / instructions"
preset:
instructions: "Please handle customer queries regarding order status."
```
---
#### append_current_datetime
Adds the current date and time to `additional_instructions` for each run. Does not overwrite `promptPrefix`, but adds to it.
**Example:**
```yaml filename="modelSpecs / list / {spec_item} / preset / append_current_datetime"
preset:
append_current_datetime: true
```
---
### Model Options
> **Note:** Each parameter below includes a note on which endpoints support it.
> **OpenAI / AzureOpenAI / Custom** typically support `temperature`, `presence_penalty`, `frequency_penalty`, `stop`, `top_p`, `max_tokens`.
> **Google / Anthropic** typically support `topP`, `topK`, `maxOutputTokens`.
> **Anthropic / Bedrock (Anthropic and Nova models)** support `promptCache`.
> **Bedrock** supports `region`, `maxTokens`, and a few others.
#### model
> **Supported by:** All endpoints (except `agents`)
**Default:** `None`
**Example:**
```yaml
preset:
model: "gpt-4-turbo"
```
---
#### temperature
> **Supported by:** `openAI`, `azureOpenAI`, `google` (as `temperature`), `anthropic` (as `temperature`), and custom (OpenAI-like)
**Example:**
```yaml
preset:
temperature: 0.7
```
---
#### presence_penalty
> **Supported by:** `openAI`, `azureOpenAI`, custom (OpenAI-like)
> *Not typically used by Google/Anthropic/Bedrock*
**Example:**
```yaml
preset:
presence_penalty: 0.3
```
---
#### frequency_penalty
> **Supported by:** `openAI`, `azureOpenAI`, custom (OpenAI-like)
> *Not typically used by Google/Anthropic/Bedrock*
**Example:**
```yaml
preset:
frequency_penalty: 0.5
```
---
#### stop
> **Supported by:** `openAI`, `azureOpenAI`, custom (OpenAI-like)
> *Not typically used by Google/Anthropic/Bedrock*
**Example:**
```yaml
preset:
stop:
- "END"
- "STOP"
```
---
#### top_p
> **Supported by:** `openAI`, `azureOpenAI`, custom (OpenAI-like)
> **Google/Anthropic** often use `topP` (capital “P”) instead of `top_p`.
**Example:**
```yaml
preset:
top_p: 0.9
```
---
#### topP
> **Supported by:** `google` & `anthropic`
> (similar purpose to `top_p`, but named differently in those APIs)
**Example:**
```yaml
preset:
topP: 0.8
```
---
#### topK
> **Supported by:** `google` & `anthropic`
> (k-sampling limit on the next token distribution)
**Example:**
```yaml
preset:
topK: 40
```
---
#### max_tokens
> **Supported by:** `openAI`, `azureOpenAI`, custom (OpenAI-like)
> *For Google/Anthropic, use `maxOutputTokens` or `maxTokens` (depending on the endpoint).*
**Example:**
```yaml
preset:
max_tokens: 4096
```
---
#### maxOutputTokens
> **Supported by:** `google`, `anthropic`
> *Equivalent to `max_tokens` for these providers.*
**Example:**
```yaml
preset:
maxOutputTokens: 2048
```
---
#### promptCache
> **Supported by:** `anthropic`, `bedrock` (Anthropic and Nova models)
> (Toggle Anthropic’s “prompt-caching” feature)
**Default:** `true`
**Example:**
```yaml
preset:
promptCache: true
```
**Note:** For Bedrock endpoints, prompt caching is automatically enabled for Claude and Nova models. Set `promptCache: false` to explicitly disable it.
---
#### reasoning_effort
**Accepted Values:**
- `""` (empty string — unset, uses API default)
- `"none"`
- `"minimal"`
- `"low"`
- `"medium"`
- `"high"`
- `"xhigh"` (extra high)
> **Supported by:** `openAI`, `azureOpenAI`, custom (OpenAI-like), `bedrock` (ZAI, MoonshotAI models)
**Default:** `""` (unset)
**Example:**
```yaml
preset:
reasoning_effort: "low"
```
---
#### reasoning_summary
**Accepted Values:**
- `""` (empty string — disables reasoning summaries)
- `"auto"`
- `"concise"`
- `"detailed"`
> **Supported by:** `openAI`, `azureOpenAI`, custom (OpenAI-like)
**Default:** `""` (disabled)
**Example:**
```yaml
preset:
reasoning_summary: "detailed"
```
---
#### useResponsesApi
> **Supported by:** `openAI`, `azureOpenAI`, custom (OpenAI-like)
**Default:** `false`
**Example:**
```yaml
preset:
useResponsesApi: true
```
---
#### verbosity
**Accepted Values:**
- `""` (empty string — unset, uses API default)
- `"low"`
- `"medium"`
- `"high"`
> **Supported by:** `openAI`, `azureOpenAI`, custom (OpenAI-like)
**Default:** `""` (unset)
**Example:**
```yaml
preset:
verbosity: "low"
```
---
#### web_search
> **Supported by:** `openAI`, `azureOpenAI`, custom (OpenAI-like), `google`, `anthropic`
**Default:** `false`
**Note:** For Google endpoints, this parameter appears as `Grounding with Google Search` in the actual panel but controls `web_search` in the implementation.
**Example:**
```yaml
preset:
web_search: true
```
---
#### disableStreaming
> **Supported by:** `openAI`, `azureOpenAI`, custom (OpenAI-like)
**Default:** `false`
**Example:**
```yaml
preset:
disableStreaming: true
```
---
#### thinkingBudget
> **Supported by:** `google`, `anthropic`, `bedrock` (Anthropic models)
**Default:** `"Auto (-1)"` (Google), `2000` (Anthropic, Bedrock (Anthropic models))
**Example:**
```yaml
preset:
thinkingBudget: "2000"
```
---
#### thinkingLevel
> **Supported by:** `google` (Gemini 3+ models)
**Accepted Values:**
- `""` (unset/auto)
- `"minimal"`
- `"low"`
- `"medium"`
- `"high"`
**Default:** `""` (unset — model decides)
**Example:**
```yaml
preset:
thinkingLevel: "medium"
```
---
#### effort
> **Supported by:** `anthropic`, `bedrock` (Anthropic models)
**Options:** `""` (unset/auto), `"low"`, `"medium"`, `"high"`, `"max"`
**Default:** `""` (unset — model decides)
**Example:**
```yaml
preset:
effort: "high"
```
---
#### thinking
> **Supported by:** `google`, `anthropic`, `bedrock` (Anthropic models)
**Default:** `true`
**Example:**
```yaml
preset:
thinking: true
```
---
#### region
> **Supported by:** `bedrock`
> (Used to specify an AWS region for Amazon Bedrock)
**Example:**
```yaml
preset:
region: "us-east-1"
```
---
#### maxTokens
> **Supported by:** `bedrock`
> (Used in place of `max_tokens`)
**Example:**
```yaml
preset:
maxTokens: 1024
```
# OCR Config Object Structure (/docs/configuration/librechat_yaml/object_structure/ocr)
## Overview
The `ocr` object allows you to configure Optical Character Recognition (OCR) settings for the application, enabling the extraction of text from images. This section provides a detailed breakdown of the `ocr` object structure.
There are 4 main fields under `ocr`:
- `mistralModel`
- `apiKey`
- `baseURL`
- `strategy`
**Notes:**
- If using the Mistral OCR API, you don't need to edit your `librechat.yaml` file.
- You only need the following environment variables to get started: `OCR_API_KEY` and `OCR_BASEURL`.
- OCR functionality allows the application to extract text from images, which can then be processed by AI models.
- The default strategy is `mistral_ocr`, which uses Mistral's OCR capabilities.
- You can also configure a custom OCR service by setting the strategy to `custom_ocr`.
- Azure-deployed Mistral OCR models can be used by setting the strategy to `azure_mistral_ocr`.
- Google Vertex AI-deployed Mistral OCR models can be used by setting the strategy to `vertexai_mistral_ocr`.
- Requires the `GOOGLE_SERVICE_KEY_FILE` environment variable to be set with service account credentials
- The service key can be provided as: file path, URL, base64 encoded JSON, or raw JSON string
- Project ID and location are automatically extracted from the service account credentials
- Local text extraction is available via `document_parser`, which extracts text from PDF, DOCX, XLS/XLSX, and OpenDocument files without any external API.
- Uses `pdfjs-dist`, `mammoth`, and `SheetJS` locally — no API key or base URL needed
- Only the `strategy` field is required; `apiKey`, `baseURL`, and `mistralModel` are ignored
- If using the default Mistral OCR, you may optionally specify a specific Mistral model to use.
- Environment variable parsing is supported for `apiKey`, `baseURL`, and `mistralModel` parameters.
- A `user_provided` strategy option is planned for future releases but is not yet implemented.
## Automatic Document Parsing (No Configuration Required)
The built-in `document_parser` runs automatically for agent file uploads **even when no `ocr` block is configured** in your `librechat.yaml`. This means PDF, DOCX, XLS/XLSX, and ODS files are parsed out of the box without any setup.
The resolution logic works as follows:
1. **No `ocr` config exists** — When an agent context file is uploaded and its MIME type matches a supported document type (PDF, DOCX, Excel, ODS), the `document_parser` is used directly. No OCR capability check is required for the agent.
2. **`ocr` config exists** — The configured strategy (e.g., `mistral_ocr`) is tried first. If the configured strategy **fails at runtime**, the `document_parser` is used as a fallback so text extraction still succeeds for supported document types.
3. **Neither succeeds** — If both the configured strategy and the document parser fail (e.g., the file is an image-only PDF with no embedded text), an error is returned suggesting that an OCR service is needed.
The `document_parser` handles text-based documents only. For image-based PDFs or scanned documents, you still need a configured OCR strategy (such as `mistral_ocr`) to extract text from the images within those files.
## Example
```yaml filename="ocr"
ocr:
mistralModel: "mistral-ocr-latest"
apiKey: "your-mistral-api-key"
strategy: "mistral_ocr"
```
Example with custom OCR:
```yaml filename="ocr with custom OCR"
ocr:
apiKey: "your-custom-ocr-api-key"
baseURL: "https://your-custom-ocr-service.com/api"
strategy: "custom_ocr"
```
Example with Azure Mistral OCR:
```yaml filename="ocr with Azure Mistral OCR"
ocr:
mistralModel: "deployed-mistral-ocr-2503" # should match deployment name on Azure
apiKey: "${AZURE_MISTRAL_OCR_API_KEY}" # arbitrary .env var reference
baseURL: "https://your-deployed-endpoint.models.ai.azure.com/v1" # hardcoded, can also be .env var reference
strategy: "azure_mistral_ocr"
```
Example with Google Vertex AI Mistral OCR:
```yaml filename="ocr with Google Vertex AI Mistral OCR"
ocr:
mistralModel: "mistral-ocr-2505" # model name as deployed in Vertex AI
strategy: "vertexai_mistral_ocr"
```
Example with local document parser (no external API needed):
```yaml filename="ocr with document parser"
ocr:
strategy: "document_parser"
```
## mistralModel
```yaml filename="ocr / mistralModel"
ocr:
mistralModel: "mistral-ocr-latest"
```
For Azure deployments:
```yaml filename="ocr / mistralModel (Azure)"
ocr:
mistralModel: "deployed-mistral-ocr-2503" # Your Azure deployment name
```
For Google Vertex AI deployments:
```yaml filename="ocr / mistralModel (Google Vertex AI)"
ocr:
mistralModel: "mistral-ocr-2505" # Your Vertex AI model name
```
## apiKey
```yaml filename="ocr / apiKey"
ocr:
apiKey: "your-ocr-api-key"
```
## baseURL
```yaml filename="ocr / baseURL"
ocr:
baseURL: "https://your-ocr-service.com/api"
```
## strategy
```yaml filename="ocr / strategy"
ocr:
strategy: "custom_ocr"
```
**Available Strategies:**
- `mistral_ocr`: Uses Mistral's OCR capabilities via the standard [Mistral API](/docs/features/ocr#1-mistral-ocr-default).
- `azure_mistral_ocr`: Uses Mistral OCR models deployed on [Azure AI Foundry](/docs/features/ocr#2-azure-mistral-ocr).
- `vertexai_mistral_ocr`: Uses Mistral OCR models deployed on [Google Cloud Vertex AI](/docs/features/ocr#3-google-vertex-ai-mistral-ocr).
- `document_parser`: Uses local text extraction for PDF, DOCX, XLS/XLSX, and OpenDocument files. No external API needed. Also runs automatically for agent file uploads when no `ocr` config is present, and as a fallback when a configured OCR strategy fails.
- `custom_ocr`: Uses a custom OCR service specified by the `baseURL` [(not yet implemented)](/docs/features/ocr#future-enhancements).
# Registration Object Structure (/docs/configuration/librechat_yaml/object_structure/registration)
## Example
```yaml filename="Registration Object Structure"
# Example Registration Object Structure
registration:
socialLogins: ["google", "facebook", "github", "discord", "openid"]
allowedDomains:
- "gmail.com"
- "protonmail.com"
```
## socialLogins
**Key:**
**Example:**
```yaml filename="registration / socialLogins"
socialLogins: ["google", "facebook", "github", "discord", "openid"]
```
## allowedDomains
**Key:**
**Required**
**Example:**
```yaml filename="registration / allowedDomains"
allowedDomains:
- "gmail.com"
- "protonmail.com"
```
# Shared Endpoint Settings (/docs/configuration/librechat_yaml/object_structure/shared_endpoint_settings)
This page describes the shared configuration settings for all endpoints. The settings highlighted here are available to all configurations under the ["Endpoints"](/docs/configuration/librechat_yaml/object_structure/config#endpoints) field unless noted otherwise.
## Example Configuration
```yaml filename="Shared Endpoint Settings"
endpoints:
# Individual endpoint configurations
openAI:
streamRate: 25
titleModel: "gpt-4o-mini"
titleMethod: "completion"
titlePrompt: "Create a concise title for this conversation:\n\n{convo}"
azureOpenAI:
streamRate: 35
titleModel: "grok-3"
titleMethod: "structured"
titlePrompt: |
Analyze this conversation and provide:
1. A concise title in the detected language (5 words or less, no punctuation or quotation)
2. Always provide a relevant emoji at the start of the title
{convo}
titleConvo: true
anthropic:
streamRate: 25
titleModel: "claude-3-5-haiku-20241022"
titleMethod: "completion"
bedrock:
streamRate: 25
titleModel: "us.amazon.nova-lite-v1:0"
titleEndpoint: "anthropic"
google:
streamRate: 1
titleModel: "gemini-2.0-flash-lite"
titlePromptTemplate: "Human: {input}\nAssistant: {output}"
assistants:
streamRate: 30
azureAssistants:
streamRate: 30
# Global configuration using 'all' - this will override ALL individual endpoint settings that are "shared",
# i.e. streamRate, titleModel, titleMethod, titlePrompt, titlePromptTemplate, titleEndpoint.
all:
titleConvo: true
titleModel: "gpt-4.1-nano"
titlePrompt: |
Analyze this conversation and provide:
1. The detected language of the conversation
2. A concise title in the detected language (5 words or less, no punctuation or quotation)
3. Always provide a relevant emoji at the start of the title
{convo}
```
> **Important:** When using the `all` configuration, it will override ALL individual endpoint settings for the properties you define. In the example above, the `all` configuration would override the `titleConvo`, `titleModel`, and `titlePrompt` settings for all endpoints, while individual `streamRate` settings would be preserved since it's not defined in `all`.
## streamRate
**Key:**
**Default:** 1
> Allows for streaming data at the fastest rate possible while allowing the system to wait for the next tick
## titleConvo
**Key:**
**Default:** `false`
**Notes:**
- When enabled, titles will be generated automatically using the configured title settings
- Must be used in conjunction with `titleModel` or the endpoint must have a default model available
**Example:**
```yaml filename="titleConvo"
titleConvo: true
```
## titleModel
**Key:**
**Default:** System default for the current endpoint
## titleMethod
**Key:**
**Default:** `"completion"`
**Available Methods:**
- **`"completion"`** - Uses standard completion API without tools/functions. Compatible with most LLMs.
- **`"structured"`** - Uses structured output for title generation. Requires provider/model support.
- **`"functions"`** - Legacy alias for "structured". Functionally identical.
**Example:**
```yaml filename="titleMethod"
titleMethod: "completion"
```
## titlePrompt
**Key:**
**Default:**
```
Analyze this conversation and provide:
1. The detected language of the conversation
2. A concise title in the detected language (5 words or less, no punctuation or quotation)
{convo}
```
**Notes:**
- Must always include the `{convo}` placeholder
- The `{convo}` placeholder will be replaced with the formatted conversation
- Can be placed anywhere in the prompt
**Example:**
```yaml filename="titlePrompt"
titlePrompt: "Create a brief, descriptive title for the following conversation:\n\n{convo}\n\nTitle:"
```
## titlePromptTemplate
**Key:**
**Default:** `"User: {input}\nAI: {output}"`
**Notes:**
- Must include both `{input}` and `{output}` placeholders
- `{input}` is replaced with the user's initial message
- `{output}` is replaced with the AI's response
- The formatted result replaces `{convo}` in the titlePrompt
**Example:**
```yaml filename="titlePromptTemplate"
titlePromptTemplate: "Human: {input}\n\nAssistant: {output}"
```
## titleEndpoint
**Key:**
**Default:** Uses the current conversation's endpoint
**Accepted Values:**
- `openAI`
- `azureOpenAI`
- `google`
- `anthropic`
- `bedrock`
- For custom endpoints: use the exact [custom endpoint name](/docs/configuration/librechat_yaml/object_structure/custom_endpoint#name)
**Example:**
```yaml filename="titleEndpoint"
# Use Anthropic for titles even when chatting with OpenAI
endpoints:
openAI:
titleEndpoint: "anthropic"
# Will use anthropic's configuration for title generation
```
## maxToolResultChars
**Key:**
**Default:** No limit
**Notes:**
- Helps prevent excessively large tool outputs from consuming too many tokens
- Applies to all tool call results for the endpoint
**Example:**
```yaml filename="maxToolResultChars"
endpoints:
all:
maxToolResultChars: 50000
```
---
**Notes:**
- All settings shown on this page can be configured individually per endpoint or globally using the `all` key
- When using the `all` configuration, it will override the corresponding settings in ALL individual endpoints
- The `all` key does not accept `baseURL`
- Settings not defined in `all` will preserve their individual endpoint values
- For `streamRate`: Recommended values are between 25-40 for a smooth streaming experience
- Using a higher stream rate is a must when serving the app to many users at scale
**Example of Override Behavior:**
```yaml
endpoints:
openAI:
streamRate: 25 # This will be preserved
titleModel: "gpt-4" # This will be overridden
titleConvo: false # This will be overridden
all:
titleConvo: true
titleModel: "gpt-3.5-turbo"
# streamRate not defined here, so individual values are kept
```
---
# Endpoint Settings
- [Custom Endpoints](/docs/configuration/librechat_yaml/object_structure/custom_endpoint)
- [OpenAI](/docs/configuration/pre_configured_ai/openai)
- [Anthropic](/docs/configuration/pre_configured_ai/anthropic)
- [Bedrock](/docs/configuration/pre_configured_ai/bedrock)
- [Google](/docs/configuration/pre_configured_ai/google)
- [Azure OpenAI](/docs/configuration/librechat_yaml/object_structure/azure_openai)
- [Assistants](/docs/configuration/librechat_yaml/object_structure/assistants_endpoint)
# Speech Configuration (/docs/configuration/librechat_yaml/object_structure/speech)
## Overview
The `speech` object allows you to configure Text-to-Speech (TTS) and Speech-to-Text (STT) providers directly in your `librechat.yaml` configuration file. This enables server-side speech services without requiring users to configure their own API keys.
**Fields under `speech`:**
- `tts` - Text-to-Speech provider configurations
- `stt` - Speech-to-Text provider configurations
- `speechTab` - Default UI settings for speech features
**Notes:**
- Multiple providers can be configured simultaneously
- Users can select their preferred provider from the available options
- API keys in the config file should use environment variable references for security
## Example
```yaml filename="speech"
speech:
tts:
openai:
apiKey: "${TTS_API_KEY}"
model: "tts-1"
voices: ["alloy", "echo", "fable", "onyx", "nova", "shimmer"]
elevenlabs:
apiKey: "${ELEVENLABS_API_KEY}"
model: "eleven_multilingual_v2"
voices: ["voice-id-1", "voice-id-2"]
stt:
openai:
apiKey: "${STT_API_KEY}"
model: "whisper-1"
speechTab:
conversationMode: true
advancedMode: false
speechToText: true
textToSpeech: true
```
---
## tts
The `tts` object configures Text-to-Speech providers. Multiple providers can be configured, and users can choose which one to use.
### openai
OpenAI TTS configuration using models like `tts-1` or `tts-1-hd`.
**Example:**
```yaml filename="speech / tts / openai"
tts:
openai:
apiKey: "${TTS_API_KEY}"
model: "tts-1"
voices: ["alloy", "echo", "fable", "onyx", "nova", "shimmer"]
```
### azureOpenAI
Azure OpenAI TTS configuration.
**Example:**
```yaml filename="speech / tts / azureOpenAI"
tts:
azureOpenAI:
instanceName: "my-azure-instance"
apiKey: "${AZURE_TTS_API_KEY}"
deploymentName: "tts-deployment"
apiVersion: "2024-02-15-preview"
model: "tts-1"
voices: ["alloy", "echo", "nova"]
```
### elevenlabs
ElevenLabs TTS configuration for high-quality voice synthesis.
**voice_settings Sub-keys:**
**Example:**
```yaml filename="speech / tts / elevenlabs"
tts:
elevenlabs:
apiKey: "${ELEVENLABS_API_KEY}"
model: "eleven_multilingual_v2"
voices: ["21m00Tcm4TlvDq8ikWAM", "AZnzlk1XvdvUeBnXmlld"]
voice_settings:
stability: 0.5
similarity_boost: 0.75
use_speaker_boost: true
```
### localai
LocalAI TTS configuration for self-hosted speech synthesis.
**Example:**
```yaml filename="speech / tts / localai"
tts:
localai:
url: "http://localhost:8080"
voices: ["en-us-amy-low", "en-us-danny-low"]
backend: "piper"
```
---
## stt
The `stt` object configures Speech-to-Text providers.
### openai
OpenAI Whisper STT configuration.
**Example:**
```yaml filename="speech / stt / openai"
stt:
openai:
apiKey: "${STT_API_KEY}"
model: "whisper-1"
```
### azureOpenAI
Azure OpenAI Whisper STT configuration.
**Example:**
```yaml filename="speech / stt / azureOpenAI"
stt:
azureOpenAI:
instanceName: "my-azure-instance"
apiKey: "${AZURE_STT_API_KEY}"
deploymentName: "whisper-deployment"
apiVersion: "2024-02-15-preview"
```
---
## speechTab
The `speechTab` object configures default UI settings for speech features. These settings control what users see by default in the speech settings panel.
### speechToText (Object format)
When using an object instead of a boolean:
### textToSpeech (Object format)
When using an object instead of a boolean:
**Example:**
```yaml filename="speech / speechTab"
speechTab:
conversationMode: false
advancedMode: false
speechToText:
engineSTT: "openai"
autoTranscribeAudio: true
decibelValue: -45
textToSpeech:
engineTTS: "openai"
voice: "nova"
automaticPlayback: false
playbackRate: 1.0
cacheTTS: true
```
---
## Complete Example
```yaml filename="librechat.yaml"
version: 1.3.8
cache: true
speech:
tts:
openai:
apiKey: "${TTS_API_KEY}"
model: "tts-1-hd"
voices: ["alloy", "echo", "fable", "onyx", "nova", "shimmer"]
elevenlabs:
apiKey: "${ELEVENLABS_API_KEY}"
model: "eleven_multilingual_v2"
voices: ["21m00Tcm4TlvDq8ikWAM", "AZnzlk1XvdvUeBnXmlld"]
voice_settings:
stability: 0.5
similarity_boost: 0.75
stt:
openai:
apiKey: "${STT_API_KEY}"
model: "whisper-1"
speechTab:
conversationMode: false
advancedMode: false
speechToText: true
textToSpeech:
engineTTS: "openai"
voice: "nova"
automaticPlayback: false
```
---
## Notes
- Always use environment variable references (e.g., `${API_KEY}`) for API keys in configuration files
- Multiple TTS providers can be configured; users select their preferred option in the UI
- The `speechTab` settings define defaults that users can override in their personal settings
- For detailed feature documentation, see [Speech to Text & Text to Speech](/docs/configuration/stt_tts)
# Summarization Configuration (/docs/configuration/librechat_yaml/object_structure/summarization)
## Overview
The `summarization` configuration provides centralized control over conversation summarization and context pruning. This replaces the per-endpoint `summarize` and `summaryModel` fields that were previously available on custom and Azure OpenAI endpoints.
When a conversation exceeds the model's context window, the summarization system automatically compresses older messages into a concise checkpoint summary. This allows conversations to continue indefinitely without losing important context. The system also includes **context pruning**, which progressively degrades large tool results in older messages to reclaim token space before summarization is needed.
## Example
```yaml filename="summarization"
summarization:
provider: "openAI"
model: "gpt-4o-mini"
maxSummaryTokens: 4096
reserveRatio: 0.05
trigger:
type: "token_ratio"
value: 0.8
contextPruning:
enabled: true
keepLastAssistants: 3
softTrimRatio: 0.3
hardClearRatio: 0.5
minPrunableToolChars: 50000
softTrim:
maxChars: 4000
headChars: 1500
tailChars: 1500
hardClear:
enabled: true
placeholder: "[Old tool result content cleared]"
```
## provider
**Default:** Agent's own provider
## model
**Default:** Agent's own model
## parameters
## prompt
**Default:** A structured checkpoint prompt that produces sections for Goal, Constraints & Preferences, Progress, Key Decisions, Next Steps, and Critical Context.
## updatePrompt
**Default:** A built-in prompt that merges new messages into the existing checkpoint, compresses older details, and gives recent actions more detail.
## maxSummaryTokens
## reserveRatio
**Default:** `0.05` (5% headroom)
## trigger
### trigger Sub-keys
### Trigger Types
| Type | Value | Fires When |
|---|---|---|
| `token_ratio` | `0.0–1.0` | The fraction of context tokens used reaches or exceeds the value |
| `remaining_tokens` | Number | The remaining context tokens drops to or below the value |
| `messages_to_refine` | Number | The count of messages eligible for summarization reaches or exceeds the value |
| _(not set)_ | — | Whenever pruning drops any messages (default behavior) |
**Example:**
```yaml filename="summarization / trigger"
summarization:
trigger:
type: "remaining_tokens"
value: 8000
```
## contextPruning
Context pruning is an opt-in feature that operates independently of summarization. It targets large tool call results in older messages, applying two progressive stages:
1. **Soft trim** — Truncates tool results to keep only the head and tail portions, with an ellipsis in between
2. **Hard clear** — Replaces the entire tool result with a short placeholder
Both stages are position-based: messages closer to the beginning of the conversation (older) are pruned first.
### contextPruning Sub-keys
**Defaults:**
| Field | Default |
|---|---|
| `enabled` | `false` |
| `keepLastAssistants` | `3` |
| `softTrimRatio` | `0.3` |
| `hardClearRatio` | `0.5` |
| `minPrunableToolChars` | `50000` |
### softTrim Sub-keys
**Defaults:** `maxChars: 4000`, `headChars: 1500`, `tailChars: 1500`
### hardClear Sub-keys
**Defaults:** `enabled: true`, `placeholder: "[Old tool result content cleared]"`
**Example:**
```yaml filename="summarization / contextPruning"
summarization:
contextPruning:
enabled: true
keepLastAssistants: 5
softTrimRatio: 0.25
hardClearRatio: 0.6
minPrunableToolChars: 30000
softTrim:
maxChars: 6000
headChars: 2500
tailChars: 2500
hardClear:
enabled: true
placeholder: "[Content removed for context management]"
```
## Complete Configuration Example
```yaml filename="librechat.yaml"
version: 1.3.8
cache: true
summarization:
provider: "openAI"
model: "gpt-4o-mini"
maxSummaryTokens: 4096
reserveRatio: 0.05
trigger:
type: "token_ratio"
value: 0.8
contextPruning:
enabled: true
keepLastAssistants: 3
softTrimRatio: 0.3
hardClearRatio: 0.5
minPrunableToolChars: 50000
softTrim:
maxChars: 4000
headChars: 1500
tailChars: 1500
hardClear:
enabled: true
placeholder: "[Old tool result content cleared]"
```
## Migration from Per-Endpoint Settings
If you previously used `summarize` and `summaryModel` on custom or Azure OpenAI endpoints:
```yaml filename="Before (removed)"
endpoints:
custom:
- name: "My Endpoint"
summarize: true
summaryModel: "gpt-3.5-turbo"
```
These fields have been removed. Use the top-level `summarization` configuration instead:
```yaml filename="After"
summarization:
model: "gpt-4o-mini"
```
## Notes
- Summarization is configured globally rather than per-endpoint
- The `summarize` and `summaryModel` fields on custom endpoints and Azure OpenAI endpoints are no longer supported
- When `provider` and `model` are omitted, the agent's own provider and model are used for summarization
- Context pruning is disabled by default and must be explicitly enabled with `contextPruning.enabled: true`
- Context pruning only affects tool call results that exceed `minPrunableToolChars` — smaller results are never pruned
- The `keepLastAssistants` setting protects recent turns from pruning regardless of the trim/clear ratios
- Custom `prompt` and `updatePrompt` values fully replace the built-in prompts — use with care
- Set `AGENT_DEBUG_LOGGING=true` in your `.env` file to enable verbose logging of token counts and context pruning diagnostics
# Transactions (/docs/configuration/librechat_yaml/object_structure/transactions)
## Overview
The `transactions` object controls whether token usage records are saved to the database in LibreChat. This allows administrators to enable or disable transaction tracking independently from the balance system.
**Fields under `transactions`:**
- `enabled`
**Notes:**
- Transaction recording is essential for tracking historical token usage
- When `balance.enabled` is set to `true`, transactions are automatically enabled regardless of this setting
- Default value is `true` to ensure token usage is tracked by default
- Disabling transactions can reduce database storage requirements but will prevent historical usage analysis
## Example
```yaml filename="transactions"
transactions:
enabled: false
```
## enabled
**Key:**
**Description:**
The `enabled` field determines whether LibreChat saves detailed transaction records for each token usage event. These records include:
- Token counts for prompts and completions
- Associated costs and rates
- User and conversation identifiers
- Timestamps for each transaction
**Important Behavior:**
When the balance system is enabled (`balance.enabled: true`), transaction recording is automatically enabled regardless of the `transactions.enabled` setting. This ensures that:
1. Balance tracking functions correctly with a complete audit trail
2. Token usage can be accurately calculated and deducted from user balances
3. Historical data is available for balance reconciliation
**Use Cases:**
- **Enable transactions** (`true`): When you need to track usage patterns, generate reports, or maintain an audit trail
- **Disable transactions** (`false`): When you want to reduce database storage and don't need historical usage data (only works when balance tracking is also disabled)
## Relationship with Balance System
The transactions and balance systems work together:
```yaml filename="Example: Transactions with Balance"
# When balance is enabled, transactions are always enabled
balance:
enabled: true
startBalance: 20000
transactions:
enabled: false # This will be overridden to true because balance.enabled is true
```
```yaml filename="Example: Standalone Transaction Tracking"
# Track transactions without balance management
balance:
enabled: false
transactions:
enabled: true # Records all token usage without enforcing balance limits
```
## Database Impact
When transactions are enabled, each API call that consumes tokens creates a record in the "Transactions" collection with the following information:
- User ID and email
- Conversation ID
- Model used
- Token counts (prompt and completion)
- Token values and rates
- Timestamp
- Transaction type (credit or debit)
Consider the storage implications when enabling transactions for high-volume deployments.
# Cloudflare Turnstile Configuration (/docs/configuration/librechat_yaml/object_structure/turnstile)
## Example
```yaml filename="turnstile"
turnstile:
siteKey: "your-site-key-here"
options:
language: "auto" # "auto" or an ISO 639-1 language code (e.g., en)
size: "normal" # Options: "normal", "compact", "flexible", or "invisible"
```
## turnstile
**Key:**
### Fields
#### siteKey
- **Type:** `String`
- **Description:** Your unique Cloudflare Turnstile site key. Make sure you have registered your domain with Cloudflare and obtained this key from the [Cloudflare Turnstile Get Started](https://developers.cloudflare.com/turnstile/get-started/) guide.
- **Example:**
```yaml
turnstile:
siteKey: "your-site-key-here"
```
#### options
- **Type:** `Object`
- **Description:** An object to configure additional settings for the Turnstile widget.
**Subkeys:**
```yaml
turnstile:
options:
language: "auto"
size: "normal"
```
### Notes
- **Optional Integration:** The `turnstile` configuration block is optional. If you choose not to use Cloudflare Turnstile, you may omit this block entirely.
- **Dashboard Consistency:** Ensure that the values you configure here match your settings in the Cloudflare dashboard.
- **User Experience:** Customize the `options` subkeys as needed to tailor the widget's behavior and appearance to your application’s requirements.
---
# Web Search Configuration (/docs/configuration/librechat_yaml/object_structure/web_search)
The `webSearch` configuration allows you to customize the web search functionality within LibreChat, including search providers, content scrapers, and result rerankers.
## Overview
The web search feature consists of three main components:
1. **Search Providers**: Services that perform the initial web search
2. **Scrapers**: Services that extract content from web pages
3. **Rerankers**: Services that reorder search results for better relevance
## Example
```yaml filename="webSearch"
webSearch:
# Search Provider Configuration
serperApiKey: "${SERPER_API_KEY}"
searxngInstanceUrl: "${SEARXNG_INSTANCE_URL}"
searxngApiKey: "${SEARXNG_API_KEY}"
searchProvider: "serper" # Options: "serper", "searxng"
# Scraper Configuration
firecrawlApiKey: "${FIRECRAWL_API_KEY}"
firecrawlApiUrl: "${FIRECRAWL_API_URL}"
firecrawlVersion: "${FIRECRAWL_VERSION}"
scraperProvider: "firecrawl" # Options: "firecrawl", "serper"
# Reranker Configuration
jinaApiKey: "${JINA_API_KEY}"
jinaApiUrl: "${JINA_API_URL}"
cohereApiKey: "${COHERE_API_KEY}"
rerankerType: "jina" # Options: "jina", "cohere"
# General Settings
scraperTimeout: 7500 # Timeout in milliseconds for scraper requests (default: 7500)
safeSearch: 1 # Options: 0 (OFF), 1 (MODERATE - default), 2 (STRICT)
```
## Search Providers
### searchProvider
### serperApiKey
**Note:** Get your API key from [Serper.dev](https://serper.dev/api-keys)
### searxngInstanceUrl
### searxngApiKey
**Note:** This is optional and only needed if your SearXNG instance requires authentication.
## Scrapers
### firecrawlApiKey
**Note:** Get your API key from [Firecrawl.dev](https://docs.firecrawl.dev/introduction#api-key)
### firecrawlApiUrl
**Note:** This is optional and only needed if you're using a custom Firecrawl instance.
### firecrawlVersion
### scraperProviderider
### firecrawlOptions
**Subkeys:**
#### formats
#### includeTags
#### excludeTags
#### headers
#### waitFor
#### timeout
#### maxAge
**Note:** If you do not need extremely fresh data, enabling this can speed up your scrapes by 500%.
#### mobile
#### skipTlsVerification
#### blockAds
#### removeBase64Images
#### parsePDF
#### storeInCache
#### zeroDataRetention
#### location
#### onlyMainContent
#### changeTrackingOptions
**Example:**
```yaml filename="webSearch"
webSearch:
firecrawlApiKey: "${FIRECRAWL_API_KEY}"
firecrawlOptions:
formats: ["markdown", "rawHtml"]
includeTags: ["main", "article", ".content"]
excludeTags: ["nav", "footer", ".ads"]
waitFor: 2000
timeout: 10000
mobile: false
blockAds: true
onlyMainContent: true
location:
country: "US"
languages: ["en"]
```
**Note:** For detailed information about Firecrawl scraper options and defaults, see the [Firecrawl API Documentation](https://docs.firecrawl.dev/api-reference/endpoint/scrape).
## Rerankers
### jinaApiKey
**Note:** Get your API key from [Jina.ai](https://jina.ai/api-dashboard/)
### jinaApiUrl
**Note:** This is optional and only needed if you're using a custom Jina instance.
### cohereApiKey
**Note:** Get your API key from [Cohere Dashboard](https://dashboard.cohere.com/welcome/login)
### rerankerType
## General Settings
### scraperTimeout
### safeSearch
**Note:** Safe search levels align with standard search API conventions. MODERATE filtering is enabled by default to provide reasonable content filtering while maintaining search effectiveness.
## Notes
- API keys can be configured in two ways:
1. Set the environment variables specified in the YAML configuration
2. If environment variables are not set, users will be prompted to provide the API keys via the UI
- The configuration supports multiple services for each component (providers, scrapers, rerankers)
- If a specific service type is not specified, the system will try all available services in that category
- Safe search provides three levels of content filtering: OFF (0), MODERATE (1), and STRICT (2)
- Never put actual API keys in the YAML configuration - only use environment variable names
## Setting Up SearXNG
SearXNG is a privacy-focused meta search engine that you can self-host.
For more information, see the [official SearXNG documentation](https://docs.searxng.org/).
Here are the steps to set up your own SearXNG instance for use with LibreChat:
### Using Docker Desktop
1. **Search for the official SearXNG image**
- Open Docker Desktop
- Search for `searxng/searxng` in the **Images** tab
- Click **Run** on the official image to automatically pull down and run a container of the image
2. **Running the container**
- Expand the **Optional Settings** dropdown in the proceeding panel that appears once the download completes
- Set your desired configuration details (port number, container name, etc.)
- Click **Run** to start the container
3. **Configure SearXNG for LibreChat**
- Navigate to the `Files` tab in Docker Desktop
- Go to `/etc/searxng/settings.yaml`
- Open the file editor
- Navigate to the `formats` section
- Add `json` as an acceptable format so that LibreChat can communicate with your instance
- Save the file
4. **Restart the container**
- Restart the container for the changes to take effect
#### Video Guide:
Here's a video to guide you through the process from start to finish in about a minute:
**Note:** In this example, the instance URL is http://localhost:55011 (port number found under the container name in the top left at the end of the video)
### Configuring LibreChat to use SearXNG
You can configure SearXNG in LibreChat within the UI or through `librechat.yaml`.
#### UI Configuration
1. **Open the tools dropdown in the chat input bar**

2. **Click on the gear icon next to Web Search**

3. **Select SearXNG from the Search Provider dropdown**

4. **Enter your configuration details (e.g. instance URL, scraper type, etc.) and click save**

5. **Click on the Web Search option in the tools dropdown**

6. **The Web Search badge should now be enabled, meaning your queries can now utilize the web search functionality**


