Auth0
Leer hoe je LibreChat configureert om Auth0 te gebruiken voor gebruikersauthenticatie.
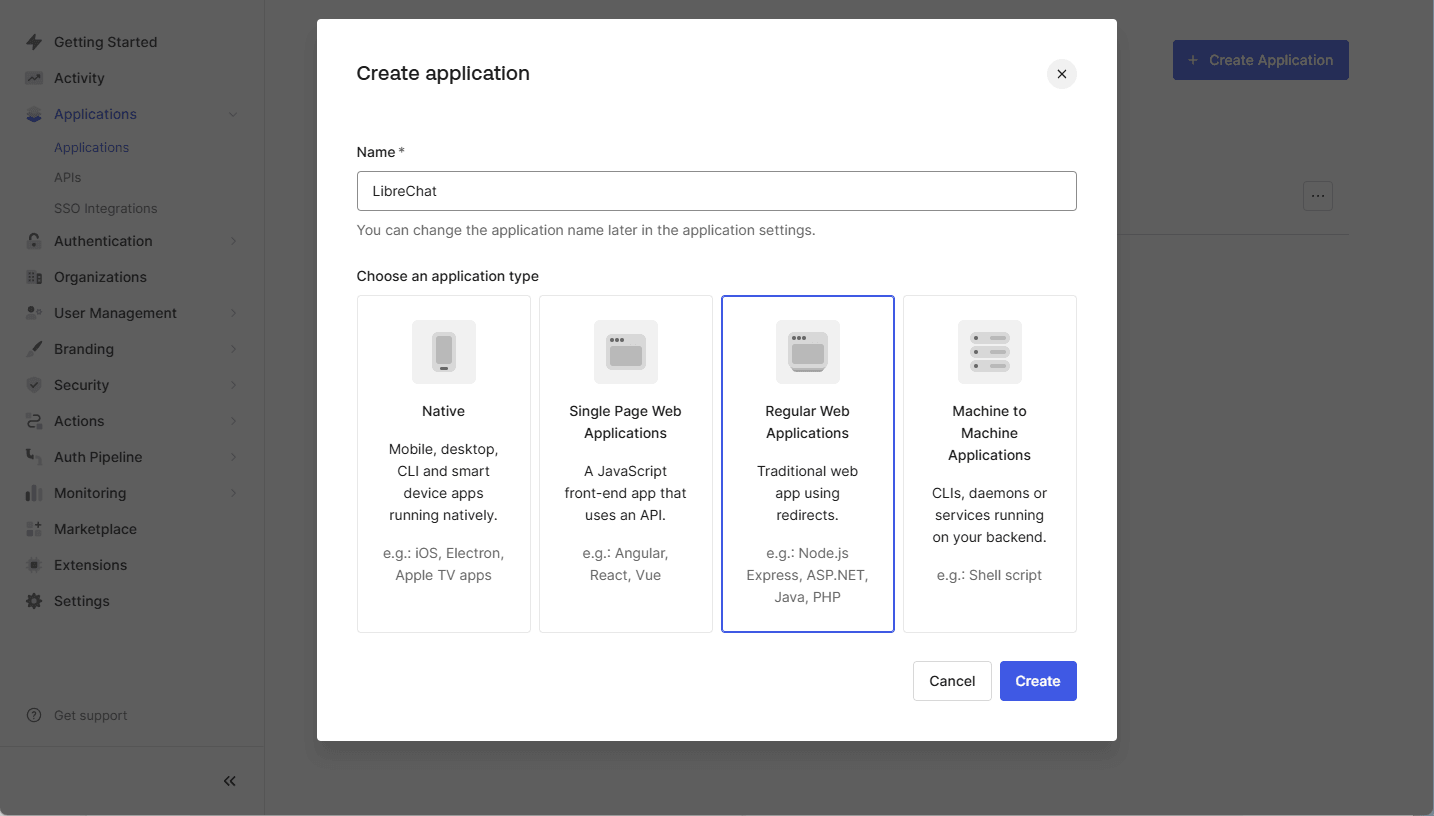
Stap 1: Maak een SAML-applicatie aan in Auth0
- Log in op je Auth0 Dashboard.
- Navigeer naar
Applications > Applications. - Klik op
Create Application. - Voer een Applicatienaam in (bijv.
LibreChat) en selecteerRegular Web Application. - Klik op
Create.
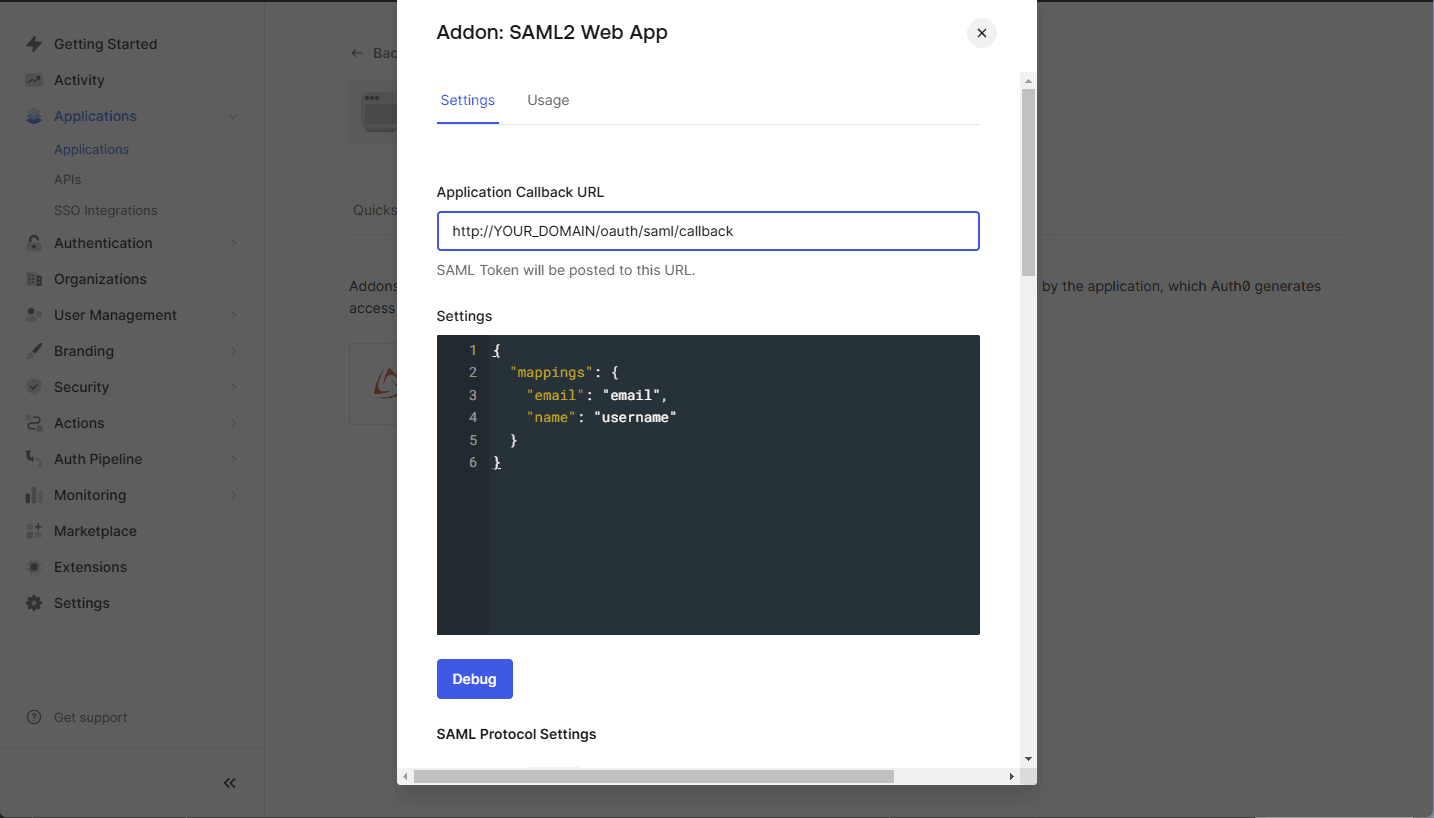
Stap 2: Configureer de SAML-add-on
- Open de zojuist gemaakte applicatie in Auth0.
- Ga naar het tabblad
Addons. - Klik op de schuifregelaar om de
SAML2 Web Appin te schakelen. - Klik op het
SAML2 Web Apppaneel. - Configureer de volgende instellingen:
- Application Callback URL: Stel dit in op uw LibreChat SAML callback URL:
https://YOUR_DOMAIN/oauth/saml/callback - Instellingen (JSON-formaat): Gebruik de volgende configuratie:
{
    "mappings": {
        "email": "email",
        "name": "username"
    }
}
opmerking
Als uw applicatie aanvullende attributen vereist zoals
given_name,family_name,usernameofpicture, zorg er dan voor dat deze toewijzingen correct zijn geconfigureerd in de Auth0 SAML-instellingen.
- Application Callback URL: Stel dit in op uw LibreChat SAML callback URL:
- Klik op
Save.

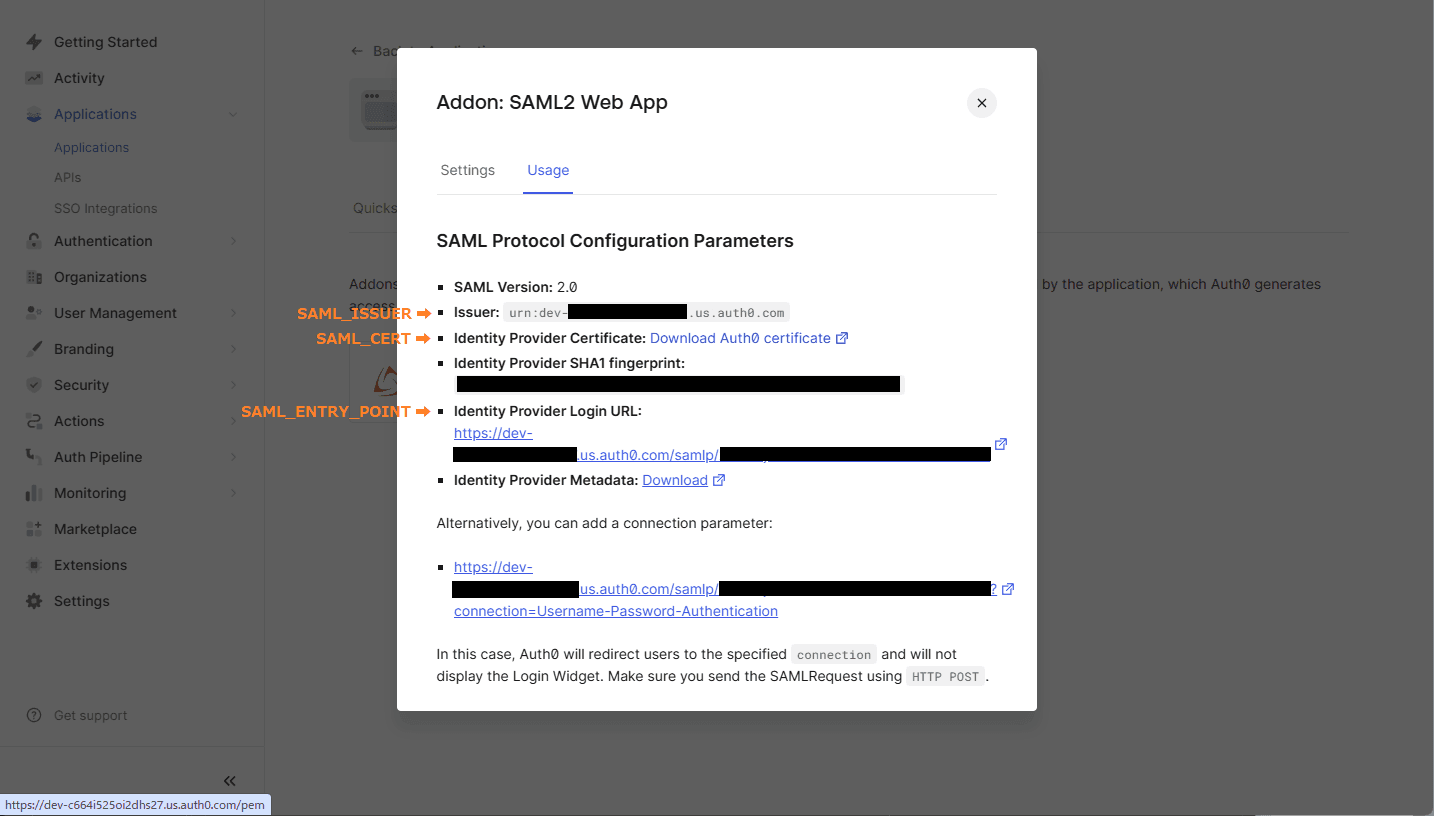
Stap 3: Verkrijg de Auth0 SAML-metadata
- Zodra SAML is ingeschakeld, ga je terug naar de
SAML2 Web Appinstellingen. - Ga naar het
Usagetabblad. - Klik op
Identity Provider Certificate: Download Atuh0 certificate. - Gebruik de
IssuervoorSAML_ISSUER - Gebruik de
Identity Provider Login URLvoorSAML_ENTRY_POINT. - Kopieer het gedownloade cert-bestand naar je projectmap
Stap 4: Configureer LibreChat met SAML
Open het .env bestand in je projectmap en voeg de volgende variabelen toe:
SAML_ENTRY_POINT=https://dev-xxxxx.us.auth0.com/samlp/aaaaaa
SAML_ISSUER=urn:dev-xxxxx.us.auth0.com
SAML_CERT=dev-xxxxx.pem
SAML_CALLBACK_URL=/oauth/saml/callback
SAML_SESSION_SECRET=[JustGenerateARandomSessionSecret]

# Attribute mappings (optional)
SAML_EMAIL_CLAIM=
SAML_USERNAME_CLAIM=
SAML_GIVEN_NAME_CLAIM=
SAML_FAMILY_NAME_CLAIM=
SAML_PICTURE_CLAIM=
SAML_NAME_CLAIM=

# Logint buttion settings (optional)
SAML_BUTTON_LABEL=
SAML_IMAGE_URL=

# Whether the SAML Response should be signed.
# - If "true", the entire `SAML Response` will be signed.
# - If "false" or unset, only the `SAML Assertion` will be signed (default behavior).
# SAML_USE_AUTHN_RESPONSE_SIGNED=
Hoe is deze gids?