Auth0
Learn how to configure LibreChat to use Auth0 for user authentication.
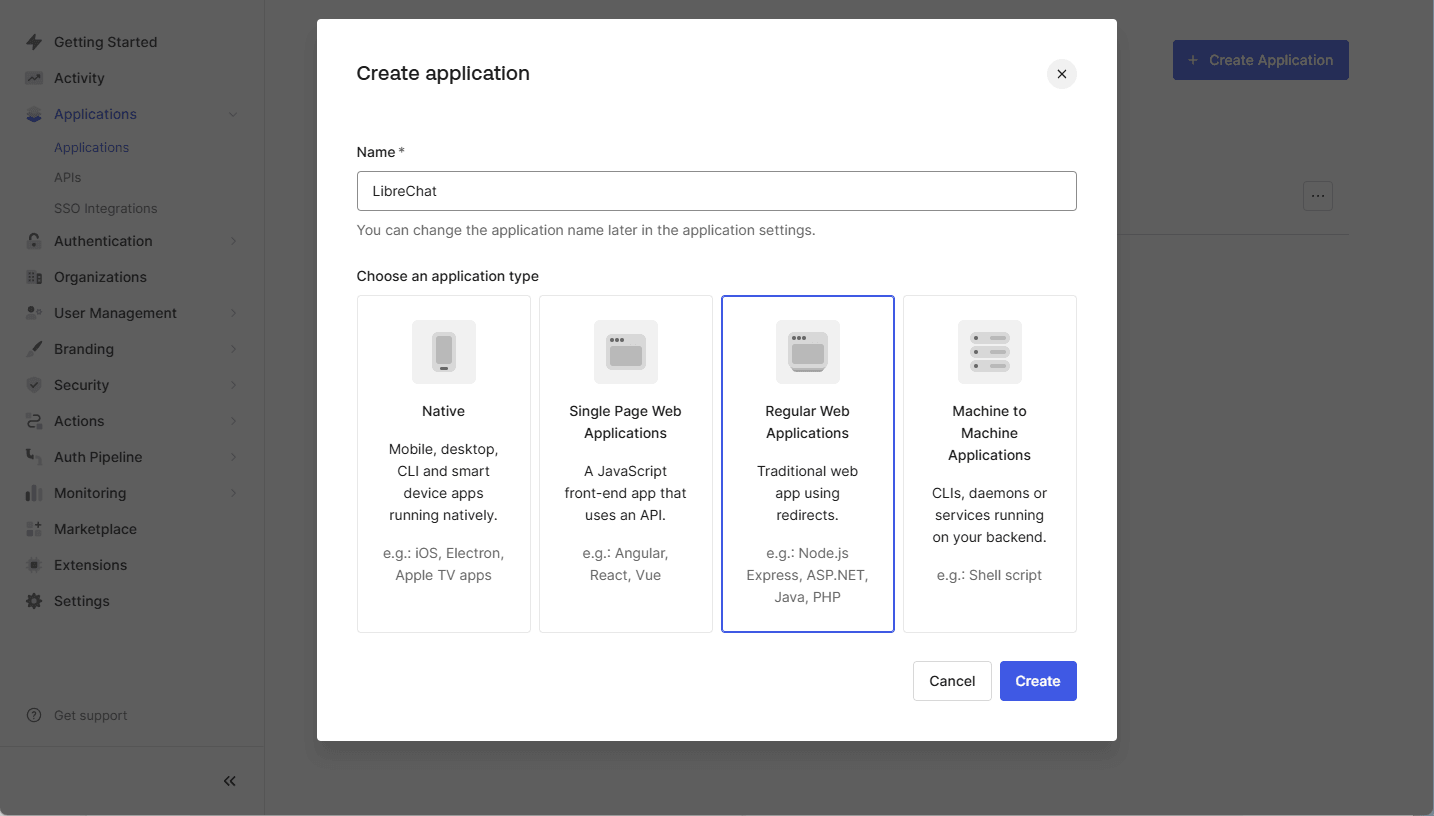
Step 1: Create a SAML Application in Auth0
- Log in to your Auth0 Dashboard.
- Navigate to
Applications > Applications. - Click
Create Application. - Enter an Application Name (e.g.,
LibreChat) and selectRegular Web Application. - Click
Create.
Step 2: Configure the SAML Add-On
- Open the newly created application in Auth0.
- Go to the
Addonstab. - Click the slider to enable the
SAML2 Web App. - Click
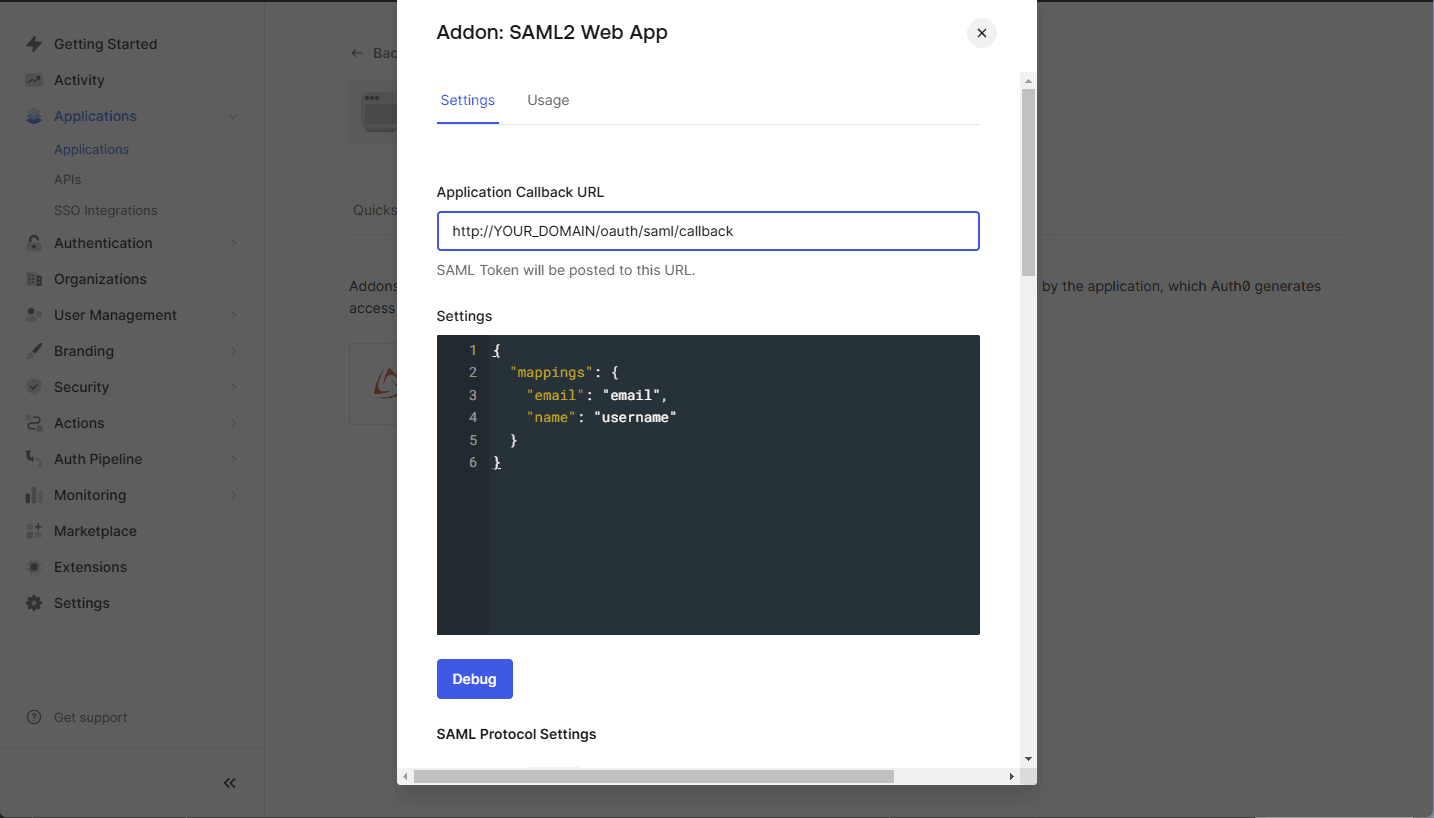
SAML2 Web Apppanel. - Configure the following settings:
- Application Callback URL: Set this to your LibreChat SAML callback URL:
https://YOUR_DOMAIN/oauth/saml/callback - Settings (JSON Format): Use the following configuration:
{
    "mappings": {
        "email": "email",
        "name": "username"
    }
}
note
If your application requires additional attributes such as
given_name,family_name,usernameorpicture, ensure these mappings are properly configured in the Auth0 SAML settings.
- Application Callback URL: Set this to your LibreChat SAML callback URL:
- Click
Save.

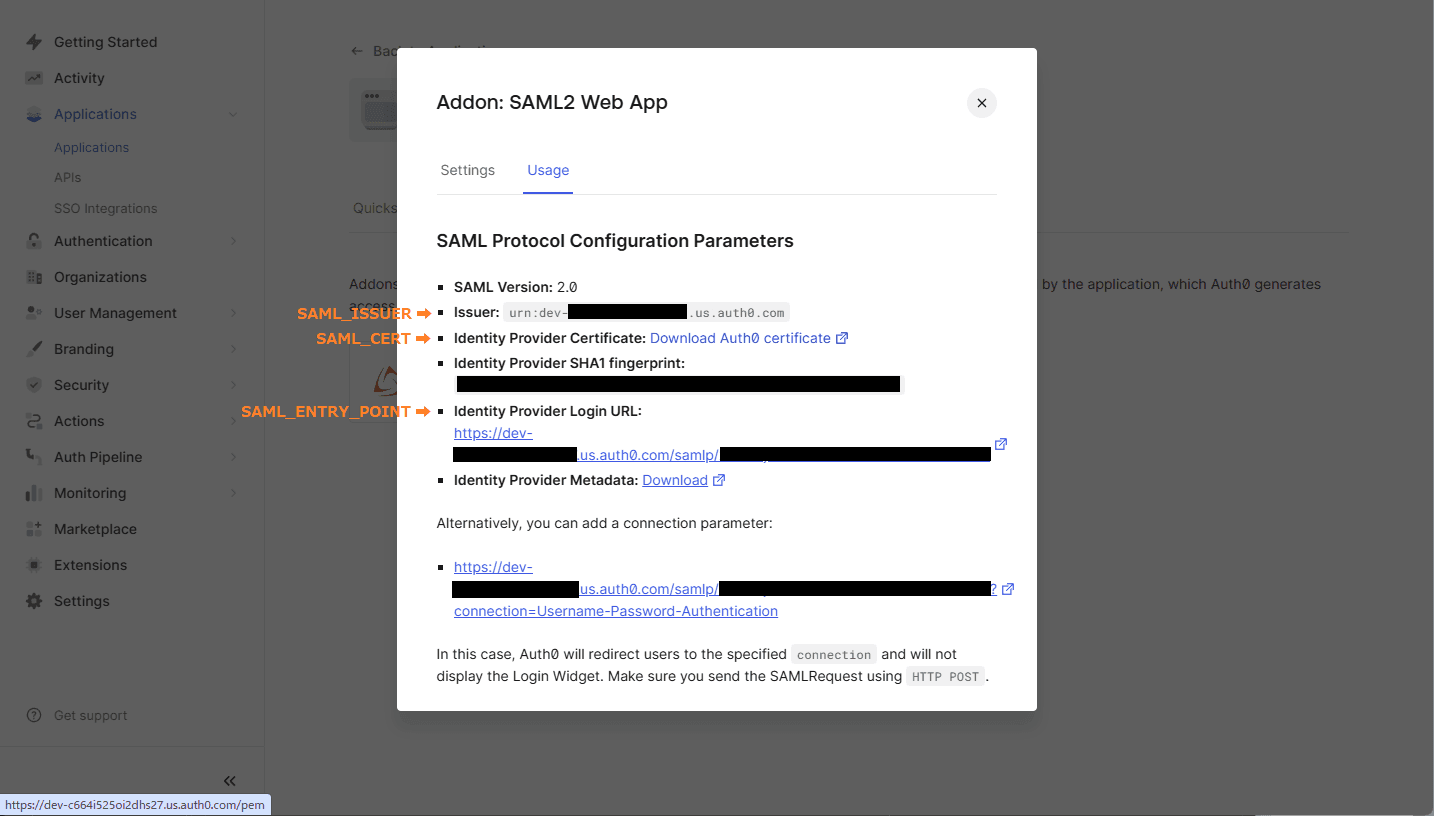
Step 3: Obtain the Auth0 SAML Metadata
- Once SAML is enabled, go back to the
SAML2 Web Appsettings. - Go to the
Usagetab. - Click on
Identity Provider Certificate: Download Atuh0 certificate. - Use the
IssuertoSAML_ISSUER - Use the
Identity Provider Login URLtoSAML_ENTRY_POINT. - Copy the donwloaded cert file to your project folder
Step 4: Configure LibreChat with SAML
Open the .env file in your project folder and add the following variables:
SAML_ENTRY_POINT=https://dev-xxxxx.us.auth0.com/samlp/aaaaaa
SAML_ISSUER=urn:dev-xxxxx.us.auth0.com
SAML_CERT=dev-xxxxx.pem
SAML_CALLBACK_URL=/oauth/saml/callback
SAML_SESSION_SECRET=[JustGenerateARandomSessionSecret]

# Attribute mappings (optional)
SAML_EMAIL_CLAIM=
SAML_USERNAME_CLAIM=
SAML_GIVEN_NAME_CLAIM=
SAML_FAMILY_NAME_CLAIM=
SAML_PICTURE_CLAIM=
SAML_NAME_CLAIM=

# Logint buttion settings (optional)
SAML_BUTTON_LABEL=
SAML_IMAGE_URL=

# Whether the SAML Response should be signed.
# - If "true", the entire `SAML Response` will be signed.
# - If "false" or unset, only the `SAML Assertion` will be signed (default behavior).
# SAML_USE_AUTHN_RESPONSE_SIGNED=
How is this guide?