 LibreChat
Message Composer
Write messages, attach files, and turn on tools, skills and MCP servers from the composer's + palette, then queue or steer follow-ups while a response streams.
The message composer is the box at the bottom of every chat. Besides the text field, it holds one + button that opens everything you can add to a message (files, tools, skills, MCP servers and files you uploaded before), the chips for the tools that are currently on, and the controls for reasoning, dictation and sending.
What's on the composer
| Element | What it does |
|---|---|
| + (Attach and tools) | Opens the palette: upload options, tools, skills, MCP servers and your recent files, all searchable from one field. |
| Tool chips | One chip per tool or MCP server that is on, next to the + button. Remove a chip to turn that tool off. |
| Staged context | Files, quotes and skills attached to your next message, shown above the text field. |
| Thinking | Reasoning effort for models that support it. |
| Context usage | How much of the model's context window the conversation uses, when token usage is available. |
| Use microphone | Dictates your message with speech to text, when speech to text is enabled. |
| Send / Stop | Sends the message, or stops the response that is streaming. |
To see which keys apply right now, such as / for prompts, @ for models or Enter to send, turn on Show composer tips in Settings > General. A one-line tip then appears under the text field. It is off by default.
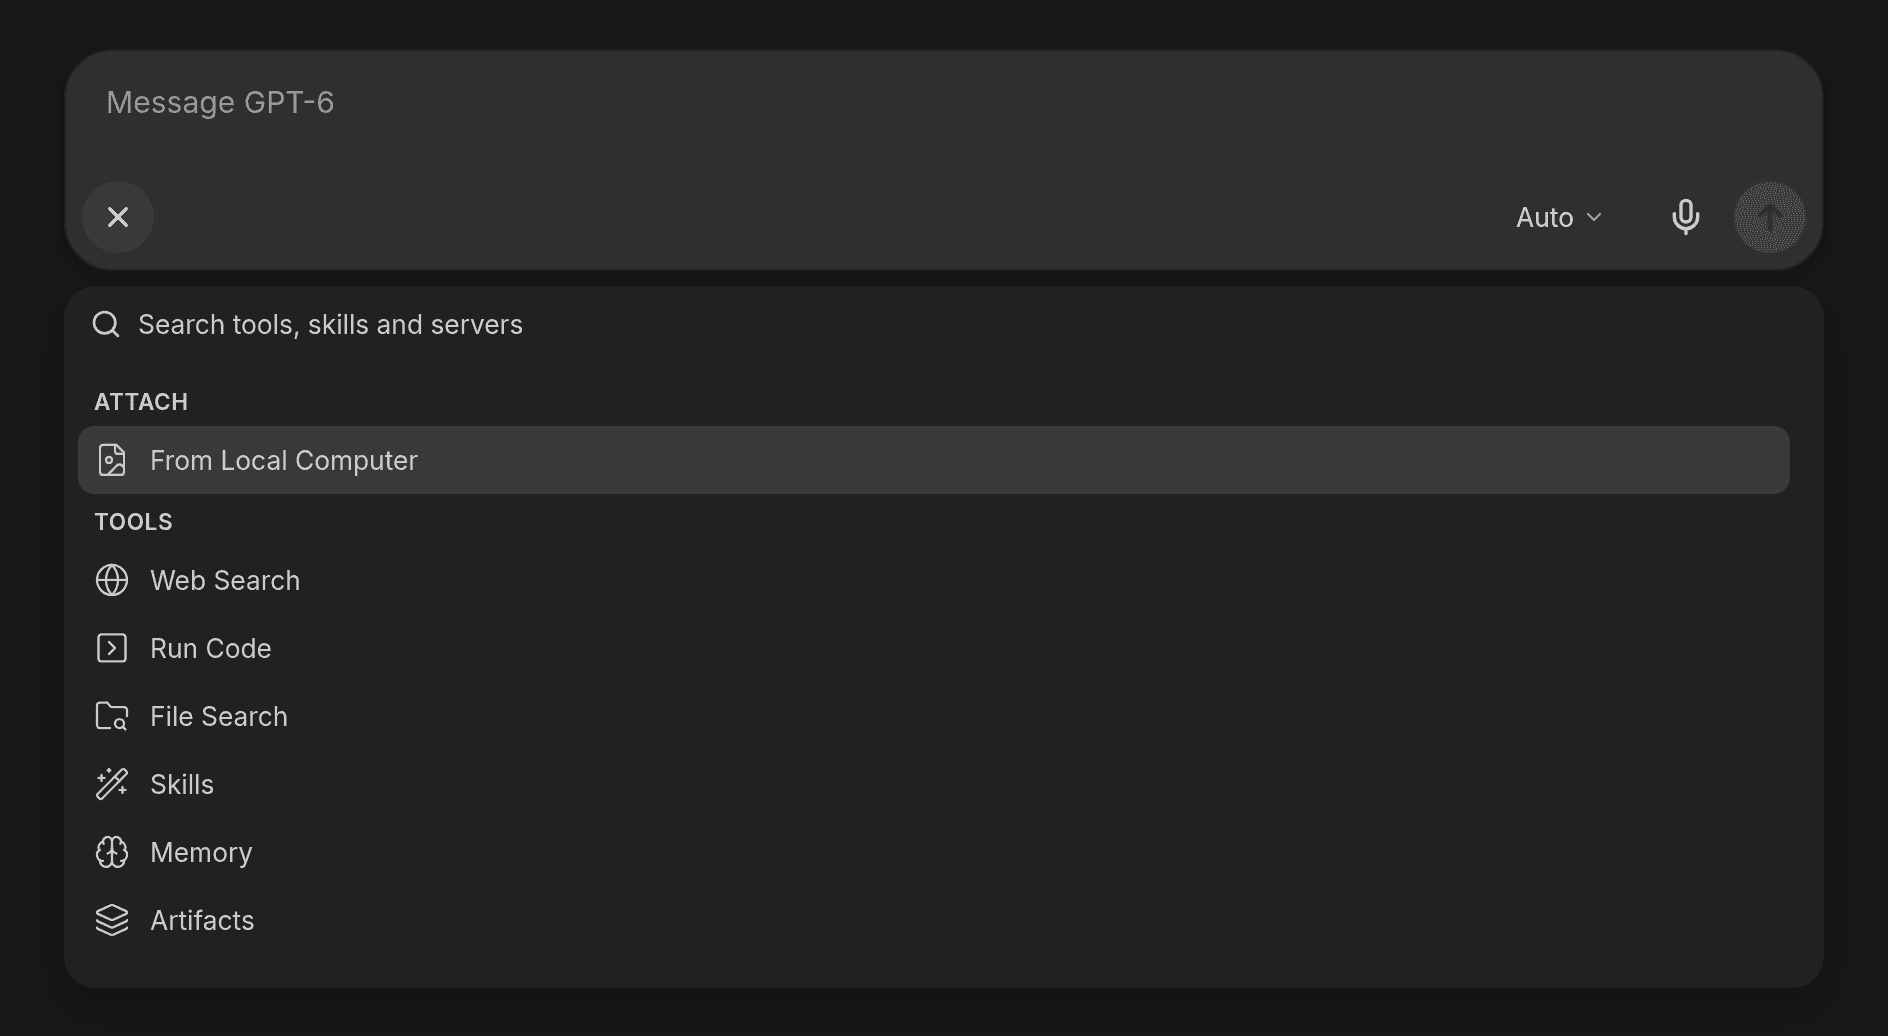
Add files
Click + and choose an option in the Attach section. You can also drag files onto the composer or paste them.
By default, LibreChat uses the unified uploader: you pick only a source, and it decides how each file reaches the model (native provider upload, text extraction, or a tool such as File Search) from the file type and the endpoint.
| Option | When it appears |
|---|---|
| From Local Computer | Always, with the default uploader. |
| From SharePoint | When the SharePoint file picker is enabled. |
If an administrator sets fileConfig.legacyFileUploadUX: true, you choose the destination yourself instead. The Attach section then shows the main option first and folds the rest behind More upload options:
| Option | When it appears |
|---|---|
| Upload to Provider | The provider accepts documents directly (for example OpenAI, Anthropic, Google, Bedrock, OpenRouter and custom endpoints, or Azure OpenAI with the Responses API on). |
| Upload Image | Shown instead of Upload to Provider when the provider only accepts images. |
| Upload as Text | The context capability is enabled. |
| Upload for File Search | File Search is enabled and allowed for the current agent. Picking it also turns File Search on. |
| Upload to Code Environment | Code execution is enabled and allowed for the current agent. Picking it also turns Run Code on. |
| Attach Files | Assistants endpoints, which handle files with the assistant's own configuration. |
With SharePoint enabled in this mode, each option also has a SharePoint version, labeled for example Upload to Provider (From SharePoint).
Reuse a file you uploaded before
The Your files section of the palette lists your most recently used files. Select one to attach it again without uploading it. Typing in the search field searches all of your files by name.
Choose Show all on the section to browse every file in a dialog, with All, Images and Documents views, a search field, and a preview for images and PDFs.
The palette shows up to five recent files. Administrators can lower that number, or hide the list with 0, using interface.composerRecentFiles.
Turn on tools, skills and MCP servers
The palette lists everything you can turn on for the current conversation, grouped into sections:
- Tools: built-in tools such as Web Search, Run Code, File Search, Skills, Memory and Artifacts, each shown only when it is enabled and you have access to it.
- Skills: individual skills you can attach to your next message.
- MCP Servers: the MCP servers available in chat.
Select a tool or MCP server to switch it on or off. The palette stays open, so you can switch several in one visit. Each tool that is on appears as a chip on the composer; remove the chip to switch it off. Some chips carry a mode menu, for example the Artifacts generation mode.
Selecting a skill stages it for your next message instead: it appears in the staged context rather than as a chip.
MCP server rows show each server's connection status. Selecting a server that is not connected starts its connection (including an OAuth sign-in, when the server needs one) or opens its configuration first if it needs your credentials. Once connected, servers that take user credentials also have a Configure control on the row, and Web Search has one for its API keys.
Agents bring their own tools
With an agent selected, the Tools and MCP Servers sections are hidden, because the agent's own configuration decides which tools it uses. On other endpoints, a model spec with hideBadgeRow: true hides the Tools, Skills and MCP Servers sections. Attach and Your files stay available in every case.
Show all
The palette shows a handful of rows per section. Choose Show all on the Skills, MCP Servers or Your files header to open a dialog with the full list, a search field and filters. Skills and MCP servers have three views: All, Made by you and Favorites.
Favorites and pinned tools
Star a row to add it to Favorites, which sits at the top of the palette. With a row highlighted, press Ctrl+D (Cmd+D on macOS) to star or unstar it. Favorites are saved to your account.
Administrators can pin built-in tools with interface.defaultPinnedTools. A pinned tool keeps its chip on the composer even while it is off, so you can switch it on with one click. Removing the chip of a pinned tool that is off unpins it.
Staged context
Everything attached to your next message appears above the text field before you send it:
- Files, with upload progress and a preview for images. Long pasted text can also land here as a file, which you can edit or move back into the message.
- Quotes you selected from earlier messages.
- Skills you picked from the palette or with the
$command.
Remove any item with its remove button. Everything staged is sent with your next message.
Thinking and effort
For models with a reasoning setting, the Thinking control opens a slider that runs from Faster to Smarter, plus the provider's separate modes such as Auto or off. It changes the same parameter as the Parameters panel, so it is hidden when the model has no reasoning setting or when the deployment turns parameters off with interface.parameters.
Queue and steer while a response streams
You can keep typing while a response is streaming. Depending on the endpoint and your settings, pressing Enter either queues the message to send after the response, or steers an agent's current response. The composer tip names the action that Enter performs at that moment.
Queued messages appear in a Queued messages rail above the composer, where you can:
- Edit message to move it back into the text field.
- Remove message to take it out of the queue.
- Send now to send it right away instead of waiting.
- Reorder messages by dragging them, or by focusing one and pressing the up and down arrow keys.
For how steering works and when it is available, see Steering and Queued Messages.
Keyboard shortcuts
In the text field
| Keys | Action |
|---|---|
| Enter | Send the message (queue or steer while a response streams). |
| Shift+Enter | New line. |
| Ctrl+Enter (Cmd+Enter) | While a response streams: the alternate action, send now when Enter queues, or queue when Enter steers. |
| Alt+Enter (Option+Enter) | While an agent responds: interrupt and send, when available. |
| Ctrl+Shift+X (Cmd+Shift+X) | Stop the response. |
/ | Insert a saved prompt. |
@ | Switch to another model, preset or agent. |
+ | Add a model or preset for an additional response. |
$ | Pick a skill for the next message. |
If you turned off Press Enter to send messages, Ctrl+Enter (Cmd+Enter) sends and Enter adds a new line.
In the palette
| Keys | Action |
|---|---|
| Type | Search tools, skills, servers, upload options and files. |
| ↑ / ↓ | Move through the rows. |
| Enter | Select the highlighted row. |
| Ctrl+D (Cmd+D) | Add the highlighted row to Favorites, or remove it. |
| Backspace on an empty search | Close the palette. |
| Escape | Close the palette. |
How is this guide?